As an affiliate, we may earn a commission from qualifying purchases. We get commissions for purchases made through links on this website from Amazon and other third parties.
Did you know that cast iron skillets have been around for over 2,000 years? Your 10-inch skillet is more than just a heavy kitchen tool; it's a versatile partner in your cooking endeavors. From perfectly seared steaks to decadent chocolate lava cakes, there's a world of culinary possibilities to explore. Each recipe promises to enhance your skills, and the flavors you'll create are bound to impress. Curious about how to get started?
Key Takeaways
- Preheat your cast iron skillet for crispy golden brown grilled cheese sandwiches.
- Sear steak with garlic butter for a juicy, flavorful main dish.
- Bake a decadent chocolate lava cake for a rich, indulgent dessert.
- Make a hearty beef and vegetable stew for comforting, simmered flavors.
- Achieve crispy crust with skillet pizza by preheating and sautéing toppings.
Perfectly Seared Steak With Garlic Butter
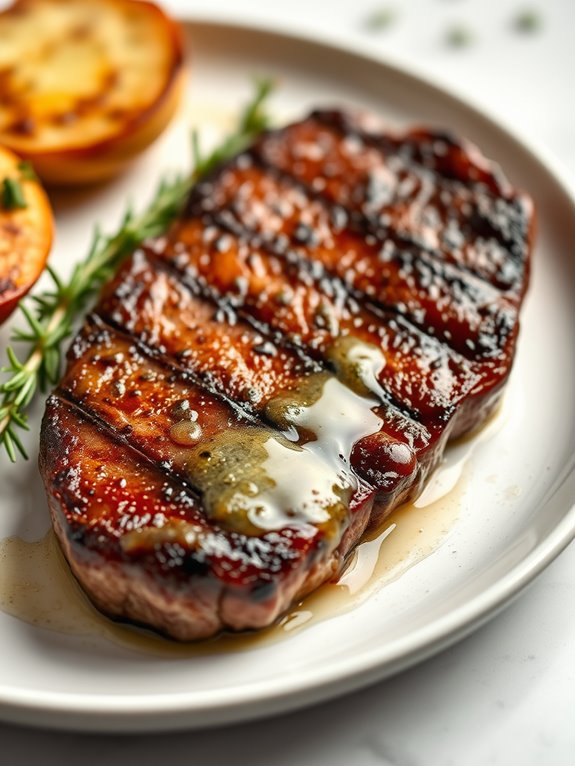
For steak lovers, achieving a perfectly seared steak with a delicious garlic butter is a culinary triumph. Cooking steak in a 10-inch cast iron skillet guarantees a beautiful crust and juicy interior, thanks to the even heat distribution and excellent heat retention of the skillet. The garlic butter adds a rich, aromatic flavor that elevates the steak to restaurant-quality levels. This recipe is simple yet indulgent, making it perfect for a special dinner or an impressive meal for guests.
The key to a perfectly seared steak is choosing a good quality cut, such as ribeye, strip, or filet mignon. The steak should be seasoned generously with salt and pepper to enhance its natural flavors. The garlic butter, made with fresh garlic, butter, and a touch of herbs, adds an extra layer of decadence that makes each bite unforgettable.
Ingredients:
- 1 (12-16 oz) steak (ribeye, strip, or filet mignon)
- 2 tablespoons olive oil
- Salt and freshly ground black pepper
- 2 tablespoons unsalted butter
- 2 cloves garlic, minced
- 1 teaspoon fresh thyme or rosemary leaves (optional)
Cooking Instructions:
- Take the steak out of the refrigerator at least 30 minutes before cooking to let it reach room temperature. This helps the steak cook more evenly.
- Pat the steak dry with paper towels to remove any moisture, then season both sides generously with salt and black pepper.
- Heat the cast iron skillet over medium-high heat until it's very hot, about 5 minutes. Add the olive oil and swirl to coat the bottom.
- Carefully place the steak in the skillet. Let it sear without moving for 3-4 minutes until a deep brown crust forms. Flip the steak and sear the other side for another 3-4 minutes.
- Reduce the heat to medium and add the butter, garlic, and herbs (if using) to the pan. Tilt the skillet slightly and use a spoon to baste the steak with the melted garlic butter for an additional 1-2 minutes or until the steak reaches your desired doneness.
- Remove the steak from the skillet and let it rest for 5-10 minutes before slicing. This allows the juices to redistribute throughout the meat, resulting in a more flavorful and tender steak.
Extra Tips:
For best results, use a meat thermometer to check the internal temperature of the steak. For medium-rare, aim for 130-135°F; for medium, 135-145°F; and for medium-well, 145-155°F. Remember that the steak will continue to cook slightly as it rests.
If you prefer your steak rare, cook for a shorter time, and if you like it well-done, cook a little longer. Additionally, make sure your skillet is hot enough before adding the steak to guarantee a good sear, and use high-quality butter for the best flavor in the garlic butter.
Classic Cast Iron Skillet Cornbread
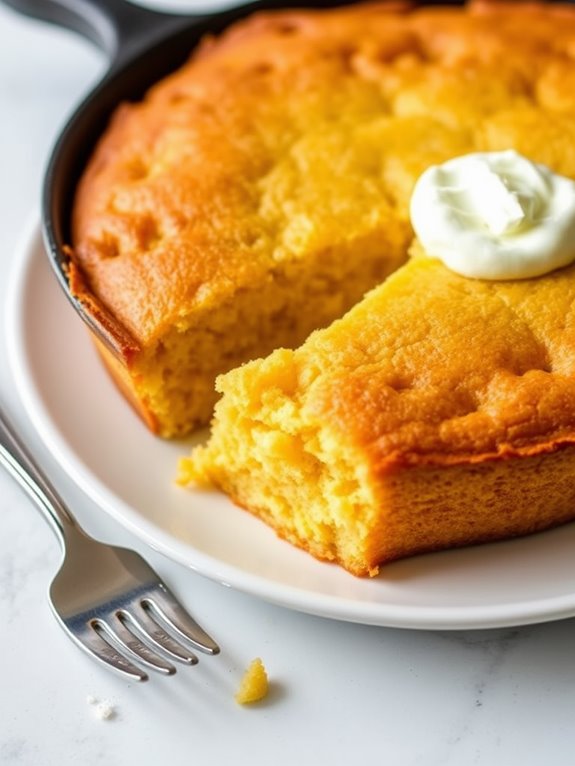
Classic Cast Iron Skillet Cornbread is a timeless dish that pairs perfectly with a variety of meals, from hearty stews to barbecued meats. The beauty of this cornbread lies in its golden crust, which is achieved through the use of a preheated cast iron skillet. This dish isn't only simple to make but also incredibly satisfying, offering a slightly sweet and buttery flavor with a moist crumb.
Whether you serve it as a side dish or enjoy it on its own, this cornbread is bound to become a staple in your kitchen. The 10-inch cast iron skillet is the perfect vessel for baking cornbread, as it guarantees even heat distribution and helps create a delightful crust.
With just a few basic ingredients that you likely already have in your pantry, you can whip up this comforting bread in no time. Gather your ingredients and follow the straightforward steps to bring this classic Southern favorite to your table.
Ingredients:
- 1 cup of cornmeal
- 1 cup of all-purpose flour
- 1/4 cup of granulated sugar
- 1 tablespoon of baking powder
- 1/2 teaspoon of salt
- 1 cup of buttermilk
- 2 large eggs
- 1/4 cup of unsalted butter, melted
- 2 tablespoons of vegetable oil
To start, preheat your oven to 425°F (220°C) and place your 10-inch cast iron skillet inside to heat up. In a large mixing bowl, combine the cornmeal, flour, sugar, baking powder, and salt.
In a separate bowl, whisk together the buttermilk and eggs until well combined. Pour the wet ingredients into the dry ingredients, stirring until just mixed. Add the melted butter to the batter and mix until smooth.
Carefully remove the hot skillet from the oven and add the vegetable oil, swirling to coat the bottom and sides evenly. Pour the cornbread batter into the skillet and spread it out evenly. Return the skillet to the oven and bake for 20-25 minutes, or until the top is golden brown and a toothpick inserted into the center comes out clean.
Allow the cornbread to cool slightly before slicing and serving. For the best results, make certain your cast iron skillet is well-seasoned to prevent sticking and enhance the flavor.
If you prefer a sweeter cornbread, you can increase the sugar to 1/3 cup. Additionally, you can add mix-ins like chopped jalapeños, cheddar cheese, or corn kernels for extra flavor and texture.
Cornbread is best enjoyed fresh out of the oven, but leftovers can be stored in an airtight container for a couple of days. When reheating, wrap it in foil to retain moisture.
Savory Chicken Thighs With Crispy Skin
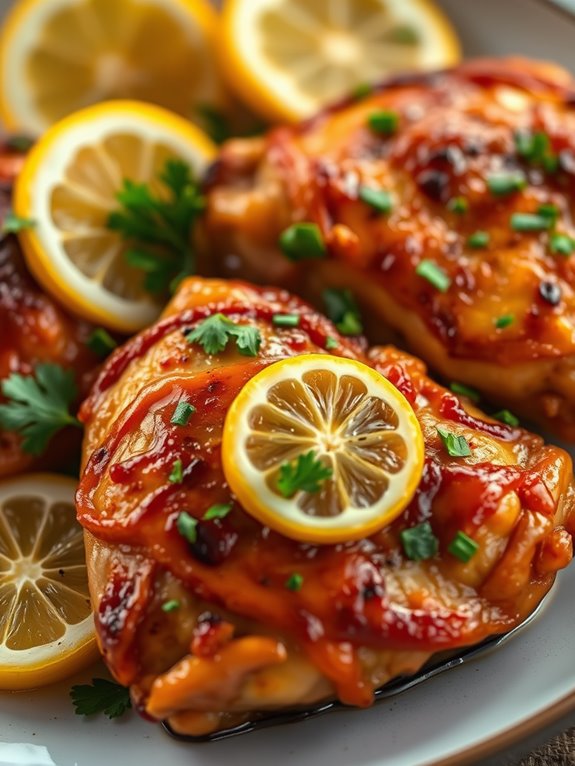
If you're looking for a delicious and satisfying meal, savory chicken thighs with crispy skin cooked in a cast iron skillet are a must-try. The combination of tender, juicy meat and perfectly crispy skin creates a delightful contrast in texture and flavor. This dish can easily become a staple in your weeknight dinner rotation, providing a hearty and comforting experience for you and your loved ones.
Cooking chicken thighs in a cast iron skillet not only enhances the flavor but also guarantees even cooking. The skillet's ability to retain heat helps in achieving that much-desired crispy skin. Plus, the chicken juices and seasoning blend together beautifully, creating a savory sauce that complements the dish wonderfully.
Ingredients:
- 4 bone-in, skin-on chicken thighs
- 1 tablespoon olive oil
- 1 teaspoon salt
- 1 teaspoon black pepper
- 1 teaspoon garlic powder
- 1 teaspoon smoked paprika
- 1/2 teaspoon dried thyme
- 1/2 lemon (optional, for garnish)
- Fresh parsley (optional, for garnish)
To start, preheat your oven to 425°F (220°C). Pat the chicken thighs dry with paper towels to remove excess moisture, which is key for achieving crispy skin. Season both sides of the chicken thighs with salt, pepper, garlic powder, smoked paprika, and dried thyme.
In a 10-inch cast iron skillet, heat the olive oil over medium-high heat. Once the oil is shimmering, place the chicken thighs skin-side down in the skillet. Sear for about 5-7 minutes without moving them, until the skin is golden brown and crispy.
After the skin is crispy, flip the chicken thighs and transfer the skillet to the preheated oven. Roast for an additional 20-25 minutes, or until the internal temperature of the chicken reaches 165°F (74°C). Remove the skillet from the oven and let the chicken rest for a few minutes before serving.
If desired, squeeze fresh lemon juice over the chicken and garnish with chopped parsley for added freshness and flavor.
For extra tips, remember not to overcrowd the skillet, as this can lead to steaming rather than searing the chicken. If your skillet is too small, cook the chicken in batches. Additionally, be patient and avoid moving the chicken too early while searing; this guarantees that the skin becomes crispy.
Also, consider using a meat thermometer to check for doneness and avoid overcooking. Enjoy your savory chicken thighs with a side of roasted vegetables or a fresh salad for a complete and satisfying meal.
One-Pan Breakfast Frittata
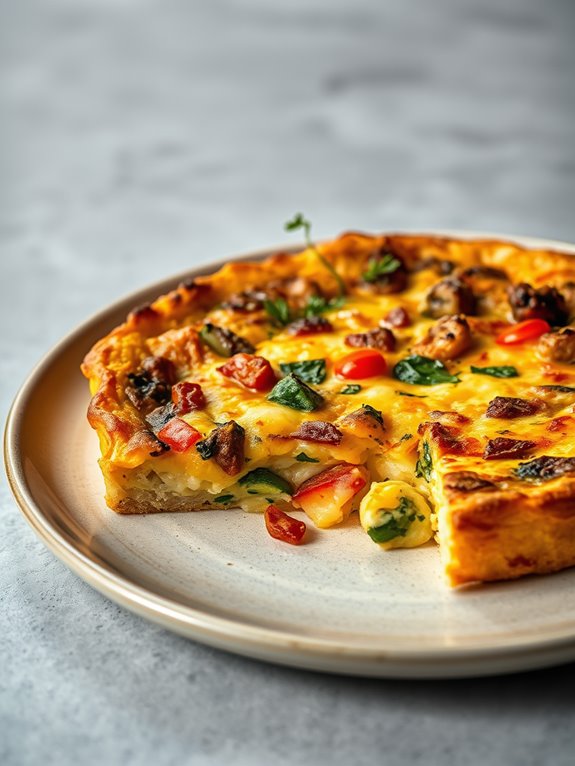
A one-pan breakfast frittata is a versatile and delicious dish that's perfect for a lazy weekend brunch or a quick weeknight dinner. It's a great way to use up leftover vegetables, meats, and cheeses, and it's all cooked in a single 10-inch cast iron skillet, making cleanup a breeze. The cast iron skillet guarantees even cooking and gives the frittata a beautiful, golden-brown crust. The frittata is light, fluffy, and packed with flavor, making it a favorite among family and friends.
To start, gather your ingredients. You'll need:
- 8 large eggs
- 1/4 cup milk
- 1 cup shredded cheese (such as cheddar or mozzarella)
- 1 cup cooked vegetables (such as spinach, bell peppers, or mushrooms)
- 1/2 cup cooked meat (such as bacon, sausage, or ham)
- 1 small onion, diced
- 2 cloves garlic, minced
- Salt and pepper, to taste
- 2 tablespoons olive oil or butter
Begin by preheating your oven to 375°F (190°C). In a large bowl, whisk together the eggs, milk, salt, and pepper until well combined. Stir in the shredded cheese, cooked vegetables, and cooked meat.
Heat the olive oil or butter in your 10-inch cast iron skillet over medium heat. Add the diced onion and minced garlic, cooking until the onion is translucent and fragrant, about 3-4 minutes. Pour the egg mixture into the skillet, spreading it out evenly. Allow the frittata to cook on the stovetop for about 5 minutes, just until the edges begin to set.
Transfer the skillet to the preheated oven and bake for 20-25 minutes, or until the frittata is fully set and the top is golden brown.
For best results, make certain that the vegetables and meat are fully cooked and drained of excess moisture before adding them to the egg mixture. This will prevent the frittata from becoming soggy. Let the frittata cool for a few minutes before slicing, as this will make it easier to cut cleanly.
To add a bit of extra flavor, consider topping the frittata with fresh herbs like parsley or basil just before serving. Enjoy your delicious, one-pan breakfast frittata hot or at room temperature.
Fluffy Skillet Pancakes
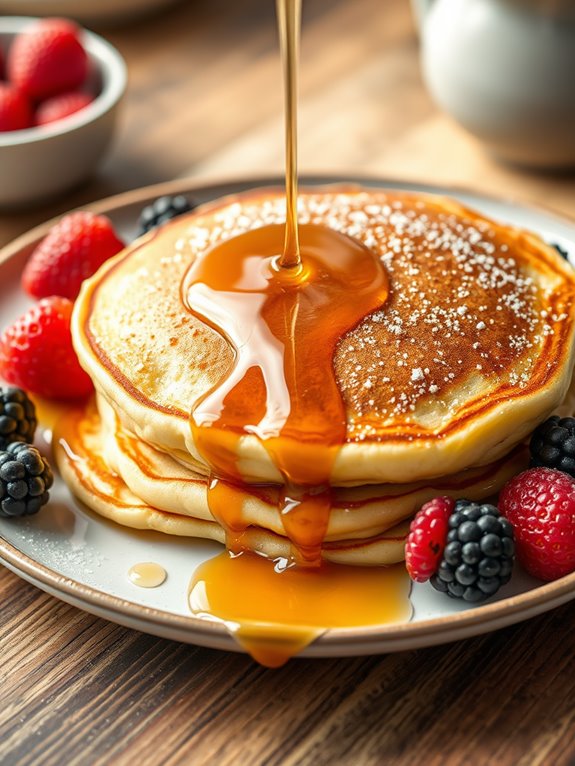
Fluffy Skillet Pancakes are a delightful breakfast treat that can be whipped up quickly in your trusty 10-inch cast iron skillet. These pancakes are light, airy, and have a perfectly golden-brown crust, making them a favorite for weekend mornings or special brunches. The key to achieving the fluffiness lies in the leavening agents and the cooking process in your skillet, guaranteeing even heat distribution and a beautiful finish.
Before you start, verify all your ingredients are at room temperature to help them blend well. This simple recipe uses ingredients that are likely already in your pantry, making it a convenient choice when you're craving something sweet and comforting.
Ingredients:
- 1 ½ cups all-purpose flour
- 3 ½ teaspoons baking powder
- 1 tablespoon sugar
- 1 teaspoon salt
- 1 ¼ cups milk
- 1 egg
- 3 tablespoons melted butter
- Additional butter for greasing the skillet
To start making your fluffy skillet pancakes, begin by preheating your oven to 350°F (175°C) and place your cast iron skillet inside to warm up. In a large mixing bowl, combine the flour, baking powder, sugar, and salt.
In a separate bowl, whisk together the milk, egg, and melted butter until well blended. Pour the wet ingredients into the dry ingredients and stir gently until just combined; it's okay if there are a few lumps. Be careful not to overmix, as this can make the pancakes tough.
Once your batter is ready and the skillet is hot, carefully remove the skillet from the oven using oven mitts. Add a small amount of butter to the skillet, allowing it to melt and coat the bottom evenly. Pour the pancake batter into the skillet, spreading it out slightly if necessary.
Place the skillet back in the oven and bake for about 15-20 minutes, or until the pancake is puffed and golden brown. A toothpick inserted into the center should come out clean. Serve your fluffy skillet pancake warm, topped with your favorite syrup, fresh fruits, or a dusting of powdered sugar.
For the best results, confirm your skillet is well-seasoned to prevent sticking. If you notice the edges browning too quickly, you can tent the skillet with aluminum foil to prevent over-browning while the center cooks through.
Remember to handle the skillet with care, as it will be very hot coming out of the oven. Enjoy your fluffy skillet pancake as a delightful start to your day!
Sizzling Shrimp Scampi
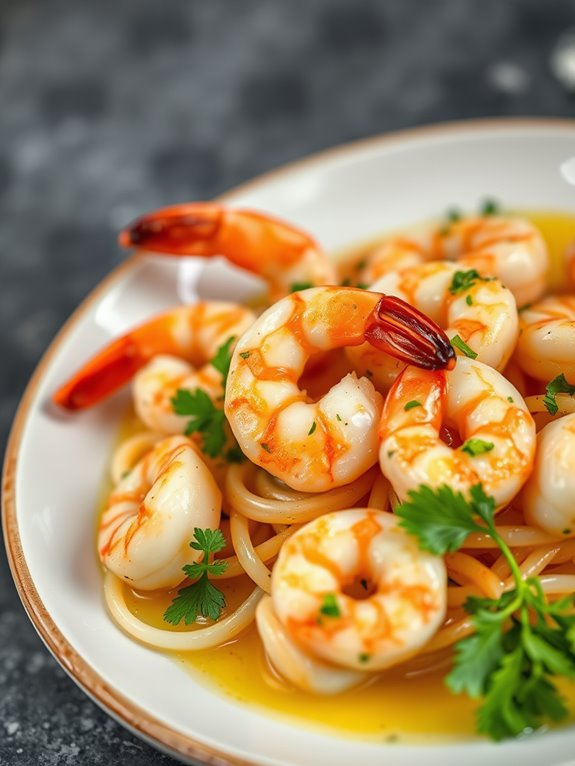
Sizzling Shrimp Scampi is a delightful seafood dish that combines the rich flavors of garlic, butter, and lemon with succulent shrimp. Perfect for a quick weeknight dinner or a special weekend meal, this recipe takes full advantage of the even heat distribution and natural non-stick surface of a 10-inch cast iron skillet.
The dish isn't only easy to prepare but also delivers a burst of fresh and vibrant flavors that are sure to impress family and friends alike.
The key to a perfect Shrimp Scampi is choosing fresh, high-quality ingredients. Fresh shrimp, preferably wild-caught, are essential for achieving the best texture and flavor. The combination of garlic, lemon, and parsley adds a revitalizing zest, while a hint of white wine brings a touch of elegance to the dish.
This recipe isn't only a feast for the taste buds but also a feast for the eyes, with its vibrant colors and enticing aroma.
Ingredients:
- 1 pound large shrimp, peeled and deveined
- 4 tablespoons unsalted butter
- 4 cloves garlic, minced
- 1/4 cup dry white wine
- 1/4 cup fresh lemon juice
- 1/4 teaspoon red pepper flakes
- Salt and black pepper, to taste
- 2 tablespoons fresh parsley, chopped
- Lemon wedges, for serving
- Cooked pasta or crusty bread, for serving (optional)
To prepare this delectable Shrimp Scampi, start by heating the cast iron skillet over medium heat. Once the skillet is hot, add the butter and let it melt completely.
Next, add the minced garlic and sauté for about 1 minute until it becomes fragrant but not browned. Add the shrimp to the skillet, spreading them out in a single layer. Cook the shrimp for about 2 minutes on each side until they turn pink and opaque.
Be careful not to overcook the shrimp, as they can become tough and rubbery.
Once the shrimp are cooked, pour in the white wine, lemon juice, and red pepper flakes. Stir everything together, scraping any bits from the bottom of the skillet to incorporate all the flavors.
Allow the sauce to simmer for an additional 2-3 minutes, letting it reduce slightly. Season with salt and black pepper to taste, then sprinkle the chopped parsley over the top.
Serve the Shrimp Scampi hot, with a side of cooked pasta or crusty bread to soak up the delicious sauce. Garnish with lemon wedges for an extra burst of citrus flavor.
Extra Tips:
When making Shrimp Scampi, it's essential to monitor the shrimp as they cook since they can go from perfectly cooked to overdone in a matter of seconds.
Use fresh lemon juice for the best flavor, and adjust the amount of red pepper flakes according to your spice preference. If you prefer a thicker sauce, consider adding a teaspoon of cornstarch mixed with a tablespoon of water to the skillet before adding the shrimp.
Finally, to enhance the dish, you can add a handful of halved cherry tomatoes or a splash of heavy cream for a creamy variation. Enjoy your sizzling Shrimp Scampi as a standalone dish or pair it with your favorite side for a complete meal.
Crispy Skillet Pizza
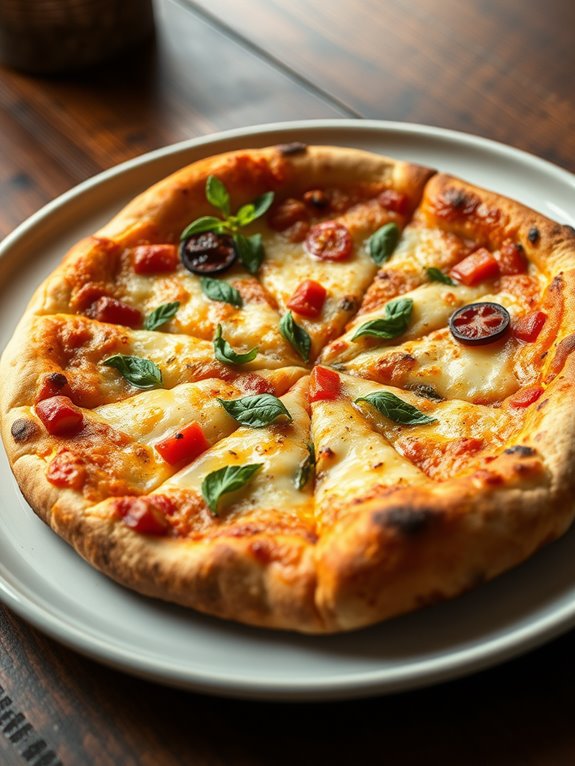
If you're looking to make a pizza that's crispy on the outside and chewy on the inside, a 10-inch cast iron skillet is the perfect tool for the job. This crispy skillet pizza recipe is easy to prepare and delivers delicious results every time. The cast iron skillet helps achieve the perfect crust while ensuring even cooking, making it a favorite for pizza lovers.
Whether you're hosting a casual dinner or just want to enjoy a homemade pizza night, this skillet pizza is the way to go. It's versatile, allowing you to top it with your favorite ingredients, and it's cooked to perfection in under 30 minutes. Get ready to savor every bite of this mouthwatering pizza.
Ingredients:
- 1 ball of pizza dough (store-bought or homemade)
- 1 tablespoon olive oil
- 1/2 cup pizza sauce
- 1 cup shredded mozzarella cheese
- 1/4 cup grated Parmesan cheese
- 1/2 teaspoon dried oregano
- 1/2 teaspoon garlic powder
- Toppings of your choice (pepperoni, mushrooms, bell peppers, etc.)
Instructions:
- Preheat your oven to 475°F (245°C). Place your cast iron skillet on the stove over medium-high heat and add the olive oil to coat the bottom and sides of the skillet.
- Stretch the pizza dough into a 10-inch circle and carefully lay it in the hot skillet. Press the dough gently to fit the skillet, allowing it to start cooking for about 2 minutes until the bottom starts to firm up.
- Spread the pizza sauce evenly over the dough, then sprinkle with mozzarella and Parmesan cheeses. Add any additional toppings you desire, and season with oregano and garlic powder.
- Carefully transfer the skillet to the preheated oven and bake for 12-15 minutes, or until the crust is golden brown and the cheese is bubbly and slightly browned.
- Remove the skillet from the oven and let the pizza cool for a few minutes before slicing and serving.
Extra Tips:
For an even crispier crust, cook the pizza on the stove for a few extra minutes before transferring it to the oven. You can also experiment with different cheeses and toppings to suit your taste.
If using fresh vegetables as toppings, consider sautéing them lightly beforehand to remove excess moisture, which helps keep the crust crispy. Remember to handle the cast iron skillet with care, as it will be extremely hot coming out of the oven. Enjoy your homemade skillet pizza!
Hearty Beef and Vegetable Stew
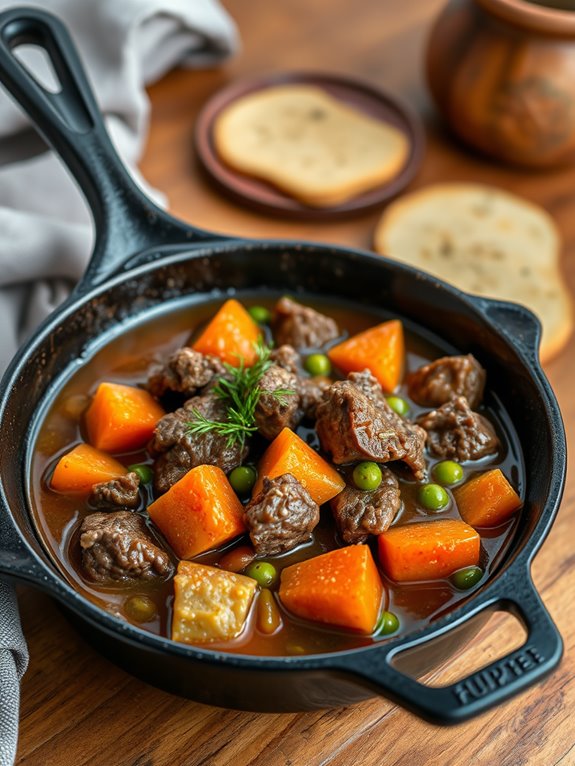
Hearty Beef and Vegetable Stew is a classic comfort dish perfect for utilizing your 10-inch cast iron skillet. This recipe is ideal for those chilly evenings when you crave something warm and filling. The combination of tender beef chunks and an array of colorful vegetables simmered in a rich, savory broth makes for a satisfying meal that will delight your taste buds.
The beauty of this stew lies in its simplicity and the rich depth of flavors developed as it slowly cooks on your stovetop. To make the dish, you'll need a few fresh ingredients that are easy to find and prepare. Using a cast iron skillet not only enhances the flavor but also guarantees even cooking, making it a versatile tool in your kitchen. With the right combination of ingredients and a bit of patience, you can create a stew that's as nourishing as it's delicious.
Ingredients:
- 1 pound beef chuck, cut into 1-inch cubes
- 1 tablespoon olive oil
- 1 large onion, diced
- 3 cloves garlic, minced
- 3 carrots, sliced into rounds
- 2 potatoes, peeled and cubed
- 2 cups beef broth
- 1 cup red wine (optional)
- 1 tablespoon tomato paste
- 1 teaspoon dried thyme
- 1 bay leaf
- Salt and pepper to taste
- 1 cup frozen peas
- 2 tablespoons flour (for thickening, optional)
In a 10-inch cast iron skillet, heat the olive oil over medium-high heat. Add the beef cubes in a single layer, searing them until they're browned on all sides. Remove the beef and set it aside.
In the same skillet, add the onions and garlic, sautéing until the onions are translucent. Stir in the carrots and potatoes, cooking for an additional few minutes before returning the beef to the skillet. Pour in the beef broth and red wine (if using), then add the tomato paste, thyme, bay leaf, salt, and pepper.
Bring the mixture to a simmer, then reduce the heat to low and cover, allowing it to cook for at least 1.5 to 2 hours, or until the beef is tender. About 20 minutes before serving, add the frozen peas to the skillet. If you prefer a thicker stew, mix the flour with a bit of water to create a slurry and stir it into the stew.
Let the stew continue to simmer uncovered until it reaches your desired consistency. Taste and adjust seasoning as necessary before serving. For best results, make certain to give the stew ample time to simmer, allowing the flavors to fully meld together.
If you're using wine, choose a bottle that you enjoy drinking, as it will enhance the flavor of the stew. Remember to stir occasionally to prevent the vegetables from sticking to the skillet. Finally, this dish can be prepared a day in advance, as it often tastes even better after the flavors have had more time to develop overnight.
Enjoy your Hearty Beef and Vegetable Stew with a side of crusty bread or over a bed of rice for a complete, comforting meal.
Golden Brown Grilled Cheese Sandwiches
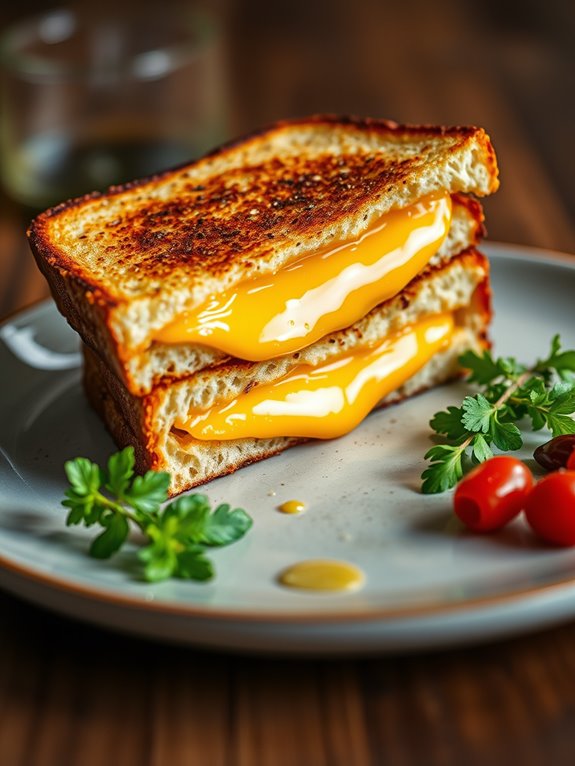
Golden brown grilled cheese sandwiches are a timeless classic, perfect for a quick lunch or a comforting dinner. The key to achieving the perfect grilled cheese is a combination of the right bread, cheese, and cooking method. Using a 10-inch cast iron skillet guarantees an even, consistent heat that will result in a crispy exterior and a gooey, melted interior.
Whether you prefer a traditional approach or like to experiment with different cheeses and add-ins, this recipe will guide you to grilled cheese perfection.
Start by selecting your favorite bread and cheese. Classic white or sourdough bread works well, while cheddar, American, or a mix of cheeses can provide the ideal melt and flavor. The cast iron skillet helps in achieving that signature golden brown crust, essential to any great grilled cheese.
Ingredients:
- 4 slices of bread (white or sourdough)
- 4 slices of cheese (cheddar, American, or a mix)
- 2 tablespoons of butter, softened
- Optional: extras like sliced tomatoes, bacon, or sautéed onions
To begin, preheat your 10-inch cast iron skillet over medium heat. While the skillet is heating, spread softened butter evenly on one side of each slice of bread.
Place two slices of bread, buttered side down, onto the skillet. Top each with two slices of cheese and any additional extras if desired. Cover with the remaining bread slices, buttered side up.
Cook for about 3-4 minutes or until the bottom slice is golden brown. Carefully flip the sandwiches and continue cooking for another 3-4 minutes, pressing gently with a spatula to guarantee even browning, until the cheese is fully melted and the other side is also golden brown.
For the best results, make certain your skillet is adequately preheated before adding the sandwiches. This helps to evenly distribute the heat, guaranteeing both the cheese melts thoroughly and the bread crisps up nicely.
If you're adding extras like bacon or tomatoes, consider pre-cooking them before adding them to the sandwiches to avoid excess moisture or undercooking. Also, remember to use a spatula for flipping to prevent the sandwiches from falling apart.
Enjoy your golden brown grilled cheese sandwiches hot off the skillet for the best taste and texture.
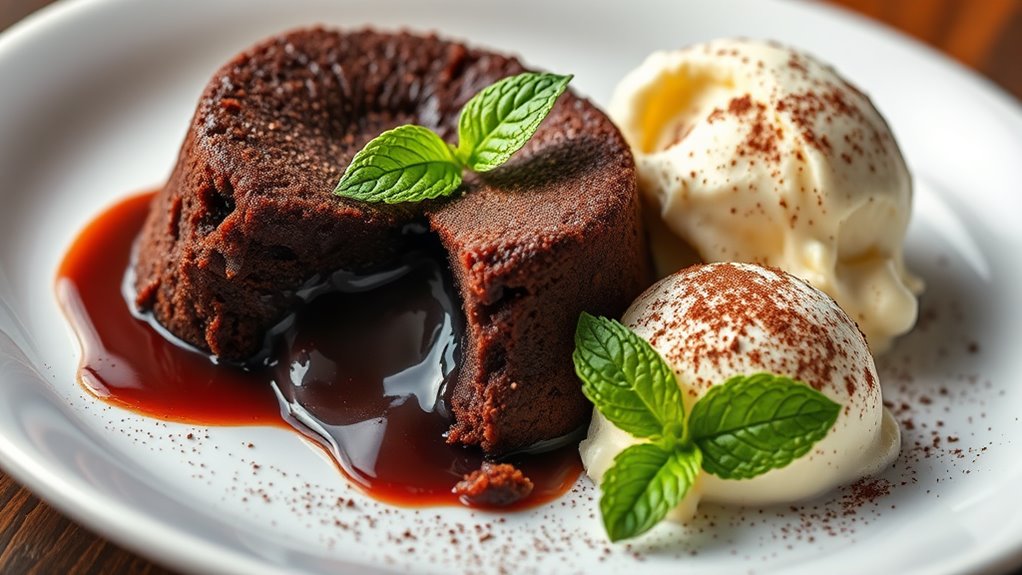
Decadent Chocolate Lava Cake
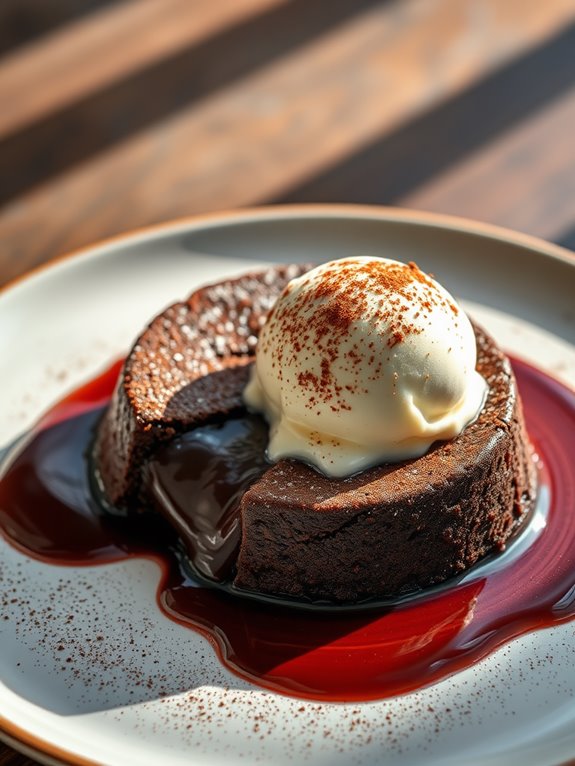
Indulge your sweet tooth with a decadent chocolate lava cake, perfect for any occasion. This rich, gooey dessert is sure to impress and is surprisingly easy to make in your 10-inch cast iron skillet. The combination of a velvety chocolate exterior with a molten chocolate center creates a heavenly experience for your taste buds.
Whether you're treating yourself or celebrating with friends and family, this dessert is bound to be a hit. A cast iron skillet is the ideal tool for achieving the perfect texture — crisp on the outside while maintaining a luscious, flowing center. The even heat distribution guarantees that the cake cooks uniformly, resulting in a perfect lava-like consistency.
So gather your ingredients, and let's plunge into creating this chocolate masterpiece.
- 1 cup of semisweet chocolate chips
- 1/2 cup of unsalted butter
- 1 cup of powdered sugar
- 2 large eggs
- 2 egg yolks
- 1 teaspoon of vanilla extract
- 1/2 cup of all-purpose flour
- A pinch of salt
- Cocoa powder (for dusting)
- Optional: vanilla ice cream or whipped cream for serving
Preheat your oven to 425°F (220°C). Begin by melting the semisweet chocolate chips and butter together in a saucepan over low heat, stirring frequently until smooth. Allow the mixture to cool slightly.
In a separate bowl, whisk together the powdered sugar, eggs, egg yolks, and vanilla extract until well combined. Gradually add the melted chocolate mixture to the egg mixture, stirring continuously. Gently fold in the flour and salt until the batter is smooth and free of lumps.
Grease your 10-inch cast iron skillet with butter or non-stick spray, and lightly dust it with cocoa powder to prevent sticking. Pour the batter into the prepared skillet, spreading it evenly. Bake in the preheated oven for about 12-14 minutes, or until the edges are firm but the center remains soft.
Remove the skillet from the oven and let it rest for 1-2 minutes. Serve immediately with a scoop of vanilla ice cream or a dollop of whipped cream, if desired.
For best results, make sure that your chocolate lava cake is served warm, as this is when the molten interior is at its most luscious. If you're preparing this dessert in advance, you can refrigerate the batter in the skillet and bake it just before serving.
Be mindful not to overbake, as the key to a perfect lava cake lies in its gooey center. Experiment with different types of chocolate or add a hint of espresso powder for a unique twist on this classic dessert.
Frequently Asked Questions
How Do I Properly Season a Cast Iron Skillet?
Imagine the warm glow of a perfectly seasoned skillet. You start by washing it, then dry thoroughly. Coat with a thin layer of oil, bake upside down at 375°F for an hour, and let it cool.
Can I Use a Cast Iron Skillet on an Induction Cooktop?
Yes, you can use a cast iron skillet on an induction cooktop. It works perfectly since cast iron is magnetic. Just guarantee the skillet's base is flat to maintain good contact with the cooktop surface.
How Do I Clean a Cast Iron Skillet Without Damaging It?
Imagine you've just finished cooking a delicious meal. To clean your cast iron skillet, avoid soap. Instead, use a stiff brush or sponge with hot water. Dry it thoroughly and apply a thin oil layer.
What Oil Is Best for Seasoning a Cast Iron Skillet?
You should use vegetable oil for seasoning your cast iron skillet because it has a high smoke point and neutral flavor. Remember, after applying the oil, heat the skillet to create a durable, non-stick surface.
Can a Cast Iron Skillet Be Used in the Oven?
Yes, you can definitely use a cast iron skillet in the oven. Its durability and heat retention make it perfect for roasting, baking, and broiling. Just remember to use oven mitts, as the handle gets hot.