As an affiliate, we may earn a commission from qualifying purchases. We get commissions for purchases made through links on this website from Amazon and other third parties.
A 6-inch cast iron skillet is like a canvas, waiting for your culinary creativity. It's the perfect size for crafting individual portions that satisfy without overwhelming. Imagine whipping up a comforting Skillet Mac and Cheese or a warm Single-Serve Chocolate Chip Cookie, all with minimal cleanup. What other delightful dishes can you create in this versatile kitchen essential? Let's explore twelve perfectly sized recipes that will inspire your next meal.
Key Takeaways
- Single-Serve Chocolate Chip Cookie: This quick recipe yields a warm, gooey cookie baked directly in a 6-inch skillet for convenience.
- Mini Frittata: Customize this versatile egg dish with vegetables and cheese, perfect for a single serving in a small skillet.
- Mini Cornbread: A delightful treat that bakes in about 25 minutes, ideal for pairing with various meals in a 6-inch skillet.
- Personal Pizza: Create an individual pizza with customizable toppings, ensuring a crispy crust in a cast iron skillet.
- Mini Quiche: This adaptable dish allows for various fillings and is perfectly sized for a 6-inch skillet, making it great for breakfast or snacks.
Skillet Mac and Cheese
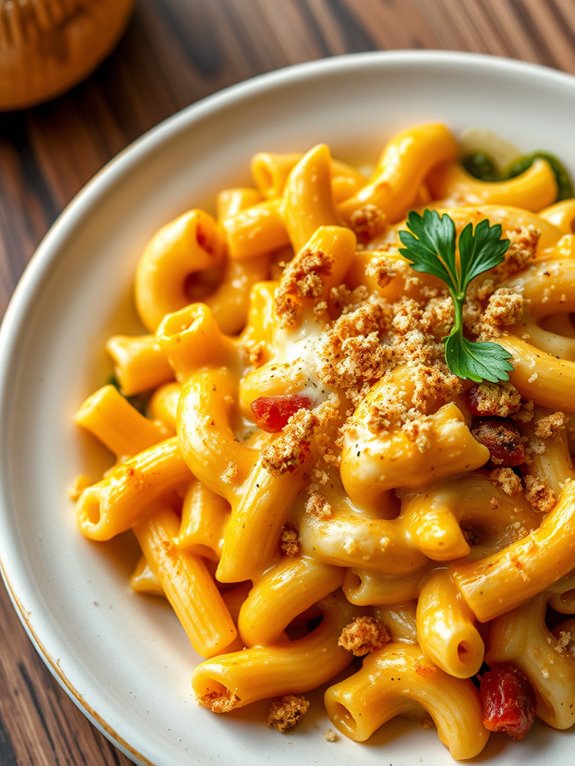
The beauty of this recipe lies in its simplicity and adaptability. You can use any combination of cheeses you have on hand, and you can also add your favorite mix-ins like cooked bacon, sautéed vegetables, or spices to elevate the dish.
Get ready to enjoy a rich, cheesy delight that's made right in your cast iron skillet!
Ingredients:
- 1 cup elbow macaroni
- 1 cup water
- 1/2 cup milk
- 1 cup shredded cheddar cheese
- 1/4 cup grated Parmesan cheese
- 1 tablespoon butter
- Salt and pepper to taste
- Optional: breadcrumbs for topping
Cooking Instructions:
Begin by adding the elbow macaroni and water to your 6-inch cast iron skillet. Place the skillet over medium-high heat and bring the water to a boil.
Once boiling, reduce the heat to medium and let the pasta cook for about 6-8 minutes, stirring occasionally, until the pasta is tender and most of the water has been absorbed.
Next, lower the heat to medium-low and stir in the milk, butter, cheddar cheese, and Parmesan cheese. Mix well until the cheese has melted and the mixture is creamy.
If you prefer a crunchy topping, sprinkle some breadcrumbs over the mac and cheese and place the skillet under the broiler for 2-3 minutes until golden brown. Serve warm and enjoy!
Extra Tips:
For an extra layer of flavor, try adding spices like garlic powder, smoked paprika, or even a pinch of cayenne pepper to the cheese mixture.
Additionally, be mindful of the heat when melting the cheese to avoid it becoming grainy.
Finally, if you're feeling adventurous, experiment with different pasta shapes or cheese varieties to customize your mac and cheese experience!
Mini Frittata
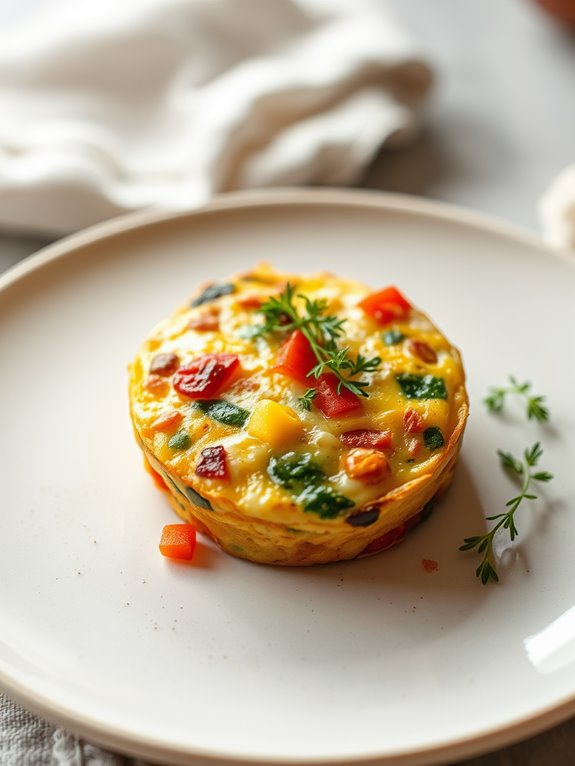
To make your mini frittata, you'll start by whisking together eggs and your choice of mix-ins. The beauty of a frittata is its adaptability; you can incorporate seasonal vegetables, herbs, or even a splash of cream for added richness.
Once combined, the mixture is poured into an oiled skillet and cooked slowly to achieve that perfect fluffy texture. This dish is sure to impress your family or guests with its delightful flavors and beautiful presentation.
Ingredients:
- 4 large eggs
- 1/4 cup milk (or cream)
- 1/2 cup diced vegetables (e.g., bell peppers, spinach, onions)
- 1/4 cup shredded cheese (e.g., cheddar, feta, or mozzarella)
- 1/4 cup cooked meat (e.g., diced ham, bacon, or sausage) – optional
- Salt and pepper to taste
- Olive oil or butter for greasing the skillet
- Fresh herbs for garnish (e.g., parsley or chives) – optional
Cooking Instructions:
Preheat your oven to 350°F (175°C). In a mixing bowl, whisk together the eggs and milk until well combined.
Stir in your choice of diced vegetables, cheese, and any cooked meat, seasoning with salt and pepper to taste.
Heat your cast iron skillet over medium heat and add a drizzle of olive oil or a pat of butter to coat the bottom. Once the skillet is hot, pour in the egg mixture and cook for about 3-4 minutes, gently stirring the edges while the center sets.
Transfer the skillet to the preheated oven and bake for 10-15 minutes, or until the frittata is puffed and the center is set.
Remove from the oven and let it cool for a couple of minutes before slicing into wedges. Garnish with fresh herbs if desired, and serve warm.
Extra Tips:
For a creamier texture, consider adding an extra tablespoon of milk or cream to the egg mixture.
You can also experiment with different flavor combinations by including various herbs and spices, such as thyme or paprika, to elevate the taste.
If you prefer a crispier top, broil the frittata for an additional 1-2 minutes after baking. Just be sure to keep a close eye on it to prevent burning.
Enjoy your delicious mini frittata fresh from the skillet!
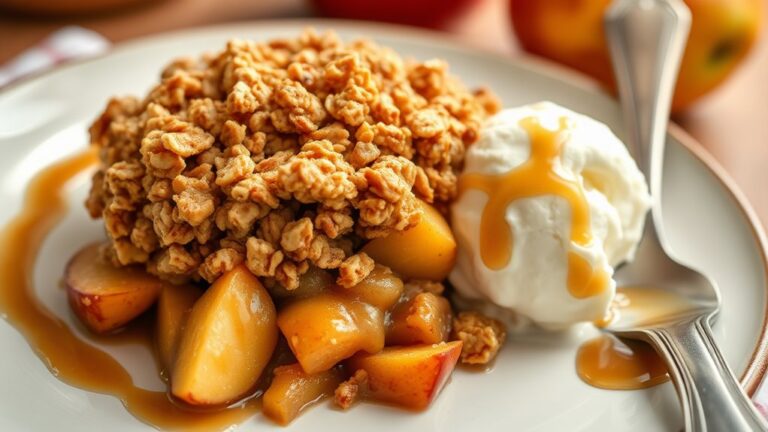
Single-Serve Chocolate Chip Cookie
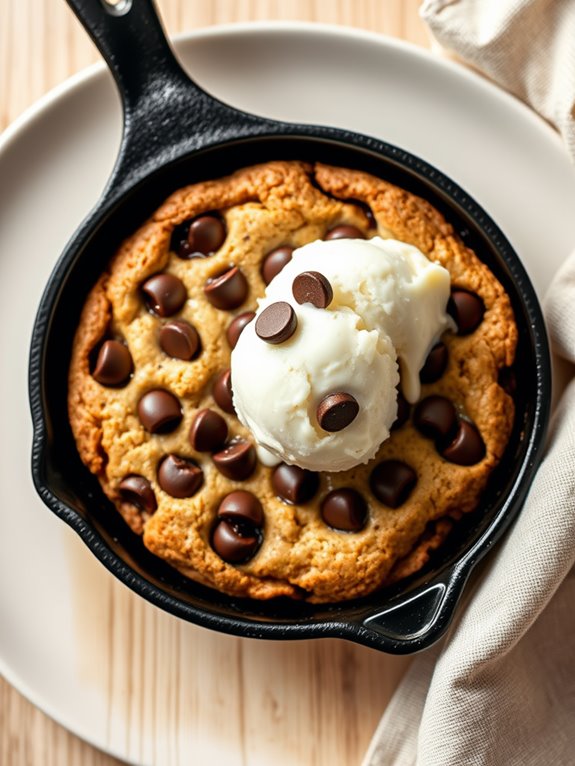
Indulging in a warm, gooey chocolate chip cookie straight from the oven is a simple pleasure that can brighten any day. With a 6-inch cast iron skillet, you can create a single-serve chocolate chip cookie that's perfectly crispy on the edges and soft in the middle.
This recipe isn't only quick but also allows you to satisfy your sweet tooth without having to make a whole batch of cookies. The beauty of this skillet cookie lies in its simplicity—just a few pantry staples come together to create a delightful treat.
Whether you're treating yourself or sharing with a friend, this chocolate chip cookie is sure to impress. Grab your ingredients and let's get started!
Ingredients:
- 2 tablespoons unsalted butter, melted
- 1 tablespoon granulated sugar
- 1 tablespoon brown sugar
- 1/4 teaspoon vanilla extract
- Pinch of salt
- 1 egg yolk
- 4 tablespoons all-purpose flour
- 2 tablespoons chocolate chips
Cooking Instructions:
- Preheat your oven to 350°F (175°C). In your 6-inch cast iron skillet, mix the melted butter, granulated sugar, brown sugar, vanilla extract, and salt until well combined.
- Add the egg yolk and stir until fully incorporated. Gradually add the flour and mix until just combined.
- Fold in the chocolate chips, ensuring they're evenly distributed throughout the dough.
- Spread the dough evenly in the skillet and smooth the top. Bake in the preheated oven for about 10-12 minutes, or until the edges are golden brown and the center is set but still soft. Let it cool for a few minutes before digging in.
Extra Tips:
For an extra indulgent treat, consider adding a scoop of vanilla ice cream on top of the warm cookie right before serving.
You can also experiment by mixing in nuts or different types of chocolate chips based on your preference. Keep an eye on the baking time, as ovens may vary; you want to avoid overbaking to preserve that delicious gooey center.
Enjoy your homemade skillet cookie!
Herb and Cheese Scone
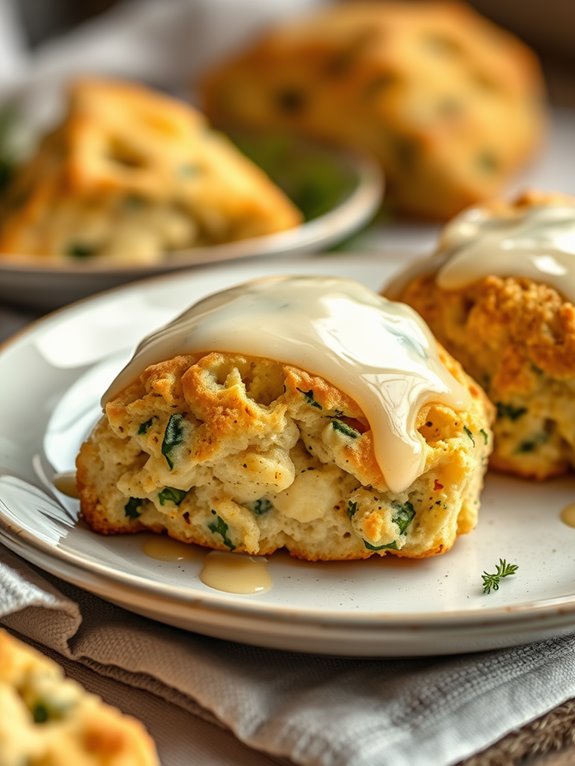
This recipe is simple and quick, allowing you to whip up a batch in no time. Whether you're serving them up for a weekend gathering or just treating yourself, these scones are sure to impress. Enjoy them warm from the oven with a pat of butter or on their own for a tasty bite.
Ingredients:
- 1 cup all-purpose flour
- 1 tablespoon baking powder
- 1/4 teaspoon salt
- 1/4 cup cold butter, cubed
- 1/3 cup shredded cheese (cheddar or your choice)
- 2 tablespoons fresh herbs (such as chives, parsley, or thyme), chopped
- 1/2 cup milk
- 1 egg (for egg wash)
Cooking Instructions:
Preheat your oven to 400°F (200°C). In a mixing bowl, combine the flour, baking powder, and salt. Cut in the cold butter using a pastry cutter or your fingertips until the mixture resembles coarse crumbs.
Stir in the shredded cheese and chopped herbs. Gradually add the milk, mixing until just combined; be careful not to overwork the dough.
Transfer the dough to a floured surface and gently pat it into a 6-inch round, about 1-inch thick. Place the round in a preheated 6-inch cast iron skillet. Brush the top with the beaten egg for a golden finish.
Bake in the oven for about 15-20 minutes or until the scone is golden brown and a toothpick inserted into the center comes out clean. Allow it to cool slightly before slicing into wedges and serving.
Extra Tips:
For an extra flavor boost, consider adding a hint of garlic powder or a pinch of red pepper flakes to the dough.
You can also experiment with different types of cheese and herbs according to your preference. Make sure your butter is very cold for the flakiest texture, and if you have leftover scones, they can be stored in an airtight container for a couple of days or frozen for longer-lasting enjoyment. Enjoy!
Shrimp and Grits
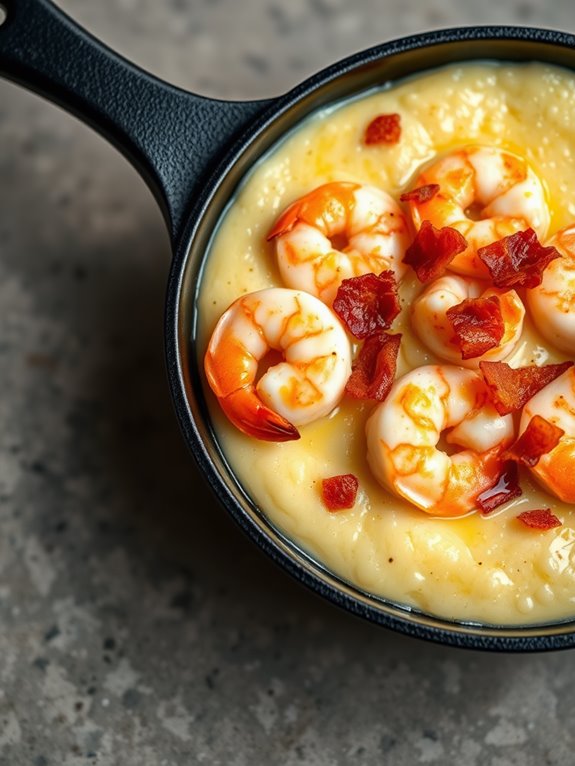
Shrimp and grits is a classic Southern dish that brings together the rich, creamy texture of grits with the savory flavor of shrimp. This comforting meal is perfect for breakfast, brunch, or even dinner, and is sure to impress anyone who tries it. The combination of spices and the addition of cheese in the grits elevate the dish, making it a delightful indulgence.
Cooking shrimp and grits in a 6-inch cast iron skillet allows for even heat distribution, resulting in perfectly cooked shrimp and creamy grits. The skillet's natural non-stick properties will help achieve the ideal texture, while also providing a beautiful presentation. With just a few ingredients and some straightforward techniques, you can create this flavorful dish right at home.
Ingredients:
- 1 cup water
- 1/4 cup grits
- 1/2 cup shredded cheddar cheese
- 1 tablespoon butter
- 1/2 pound shrimp, peeled and deveined
- 2 slices of bacon, chopped
- 1 clove garlic, minced
- 1/4 teaspoon paprika
- Salt and pepper, to taste
- Chopped green onions, for garnish
Cooking Instructions:
Start by bringing the water to a boil in your cast iron skillet. Once boiling, gradually stir in the grits, reduce the heat to low, and let them simmer for about 5-7 minutes, stirring occasionally until they're thick and creamy. Stir in the butter and shredded cheddar cheese, mixing until completely melted and incorporated. Season with salt and pepper to taste.
In another skillet or the same cast iron skillet if there's space, cook the chopped bacon over medium heat until crispy. Remove the bacon and set it aside, leaving the rendered fat in the skillet. Add the shrimp to the skillet, cooking them for about 2-3 minutes on each side until they're pink and opaque. Add the minced garlic and paprika, cooking for an additional minute. Combine the shrimp with the bacon, and serve over the creamy grits, garnished with chopped green onions.
Extra Tips:
For an extra layer of flavor, consider adding a splash of hot sauce to the shrimp while cooking, or mix in some sautéed vegetables like bell peppers or spinach into the grits. Make sure not to overcook the shrimp; they cook quickly, and you want them tender. Additionally, using freshly grated cheese will enhance the creaminess of the grits, making your dish even more delectable.
Personal Pizza
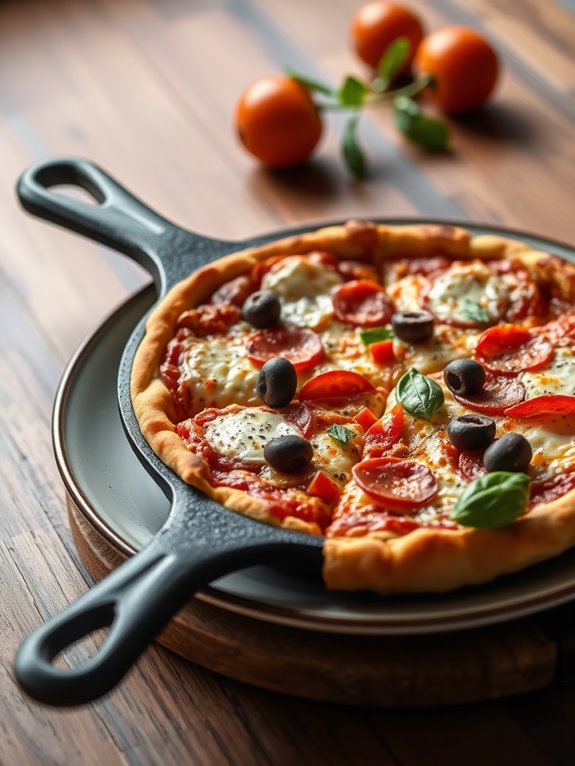
Making a personal pizza in a 6-inch cast iron skillet is a delightful way to enjoy a fresh, homemade meal with minimal effort. The small size of the skillet is perfect for individual servings, allowing you to customize the toppings to suit your taste.
Whether you're in the mood for a classic margherita or something more adventurous like a BBQ chicken pizza, the cast iron skillet guarantees that your crust comes out crispy and golden. This method of cooking not only enhances the flavor but also makes cleanup a breeze.
With just a few ingredients and simple steps, you'll have a delicious personal pizza ready to enjoy in no time. Let's gather our ingredients and get started on this savory treat.
Ingredients:
- 1 small pizza dough ball (store-bought or homemade)
- 1/4 cup pizza sauce
- 1/2 cup shredded mozzarella cheese
- Your choice of toppings (pepperoni, bell peppers, mushrooms, olives, etc.)
- Olive oil
- Italian seasoning (optional)
Instructions:
- Preheat your oven to 475°F (245°C). While the oven is heating, lightly coat the bottom and sides of your 6-inch cast iron skillet with olive oil to prevent sticking.
- Roll out the pizza dough on a lightly floured surface until it's slightly larger than the skillet. Carefully place the dough into the skillet, pressing it into the edges to form a crust.
- Spread the pizza sauce evenly over the dough, leaving a small border around the edges. Sprinkle the shredded mozzarella cheese over the sauce, followed by your choice of toppings.
- If desired, sprinkle a pinch of Italian seasoning on top for added flavor. Place the skillet in the preheated oven and bake for about 10-12 minutes, or until the cheese is bubbling and the crust is golden brown.
Extra Tips:
For a perfectly cooked pizza, keep an eye on it as it bakes, as oven temperatures can vary. If you prefer a thicker crust, let the dough rise a bit before baking, or use a thicker pizza dough.
Experiment with different sauces and cheeses to create your ideal flavor profile. Enjoy your homemade personal pizza straight from the skillet for a rustic touch!
One-Pan Lemon Garlic Chicken
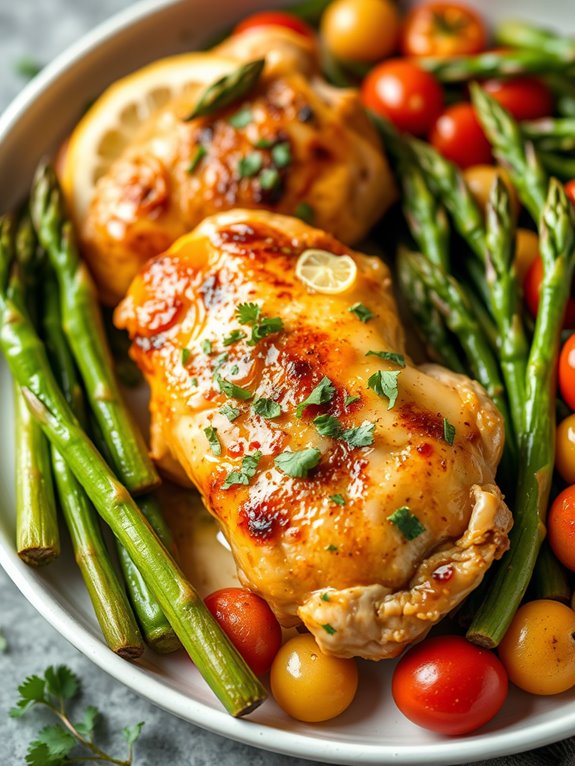
This recipe not only showcases the versatility of your cast iron skillet but also highlights how easy it's to create a delicious meal with just a few ingredients.
Whether you serve it with a side of steamed vegetables or over a bed of rice, this dish is bound to become a favorite in your household.
Ingredients:
- 2 boneless, skinless chicken thighs
- 2 tablespoons olive oil
- 2 cloves garlic, minced
- Juice and zest of 1 lemon
- Salt and pepper, to taste
- Fresh parsley, chopped (for garnish)
Cooking Instructions:
Start by preheating your oven to 400°F (200°C).
Heat the olive oil in your cast iron skillet over medium-high heat. Season the chicken thighs with salt and pepper on both sides.
Once the skillet is hot, add the chicken thighs and sear them for about 5 minutes on each side until they're golden brown.
Next, reduce the heat to medium and add the minced garlic to the skillet, cooking it for about 30 seconds until fragrant.
Squeeze the lemon juice over the chicken and sprinkle the lemon zest on top.
Transfer the skillet to the preheated oven and bake for an additional 15-20 minutes or until the chicken is cooked through and reaches an internal temperature of 165°F (75°C).
Once done, remove from the oven and let it rest for a few minutes before garnishing with fresh parsley.
Extra Tips:
For added depth of flavor, consider marinating the chicken in the lemon juice and garlic for a few hours before cooking.
Additionally, you can customize this recipe by adding vegetables such as asparagus or cherry tomatoes to the skillet during the last 10 minutes of baking for a complete meal.
Always verify your cast iron skillet is well-seasoned to prevent sticking and to enhance the overall taste of the dish.
Mini Cornbread
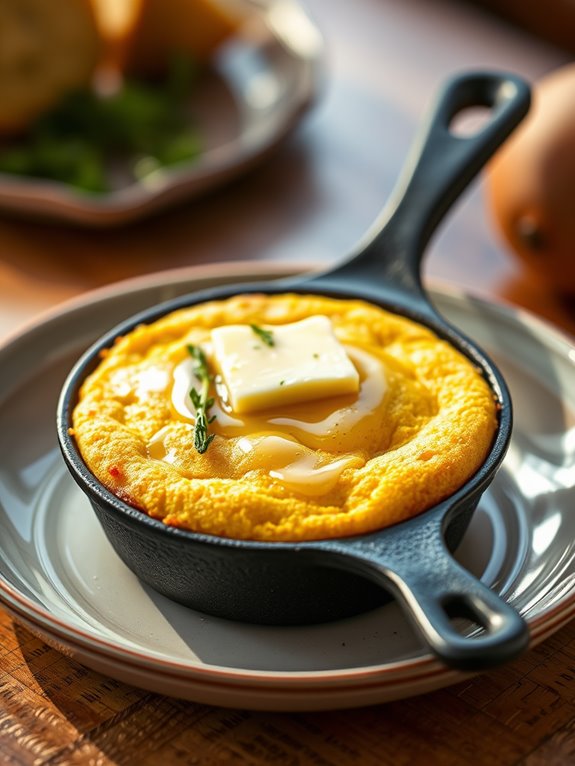
Mini cornbread is a delightful treat that perfectly complements a variety of meals or can be enjoyed on its own. This recipe is designed specifically for a 6-inch cast iron skillet, making it ideal for small gatherings or a cozy dinner at home.
With a golden crust and a moist interior, this cornbread will be a hit at your table, whether served warm with butter or as a side to chili and soups. Making mini cornbread isn't only simple but also quick, taking just about 25 minutes from start to finish.
The combination of cornmeal and buttermilk gives the bread its signature flavor and texture, while the cast iron skillet guarantees even cooking and a lovely crisp edge. Prepare to impress your family and friends with this easy-to-make and deliciously satisfying dish!
Ingredients:
- 1 cup cornmeal
- 1/2 cup all-purpose flour
- 1 tablespoon sugar
- 1 teaspoon baking powder
- 1/2 teaspoon baking soda
- 1/2 teaspoon salt
- 1 cup buttermilk
- 1 large egg
- 1/4 cup melted butter
Instructions:
Preheat your oven to 400°F (200°C). In a mixing bowl, combine the cornmeal, flour, sugar, baking powder, baking soda, and salt.
In another bowl, whisk together the buttermilk, egg, and melted butter until well combined. Gradually pour the wet mixture into the dry ingredients, stirring until just combined; don't overmix.
Heat your 6-inch cast iron skillet on the stove over medium heat for a couple of minutes. Once hot, pour a tablespoon of butter into the skillet and swirl it around to coat the bottom.
Carefully pour the cornbread batter into the skillet and transfer it to the oven. Bake for 15-20 minutes, or until the top is golden brown and a toothpick comes out clean when inserted into the center.
Extra Tips:
For added flavor, consider mixing in some shredded cheese, chopped jalapeños, or fresh herbs into the batter.
Be mindful of the cooking time; since ovens vary, keep an eye on the cornbread to verify it doesn't overbake. Let the cornbread cool for a few minutes before slicing for the best texture. Enjoy your mini cornbread warm for the ultimate experience!
Spinach and Feta Stuffed Mushrooms
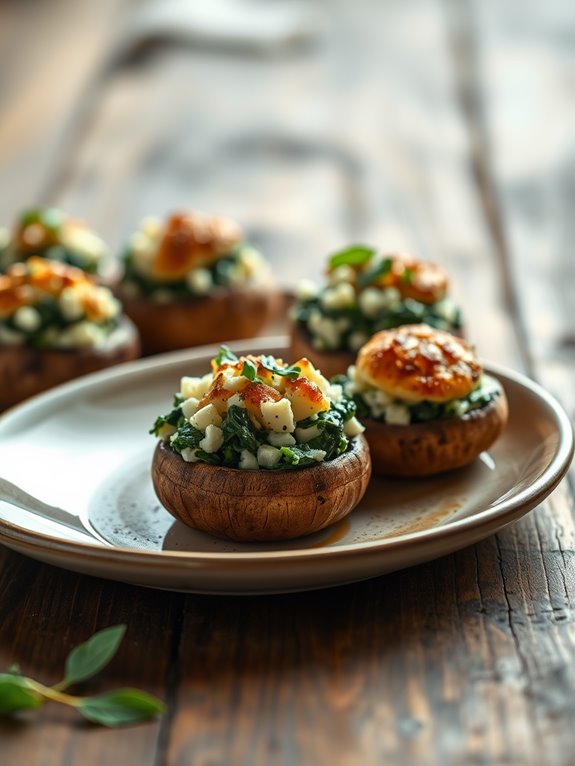
Spinach and Feta Stuffed Mushrooms are a delightful appetizer that perfectly combines the earthy flavor of mushrooms with the creamy richness of feta cheese and the vibrant taste of fresh spinach. This easy-to-make dish can be prepared in a 6-inch cast iron skillet, making it an ideal choice for small gatherings or as a side dish for a cozy dinner.
The crispy edges of the mushrooms and the warm, savory filling create a comforting bite that's sure to impress your family and friends.
These stuffed mushrooms aren't only delicious but also versatile. You can customize the filling by adding other ingredients such as garlic, herbs, or even different types of cheese. They can be served warm straight out of the skillet or allowed to cool slightly and enjoyed at room temperature.
Regardless of how you choose to serve them, these Spinach and Feta Stuffed Mushrooms are a fantastic addition to your recipe repertoire.
Ingredients:
- 12 large mushrooms, stems removed
- 1 cup fresh spinach, chopped
- 1/2 cup feta cheese, crumbled
- 1/4 cup cream cheese, softened
- 1 clove garlic, minced
- 2 tablespoons olive oil
- Salt and pepper, to taste
- 1/4 teaspoon red pepper flakes (optional)
- Fresh parsley, chopped (for garnish)
Cooking Instructions:
Preheat your 6-inch cast iron skillet over medium heat and add the olive oil. Once the oil is hot, sauté the minced garlic for about a minute until fragrant, then add the chopped spinach and cook until wilted, about 2-3 minutes.
Remove the skillet from heat and let the mixture cool slightly. In a mixing bowl, combine the sautéed spinach and garlic with the feta cheese, cream cheese, salt, pepper, and red pepper flakes, mixing until well blended.
Stuff each mushroom cap generously with the spinach and feta mixture and place them back in the skillet. Bake in a preheated oven at 375°F (190°C) for 15-20 minutes, or until the mushrooms are tender and the tops are golden brown.
Remove from the oven and let cool for a few minutes before garnishing with fresh parsley. Serve warm and enjoy!
Extra Tips:
For an added depth of flavor, consider pre-roasting the mushrooms for 5-10 minutes before stuffing them. This helps to draw out moisture and enhances the overall taste.
Additionally, feel free to experiment with different cheeses or add-ins like sundried tomatoes or chopped olives to customize the filling to your liking. Enjoy your cooking!
Individual Shepherd's Pie

Cooking in a cast iron skillet allows for excellent heat retention and even cooking, resulting in a deliciously crispy topping. This recipe is simple and perfect for weeknight meals or an intimate gathering. Plus, it can easily be customized with your favorite vegetables or spices, making it a versatile option for any palate.
Ingredients:
- 1 tablespoon olive oil
- 1/2 cup onion, diced
- 1/2 cup carrots, diced
- 1/2 cup peas (fresh or frozen)
- 1/2 pound ground lamb or beef
- 1 tablespoon tomato paste
- 1/2 cup beef broth
- 1/2 teaspoon Worcestershire sauce
- Salt and pepper to taste
- 1 cup mashed potatoes (prepared)
- Fresh parsley, chopped (for garnish)
Cooking Instructions:
Heat the olive oil in a 6-inch cast iron skillet over medium heat. Add the diced onion and carrots, cooking until they begin to soften, about 3-4 minutes.
Stir in the ground lamb or beef, breaking it apart as it cooks until browned. Add the tomato paste, beef broth, Worcestershire sauce, and peas, and season with salt and pepper. Let the mixture simmer for about 5 minutes, allowing the flavors to meld.
Once the filling is ready, remove it from the heat and spread the prepared mashed potatoes evenly over the top. Use a fork to create a few peaks in the potatoes for extra crispiness.
Place the skillet in a preheated oven at 400°F (200°C) and bake for 20-25 minutes or until the potatoes are golden brown. Remove from the oven and let it cool slightly before serving. Garnish with fresh parsley for a pop of color.
Extra Tips:
For a creamier mashed potato topping, consider mixing in some sour cream or cream cheese before spreading it over the filling.
You can also add cheese on top of the potatoes for an extra indulgent touch. Additionally, feel free to experiment with different vegetables such as mushrooms or corn to tailor the dish to your liking.
Enjoy your individual Shepherd's Pie as a warm, comforting meal perfect for any occasion!
Skillet Pancakes
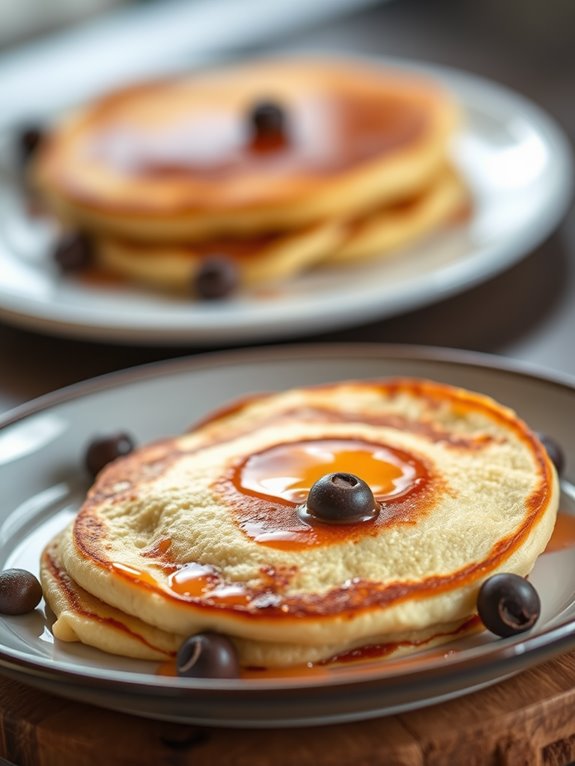
Skillet pancakes are an easy and delicious breakfast option that can be made right in your 6-inch cast iron skillet. This recipe produces fluffy, golden pancakes that can be customized with your favorite mix-ins, such as chocolate chips, berries, or nuts. The small size of the skillet makes it perfect for a single serving or a quick breakfast for two.
Using a cast iron skillet helps to achieve a beautiful golden crust on the pancakes while keeping them tender on the inside. With just a few simple ingredients, you can whip up these delightful pancakes in no time. They're perfect for a cozy weekend breakfast or a quick meal any day of the week.
Ingredients:
- 1/2 cup all-purpose flour
- 1 tablespoon sugar
- 1 teaspoon baking powder
- 1/4 teaspoon salt
- 1/2 cup milk
- 1 large egg
- 1 tablespoon melted butter (plus extra for greasing the skillet)
- Optional: chocolate chips or fresh berries
To begin, preheat your oven to 350°F (175°C). In a medium bowl, whisk together the flour, sugar, baking powder, and salt. In a separate bowl, mix the milk, egg, and melted butter until well combined. Gradually add the wet ingredients into the dry ingredients, stirring until just combined. Be careful not to overmix; a few lumps are okay. If desired, fold in chocolate chips or berries at this stage.
Next, heat your cast iron skillet over medium heat and add a small amount of butter to grease the pan. Once the butter is melted and bubbly, pour the pancake batter into the skillet, smoothing it out gently with a spatula. Cook for about 3-4 minutes or until the edges begin to set and bubbles form on the surface. Carefully flip the pancake and cook for an additional 2-3 minutes until golden brown on both sides.
If you want to keep the pancake warm, place it in the preheated oven while you prepare any additional pancakes. When cooking skillet pancakes, remember to control the heat carefully; too high can burn the pancakes while leaving them raw inside.
You can also experiment with different toppings such as maple syrup, whipped cream, or fruit compote for added flavor. Finally, if you find your pancakes are sticking to the skillet, don't hesitate to add a little more butter before each new batch. Enjoy your delicious skillet pancakes!
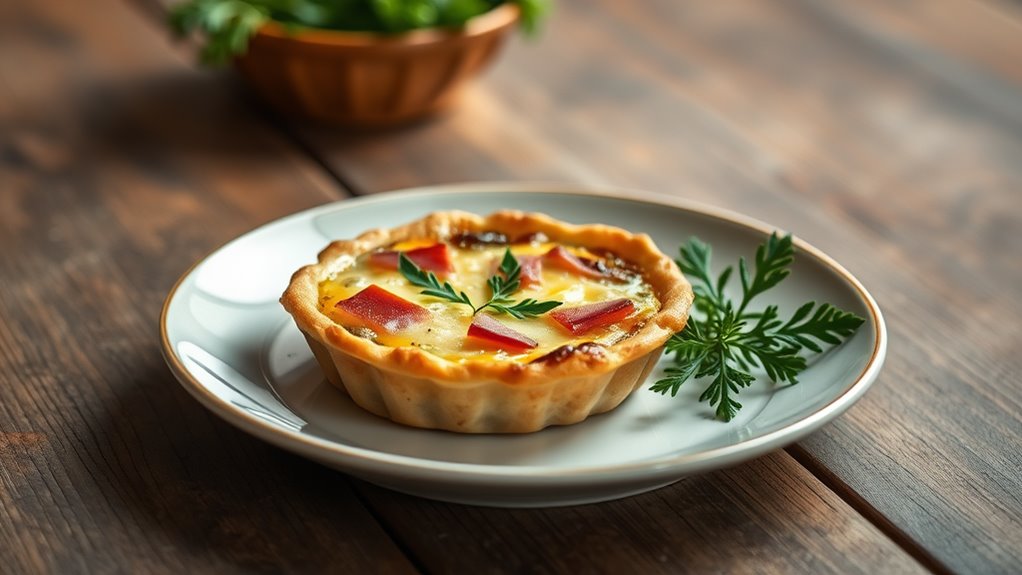
Mini Quiche
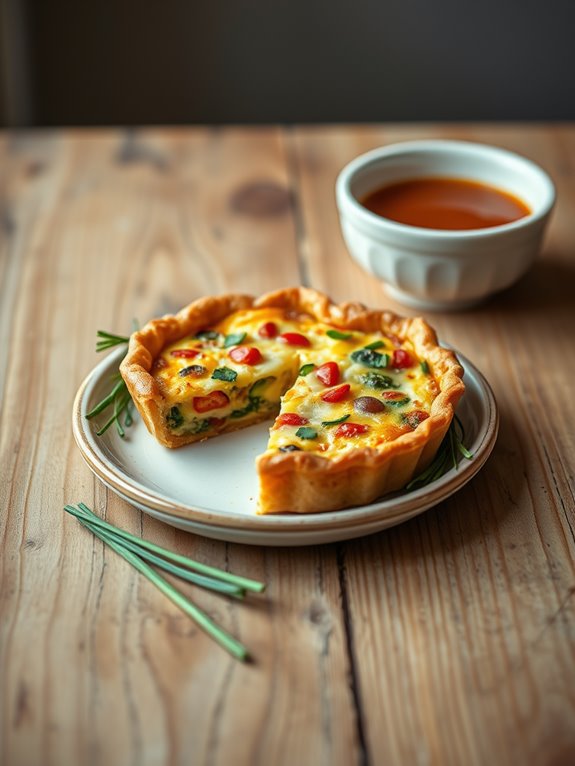
Mini quiches are a delightful dish that can be enjoyed for breakfast, brunch, or even as a snack. Their versatility allows you to customize the filling to suit your taste, whether you prefer classic ingredients like cheese and ham or more adventurous combinations with vegetables and herbs.
Using a 6-inch cast iron skillet guarantees even cooking and a beautifully browned crust, making these mini quiches not only delicious but visually appealing as well.
The beauty of mini quiches lies in their simplicity and the ease of preparation. In just a short amount of time, you can whip up a batch that will impress friends and family alike. Perfect for meal prep, these quiches can be made ahead of time and stored in the refrigerator for a quick and tasty meal on busy mornings.
Ingredients:
- 3 large eggs
- 1/2 cup milk
- 1/2 cup shredded cheese (cheddar, swiss, or your choice)
- 1/4 cup diced ham, cooked bacon, or sautéed vegetables
- Salt and pepper to taste
- Optional herbs (such as chives or parsley)
- Cooking spray or butter for greasing the skillet
Instructions:
- Preheat your oven to 375°F (190°C) and lightly grease your 6-inch cast iron skillet with cooking spray or butter.
- In a mixing bowl, whisk together the eggs and milk until well combined. Season with salt and pepper. Stir in the cheese, diced meat or vegetables, and herbs if using.
- Pour the egg mixture into the prepared skillet, ensuring an even distribution of ingredients.
- Bake in the preheated oven for 20-25 minutes, or until the quiche is set in the center and lightly golden on top. Let it cool for a few minutes before slicing and serving.
Extra Tips:
Feel free to experiment with different fillings based on your preferences or what's available in your pantry. Leafy greens like spinach or kale, sun-dried tomatoes, or even feta cheese can add unique flavors to your mini quiche.
If you're making these ahead of time, they can be stored in an airtight container in the refrigerator for up to 3 days. Reheat them in the microwave or oven for a quick meal that tastes freshly made!
Frequently Asked Questions
Can I Use a Non-Stick Spray for My Cast Iron Skillet?
Imagine your skillet as a loyal steed. You can use non-stick spray, but it's not always necessary. Seasoning your cast iron's like grooming that horse; it'll perform better without it, so embrace the natural finish!
How Do I Properly Season My 6-Inch Cast Iron Skillet?
To properly season your 6-inch cast iron skillet, clean it thoroughly, apply a thin layer of vegetable oil, and bake it upside down in the oven at 350°F for an hour. Let it cool completely.
Are There Any Specific Cleaning Tips for Cast Iron Skillets?
When it comes to cleaning cast iron skillets, you'll want to avoid throwing in the towel. Use hot water, a stiff brush, and minimal soap. Dry it immediately and apply a thin oil layer to prevent rust.
What's the Best Way to Store My Cast Iron Skillet?
To store your cast iron skillet, make sure it's completely dry, then apply a thin layer of cooking oil. Place a paper towel inside to absorb moisture and prevent rust. Keep it in a cool, dry place.
Can I Use My Skillet on an Induction Cooktop?
Yes, you can use your cast iron skillet on an induction cooktop. Just make sure your skillet has a flat, smooth bottom for ideal heat transfer. Enjoy the versatility of cooking with it!