As an affiliate, we may earn a commission from qualifying purchases. We get commissions for purchases made through links on this website from Amazon and other third parties.
When you crave a quick meal, seek a tasty snack, or desire a simple dessert, a 3.5-inch cast iron skillet can deliver. These nine tiny but mighty recipes showcase just how versatile this little kitchen tool can be. Each dish is crafted with straightforward ingredients and minimal fuss, making them perfect for any occasion. Curious about how to whip up these delightful, bite-sized creations? Let's explore what you can make with this compact skillet.
Key Takeaways
- Mini Vegetable Frittata and Single-Serve Cornbread are perfect breakfast options made in a small skillet for easy meal prep.
- Tiny Skillet Mac and Cheese offers a quick, comforting dish ideal for one or two, utilizing simple ingredients.
- Personal Size Pizza allows for customization with favorite toppings, baked to perfection in a 3.5-inch cast iron skillet.
- Cast Iron Quesadilla is a tasty snack that combines tortillas and cheese, perfect for a quick meal or appetizer.
- Individual Chocolate Lava Cake provides a delightful dessert baked in a small skillet, delivering a rich, gooey center.
Mini Vegetable Frittata
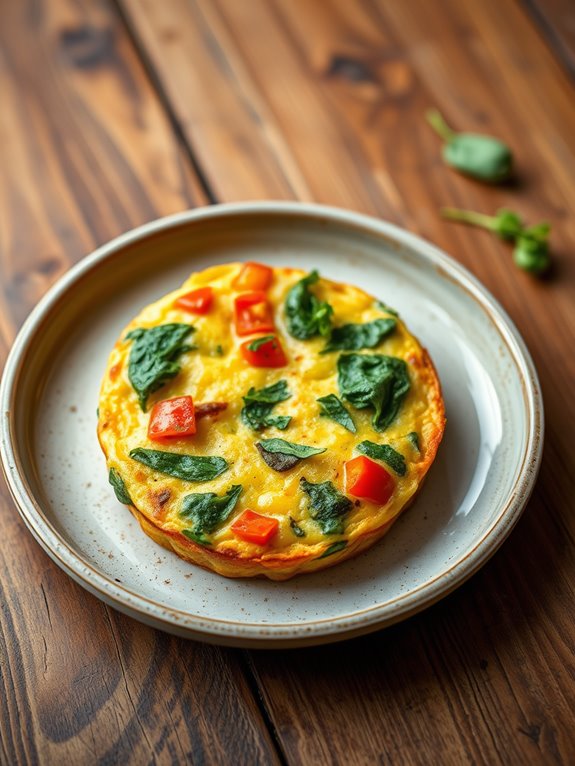
Using a cast iron skillet is perfect for achieving a fluffy texture and ensuring that the frittata cooks evenly. You can experiment with various vegetables such as bell peppers, spinach, or zucchini, and even add cheese or herbs to elevate the flavor.
This recipe is perfect for meal prep, as it can be made in advance and stored in the refrigerator for a quick grab-and-go option.
Ingredients
- 4 large eggs
- 1/4 cup milk
- 1/2 cup chopped bell peppers
- 1/2 cup chopped spinach
- 1/4 cup chopped onion
- 1/4 cup shredded cheese (optional)
- Salt and pepper, to taste
- 1 tablespoon olive oil or butter
Cooking Instructions
- Preheat your oven to 375°F (190°C). In a medium bowl, whisk together the eggs, milk, salt, and pepper until well combined. Stir in the chopped vegetables and cheese, if using.
- Heat the olive oil or butter in a cast iron skillet over medium heat. Add the onion and sauté for 2-3 minutes until translucent. Then, pour the egg mixture over the sautéed vegetables, ensuring it spreads evenly. Cook on the stove for about 3-4 minutes until the edges begin to set.
- Transfer the skillet to the preheated oven and bake for 10-12 minutes, or until the frittata is puffed and golden brown. Remove from the oven and let it cool for a few minutes before slicing into wedges.
Extra Tips
For a more flavorful frittata, consider adding herbs such as fresh basil or chives, or even spices like paprika or cumin for a bit of a kick.
You can also swap the vegetables based on seasonal availability or personal preference. If you have leftover frittata, it keeps well in the refrigerator for up to three days and can be easily reheated in the skillet or microwave.
Enjoy your mini vegetable frittata warm or cold!
Single-Serve Cornbread
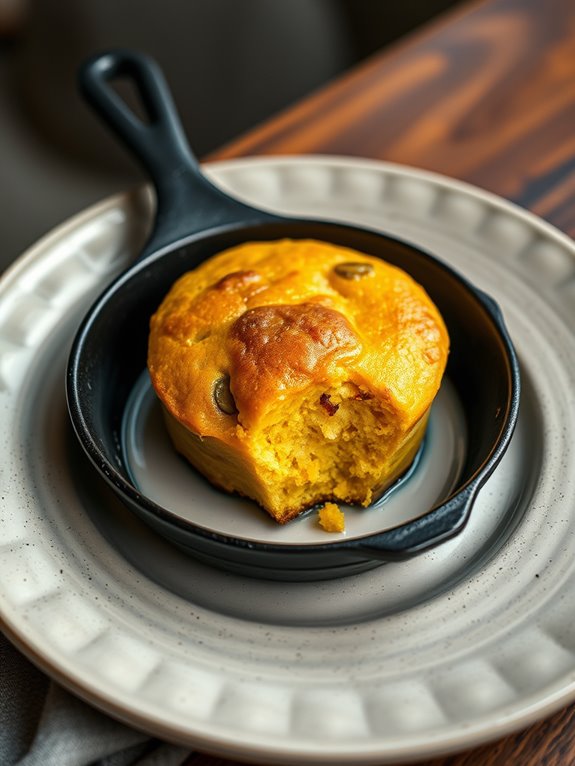
This single-serve cornbread isn't only a fantastic treat, but it's also a great way to experiment with flavors. You can add in ingredients like cheese, jalapeños, or herbs to create your own unique twist.
Whether you're cooking for one or just want a quick side dish, this recipe will have you enjoying warm, buttery cornbread in no time.
Ingredients:
- 1/2 cup cornmeal
- 1/4 cup all-purpose flour
- 2 tablespoons sugar
- 1 teaspoon baking powder
- 1/4 teaspoon salt
- 1/2 cup milk
- 1 large egg
- 2 tablespoons melted butter
- Optional: cheese, jalapeños, or herbs for additional flavor
Instructions:
Preheat your oven to 400°F (200°C). In a small cast iron skillet, melt the butter and set it aside to cool slightly.
In a mixing bowl, combine the cornmeal, flour, sugar, baking powder, and salt. In another bowl, whisk together the milk and egg, then add the melted butter.
Pour the wet ingredients into the dry ingredients and mix until just combined; be careful not to overmix. If you're adding any optional ingredients, fold them in at this stage.
Pour the batter into the hot skillet and bake for about 20 minutes, or until the top is golden brown and a toothpick inserted in the center comes out clean.
Let it cool for a few minutes before slicing and enjoying your warm cornbread.
Extra Tips:
To achieve the best texture and flavor, make sure your cast iron skillet is preheated before adding the batter. This will create a beautiful crust on the bottom and sides.
Additionally, feel free to experiment with different mix-ins to suit your taste. Serve your cornbread warm with a pat of butter or drizzle of honey for an extra touch of sweetness!
Tiny Skillet Mac and Cheese
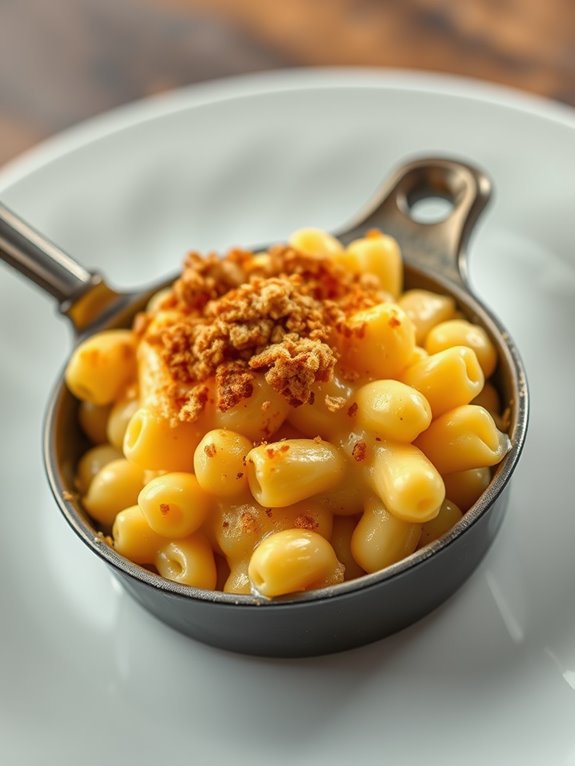
The beauty of cooking in a tiny skillet is that it's quick to heat up and easy to clean. This recipe serves one or two people, making it ideal for a quick meal or a late-night snack. With just a few ingredients and minimal effort, you can indulge in a rich and flavorful mac and cheese that will have you coming back for seconds.
Ingredients:
- 1 cup elbow macaroni
- 1 cup milk
- 1 cup shredded sharp cheddar cheese
- 2 tablespoons butter
- 1 tablespoon all-purpose flour
- Salt and pepper to taste
- Optional: breadcrumbs for topping
Cooking Instructions:
Start by cooking the elbow macaroni in a small pot of boiling salted water according to package instructions until al dente. Drain and set aside.
In the tiny cast iron skillet, melt the butter over medium heat. Once melted, whisk in the flour and cook for about 1 minute until golden. Gradually add the milk while continuously whisking to avoid lumps. Bring the mixture to a gentle simmer until it thickens, about 2-3 minutes.
Once thickened, reduce the heat to low and stir in the shredded cheese until melted and smooth. Add the cooked macaroni to the skillet and mix until the pasta is fully coated in the cheesy sauce.
If desired, sprinkle breadcrumbs on top and place the skillet under the broiler for 2-3 minutes until the topping is golden brown. Serve hot and enjoy your tiny skillet mac and cheese!
Extra Tips:
For a little extra flavor, consider adding a pinch of garlic powder or a dash of hot sauce to the cheese sauce before mixing in the pasta.
You can also experiment with different types of cheese, such as mozzarella or gouda, for a unique twist. If you want to make it a complete meal, toss in some cooked veggies or proteins like chicken or bacon to make it heartier.
Enjoy your delicious creation right from the skillet!
Personal Size Pizza

In this recipe, you'll learn how to create a delicious personal pizza that you can top with your favorite ingredients.
Whether you prefer classic pepperoni, fresh vegetables, or a combination of both, this method allows for creativity and personalization.
Grab your cast iron skillet, and let's get started!
Ingredients:
- 1 pre-made pizza dough (or homemade)
- 1/2 cup pizza sauce
- 1 cup shredded mozzarella cheese
- 1/4 cup sliced pepperoni (or other toppings of choice)
- 1 tablespoon olive oil
- 1 teaspoon dried oregano
- Salt and pepper to taste
Instructions:
- Preheat your oven to 450°F (232°C). While the oven is heating, lightly grease your cast iron skillet with olive oil, ensuring the bottom and sides are well coated.
- Roll out your pizza dough to fit the size of the skillet, making sure it's slightly larger than the skillet's diameter.
- Place the dough in the skillet, pressing it into the corners and up the sides.
- Spread the pizza sauce evenly over the dough, leaving a small border around the edges.
- Sprinkle the shredded mozzarella cheese on top, followed by your desired toppings, such as pepperoni.
- Sprinkle the dried oregano, salt, and pepper over the pizza.
- Place the skillet in the preheated oven and bake for 12-15 minutes, or until the crust is golden brown and the cheese is bubbly.
Extra Tips:
For an even crispier crust, you can pre-bake the pizza dough in the skillet for about 5 minutes before adding the sauce and toppings.
Additionally, feel free to experiment with different cheeses or sauces to create your perfect flavor profile.
If you're using fresh vegetables, consider sautéing them first to reduce moisture and enhance their flavors.
Enjoy your delicious personal pizza!
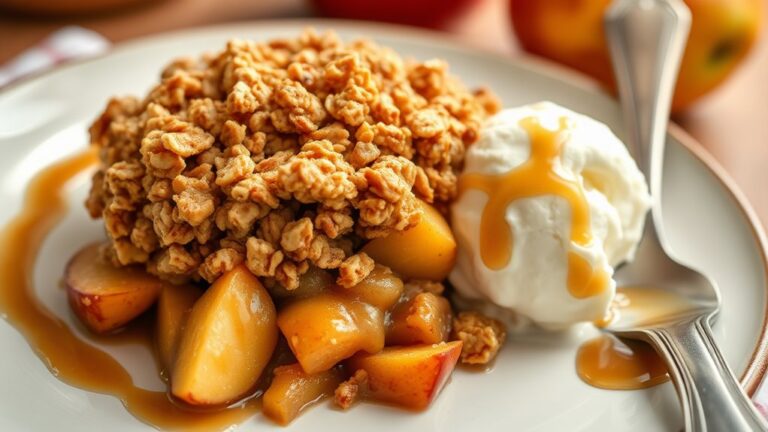
Miniature Apple Crisp
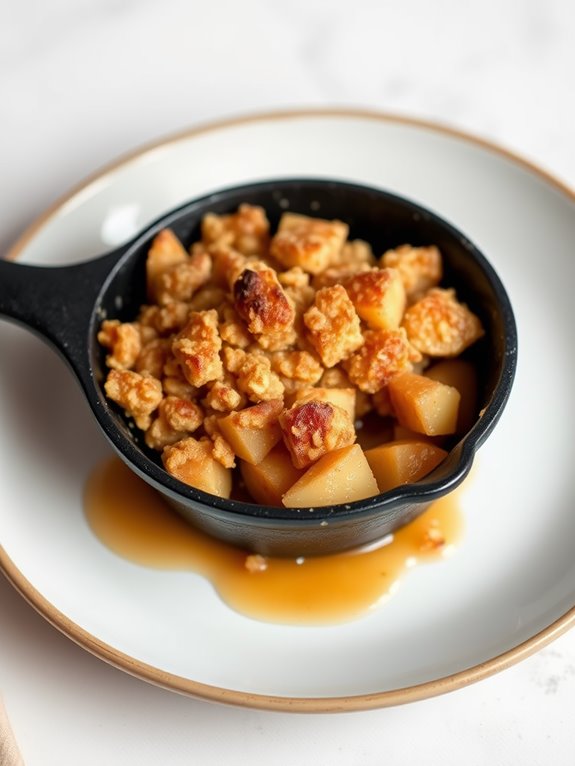
This tiny apple crisp isn't only easy to prepare, but it also makes for a charming presentation. Whether you're hosting a dinner party or looking for a cozy night in, this recipe is versatile and can be whipped up in no time. Serve it warm with a scoop of vanilla ice cream or a dollop of whipped cream for an extra indulgence.
Ingredients:
- 2 small apples (such as Granny Smith or Honeycrisp), peeled, cored, and diced
- 1 tablespoon brown sugar
- 1/2 teaspoon cinnamon
- 1/4 cup rolled oats
- 2 tablespoons all-purpose flour
- 2 tablespoons granulated sugar
- 2 tablespoons unsalted butter, melted
- A pinch of salt
Cooking Instructions:
Preheat your oven to 350°F (175°C). In a small cast iron skillet, combine the diced apples, brown sugar, and cinnamon. Toss the mixture to guarantee the apples are evenly coated in the sugar and spices.
Spread the apple mixture evenly across the bottom of the skillet.
In a separate bowl, mix together the rolled oats, flour, granulated sugar, melted butter, and a pinch of salt until the mixture resembles coarse crumbs.
Sprinkle this topping over the apple layer in the skillet. Bake in the preheated oven for about 20-25 minutes, or until the apples are tender and the topping is golden brown. Allow the mini apple crisp to cool slightly before serving.
Extra Tips:
For added flavor, consider incorporating nuts like walnuts or pecans into the topping for a delightful crunch.
You can also experiment with different spices such as nutmeg or ginger for a unique twist.
If you prefer a sweeter dessert, feel free to adjust the sugar levels according to your taste.
Enjoy your miniature apple crisp fresh from the oven for the best taste and texture!
Cast Iron Quesadilla
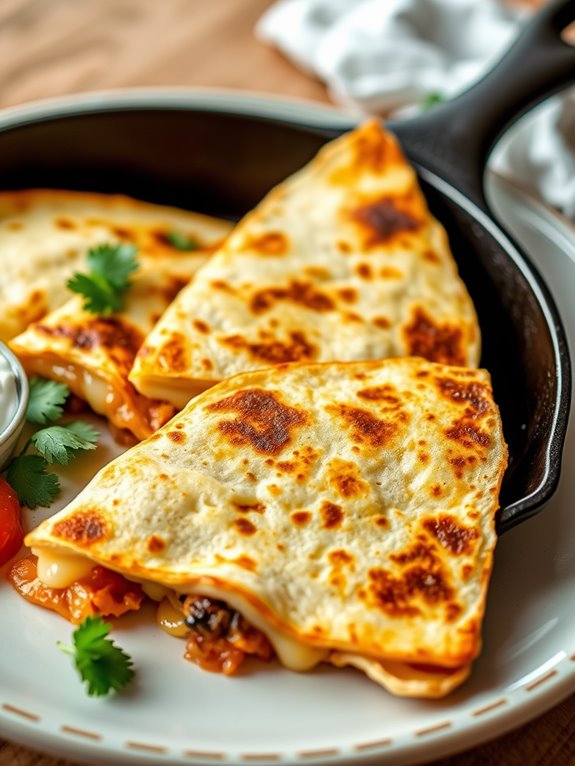
To get started, gather your ingredients and preheat your cast iron skillet over medium heat. The key to a great quesadilla is ensuring that the skillet is hot enough to crisp the tortilla without burning it. The combination of a golden brown tortilla and melted cheese is sure to impress everyone at the table.
Let's explore the simple steps to create this delightful dish!
Ingredients:
- 2 large flour tortillas
- 1 cup shredded cheese (cheddar, Monterey Jack, or your choice)
- ½ cup cooked chicken, beef, or vegetables (optional)
- ¼ cup diced onions (optional)
- ¼ cup diced bell peppers (optional)
- Olive oil or cooking spray
- Salsa or sour cream for serving (optional)
Instructions:
- Heat the cast iron skillet over medium heat and lightly coat it with olive oil or cooking spray. Place one tortilla in the skillet and sprinkle half of the cheese evenly over the tortilla. If using, add the cooked meat, vegetables, and any additional toppings on top of the cheese.
- Sprinkle the remaining cheese over the toppings and place the second tortilla on top. Cook for about 3-4 minutes, or until the bottom tortilla is golden brown and crispy.
- Carefully flip the quesadilla using a spatula and cook the other side for another 3-4 minutes until it's golden and the cheese is melted.
- Remove the quesadilla from the skillet and let it rest for a minute before slicing it into wedges. Serve with salsa or sour cream on the side for dipping.
Extra Tips:
For an even more flavorful quesadilla, consider adding spices such as cumin or chili powder to the filling.
You can also experiment with different types of cheese or add fresh herbs like cilantro for an extra burst of flavor.
If you're making multiple quesadillas, keep the cooked ones warm in a low-temperature oven while you finish the rest.
Enjoy your delicious cast iron quesadilla creation!
Individual Chocolate Lava Cake
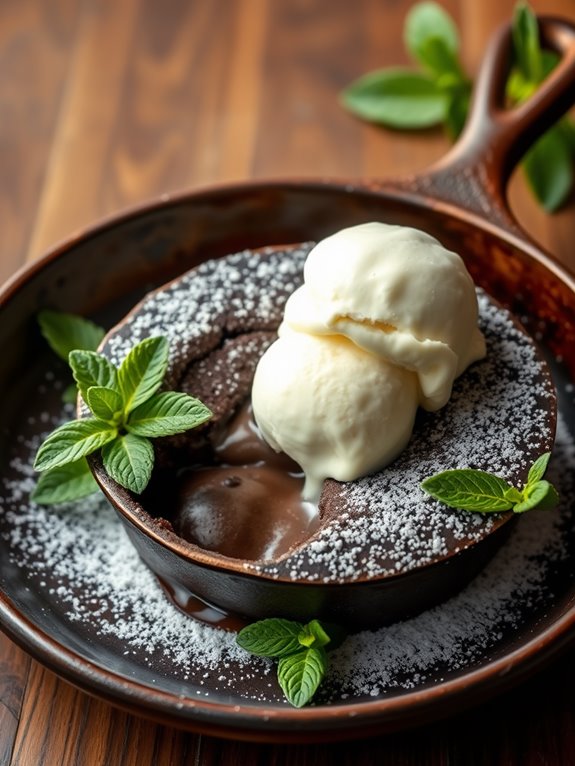
Indulging in a rich, gooey chocolate lava cake is a delightful experience, and making it in a cast iron skillet elevates the charm of this dessert. This individual-sized version is perfect for satisfying your sweet tooth without the need for extensive baking. The molten center oozes warmth and flavor, making it an ideal treat for any occasion, from a cozy dinner for two to a special celebration.
Using a cast iron skillet not only provides even heat distribution but also gives your lava cake a beautiful, rustic presentation. With a few basic ingredients and just a little time, you can create a chocolate masterpiece that will impress anyone fortunate enough to share in the experience.
Get ready to treat yourself to a decadent dessert that's as fun to make as it's to eat.
Ingredients:
- 4 oz semisweet chocolate, chopped
- ½ cup unsalted butter
- 1 cup powdered sugar
- 2 large eggs
- 2 large egg yolks
- 1 tsp vanilla extract
- ½ cup all-purpose flour
- Pinch of salt
- Cooking spray or butter for greasing
Instructions:
- Preheat your oven to 425°F (220°C). Grease a small cast iron skillet with cooking spray or a little butter to prevent sticking.
- In a medium saucepan over low heat, melt the chopped chocolate and butter together, stirring frequently until smooth. Remove from heat and let it cool slightly.
- Whisk in the powdered sugar until combined, followed by the eggs and egg yolks, mixing until fully incorporated. Add the vanilla extract, flour, and salt, stirring until just combined.
- Pour the batter into the prepared skillet, filling it about halfway. Bake in the preheated oven for 12-14 minutes, or until the edges are firm but the center remains soft and jiggly.
- Allow the cake to cool for a minute before serving. If desired, serve with a scoop of vanilla ice cream or a dusting of powdered sugar on top.
Extra Tips:
For the best results, be sure not to overbake the lava cake, as the gooey center is what makes it special. If you want to prepare it ahead of time, you can make the batter and refrigerate it for up to 24 hours before baking. Just remember to add a minute or two to the baking time if you're using chilled batter.
Enjoy your delicious creation!
Petite Shrimp Stir-Fry
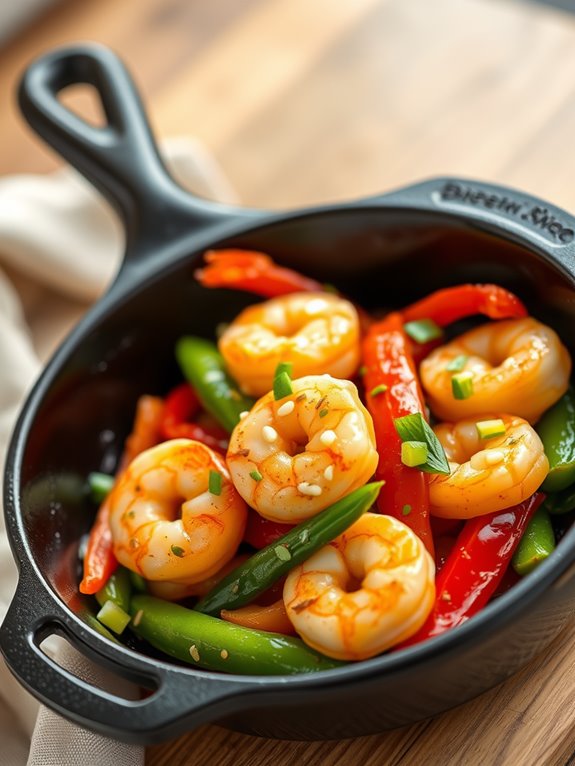
This recipe is versatile, allowing you to customize it with your favorite veggies or sauces.
Whether served over rice, quinoa, or enjoyed on its own, this dish is packed with protein and essential nutrients. Preparing your ingredients ahead of time will streamline the cooking process, making it all the more enjoyable.
Ingredients:
- 1 pound of shrimp, peeled and deveined
- 1 cup of bell peppers, sliced (red, green, or yellow)
- 1 cup of snap peas
- 2 cloves of garlic, minced
- 1 tablespoon of ginger, minced
- 2 tablespoons of soy sauce
- 1 tablespoon of sesame oil
- 1 tablespoon of vegetable oil
- Salt and pepper to taste
- Cooked rice or quinoa, for serving
- Sesame seeds, for garnish (optional)
- Green onions, chopped for garnish (optional)
Cooking Instructions:
Start by heating the vegetable oil in your cast iron skillet over medium-high heat.
Once the oil is hot, add the minced garlic and ginger, cooking for about 30 seconds until fragrant. Toss in the shrimp and cook for approximately 3-4 minutes, stirring frequently until they turn pink and opaque. Remove the shrimp from the skillet and set them aside.
In the same skillet, add the sliced bell peppers and snap peas. Stir-fry for about 2-3 minutes until they're tender-crisp.
Return the shrimp to the skillet, add the soy sauce and sesame oil, and mix well to combine all the ingredients. Season with salt and pepper to taste. Cook for an additional minute to heat through, then remove from heat. Serve over rice or quinoa and garnish with sesame seeds and chopped green onions if desired.
Extra Tips:
To enhance the flavor profile of your shrimp stir-fry, consider adding a splash of rice vinegar or a sprinkle of red pepper flakes for heat.
Make sure not to overcrowd the skillet, as this can prevent the shrimp from searing properly. If you're using frozen shrimp, be sure to thaw them thoroughly and pat them dry for the best results.
Enjoy your delicious and colorful meal!
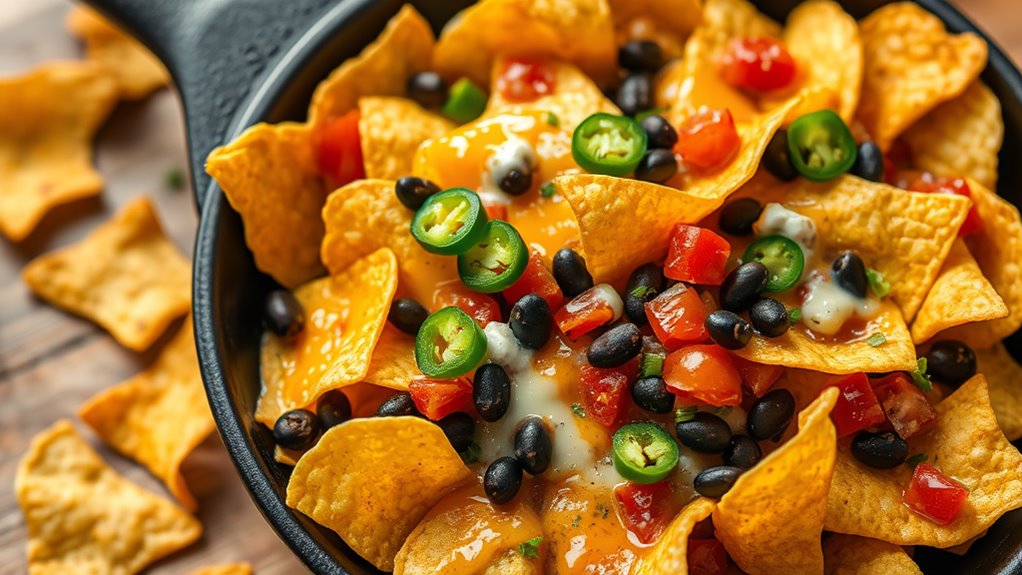
Small Batch Nachos
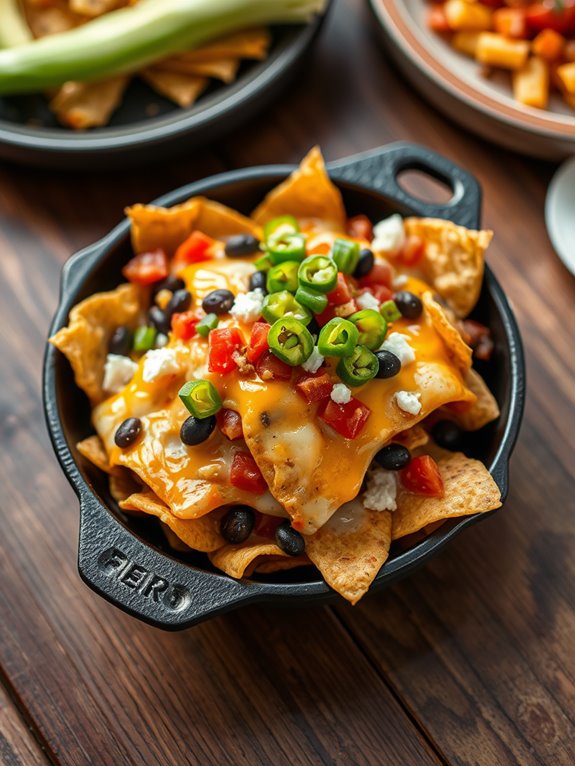
Small Batch Nachos are the perfect solution when you're craving a snack but don't want to make a full-sized portion. Using a cast iron skillet, you can achieve perfectly melted cheese and crispy tortilla chips that are bursting with flavor.
This recipe is quick, easy, and allows you to customize your nachos to your liking, whether you prefer classic toppings or something a little more adventurous.
With a small batch, you can enjoy your nachos fresh out of the oven without worrying about leftovers. This recipe is ideal for a cozy night in or a quick appetizer for unexpected guests. Gather your ingredients and get ready to indulge in a cheesy, crunchy treat that will satisfy your taste buds.
Ingredients:
- 2 cups tortilla chips
- 1 cup shredded cheese (cheddar, Monterey Jack, or a blend)
- 1/4 cup canned black beans, rinsed and drained
- 1/4 cup diced tomatoes (fresh or canned)
- 2 tablespoons sliced jalapeños (pickled or fresh)
- 1/4 cup sliced green onions
- Sour cream and salsa for serving (optional)
Instructions:
- Preheat your oven to 400°F (200°C). In your cast iron skillet, spread the tortilla chips evenly across the bottom.
- Sprinkle the shredded cheese generously over the chips, followed by the black beans, diced tomatoes, and sliced jalapeños.
- Place the skillet in the preheated oven and bake for about 10 minutes, or until the cheese is fully melted and bubbly.
- Remove from the oven and top with sliced green onions. Serve immediately with sour cream and salsa on the side.
Extra Tips:
For a little extra flair, consider adding toppings like diced avocado, fresh cilantro, or crumbled queso fresco after baking.
If you want to take your nachos to the next level, try adding cooked ground beef or shredded chicken for a heartier dish. Just remember to keep an eye on the chips while they're baking to prevent them from getting too crispy or burnt!
Frequently Asked Questions
Can I Use a Non-Stick Spray in My Cast Iron Skillet?
You can use non-stick spray in your cast iron skillet, but it's not necessary. Seasoning your skillet properly creates a natural non-stick surface, which enhances flavor and makes cleaning easier. Just remember to maintain that seasoning!
What Is the Best Way to Clean a Tiny Cast Iron Skillet?
Cleaning a tiny cast iron skillet? You'd think it'd be easy, right? Just scrub it gently with hot water and a brush, then dry it thoroughly. Don't forget to season it for lasting perfection!
How Do I Season My 3.5-Inch Cast Iron Skillet?
To season your 3.5-inch cast iron skillet, wash it with mild soap, dry thoroughly, then apply a thin layer of oil. Bake it upside down in the oven at 375°F for an hour. Enjoy!
Can I Bake in My Tiny Cast Iron Skillet?
Did you know that 75% of cast iron users enjoy baking? You can absolutely bake in your tiny cast iron skillet! Its heat retention makes it perfect for mini desserts or personal-sized dishes. Happy baking!
What Other Recipes Work Well in a Small Skillet?
You can whip up mini frittatas, single-serving desserts, or sauté small portions of veggies in your small skillet. It's perfect for experimenting with one-pan meals or reheating leftovers. The possibilities are endless!