As an affiliate, we may earn a commission from qualifying purchases. We get commissions for purchases made through links on this website from Amazon and other third parties.
If you're looking to elevate your cooking game, cast iron might be the answer. This versatile cookware offers even heating and can transform everyday ingredients into mouthwatering meals. From comforting skillet cornbread to a rich beef stew, there's a recipe for every occasion. And let's not forget the desserts that can be whipped up right in the skillet. Let's explore some must-try cast iron recipes that could soon become your kitchen staples.
Key Takeaways
- Start with classic comfort foods like skillet cornbread and fried chicken, perfect for gatherings and cozy dinners.
- Explore quick and easy meals such as one-pan lemon chicken and crispy hash browns for busy weeknights.
- Enjoy savory breakfast options like a vegetable frittata that's both nutritious and delicious.
- Indulge in decadent desserts like cast iron apple crisp and chocolate chip skillet cookie for a sweet finish.
- Utilize cast iron cooking techniques to enhance flavors, achieve crispy textures, and ensure even cooking across all dishes.
Skillet Cornbread
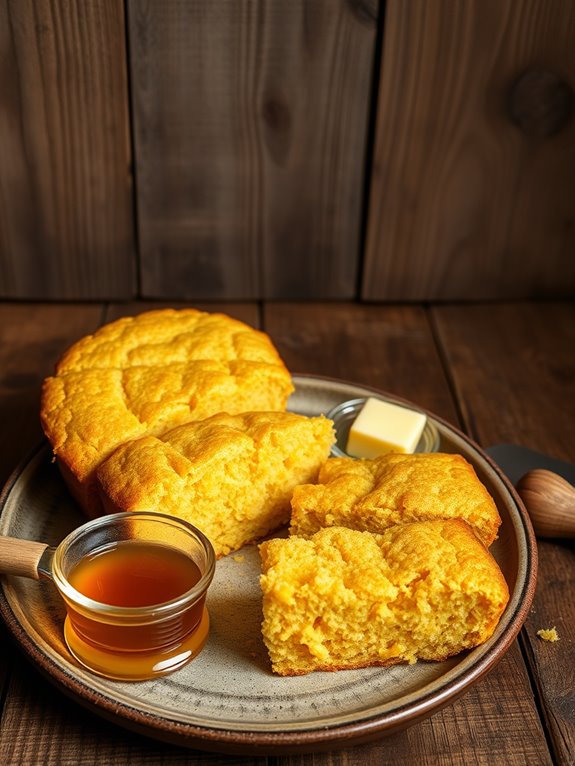
Skillet cornbread is a classic Southern dish that brings warmth and comfort to any meal. Its golden crust and tender interior make it a perfect accompaniment to chili, soups, or barbecue. Cooking cornbread in a cast iron skillet not only enhances its flavor but also gives it a beautifully crispy edge that you just can't achieve with other baking methods.
This recipe is simple yet rewarding, making it an ideal choice for both novice and experienced cooks alike. The combination of cornmeal and buttermilk creates a delightful texture, while the skillet's heat guarantees an even bake. Whether you're serving it for breakfast with a drizzle of honey or as a side dish for dinner, skillet cornbread is sure to please.
Ingredients:
- 1 cup cornmeal
- 1 cup all-purpose flour
- 1 tablespoon baking powder
- 1/2 teaspoon salt
- 1/4 cup sugar (optional)
- 1 cup buttermilk
- 2 large eggs
- 1/4 cup melted butter
- 1 tablespoon vegetable oil (for the skillet)
Cooking Instructions:
Preheat your oven to 400°F (200°C). In a large mixing bowl, combine the cornmeal, flour, baking powder, salt, and sugar if using.
In another bowl, whisk together the buttermilk, eggs, and melted butter until well blended. Pour the wet ingredients into the dry ingredients and stir until just combined; be careful not to overmix.
Heat the vegetable oil in a 10-inch cast iron skillet over medium heat. Once the oil is hot, pour the batter into the skillet. Cook on the stovetop for about 2-3 minutes until the edges start to bubble.
Then, transfer the skillet to the preheated oven and bake for 20-25 minutes or until the top is golden brown and a toothpick inserted into the center comes out clean. Allow to cool for a few minutes before slicing and serving.
Extra Tips:
For an extra flavor boost, consider adding ingredients like jalapeños, cheese, or herbs to the batter.
Make sure your skillet is properly preheated to achieve that perfect crispy crust. If you don't have buttermilk on hand, you can substitute it with regular milk mixed with a tablespoon of vinegar or lemon juice to mimic the acidity.
Enjoy your homemade skillet cornbread warm, perhaps with a pat of butter melting on top!
Classic Cast Iron Fried Chicken
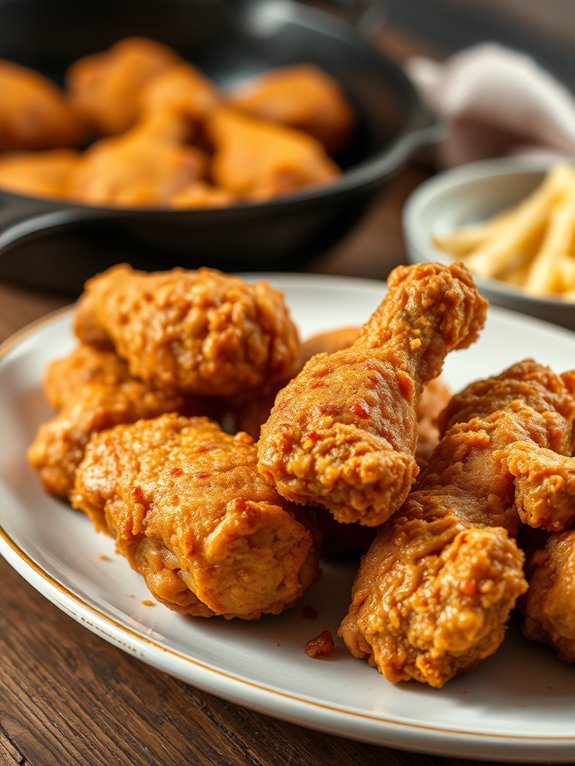
Classic Cast Iron Fried Chicken is a timeless dish that brings comfort and joy to the dinner table. The crispy, golden-brown skin and juicy, tender meat make it a favorite for family gatherings and special occasions. Cooking fried chicken in a cast iron skillet not only enhances the flavor but also guarantees even cooking, resulting in perfectly crisp skin every time.
To achieve that ideal crunch, it's vital to use a seasoned cast iron skillet, as it retains heat well and creates an excellent frying environment. With the right blend of spices and a simple but effective frying technique, you'll be able to impress your family and friends with this classic dish that never goes out of style.
Ingredients:
- 1 whole chicken, cut into pieces
- 2 cups buttermilk
- 2 cups all-purpose flour
- 1 tablespoon paprika
- 1 tablespoon garlic powder
- 1 tablespoon onion powder
- 1 teaspoon cayenne pepper (optional)
- Salt and pepper to taste
- Vegetable oil for frying
Cooking Instructions:
Begin by marinating the chicken pieces in buttermilk, adding salt and pepper to taste. Cover and refrigerate for at least 4 hours or overnight for best results.
When you're ready to fry, remove the chicken from the buttermilk, allowing excess liquid to drip off. In a large bowl, mix the flour with paprika, garlic powder, onion powder, cayenne pepper, salt, and pepper. Dredge the chicken pieces in the flour mixture until well coated, shaking off any excess flour.
Heat about 1 inch of vegetable oil in a cast iron skillet over medium-high heat until it reaches 350°F (175°C). Carefully place the chicken pieces skin-side down into the hot oil, being cautious of splatter. Fry in batches to avoid overcrowding, cooking for about 4-5 minutes per side until golden brown and cooked through.
Once done, transfer the chicken to a wire rack to drain excess oil, allowing it to stay crispy.
Extra Tips:
For an extra layer of flavor, consider adding your favorite herbs and spices to the buttermilk marinade or flour mixture.
Using a thermometer to monitor oil temperature will help achieve that perfect crispy texture without burning. Also, letting the fried chicken rest for a few minutes before serving allows the juices to redistribute, guaranteeing a tender bite.
Enjoy your homemade classic cast iron fried chicken with your favorite sides!
One-Pan Cast Iron Lemon Chicken
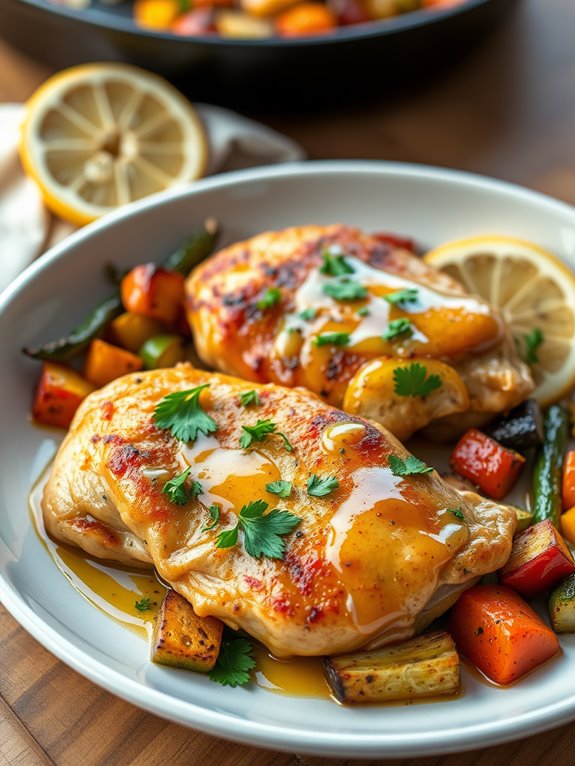
One-Pan Cast Iron Lemon Chicken is a delightful dish that brings together the bright flavors of lemon and herbs with juicy chicken, all cooked in a single cast iron skillet for easy cleanup. This recipe is perfect for busy weeknights or a cozy weekend dinner, as it requires minimal preparation and cooks quickly.
The beauty of using a cast iron skillet lies not only in its heat retention but also in the beautiful sear it gives to the chicken, ensuring a crispy skin while keeping the meat tender and flavorful. The combination of fresh lemon juice, garlic, and herbs adds a vibrant zing to the chicken, making each bite a burst of flavor.
Pair this delicious dish with roasted vegetables or a fresh salad for a complete meal that's both satisfying and healthy. With just a few simple ingredients, you can create a restaurant-quality dish right at home.
Ingredients:
- 4 boneless, skinless chicken breasts
- 2 tablespoons olive oil
- 4 cloves garlic, minced
- Juice of 2 lemons
- Zest of 1 lemon
- 1 teaspoon dried oregano
- 1 teaspoon dried thyme
- Salt and pepper to taste
- Fresh parsley for garnish (optional)
Cooking Instructions:
Start by preheating your oven to 400°F (200°C). In a large cast iron skillet, heat the olive oil over medium-high heat. Season the chicken breasts with salt and pepper, then add them to the skillet, searing for about 5-7 minutes on each side until they're golden brown.
Once the chicken is nicely browned, add the minced garlic, lemon juice, lemon zest, oregano, and thyme to the skillet, stirring to combine the flavors. Transfer the skillet to the preheated oven and bake for an additional 15-20 minutes, or until the chicken is cooked through and reaches an internal temperature of 165°F (75°C).
Remove the skillet from the oven and let the chicken rest for a few minutes before slicing. Garnish with fresh parsley if desired and serve warm.
Extra Tips:
When cooking this dish, make sure not to overcrowd the skillet as it can lead to uneven cooking. If your chicken breasts are particularly thick, consider pounding them to an even thickness before cooking for better results.
Additionally, feel free to customize the herbs or add vegetables like asparagus or cherry tomatoes to the skillet for a more complete meal. Enjoy your one-pan lemon chicken with a side of your favorite grains or greens for a delightful dining experience!
Hearty Beef Stew in Dutch Oven
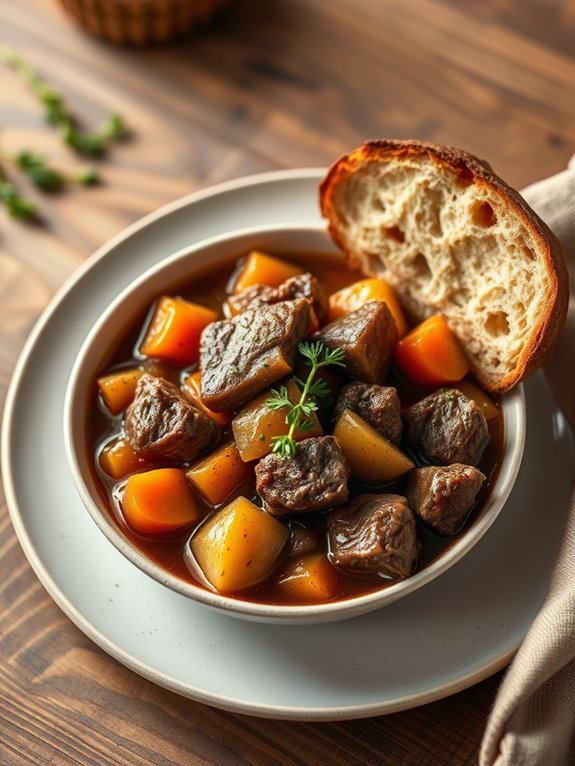
Hearty beef stew is a classic comfort food that warms the soul and brings the family together. Cooking it in a Dutch oven not only enhances the flavors but also allows for even heat distribution, resulting in tender meat and rich broth. This dish is perfect for chilly evenings or casual gatherings, offering a satisfying meal that can simmer away while you attend to other tasks.
This recipe features hearty chunks of beef, a medley of vegetables, and aromatic herbs that meld together to create a deliciously comforting stew. The slow cooking process allows the flavors to develop fully, making each bite a delightful experience.
Ingredients:
- 2 pounds beef chuck, cut into 1-inch cubes
- 2 tablespoons olive oil
- 1 large onion, chopped
- 3 cloves garlic, minced
- 4 carrots, sliced
- 3 potatoes, diced
- 2 cups beef broth
- 1 cup red wine (optional)
- 2 tablespoons tomato paste
- 2 teaspoons dried thyme
- 2 teaspoons dried rosemary
- Salt and pepper to taste
- 2 bay leaves
Cooking Instructions:
In your Dutch oven, heat the olive oil over medium-high heat. Season the beef cubes with salt and pepper, then brown them in batches until they're well-seared on all sides. Once browned, remove the beef from the pot and set it aside.
In the same pot, add the chopped onion and garlic, sautéing until they're soft and fragrant. Next, return the beef to the pot and stir in the carrots, potatoes, tomato paste, thyme, rosemary, and bay leaves.
Pour in the beef broth and red wine, bringing the mixture to a gentle simmer. Cover the Dutch oven and reduce the heat to low. Let it simmer for about 2 to 3 hours, or until the beef is fork-tender and the flavors are well combined. Stir occasionally and add more broth if necessary.
Extra Tips:
For an even deeper flavor, consider browning the vegetables after the beef and before adding the liquids. You can also customize the stew by adding seasonal vegetables or herbs.
If you prefer a thicker stew, mix a tablespoon of cornstarch with cold water and stir it into the pot during the last 30 minutes of cooking. Enjoy your hearty beef stew with crusty bread for a complete meal!
Crispy Cast Iron Hash Browns
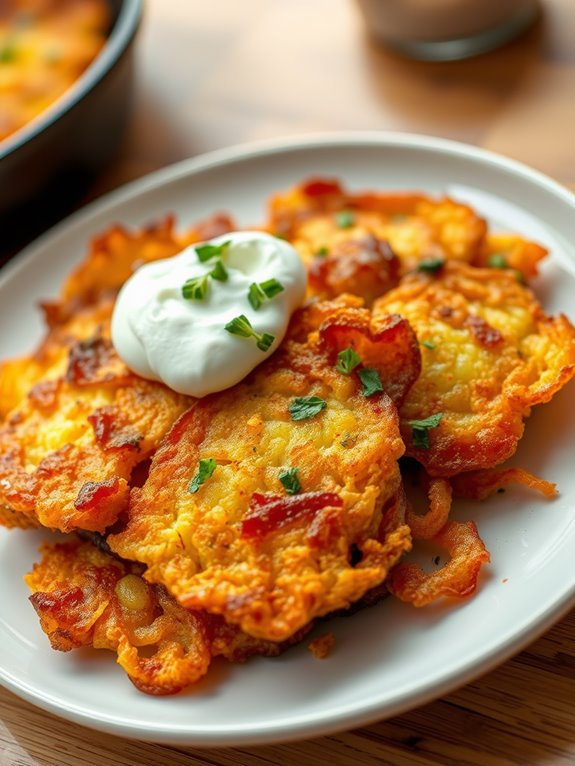
Crispy cast iron hash browns are a delicious and satisfying breakfast option that can easily be made using a trusty cast iron skillet. The key to achieving that perfect crispy texture lies in how you prepare and cook the potatoes. Using a cast iron skillet allows for even heat distribution, which guarantees that your hash browns develop a golden-brown crust while remaining tender on the inside.
Whether enjoyed on their own or paired with eggs and bacon, these hash browns are sure to please.
To make the best crispy hash browns, start with starchy potatoes like Russets, as they'll create the ideal texture. Prepping the potatoes involves peeling and shredding them, followed by a thorough rinse to remove excess starch. After that, it's all about getting the right balance of heat and patience as you cook them in your cast iron skillet. Follow this recipe, and you'll be well on your way to creating a mouthwatering breakfast treat.
Ingredients:
- 2 large Russet potatoes
- 1 small onion (optional)
- 2 tablespoons vegetable oil or butter
- Salt, to taste
- Pepper, to taste
Cooking Instructions:
Begin by peeling and shredding the Russet potatoes using a box grater or a food processor. If you choose to include onion, finely chop it.
Place the shredded potatoes in a bowl of cold water and let them soak for about 10 minutes. This step helps to remove excess starch, which will contribute to crispiness. After soaking, drain and thoroughly dry the potatoes using a clean kitchen towel or paper towels.
Heat your cast iron skillet over medium-high heat and add the vegetable oil or butter, allowing it to become hot and shimmering. Once the skillet is ready, add the dried potatoes (and onions, if using) in an even layer. Press down gently with a spatula to compact the mixture.
Cook for about 5-7 minutes without stirring, until the bottom is golden brown and crispy. Flip the hash browns in sections or all at once, and cook for an additional 5-7 minutes on the other side until crispy and golden brown. Season with salt and pepper to taste before serving.
Extra Tips:
For extra crispiness, make sure to remove as much moisture as possible from the shredded potatoes before cooking. If the mixture feels too wet, you can even squeeze it in a clean kitchen towel to remove excess water.
Additionally, avoid overcrowding the skillet; if you have a large batch, cook in batches to guarantee they fry evenly and become crispy. Enjoy your crispy cast iron hash browns with a dollop of sour cream or a sprinkle of fresh herbs for added flavor!
Savory Vegetable Frittata
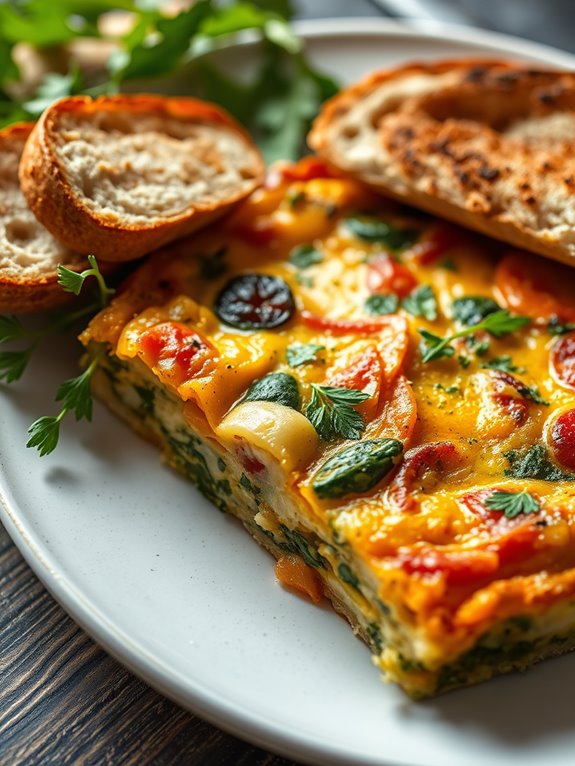
Making a frittata is simple and straightforward. You can prepare it in advance and reheat it for a quick meal throughout the week.
Whether you're serving it to guests or enjoying it yourself, this dish is sure to impress with its vibrant colors and delicious flavors. Pair it with a fresh salad or some crusty bread for a complete meal.
Ingredients:
- 6 large eggs
- 1 cup milk
- 1 cup chopped vegetables (e.g., bell peppers, spinach, zucchini, onions)
- 1 cup shredded cheese (e.g., cheddar, feta, or mozzarella)
- 2 tablespoons olive oil
- Salt and pepper to taste
- Fresh herbs (e.g., parsley, basil, or thyme) for garnish
Cooking Instructions:
- Preheat your oven to 375°F (190°C). In a large bowl, whisk together the eggs, milk, salt, and pepper until well combined. Stir in the chopped vegetables and cheese.
- Heat olive oil in a cast iron skillet over medium heat. Once hot, pour the egg mixture into the skillet and cook without stirring for about 5 minutes, or until the edges begin to set.
- Transfer the skillet to the preheated oven and bake for 15-20 minutes, or until the frittata is puffed and golden brown on top.
Extra Tips:
To add even more flavor to your frittata, consider sautéing the vegetables in the skillet before adding the egg mixture. This will enhance their taste and guarantee that they're tender.
Additionally, feel free to experiment with different combinations of vegetables and cheeses to suit your preferences. Leftovers can be stored in the refrigerator for up to three days and make for a quick and easy meal option.
Sweet and Spicy Cast Iron Shrimp
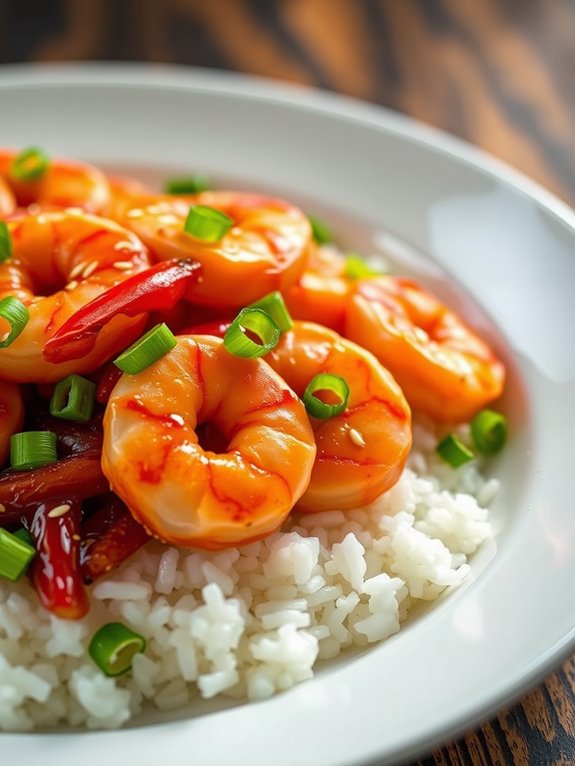
Sweet and Spicy Cast Iron Shrimp is a delightful dish that combines succulent shrimp with a perfect blend of sweet and spicy flavors, all cooked to perfection in a cast iron skillet. This recipe isn't only quick and easy to prepare but also packed with vibrant flavors that will impress your family and friends.
The cast iron skillet guarantees an even cook and a beautiful sear, making the shrimp juicy and full of flavor. This dish can be served as an appetizer or a main course, and it pairs perfectly with rice, quinoa, or a fresh salad. The balance of sweet and spicy creates a mouthwatering experience that will leave everyone wanting more.
Whether you're hosting a dinner party or enjoying a quiet night in, Sweet and Spicy Cast Iron Shrimp is sure to be a hit.
Ingredients:
- 1 pound large shrimp, peeled and deveined
- 2 tablespoons olive oil
- 1 tablespoon honey
- 1 tablespoon soy sauce
- 1 tablespoon Sriracha or your favorite hot sauce
- 2 cloves garlic, minced
- 1 teaspoon ginger, grated
- Salt and pepper to taste
- 2 green onions, sliced (for garnish)
- Sesame seeds (for garnish)
To prepare the Sweet and Spicy Cast Iron Shrimp, start by heating the olive oil in your cast iron skillet over medium-high heat. In a bowl, mix the honey, soy sauce, Sriracha, minced garlic, and grated ginger.
Once the skillet is hot, add the shrimp and season with salt and pepper. Cook the shrimp for about 2-3 minutes on one side until they turn pink and start to caramelize. Flip the shrimp and pour the sauce mixture over them, allowing it to coat the shrimp evenly.
Continue cooking for another 2-3 minutes until the shrimp are fully cooked and the sauce has thickened slightly. Once cooked, remove the skillet from heat and garnish with sliced green onions and sesame seeds.
Serve the Sweet and Spicy Cast Iron Shrimp immediately, either on a bed of rice or alongside your favorite sides.
Extra Tips:
For an extra kick, feel free to adjust the amount of Sriracha according to your spice preference. If you're preparing this dish for a crowd, you can easily double the recipe.
Also, be sure not to overcrowd the skillet; cook the shrimp in batches if necessary to achieve that perfect sear. Enjoy your flavorful creation!
Rustic Cast Iron Pizza
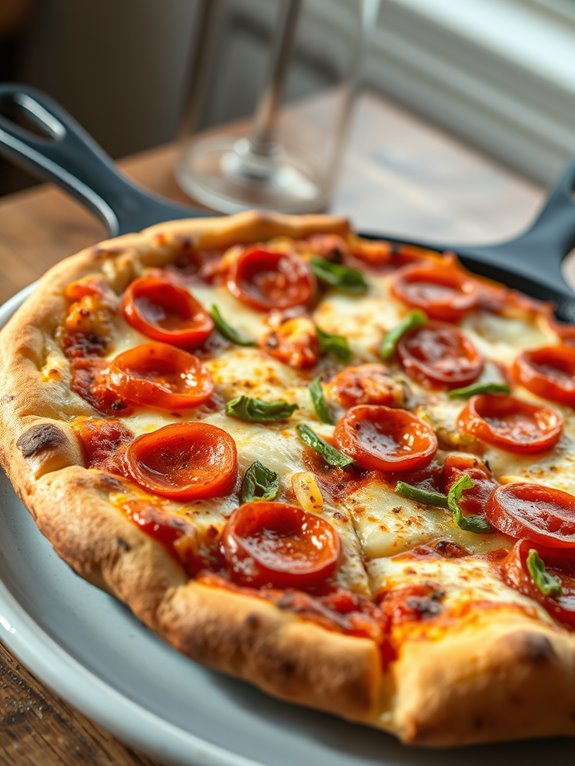
When it comes to making pizza, nothing beats the rustic charm of a cast iron skillet. This method gives you a beautifully crispy crust while allowing for a perfectly cooked topping. The heat retention of cast iron is ideal for achieving that golden-brown finish, making your homemade pizza the talk of the table.
Whether you're using store-bought dough or making it from scratch, this recipe will guide you to a delicious pizza that's sure to impress.
In this rustic cast iron pizza recipe, you'll discover how simple it's to prepare a mouth-watering meal right in your own kitchen. The process is straightforward, and the end result is a delightful pizza bursting with your favorite flavors.
Gather your ingredients and get ready to create a pizza that rivals your favorite pizzeria!
Ingredients:
- 1 pound pizza dough
- 1 tablespoon olive oil
- 1 cup marinara sauce
- 2 cups shredded mozzarella cheese
- 1/2 cup sliced pepperoni
- 1/4 cup sliced bell peppers
- 1/4 cup sliced onions
- 1 teaspoon dried oregano
- Salt and pepper to taste
- Fresh basil leaves for garnish (optional)
Cooking Instructions:
- Preheat your oven to 475°F (245°C). While the oven is heating, take your cast iron skillet and place it on the stovetop over medium heat. Add the olive oil and let it warm for a minute.
- Roll out your pizza dough on a lightly floured surface to fit the size of your skillet. Carefully transfer the dough into the skillet, pressing it into the corners and up the sides slightly for a thick crust.
- Spread the marinara sauce evenly over the dough, then sprinkle the shredded mozzarella cheese on top. Add your desired toppings like pepperoni, bell peppers, and onions, followed by a sprinkle of oregano, salt, and pepper.
- Transfer the skillet to the preheated oven and bake for about 15-20 minutes, or until the crust is golden brown and the cheese is bubbly and melted. Once done, remove from the oven and let it cool for a few minutes before slicing.
Extra Tips:
For an extra crispy crust, preheat your cast iron skillet in the oven for a few minutes before adding the dough. This technique will give you a great crunch.
Additionally, feel free to get creative with your toppings; fresh vegetables, different cheeses, or even a drizzle of balsamic glaze after baking can elevate your rustic cast iron pizza to new heights. Happy cooking!
Baked Macaroni and Cheese
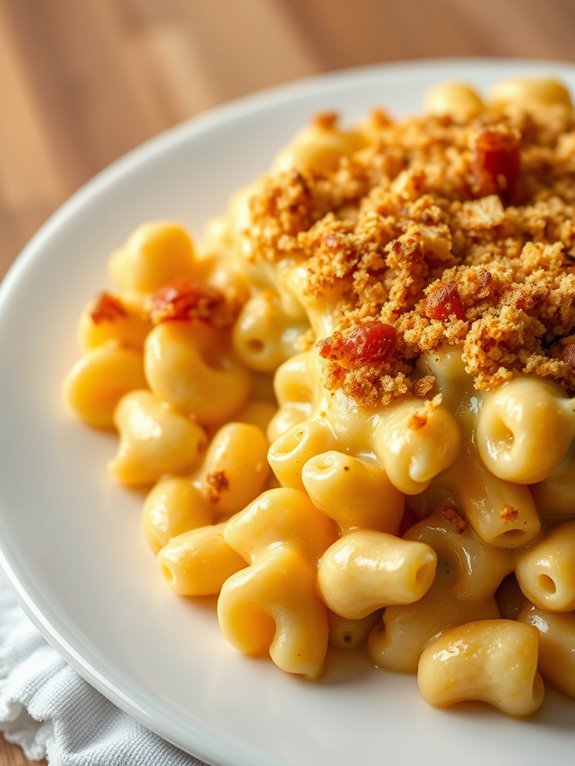
Baked macaroni and cheese is a comforting classic that brings warmth and joy to the table. This dish features perfectly cooked macaroni coated in a creamy cheese sauce, all baked to golden perfection. Using a cast iron skillet not only enhances the flavor through even heat distribution but also gives the dish a beautiful crust that's hard to resist.
This recipe is easy to follow and promises a delightful cheesy experience. Whether you're serving it as a side dish or the main attraction at a family gathering, this baked macaroni and cheese will surely please everyone at the table. Get ready to indulge in a rich and satisfying meal that combines simplicity with rich flavors.
Ingredients:
- 8 ounces elbow macaroni
- 2 tablespoons unsalted butter
- 2 tablespoons all-purpose flour
- 2 cups milk
- 2 cups shredded sharp cheddar cheese
- 1 cup shredded mozzarella cheese
- 1 teaspoon mustard powder
- ½ teaspoon garlic powder
- Salt and pepper to taste
- ½ cup breadcrumbs (optional)
- 2 tablespoons grated Parmesan cheese (optional)
Cooking Instructions:
- Preheat your oven to 350°F (175°C). In a large pot, cook the macaroni according to the package instructions until al dente. Drain and set aside.
- In a cast iron skillet over medium heat, melt the butter. Once melted, whisk in the flour and cook for about 1 minute to form a roux. Slowly pour in the milk, whisking constantly until the mixture thickens, about 5 minutes. Reduce the heat to low and stir in the cheddar and mozzarella cheese until melted and smooth. Add the mustard powder, garlic powder, salt, and pepper.
- Combine the cooked macaroni with the cheese sauce in the skillet, mixing well. If desired, sprinkle breadcrumbs and Parmesan cheese on top for added crunch. Bake in the preheated oven for about 25-30 minutes, or until the top is golden brown and bubbly.
Extra Tips:
For an extra layer of flavor, consider adding cooked bacon, sautéed vegetables, or even a dash of hot sauce to the cheese mixture before baking. You can also experiment with different cheese blends for a unique taste.
If you prefer a creamier texture, feel free to add a bit more milk to the sauce. Enjoy your delicious baked macaroni and cheese straight from the skillet for a rustic presentation!
Perfectly Seared Steak
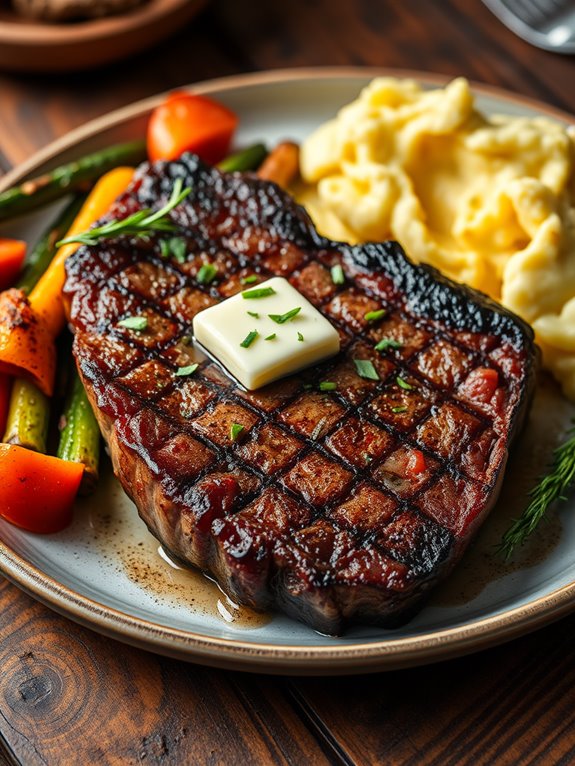
Cooking a perfectly seared steak in a cast iron skillet is an art that combines the right cut of meat, proper seasoning, and precise cooking techniques. The high heat retention of cast iron allows for a beautiful crust to form while keeping the inside juicy and tender.
Whether you're preparing a ribeye, sirloin, or filet mignon, following these steps will elevate your steak cooking game to restaurant-quality at home.
Before you begin, verify your steak is at room temperature for even cooking. Season generously with salt and freshly cracked black pepper. The simplicity of these ingredients allows the natural flavors of the beef to shine through.
With a hot skillet, you'll achieve that coveted sear, which locks in moisture and enhances the texture.
Ingredients:
- 1-inch thick steak (ribeye, sirloin, or filet mignon)
- Salt
- Freshly cracked black pepper
- 1-2 tablespoons of vegetable oil (or any high smoke point oil)
- Optional: Fresh herbs (like rosemary or thyme) and butter for basting
Cooking Instructions:
- Preheat your cast iron skillet over medium-high heat until it's very hot. Add the vegetable oil and let it heat until shimmering but not smoking.
- While the skillet heats, pat the steak dry with paper towels. Season both sides liberally with salt and black pepper.
- Carefully place the steak in the skillet, verifying it lays flat and doesn't touch any other steaks if cooking multiple. Avoid moving it for the first 2-3 minutes to allow a crust to form.
- After a few minutes, check the sear by gently lifting the steak; if it releases easily and has a deep brown color, it's time to flip. Cook for another 2-3 minutes for medium-rare, adjusting the time for your desired doneness. If using, add butter and herbs in the last minute and baste the steak with the melted butter for extra flavor.
Extra Tips:
Allow the steak to rest for at least 5-10 minutes after cooking to let the juices redistribute, confirming each bite is tender and juicy.
Use a meat thermometer to check for doneness, with 130-135°F being perfect for medium-rare. Additionally, consider experimenting with different seasonings or marinades to customize your steak to your liking. Happy cooking!
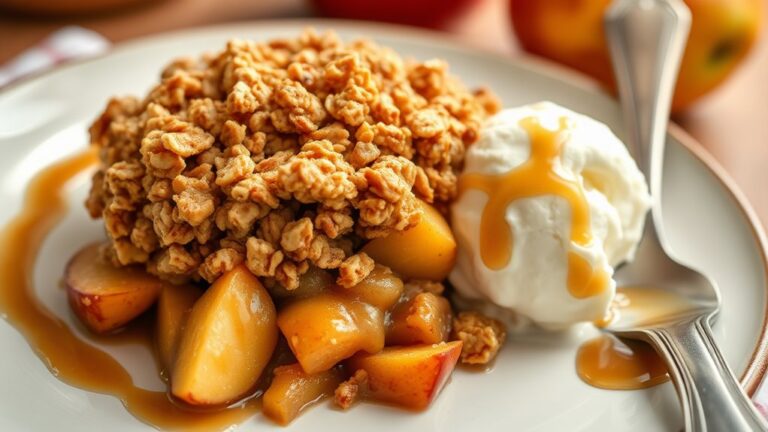
Cast Iron Apple Crisp
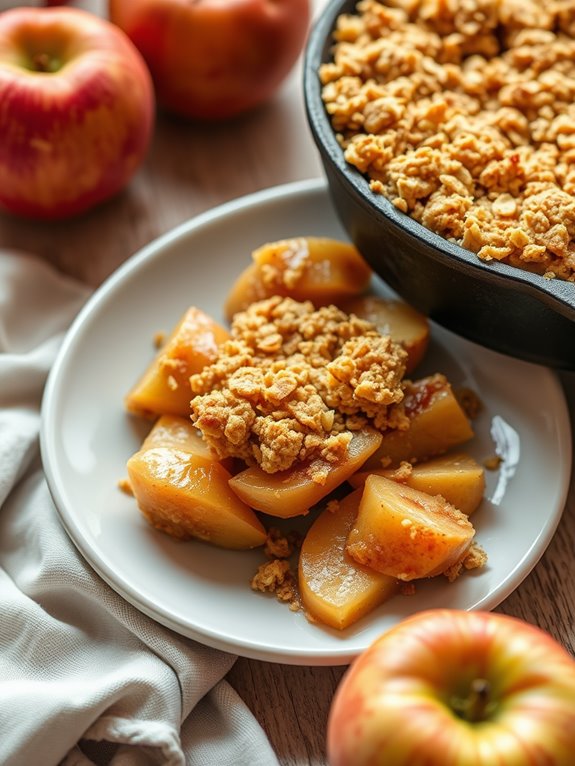
This dish is perfect for fall gatherings or any time you crave a warm dessert. Serve it with a scoop of vanilla ice cream for an indulgent treat or enjoy it on its own. Making apple crisp in a cast iron skillet not only enhances the flavor but also provides a beautiful rustic presentation straight from oven to table.
Ingredients:
- 6 cups of peeled and sliced apples (Granny Smith or Honeycrisp work well)
- 1 tablespoon lemon juice
- 1 teaspoon ground cinnamon
- 1 cup old-fashioned oats
- 1 cup brown sugar, packed
- ½ cup all-purpose flour
- ½ teaspoon salt
- ½ cup unsalted butter, melted
- 1 teaspoon vanilla extract
Instructions:
Preheat your oven to 350°F (175°C). In a large mixing bowl, combine the sliced apples, lemon juice, and cinnamon. Toss well to guarantee the apples are evenly coated.
Transfer the apple mixture into a preheated cast iron skillet, spreading it out evenly.
In another bowl, mix together the oats, brown sugar, flour, and salt. Pour the melted butter and vanilla extract into the dry ingredients and stir until crumbly.
Sprinkle the oat mixture over the apples in the skillet. Bake in the preheated oven for about 30-35 minutes or until the topping is golden brown and the apples are tender.
Extra Tips:
For an added depth of flavor, consider mixing in some chopped nuts like walnuts or pecans into the topping.
You can also experiment with different spices, such as nutmeg or allspice, to personalize the taste. If you prefer a sweeter apple crisp, feel free to adjust the sugar to your liking.
Remember that the type of apples you choose can greatly influence the final flavor, so select a mix of sweet and tart varieties for a more complex taste.
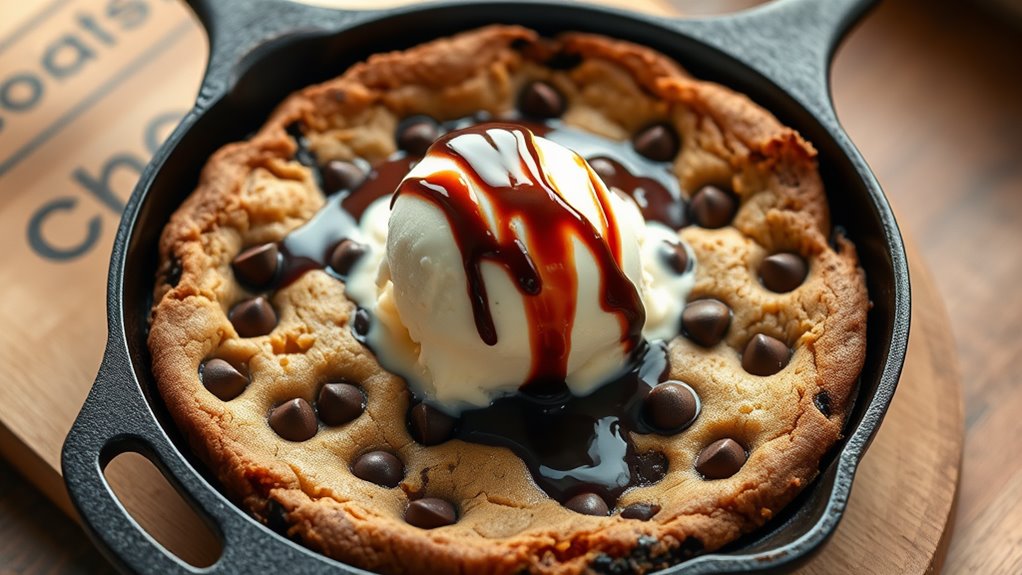
Decadent Chocolate Chip Skillet Cookie
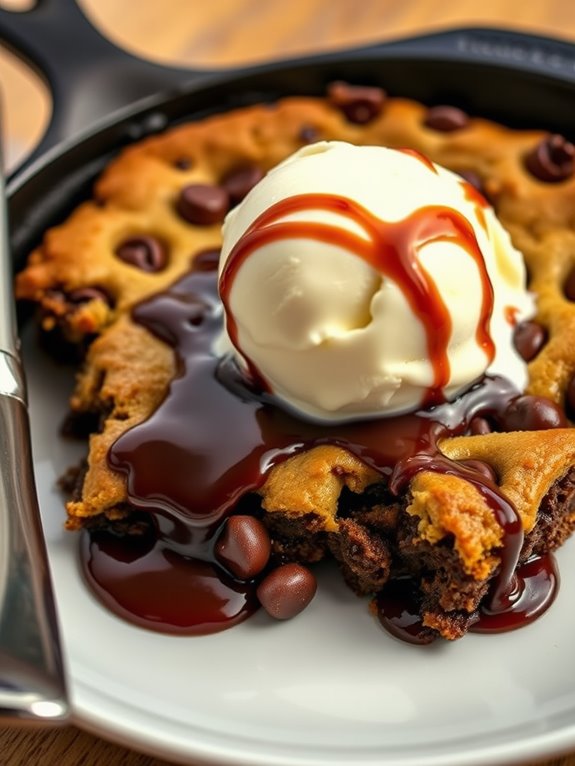
Indulge in the gooey, warm delight of a Decadent Chocolate Chip Skillet Cookie, an irresistible dessert that's perfect for sharing or savoring all by yourself. This recipe combines the rich taste of brown sugar, the creamy texture of butter, and an abundance of chocolate chips, all baked to perfection in a cast iron skillet. The result is a cookie that has a crispy edge with a soft, chewy center, making it the ultimate comfort food for any occasion.
Not only is this skillet cookie simple to make, but it also offers a unique presentation that will impress friends and family alike. Serve it straight from the skillet, topped with a scoop of vanilla ice cream or a drizzle of warm chocolate sauce for an extra touch of decadence. Get ready to enjoy a warm, chocolaty treat that's sure to satisfy your sweet tooth!
Ingredients:
- 1 cup unsalted butter, softened
- 1 cup brown sugar, packed
- 1/2 cup granulated sugar
- 2 large eggs
- 1 teaspoon vanilla extract
- 2 1/4 cups all-purpose flour
- 1 teaspoon baking soda
- 1/2 teaspoon salt
- 2 cups semi-sweet chocolate chips
Cooking Instructions:
Preheat your oven to 350°F (175°C). In a large mixing bowl, cream together the softened butter, brown sugar, and granulated sugar until light and fluffy.
Add in the eggs one at a time, mixing well after each addition, then stir in the vanilla extract. In a separate bowl, whisk together the flour, baking soda, and salt. Gradually add the dry ingredients to the wet ingredients, mixing until just combined. Fold in the chocolate chips.
Grease a 10-inch cast iron skillet with a little butter or non-stick spray. Pour the cookie dough into the skillet and spread it out evenly. Bake in the preheated oven for 25-30 minutes, or until the edges are golden brown and the center is set but still slightly soft.
Allow the skillet cookie to cool for a few minutes before serving, and enjoy it warm with a scoop of ice cream or your favorite toppings.
Extra Tips:
For an even more indulgent experience, consider adding chopped nuts, such as walnuts or pecans, to the dough.
You can also experiment with different types of chocolate chips, like dark chocolate or white chocolate, for a unique twist. If you find that the edges are browning too quickly while baking, you can cover the skillet loosely with aluminum foil to prevent over-browning while allowing the center to bake through.
Enjoy your Decadent Chocolate Chip Skillet Cookie fresh out of the oven for the best flavor and texture!
Frequently Asked Questions
How Do I Properly Season My Cast Iron Cookware?
Think of seasoning your cast iron like nurturing a garden. Start by cleaning it, then apply a thin layer of oil. Bake it upside down at high heat, letting the magic of polymerization create a non-stick surface.
Can I Use Cast Iron on an Induction Cooktop?
Yes, you can use cast iron on an induction cooktop. Just guarantee your cast iron is flat and magnetic. It'll heat up quickly, providing excellent heat retention for your cooking needs. Enjoy the benefits!
What Is the Best Way to Clean Cast Iron?
Cleaning cast iron isn't like washing regular dishes. You'll want to avoid soap, instead using hot water and a stiff brush. Afterward, dry it thoroughly and apply a thin layer of oil to protect it.
Can I Cook Acidic Foods in Cast Iron?
Yes, you can cook acidic foods in cast iron, but it's best to avoid prolonged cooking. Shorter cooking times help maintain your pan's seasoning, preventing any potential metallic taste from developing in your dishes.
How Do I Prevent Rust on My Cast Iron Skillet?
To prevent rust on your cast iron skillet, keep it dry after cleaning, apply a thin layer of vegetable oil, and store it in a moisture-free environment. Regular seasoning helps maintain its protective layer, too.