As an affiliate, we may earn a commission from qualifying purchases. We get commissions for purchases made through links on this website from Amazon and other third parties.
Think of cooking as a puzzle, where the right pieces create a satisfying meal. However, on busy weeknights, finding those pieces can feel overwhelming. That's where Instant Pot recipes shine, using just a few ingredients to whip up delicious dishes effortlessly. Imagine enjoying a hearty meal without the fuss. Curious about how these simple recipes can transform your dinner routine? Let's explore some options that might just change your cooking game.
Key Takeaways
- One-pot meals like Spicy Black Bean Chili and Hearty Lentil Stew require minimal ingredients and deliver maximum flavor with easy preparation.
- Simple Teriyaki Chicken uses just chicken thighs and a few pantry staples for a quick and satisfying dinner option.
- Lemon Garlic Salmon can be made with salmon fillets, lemon, and garlic, making it a wholesome dish with minimal effort.
- Mediterranean Quinoa Salad combines quinoa with fresh vegetables and a simple dressing for a nutritious meal with few ingredients.
- Garlic Herb Mashed Potatoes need only potatoes, garlic, and basic seasonings, offering a comforting side dish with straightforward preparation.
One-Pot Creamy Chicken and Rice

One-Pot Creamy Chicken and Rice is a comforting and delicious dish that's perfect for any weeknight dinner. The Instant Pot makes this recipe a breeze, allowing you to cook everything in one pot, which means less cleanup time. The creamy sauce, tender chicken, and fluffy rice come together to create a satisfying meal that the whole family will love.
This dish isn't only quick to prepare, but it also packs a punch of flavor. With simple ingredients and minimal prep work, you can have a hearty dinner ready in no time. Whether you're feeding a hungry crowd or just looking for a comforting meal, this creamy chicken and rice will surely hit the spot.
Ingredients:
- 1 pound boneless, skinless chicken thighs or breasts
- 1 cup long-grain white rice
- 1 small onion, finely chopped
- 2 cloves garlic, minced
- 1 cup chicken broth
- 1 cup heavy cream
- 1 cup frozen peas and carrots (or your choice of vegetables)
- 1 teaspoon dried thyme
- 1 teaspoon paprika
- Salt and pepper to taste
- 2 tablespoons olive oil
- Fresh parsley for garnish (optional)
Cooking Instructions:
Start by setting your Instant Pot to the sauté function. Add olive oil to the pot and let it heat up. Once hot, add the chopped onion and minced garlic, sautéing until fragrant and the onion is translucent.
Season the chicken with salt, pepper, thyme, and paprika, then place it in the pot. Brown the chicken on both sides for about 2-3 minutes.
Next, add the rice, chicken broth, and heavy cream to the pot, stirring to combine. Make sure to scrape any browned bits off the bottom of the pot to avoid the burn warning.
Close the lid, set the valve to sealing, and cook on high pressure for 10 minutes. Once the cooking time is up, allow for a natural release for 5 minutes before switching to a quick release.
Open the pot and stir in the frozen peas and carrots. Let the dish sit for a couple of minutes to thicken before serving, garnished with fresh parsley if desired.
Extra Tips:
For a lighter version, you can substitute half-and-half for the heavy cream or use brown rice instead of white rice, adjusting the cooking time accordingly.
If you want to add more flavor, consider incorporating your favorite herbs or spices, or even some grated Parmesan cheese before serving.
Make sure to always check that your chicken is fully cooked through, reaching an internal temperature of 165°F for safety. Enjoy your creamy chicken and rice!
Quick Beef Stroganoff

Beef Stroganoff is a classic comfort food that combines tender beef with a creamy sauce, typically served over egg noodles or rice. It's a dish that not only satisfies your hunger but also warms your soul.
The beauty of making Beef Stroganoff in an Instant Pot is that it greatly reduces cooking time while still delivering rich flavors, making it perfect for busy weeknights or when you want a hearty meal without the fuss.
With the Instant Pot, you can quickly sauté the ingredients before pressure cooking them to perfection. The high-pressure environment helps to tenderize the beef while infusing it with the delicious flavors of the sauce. In just under an hour, you'll have a mouthwatering Beef Stroganoff that will impress your family and friends.
Ingredients:
- 1 pound beef sirloin, thinly sliced
- 1 tablespoon olive oil
- 1 medium onion, chopped
- 2 cloves garlic, minced
- 8 ounces mushrooms, sliced
- 1 cup beef broth
- 2 tablespoons Worcestershire sauce
- 1 teaspoon Dijon mustard
- 1 cup sour cream
- Salt and pepper to taste
- 12 ounces egg noodles (optional, for serving)
- Fresh parsley, chopped (for garnish)
Cooking Instructions:
Start by setting your Instant Pot to "Sauté" mode and adding the olive oil. Once hot, add the chopped onion and garlic, stirring for about 2-3 minutes until softened.
Next, add the sliced beef and cook until browned on all sides, approximately 5 minutes. Add the mushrooms and continue to sauté for another 2 minutes.
Pour in the beef broth, Worcestershire sauce, and Dijon mustard, stirring well to combine. Close the lid and set the Instant Pot to "Manual" on high pressure for 10 minutes.
Once the cooking time is complete, perform a quick release of the pressure. Carefully remove the lid and stir in the sour cream until the sauce is creamy and well incorporated. Season with salt and pepper to taste.
If you prefer to serve it over egg noodles, you can cook them separately according to package instructions while the beef stroganoff is cooking. Serve the beef mixture over the noodles and garnish with fresh parsley.
Extra Tips:
For an even richer flavor, consider adding a splash of white wine or a tablespoon of tomato paste during the sautéing step.
If you want to make the dish lighter, you can substitute Greek yogurt for sour cream. Additionally, feel free to customize your beef stroganoff by adding vegetables such as peas or bell peppers for extra color and nutrition.
Enjoy your cooking!
Easy Vegetable Soup
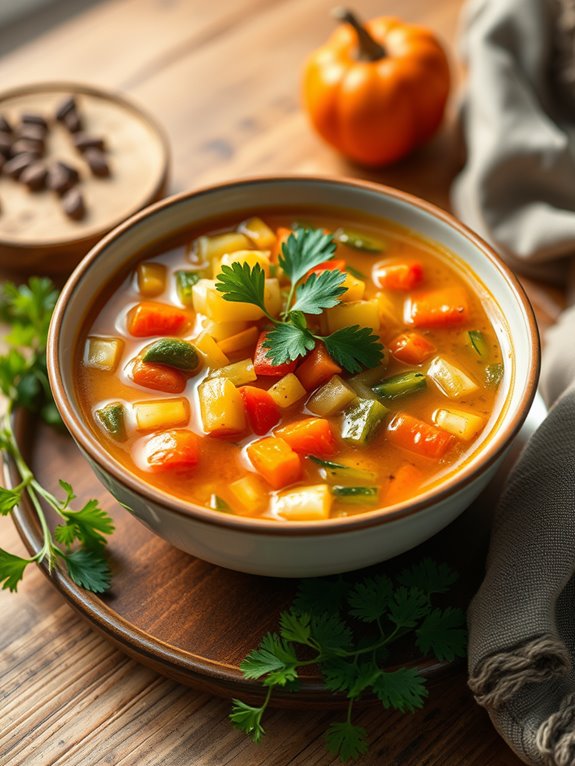
This vegetable soup is highly versatile—feel free to customize it with your favorite vegetables or grains.
Whether you're looking for a light lunch, a side dish, or a cozy dinner, this soup is sure to satisfy. It's also a fantastic option for meal prep, as it stores well in the fridge or freezer and can be easily reheated for a quick meal throughout the week.
Ingredients:
- 1 tablespoon olive oil
- 1 medium onion, chopped
- 2 cloves garlic, minced
- 2 carrots, sliced
- 2 celery stalks, sliced
- 1 bell pepper, chopped
- 1 zucchini, diced
- 1 cup green beans, trimmed and cut into pieces
- 4 cups vegetable broth
- 1 can (14.5 oz) diced tomatoes, with juice
- 1 teaspoon dried thyme
- 1 teaspoon dried basil
- Salt and pepper to taste
- Fresh parsley for garnish (optional)
Instructions:
- Begin by setting your Instant Pot to the sauté mode. Add the olive oil and once it's hot, sauté the chopped onion for about 3-4 minutes until it becomes translucent. Stir in the minced garlic and cook for an additional minute until fragrant.
- Next, add the carrots, celery, bell pepper, and zucchini to the pot. Sauté these vegetables for about 5 minutes, stirring occasionally. Then, add the green beans, vegetable broth, diced tomatoes, thyme, basil, salt, and pepper. Stir everything together to combine.
- Close the lid of the Instant Pot, ensuring the valve is set to sealing. Select the manual or pressure cook setting and set the timer for 10 minutes. Once the cooking time is complete, allow for a natural pressure release for about 10 minutes, then switch the valve to venting to release any remaining pressure. Carefully open the lid, and your soup is ready to serve!
Extra Tips:
For added depth of flavor, consider adding a splash of lemon juice or a sprinkle of nutritional yeast just before serving.
You can also throw in some cooked grains like quinoa or rice for a heartier version of the soup. If you're looking to make it spicier, add a pinch of red pepper flakes or some diced jalapeños during cooking.
Don't forget to garnish with fresh parsley for a pop of color and freshness!
Simple Teriyaki Chicken

Teriyaki chicken is a delightful dish that's not only flavorful but also incredibly easy to prepare in an Instant Pot. The sweet and savory sauce is perfect for glazing tender chicken, making it a hit with both kids and adults alike.
Plus, cooking it in the Instant Pot guarantees that the chicken remains juicy and infused with the delicious teriyaki flavor. This recipe is perfect for a weeknight dinner as it comes together in under 30 minutes.
Serve it with steamed rice and some sautéed vegetables for a well-rounded meal. With just a few simple ingredients and your Instant Pot, you can whip up this tasty dish in no time!
Ingredients:
- 1 pound boneless, skinless chicken thighs
- 1/2 cup soy sauce
- 1/4 cup honey
- 1/4 cup rice vinegar
- 2 cloves garlic, minced
- 1 teaspoon grated ginger
- 1 tablespoon cornstarch
- 2 tablespoons water
- Sesame seeds (for garnish)
- Sliced green onions (for garnish)
To cook the Simple Teriyaki Chicken, start by placing the chicken thighs in the Instant Pot. In a separate bowl, whisk together the soy sauce, honey, rice vinegar, minced garlic, and grated ginger.
Pour this mixture over the chicken in the pot. Close the lid and set the Instant Pot to cook on high pressure for 10 minutes. Once the cooking time is complete, allow for a natural release for about 5 minutes before performing a quick release to release any remaining pressure.
After removing the chicken from the pot, set it aside and turn the Instant Pot to the sauté function. In a small bowl, mix the cornstarch and water to create a slurry. Stir this into the liquid in the pot and allow it to thicken for a couple of minutes.
Slice the chicken, return it to the pot, and coat it with the sauce. Serve the chicken over rice, garnished with sesame seeds and sliced green onions.
Extra Tips:
For an even more robust flavor, consider marinating the chicken in the teriyaki sauce for a couple of hours before cooking.
You can also add vegetables like bell peppers or broccoli to the pot for a complete meal in one dish. If you prefer a spicier kick, add a dash of sriracha to the sauce mixture!
Spicy Black Bean Chili
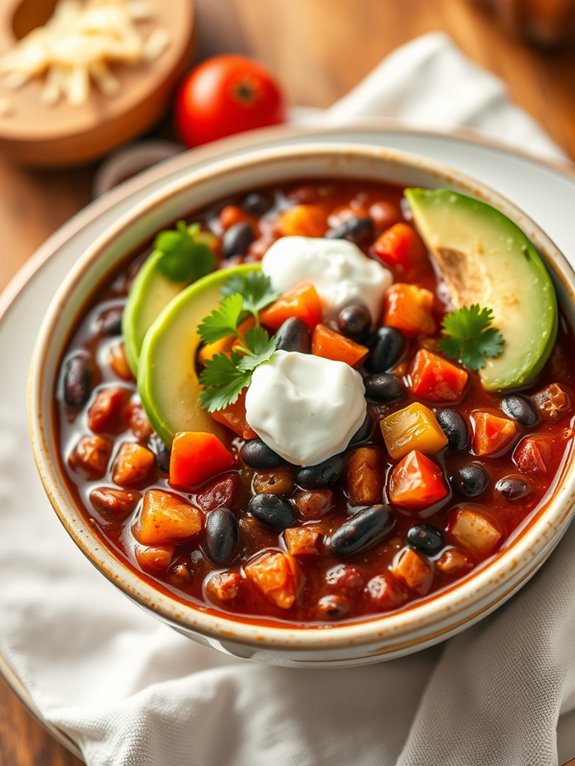
Spicy Black Bean Chili is a hearty and flavorful dish that's perfect for any occasion. With its rich blend of spices and the satisfying texture of black beans, this chili isn't only delicious but also packed with nutrients. The Instant Pot makes it incredibly easy to prepare, allowing the flavors to meld together beautifully in a fraction of the time compared to traditional methods.
This chili is versatile and can be adjusted to suit your heat preference. Whether you're serving it at a game day gathering or enjoying a cozy night in, it's sure to be a hit. Pair it with some cornbread or over rice for a complete meal, and don't forget to top it off with your favorite garnishes like avocado, cilantro, or a dollop of sour cream.
Ingredients:
- 1 tablespoon olive oil
- 1 large onion, diced
- 3 cloves garlic, minced
- 2 bell peppers, diced (any color)
- 2 teaspoons ground cumin
- 2 teaspoons chili powder
- 1 teaspoon smoked paprika
- 1/2 teaspoon cayenne pepper (adjust for spice level)
- 2 (15-ounce) cans black beans, drained and rinsed
- 1 (15-ounce) can diced tomatoes
- 2 cups vegetable broth
- Salt and pepper to taste
- Optional toppings: avocado, cilantro, sour cream, shredded cheese
To make the Spicy Black Bean Chili, start by setting your Instant Pot to the sauté function. Add the olive oil, diced onion, and minced garlic, cooking until the onion becomes translucent.
Next, add the diced bell peppers and sauté for a few more minutes. Stir in the cumin, chili powder, smoked paprika, and cayenne pepper, allowing the spices to toast for about a minute.
Once the vegetables are fragrant, add the black beans, diced tomatoes, and vegetable broth. Stir everything together, ensuring it's well combined.
Close the lid of the Instant Pot, making sure the valve is set to sealing. Select the manual or pressure cook function and set the timer for 15 minutes. After the cooking time is complete, allow the pressure to release naturally for about 10 minutes before switching the valve to venting to release any remaining pressure.
Carefully open the lid, stir the chili, and season with salt and pepper to taste. For best results, consider letting the chili sit for a bit after cooking to allow the flavors to deepen.
You can also make it ahead of time and refrigerate it overnight; the taste only gets better! If you prefer a thicker chili, you can use the sauté function again after cooking to reduce the liquid. Remember to adjust the spices according to your preferences, and don't hesitate to add more beans or veggies for added nutrition. Enjoy your delicious Spicy Black Bean Chili!
Garlic Herb Mashed Potatoes

Garlic Herb Mashed Potatoes cooked in an Instant Pot are a delightful side dish that can elevate any meal. The combination of creamy potatoes, aromatic garlic, and fresh herbs creates a flavor profile that's both comforting and sophisticated.
Using the Instant Pot not only speeds up the cooking process but also guarantees that the potatoes are cooked evenly and retain their rich flavor. This recipe is perfect for weeknight dinners, holiday gatherings, or any occasion where you want to impress your guests with minimal effort.
The beauty of this dish lies in its simplicity. With just a few ingredients and the magic of the Instant Pot, you can whip up a batch of mashed potatoes that are creamy, garlicky, and infused with the freshness of herbs.
Whether you prefer them with a hint of butter or a splash of cream, these Garlic Herb Mashed Potatoes will quickly become a favorite in your household.
Ingredients:
- 2 pounds of russet potatoes, peeled and cubed
- 4 cloves of garlic, minced
- 1/2 cup of chicken broth (or vegetable broth)
- 1/2 cup of milk (or heavy cream)
- 4 tablespoons of unsalted butter
- 1 teaspoon of salt
- 1/2 teaspoon of black pepper
- 1 tablespoon of fresh parsley, chopped
- 1 tablespoon of fresh chives, chopped
Cooking Instructions:
- Place the cubed potatoes and minced garlic in the Instant Pot. Pour in the chicken or vegetable broth and sprinkle the salt and pepper over the top. Close the lid and set the valve to sealing. Cook on high pressure for 10 minutes.
- Once the cooking time is complete, do a quick release of the pressure. Carefully remove the lid and drain any excess liquid if needed. Add the butter, milk, parsley, and chives to the potatoes. Use a potato masher or an electric mixer to mash the potatoes to your desired consistency. Taste and adjust seasoning if necessary.
Extra Tips:
For an extra layer of flavor, consider roasting the garlic before adding it to the potatoes. Simply wrap whole garlic cloves in foil with a drizzle of olive oil and roast them in the oven until soft and caramelized.
Additionally, feel free to customize the herbs according to your preference; rosemary or thyme can also work beautifully in this recipe. Finally, serve the mashed potatoes immediately for the best texture, but they can be kept warm in the Instant Pot on the "keep warm" setting if needed.
Lemon Garlic Salmon
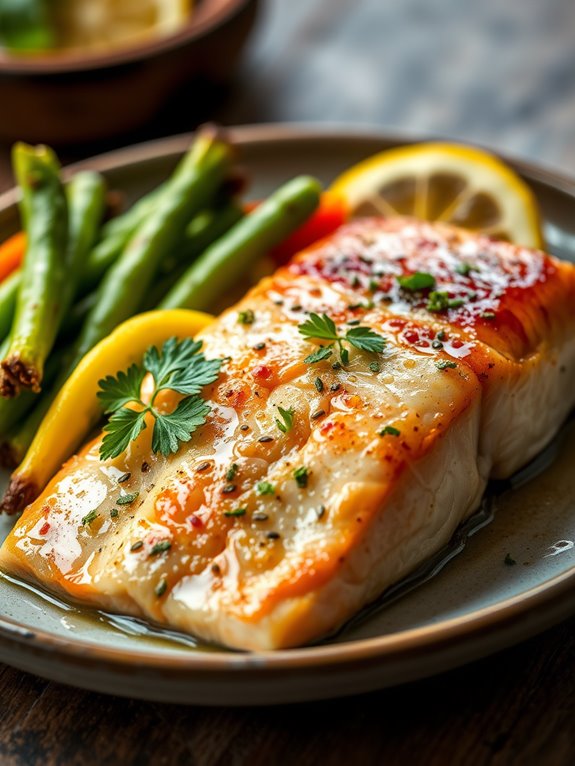
Lemon Garlic Salmon is a delightful dish that combines the fresh flavors of lemon and garlic with tender, flaky salmon. Cooking this dish in an Instant Pot not only saves time but also guarantees that the salmon retains its moisture and flavor. This method is perfect for a quick weeknight dinner or a special occasion, allowing you to serve a gourmet meal without the hassle of traditional cooking methods.
The beauty of this recipe lies in its simplicity. With just a few ingredients, you can create a restaurant-quality dish that's both healthy and satisfying. Serve it with a side of steamed vegetables or a light salad for a complete meal that will impress your family and guests.
Ingredients:
- 4 salmon fillets
- 2 tablespoons olive oil
- 4 cloves garlic, minced
- 1 lemon, juiced
- 1 teaspoon lemon zest
- Salt and pepper, to taste
- Fresh parsley, for garnish
- 1 cup vegetable or chicken broth
Cooking Instructions:
- Start by seasoning the salmon fillets with salt, pepper, and lemon zest. In a small bowl, mix the minced garlic, lemon juice, and olive oil, then pour this mixture over the salmon, ensuring each fillet is well-coated. Let the salmon marinate for about 15-20 minutes for the flavors to meld.
- Pour the broth into the bottom of the Instant Pot and place the trivet inside. Carefully place the marinated salmon fillets on the trivet. Close the lid and set the valve to the sealing position. Cook on high pressure for 3-4 minutes, depending on the thickness of the fillets. Once the cooking time is complete, perform a quick release of the pressure.
For an added touch, garnish the salmon with fresh parsley before serving. The broth will create a delicious sauce that can be spooned over the fillets for extra flavor.
Extra Tips:
When cooking salmon in the Instant Pot, be mindful of the cooking time to avoid overcooking, which can lead to a dry texture. If you're uncertain about the thickness of your fillets, check for doneness with a fork; the salmon should flake easily but remain moist.
Additionally, feel free to experiment with different herbs or add a splash of white wine to the broth for a unique twist on this classic dish.
Beef and Broccoli Stir-Fry
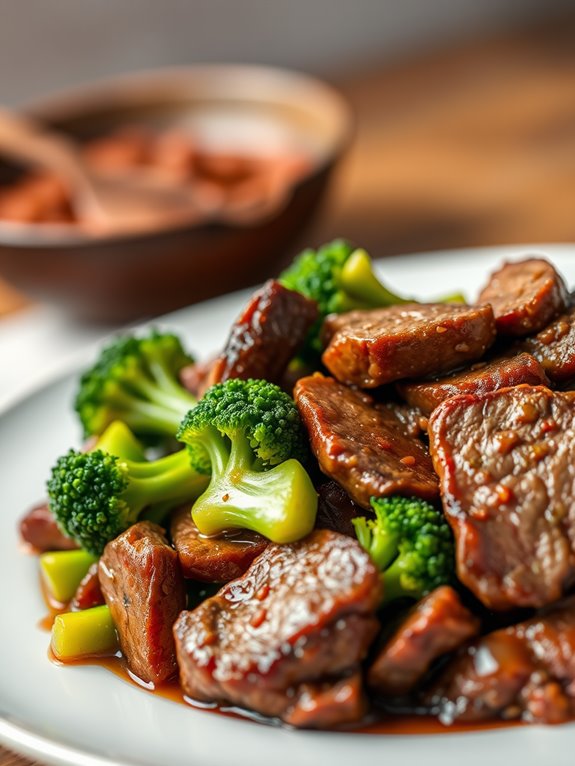
Beef and Broccoli Stir-Fry is a classic dish that combines tender beef, vibrant broccoli, and a savory sauce, all cooked to perfection in your Instant Pot. This recipe is perfect for busy weeknights when you want a delicious and nutritious meal on the table in no time.
With the Instant Pot, you can achieve that restaurant-quality flavor with minimal effort, making it an ideal choice for everyone from novice cooks to seasoned chefs. Incorporating fresh vegetables and lean protein, this dish not only satisfies your taste buds but also provides essential nutrients.
The combination of soy sauce, garlic, and ginger gives the beef a rich flavor, while the quick cooking time preserves the bright color and crunch of the broccoli. Let's get started on this easy and tasty Beef and Broccoli Stir-Fry!
Ingredients:
- 1 pound of flank steak, thinly sliced
- 2 cups of broccoli florets
- 1/2 cup of soy sauce
- 1/4 cup of beef broth
- 2 tablespoons of cornstarch
- 1 tablespoon of brown sugar
- 1 tablespoon of sesame oil
- 3 cloves of garlic, minced
- 1 tablespoon of fresh ginger, minced
- 2 tablespoons of vegetable oil
- Cooked rice, for serving
Cooking Instructions:
Start by selecting the Sauté function on your Instant Pot. Add the vegetable oil and allow it to heat up before adding the sliced beef. Sauté the beef for about 3-4 minutes, or until it's browned, then remove it from the pot and set it aside.
In the same pot, add the minced garlic and ginger, cooking for about 30 seconds until fragrant. Next, stir in the soy sauce, beef broth, brown sugar, and cornstarch, mixing until well combined. Return the beef to the pot along with the broccoli florets.
Secure the lid, making sure the steam release valve is set to sealing, and set the Instant Pot to Manual mode for 3 minutes. Once the cooking time is complete, carefully perform a quick release of the steam. Open the lid and stir the beef and broccoli to coat them in the sauce. Serve hot over a bed of cooked rice.
Extra Tips:
To enhance the flavor of your Beef and Broccoli Stir-Fry, consider marinating the beef in a mixture of soy sauce, garlic, and ginger for 30 minutes before cooking. This will infuse the meat with even more flavor.
Additionally, you can substitute or add other vegetables such as bell peppers or snap peas for a colorful and nutritious twist. If you prefer a thicker sauce, simply mix an additional tablespoon of cornstarch with water and stir it into the pot after cooking, allowing it to thicken over a few minutes on the Sauté setting.
Enjoy your quick and delicious meal!
Mediterranean Quinoa Salad
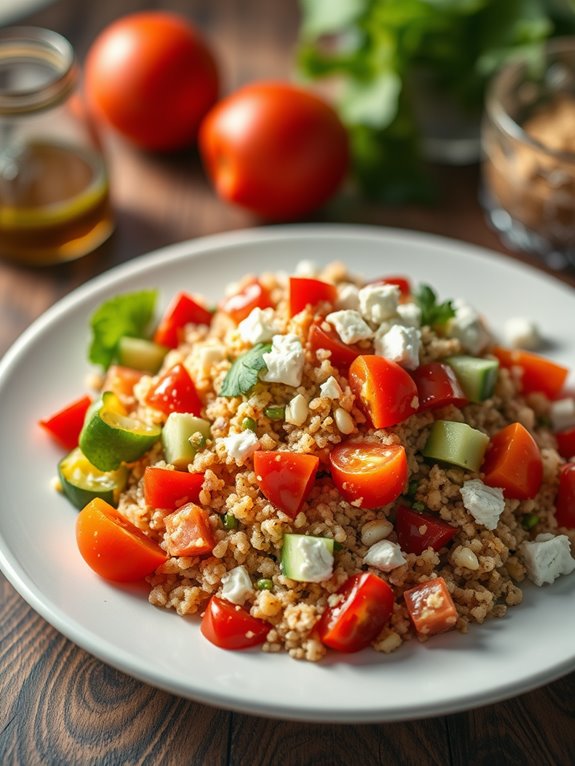
Mediterranean Quinoa Salad is a vibrant and nutritious dish that perfectly captures the essence of Mediterranean flavors. This salad isn't only invigorating but also packed with protein and fiber, making it a great option for a light lunch or a side dish for dinner.
The combination of fresh vegetables, herbs, and a zesty lemon dressing creates a delightful experience that's both satisfying and wholesome.
Using an Instant Pot to prepare this salad simplifies the cooking process, allowing you to achieve perfectly cooked quinoa in a fraction of the time it would take on the stovetop. The versatility of this dish means you can customize it with your favorite ingredients or whatever you have on hand, making it a great recipe to have in your repertoire.
Let's explore how to make this delicious Mediterranean Quinoa Salad!
Ingredients:
- 1 cup quinoa, rinsed
- 2 cups vegetable broth or water
- 1 cup cherry tomatoes, halved
- 1 cucumber, diced
- 1 bell pepper, diced
- 1/2 red onion, finely chopped
- 1 cup Kalamata olives, pitted and sliced
- 1/2 cup feta cheese, crumbled
- 1/4 cup fresh parsley, chopped
- 1/4 cup olive oil
- 2 tablespoons lemon juice
- Salt and pepper, to taste
Cooking Instructions:
- Add the rinsed quinoa and vegetable broth (or water) to the Instant Pot. Secure the lid, ensuring the valve is set to sealing. Cook on high pressure for 1 minute.
- Once the cooking cycle is complete, allow the pressure to release naturally for about 10 minutes before performing a quick release for any remaining pressure. Fluff the quinoa with a fork and let it cool slightly.
- In a large mixing bowl, combine the cooled quinoa with cherry tomatoes, cucumber, bell pepper, red onion, olives, and feta cheese.
- In a separate small bowl, whisk together the olive oil, lemon juice, salt, and pepper. Pour the dressing over the quinoa salad and mix well.
- Finally, fold in the fresh parsley before serving.
Extra Tips:
To enhance the flavors of your Mediterranean Quinoa Salad, consider adding other ingredients like artichoke hearts, sun-dried tomatoes, or arugula.
You can also prepare the salad in advance and let it sit in the refrigerator for a few hours to allow the flavors to meld together. This dish is perfect for meal prep and can be stored in an airtight container in the fridge for up to 4 days. Enjoy!
Classic Tomato Basil Pasta
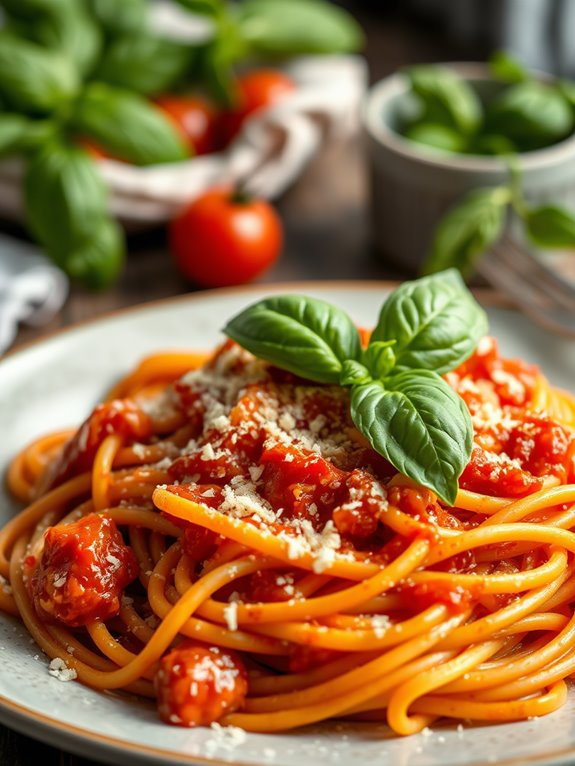
Classic Tomato Basil Pasta is a delightful and easy dish to prepare in your Instant Pot. With the right balance of fresh flavors, it brings together the sweetness of tomatoes and the aromatic touch of basil, making it a perfect weeknight meal. This recipe allows you to enjoy a comforting pasta dish in no time, utilizing the Instant Pot's efficiency to develop rich flavors without the need for constant monitoring.
Using just a few simple ingredients, this Tomato Basil Pasta isn't only quick to make but also packs a punch of flavor. The Instant Pot cooks the pasta perfectly al dente while allowing the sauce to meld beautifully. Whether you're cooking for yourself or entertaining guests, this dish is sure to impress.
Ingredients:
- 12 ounces of penne pasta
- 1 can (28 ounces) crushed tomatoes
- 1 cup vegetable broth
- 1 medium onion, diced
- 4 cloves garlic, minced
- 2 tablespoons olive oil
- 1 teaspoon dried basil
- 1 teaspoon dried oregano
- Salt and pepper to taste
- Fresh basil leaves for garnish
- Grated Parmesan cheese (optional)
Cooking Instructions:
Start by setting your Instant Pot to the sauté function. Add the olive oil, diced onion, and minced garlic. Sauté for about 3-4 minutes until the onion is soft and translucent.
Next, add the crushed tomatoes, vegetable broth, dried basil, dried oregano, salt, and pepper. Stir to combine. Then, add the penne pasta and make certain it's submerged in the liquid.
Close the lid of the Instant Pot, making sure the valve is set to sealing. Set the cooking time to 5 minutes on high pressure. Once the timer goes off, do a quick release of the pressure.
Carefully open the lid, and give the pasta a good stir. If desired, let it sit for a couple of minutes to allow any remaining liquid to absorb. Serve hot, garnished with fresh basil leaves and grated Parmesan cheese if you like.
Extra Tips:
When making this dish, feel free to customize it by adding vegetables such as spinach or bell peppers for extra nutrition. You can also adjust the seasoning to your taste, adding more herbs or a pinch of red pepper flakes for a bit of heat.
Sweet and Sour Pork
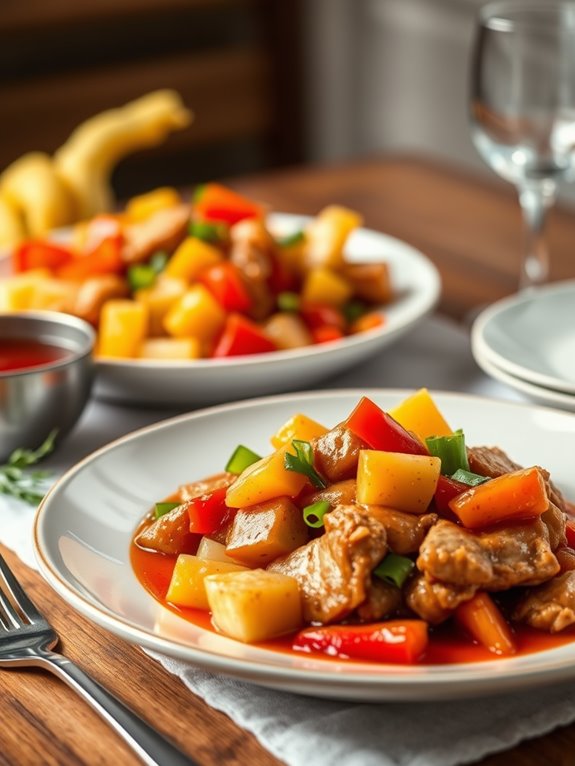
Sweet and Sour Pork is a delightful dish that combines tender pieces of pork with a vibrant sauce that balances sweetness and tanginess. This dish is perfect for a family dinner or a gathering, as it appeals to a wide range of palates.
Cooking it in an Instant Pot not only speeds up the process but also guarantees that the pork remains juicy and flavorful while the flavors meld beautifully.
With the convenience of the Instant Pot, you can whip up this classic dish in no time. The pressure cooking method helps to infuse the pork with the delicious sweet and sour sauce, creating a meal that's both comforting and satisfying. Serve it over rice or with steamed vegetables for a complete meal that everyone will love.
Ingredients:
- 1 lb pork tenderloin, cut into bite-sized pieces
- 1 cup bell peppers, chopped (red and green)
- 1 cup pineapple chunks (canned or fresh)
- 1 cup onion, chopped
- 1 cup sweet and sour sauce
- 2 cloves garlic, minced
- 1 tablespoon soy sauce
- 1 tablespoon vegetable oil
- Salt and pepper to taste
- Cooked rice, for serving
To make Sweet and Sour Pork in your Instant Pot, start by selecting the sauté function. Add the vegetable oil and allow it to heat up.
Once hot, add the pork pieces and season with salt and pepper. Sauté the pork until it's browned on all sides, about 5-7 minutes.
Add the garlic, bell peppers, onion, pineapple, sweet and sour sauce, and soy sauce to the pot. Stir well to combine all the ingredients.
Secure the lid on the Instant Pot and set it to cook on high pressure for 10 minutes. Once the cooking time is complete, let the pressure release naturally for about 5 minutes before performing a quick release for any remaining pressure.
For the best results, make certain to adjust the sweetness of the sauce to your preference by adding more or less sweet and sour sauce.
You can also customize the vegetables in this dish; feel free to include carrots, snap peas, or any other favorite veggies.
If you want a thicker sauce, you can mix a tablespoon of cornstarch with a little water to create a slurry and add it to the pot after pressure cooking, using the sauté function to thicken the sauce further.
Enjoy your Sweet and Sour Pork over fluffy rice for a delicious and satisfying meal!
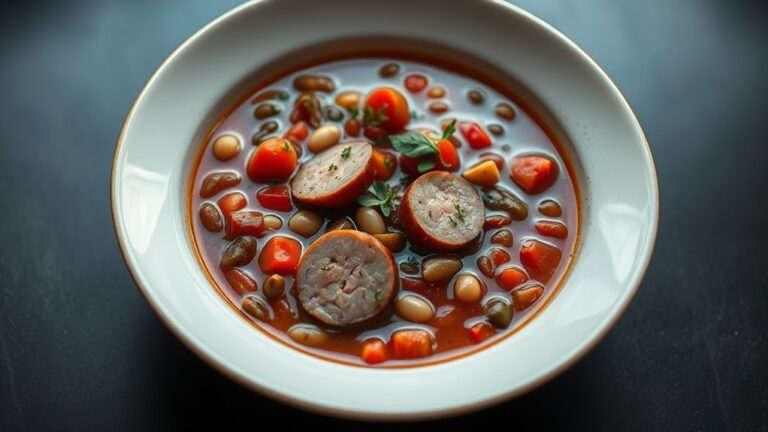
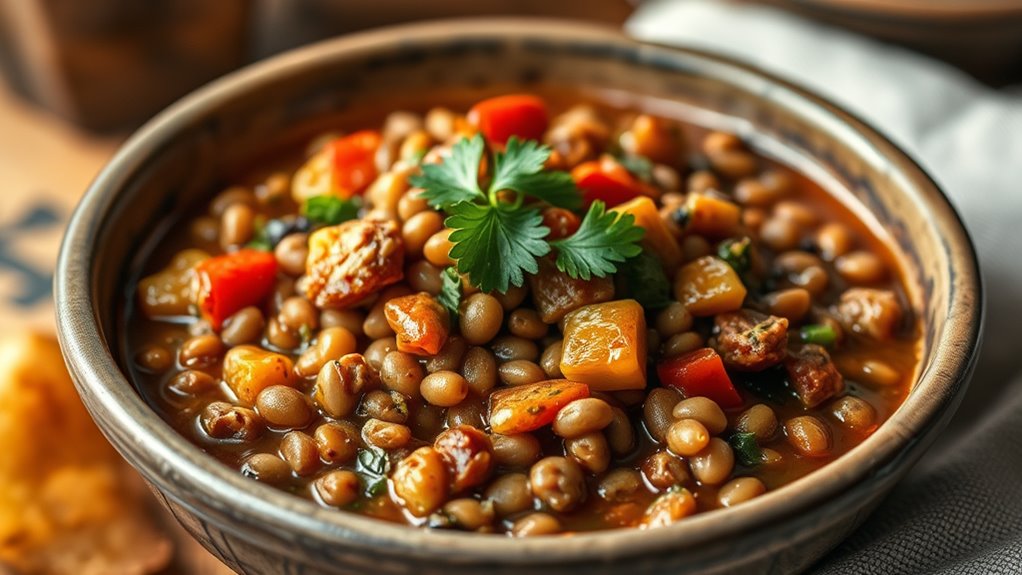
Hearty Lentil Stew
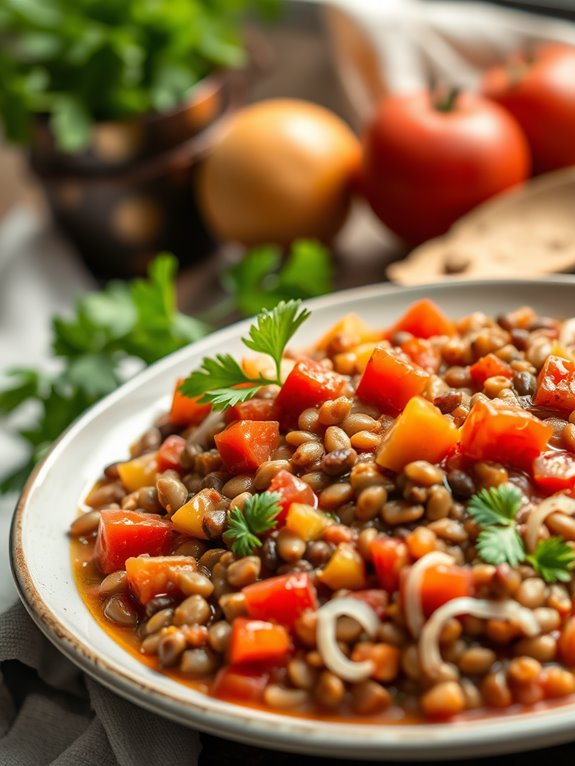
Hearty lentil stew is a wonderfully filling and nutritious dish that brings warmth and comfort to your table. Packed with protein-rich lentils, a medley of vegetables, and aromatic spices, this stew is perfect for a cozy evening or meal prep for the week ahead. The Instant Pot makes it incredibly easy to whip up this delicious stew in no time, allowing the flavors to meld beautifully while you go about your day.
The great thing about lentil stew is its versatility. You can customize it with your favorite vegetables or adjust the spices to suit your taste. Whether you serve it with crusty bread, over rice, or simply on its own, this hearty stew is sure to satisfy your hunger and nourish your body.
Ingredients:
- 1 cup dried green or brown lentils
- 1 medium onion, diced
- 2 carrots, chopped
- 2 celery stalks, chopped
- 3 cloves garlic, minced
- 1 can (14.5 oz) diced tomatoes
- 4 cups vegetable broth
- 1 teaspoon cumin
- 1 teaspoon paprika
- 1 teaspoon thyme
- Salt and pepper to taste
- 2 tablespoons olive oil
- 1 bay leaf
- Fresh parsley for garnish (optional)
Cooking Instructions:
Begin by setting your Instant Pot to the sauté mode. Add the olive oil, and once it's heated, toss in the diced onion, carrots, and celery. Sauté for about 5 minutes, or until the vegetables are softened.
Stir in the garlic and cook for another minute until fragrant. Next, add the lentils, diced tomatoes (with their juices), vegetable broth, cumin, paprika, thyme, bay leaf, and season with salt and pepper. Stir everything together to combine.
Close the Instant Pot lid and set it to pressure cook on high for 15 minutes. Once the cooking time is complete, allow the pressure to release naturally for about 10 minutes, then carefully do a quick release for any remaining pressure.
Open the lid, remove the bay leaf, and stir the stew. Adjust seasoning if needed and serve hot, garnished with fresh parsley if desired.
Extra Tips:
For added depth of flavor, consider incorporating other spices such as turmeric or smoked paprika. You can also include different vegetables like potatoes, zucchini, or bell peppers based on what you have on hand.
If you prefer a thicker stew, you can mash some of the lentils with a fork after cooking or let the stew simmer on the sauté setting for a few minutes before serving. This stew keeps well in the fridge for several days and can be frozen for easy meals later on!
Frequently Asked Questions
Can I Use Frozen Ingredients in These Recipes?
Yes, you can use frozen ingredients in these recipes. Just adjust the cooking time slightly, and you'll still get great results. It's a convenient way to save time while preparing delicious meals. Enjoy cooking!
What Size Instant Pot Do I Need for These Recipes?
To choose the right size Instant Pot, consider your cooking needs. If you're cooking for one or two, a 3-quart works well. For families or meal prepping, opt for a 6-quart or larger model.
How Can I Adjust Cooking Times for Larger Quantities?
When you increase quantities, keep in mind that cooking times might need adjustments. Generally, add about 10-15% more time for larger amounts, but always check for doneness to guarantee everything cooks evenly.
Are There Vegan Options for These Recipes?
Absolutely, you can find plenty of vegan options! Just swap out any animal products for plant-based alternatives. Think beans, lentils, or tofu. They'll add flavor and nutrition without compromising your dietary preferences. Enjoy experimenting!
How Do I Store Leftovers From These Meals?
To store leftovers, let your meal cool down, then transfer it to airtight containers. Label them with dates, and refrigerate for up to four days or freeze for longer storage. Enjoy your meals later!