As an affiliate, we may earn a commission from qualifying purchases. We get commissions for purchases made through links on this website from Amazon and other third parties.
If you're looking for a way to simplify your weeknight dinners, these 10 oven-baked meal prep recipes might just be what you need. Each dish is designed for convenience, blending flavor and nutrition effortlessly. You can customize ingredients based on your preferences, making them even more appealing. Ready to explore how these easy meals can transform your dinner routine? Let's plunge into the first recipe and see what makes it a standout choice.
Key Takeaways
- Incorporate versatile recipes like Cheesy Chicken and Broccoli Casserole for a protein-packed, customizable meal option perfect for meal prep.
- Try Mediterranean Quinoa Bake for a flavorful, plant-based dish that offers easy swaps for vegetables based on personal preference.
- One-Pan Baked Lemon Garlic Salmon allows for minimal cleanup while delivering a nutrient-dense meal, ideal for quick weeknight dinners.
- Sweet Potato and Black Bean Enchiladas provide a wholesome, satisfying option that can be customized with various vegetables and toppings.
- Utilize general meal prep tips to enhance convenience, including proper storage methods to ensure freshness throughout the week.
Cheesy Chicken and Broccoli Casserole
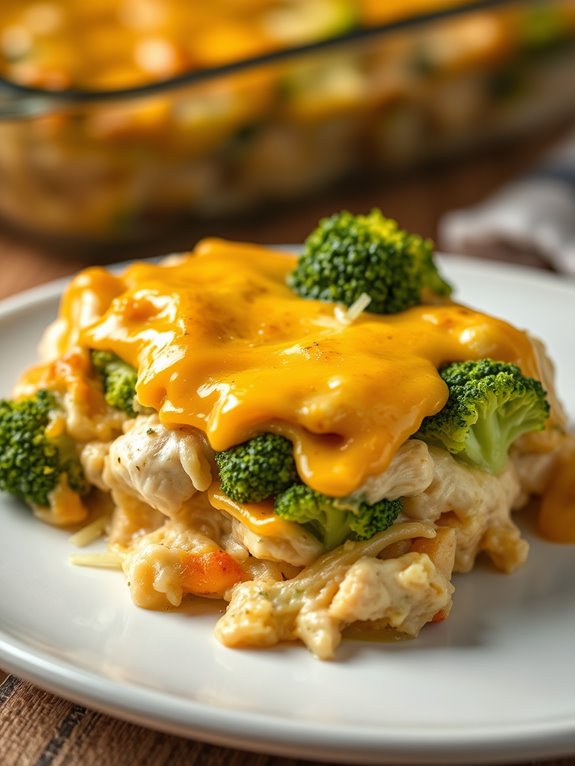
Cheesy Chicken and Broccoli Casserole is a delicious and comforting dish that combines tender chicken, vibrant broccoli, and creamy cheese in a satisfying bake. Perfect for meal prep, this casserole can be made ahead of time and easily reheated for a quick and nutritious dinner.
It's packed with protein and vegetables, making it a well-rounded option for busy weeknights or family gatherings. This recipe isn't only simple to prepare but also customizable. You can switch out the chicken for turkey or even use a meat substitute if you prefer a vegetarian option.
The cheesy goodness and the flavors meld together beautifully, ensuring that every bite is as delightful as the last. Whether served as a main dish or a side, this casserole is sure to become a favorite in your household.
Ingredients:
- 2 cups cooked chicken, shredded
- 2 cups broccoli florets, steamed
- 1 cup cooked rice (white or brown)
- 1 can (10.5 oz) cream of chicken soup
- 1 cup shredded cheddar cheese
- 1/2 cup milk
- 1 teaspoon garlic powder
- 1 teaspoon onion powder
- Salt and pepper to taste
- 1/2 cup breadcrumbs (optional for topping)
Instructions:
Preheat your oven to 350°F (175°C). In a large mixing bowl, combine the shredded chicken, steamed broccoli, cooked rice, cream of chicken soup, milk, garlic powder, onion powder, half of the cheddar cheese, salt, and pepper.
Mix everything together until well combined. Transfer the mixture into a greased 9×13 inch baking dish and spread it evenly. Top with the remaining cheddar cheese and, if desired, sprinkle breadcrumbs over the top for an extra crispy texture.
Bake in the preheated oven for about 25-30 minutes, or until the cheese is bubbly and the casserole is heated through. Once done, let it sit for a few minutes before serving to allow it to set slightly, making it easier to scoop.
Extra Tips:
For added flavor, consider mixing in some cooked mushrooms or bell peppers to the casserole. You can also experiment with different types of cheese, such as mozzarella or pepper jack, for a unique twist.
If you're prepping this dish for meals throughout the week, it can be stored in an airtight container in the fridge for up to 3-4 days, or frozen for longer storage. When reheating, add a splash of milk to keep it creamy and delicious.
Mediterranean Quinoa Bake

The Mediterranean Quinoa Bake is a delightful and nutritious dish that combines the hearty texture of quinoa with vibrant Mediterranean flavors. It's perfect for meal prep, as it can be made in advance and stored for easy lunches or dinners throughout the week. Packed with vegetables, herbs, and spices, this bake isn't only filling but also a great way to incorporate plant-based protein into your diet.
This recipe is incredibly versatile; you can swap out vegetables based on what you have on hand or your personal preferences. The use of feta cheese adds a creamy tanginess that complements the dish beautifully, while the olives and sun-dried tomatoes provide bursts of flavor. Whether enjoyed on its own or served with a side salad, the Mediterranean Quinoa Bake is sure to become a favorite in your meal rotation.
Ingredients:
- 1 cup quinoa, rinsed
- 2 cups vegetable broth
- 1 cup cherry tomatoes, halved
- 1 cup spinach, chopped
- 1/2 cup red bell pepper, diced
- 1/2 cup zucchini, diced
- 1/2 cup red onion, diced
- 1/3 cup Kalamata olives, sliced
- 1/3 cup sun-dried tomatoes, chopped
- 1 cup feta cheese, crumbled
- 2 tablespoons olive oil
- 1 teaspoon dried oregano
- 1 teaspoon dried basil
- Salt and pepper to taste
Preheat your oven to 375°F (190°C). In a medium saucepan, combine the rinsed quinoa and vegetable broth, bringing it to a boil. Once boiling, reduce the heat to low, cover, and let it simmer for about 15 minutes or until the quinoa is fluffy and the liquid is absorbed.
Meanwhile, in a large mixing bowl, combine the cherry tomatoes, spinach, red bell pepper, zucchini, red onion, olives, sun-dried tomatoes, and crumbled feta. Add the cooked quinoa to the bowl along with olive oil, oregano, basil, salt, and pepper. Mix until everything is evenly incorporated.
Transfer the mixture into a greased 9×13 inch baking dish and spread it out evenly. Bake in the preheated oven for 25-30 minutes, or until the top is golden and slightly crispy. Once baked, allow the dish to cool for a few minutes before serving.
For best results, let the Mediterranean Quinoa Bake sit for a while before cutting into it, as this will help it hold its shape. This dish can be stored in an airtight container in the refrigerator for up to five days, making it an excellent option for meal prep.
Feel free to customize the vegetables and seasonings to suit your taste; adding ingredients like artichokes or different cheese varieties can elevate the flavor further!
One-Pan Baked Lemon Garlic Salmon
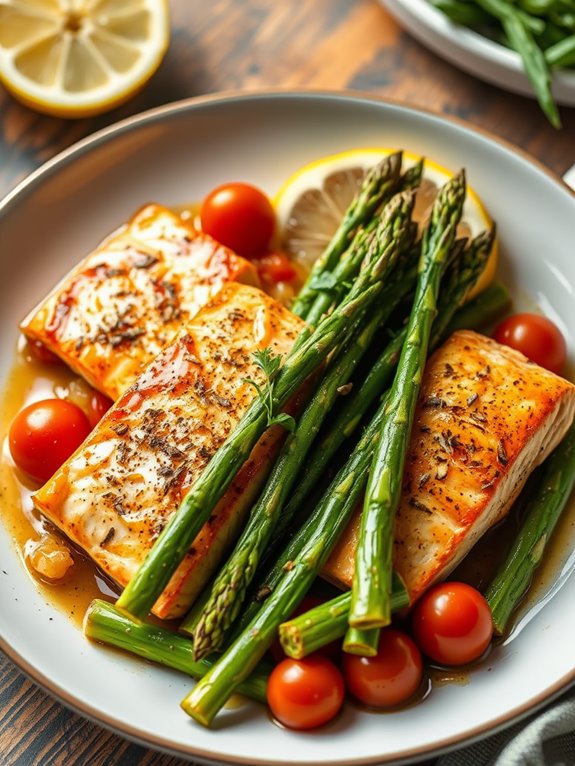
Baking salmon with a zesty lemon garlic marinade is a simple and delicious way to prepare a healthy meal. This one-pan baked lemon garlic salmon not only fills your kitchen with an enticing aroma but also makes for an incredibly nutritious meal that can be prepped ahead of time.
Pair it with your favorite vegetables for a complete dish that's perfect for meal prep. The beauty of this recipe lies in its simplicity and the fact that it requires minimal cleanup. With just one pan, you can cook the salmon and vegetables simultaneously, allowing the flavors to meld beautifully.
Whether you're making a quick weeknight dinner or prepping meals for the week, this recipe is sure to become a favorite.
Ingredients:
- 4 salmon fillets
- 3 tablespoons olive oil
- 4 cloves garlic, minced
- 2 lemons (juice and zest)
- 1 teaspoon dried oregano
- Salt and pepper to taste
- 1 cup asparagus (or your choice of vegetables)
- Fresh parsley for garnish (optional)
Instructions:
Preheat your oven to 400°F (200°C). In a small bowl, combine the olive oil, minced garlic, lemon juice, lemon zest, oregano, salt, and pepper.
Place the salmon fillets on a large baking sheet lined with parchment paper. Arrange the asparagus around the salmon, then drizzle the lemon garlic mixture over both the salmon and vegetables, making sure everything is well coated.
Bake in the preheated oven for about 15-20 minutes, or until the salmon is cooked through and flakes easily with a fork. If desired, you can broil the dish for an additional 2-3 minutes at the end to achieve a golden crust on the salmon.
Once done, garnish with fresh parsley if using, and serve warm.
Extra Tips:
For a pop of color and flavor, consider adding cherry tomatoes or bell peppers alongside the asparagus. You can also swap out the salmon for other types of fish, or even chicken, adjusting the cooking time accordingly.
This dish is versatile and can be stored in the refrigerator for up to three days, making it an excellent choice for meal prepping. Enjoy your healthy and delicious one-pan meal!
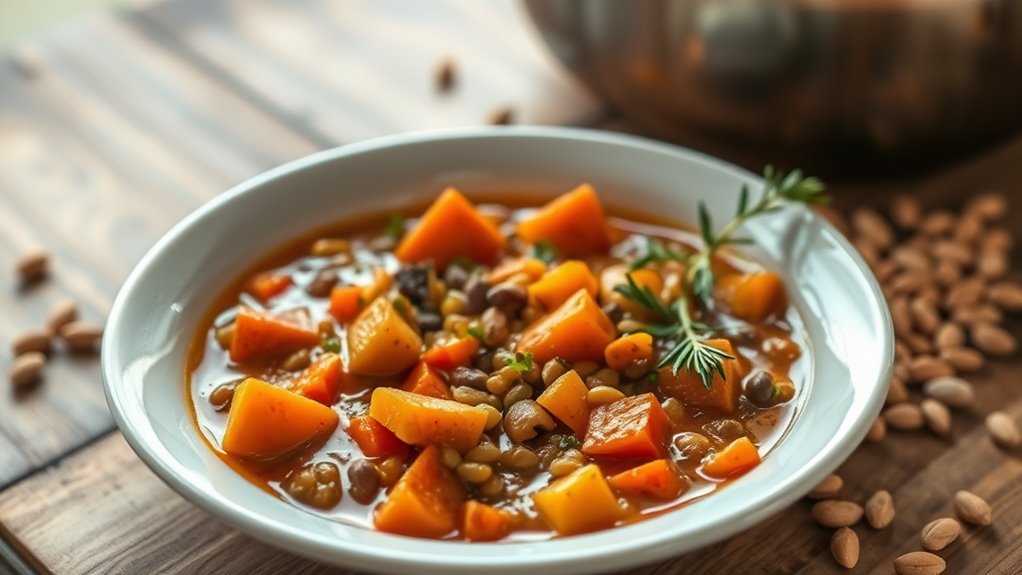
Sweet Potato and Black Bean Enchiladas
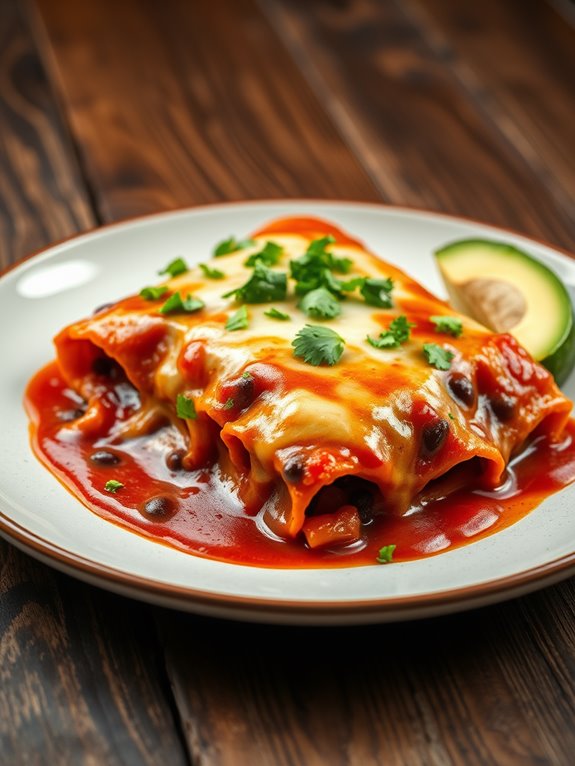
Sweet Potato and Black Bean Enchiladas are a delectable and wholesome meal that can be prepared in advance for easy weeknight dinners. The combination of tender sweet potatoes, hearty black beans, and zesty enchilada sauce creates a satisfying dish that isn't only delicious but also packed with nutrients.
These enchiladas are perfect for meal prep, as they can be easily frozen and reheated, making them a convenient option for busy days. In addition to being a great source of protein and fiber, this recipe is also versatile. You can customize the fillings to include your favorite vegetables or add some spice with jalapeños or hot sauce.
The sweet potatoes provide a natural sweetness that pairs beautifully with the savory black beans and enchilada sauce, making these enchiladas a hit for both adults and kids alike.
Ingredients:
- 2 large sweet potatoes, peeled and diced
- 1 can (15 oz) black beans, drained and rinsed
- 1 cup corn (fresh, frozen, or canned)
- 1 teaspoon cumin
- 1 teaspoon chili powder
- Salt and pepper, to taste
- 8 small corn tortillas
- 2 cups enchilada sauce
- 1 cup shredded cheese (cheddar or Monterey Jack)
- Fresh cilantro, for garnish (optional)
Cooking Instructions:
Begin by preheating your oven to 375°F (190°C). In a pot, bring water to a boil and add the diced sweet potatoes. Cook for about 10-12 minutes, or until they're tender.
Drain the sweet potatoes and place them in a mixing bowl. Add the black beans, corn, cumin, chili powder, salt, and pepper to the bowl, and gently mix until well combined.
Next, spread a thin layer of enchilada sauce on the bottom of a baking dish. Warm the corn tortillas in a dry skillet or microwave until pliable. Fill each tortilla with a generous amount of the sweet potato and black bean mixture, roll them up, and place them seam-side down in the baking dish.
Once all the tortillas are filled and arranged in the dish, pour the remaining enchilada sauce over the top and sprinkle with shredded cheese. Cover the dish with foil and bake for 20 minutes. Then, remove the foil and bake for an additional 10 minutes, or until the cheese is bubbly and golden. Garnish with fresh cilantro before serving.
Extra Tips:
For an extra layer of flavor, consider roasting the sweet potatoes before adding them to the filling. This will enhance their sweetness and add a delicious caramelized taste.
Additionally, feel free to experiment with different types of cheese or add toppings like avocado or sour cream when serving for a delightful twist. Make sure to store leftovers in an airtight container in the fridge for up to 5 days, or freeze them for longer storage.
Veggie-Packed Stuffed Bell Peppers
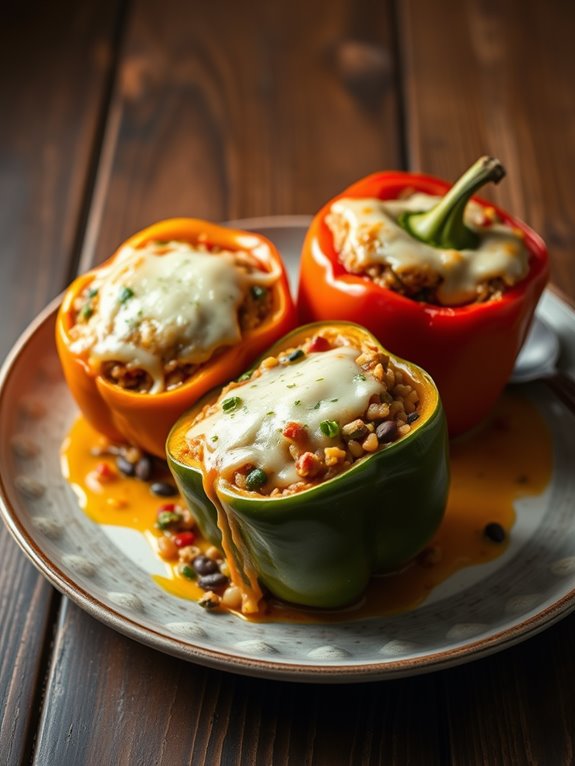
Veggie-Packed Stuffed Bell Peppers are a nutritious and colorful dish that not only looks appealing but also packs a flavorful punch. These vibrant peppers are filled with a hearty mixture of grains, beans, and vegetables, making them a perfect meal prep option for busy weeks. They can be easily customized based on your preferences and what's in your pantry, guaranteeing that every bite is both satisfying and wholesome.
This recipe isn't only easy to prepare but also allows for creativity in the kitchen. You can use a variety of fillings such as quinoa, brown rice, or lentils, along with an assortment of vegetables like zucchini, corn, and tomatoes. The stuffed peppers can be made in advance and stored in the refrigerator for a quick grab-and-go meal or can be frozen for future use, making them an excellent choice for meal prepping.
Ingredients:
- 4 large bell peppers (any color)
- 1 cup cooked quinoa (or brown rice)
- 1 can (15 oz) black beans, rinsed and drained
- 1 cup corn (frozen or canned)
- 1 cup diced tomatoes (fresh or canned)
- 1 small onion, diced
- 2 cloves garlic, minced
- 1 teaspoon cumin
- 1 teaspoon chili powder
- Salt and pepper to taste
- 1 cup shredded cheese (optional)
- Fresh cilantro or parsley for garnish (optional)
To prepare the Veggie-Packed Stuffed Bell Peppers, start by preheating your oven to 375°F (190°C). While the oven is heating, slice the tops off the bell peppers and remove the seeds and membranes.
In a large mixing bowl, combine the cooked quinoa, black beans, corn, diced tomatoes, onion, garlic, cumin, chili powder, salt, and pepper. Mix well to assure that all ingredients are evenly distributed. If you're using cheese, reserve some for topping the peppers later.
Once the filling is prepared, gently stuff each bell pepper with the mixture, packing it tightly. Place the stuffed peppers upright in a baking dish, and if desired, sprinkle the remaining cheese on top of each pepper.
Pour a small amount of water into the bottom of the baking dish to help steam the peppers during cooking. Cover the dish with aluminum foil and bake for 25-30 minutes. Remove the foil and bake for an additional 10-15 minutes, or until the peppers are tender and the cheese is bubbly. Let cool slightly before serving, and garnish with fresh herbs if desired.
Extra Tips: To add even more flavor to your stuffed peppers, consider incorporating spices such as paprika or adding a splash of hot sauce to the filling.
You can also experiment with different vegetables based on the season or your preferences. If you want to make these ahead of time, prepare the filling and stuff the peppers, then store them unbaked in the fridge for up to two days or freeze them for longer storage. Just remember to adjust the cooking time if baking from frozen!
Teriyaki Chicken and Rice Sheet Pan Dinner
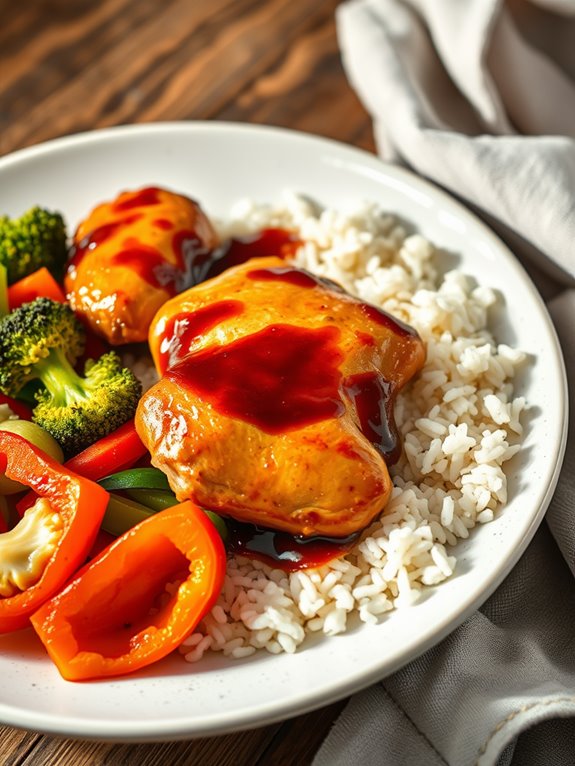
Teriyaki Chicken and Rice Sheet Pan Dinner is a delightful and healthy option for meal prep that packs a punch of flavor with minimal effort. This one-pan dish combines tender chicken thighs marinated in homemade teriyaki sauce, fluffy rice, and vibrant vegetables. Baking everything together allows the flavors to meld, resulting in a satisfying meal that can be enjoyed throughout the week.
This recipe isn't only easy to prepare but also versatile. You can customize it with your favorite veggies or adjust the seasoning to suit your taste. The convenience of a sheet pan dinner means less cleanup and more time to enjoy your delicious creation. Perfect for busy weeknights or meal prepping for lunch, this dish will quickly become a household favorite.
Ingredients:
- 1.5 lbs chicken thighs, boneless and skinless
- 1 cup jasmine rice, uncooked
- 2 cups low-sodium chicken broth
- 1 cup broccoli florets
- 1 bell pepper, sliced
- 1 cup snap peas
- 1/4 cup soy sauce (or tamari for gluten-free)
- 1/4 cup honey or maple syrup
- 2 tablespoons rice vinegar
- 1 tablespoon sesame oil
- 2 cloves garlic, minced
- 1 teaspoon ginger, grated
- Salt and pepper to taste
- Sesame seeds and green onions for garnish (optional)
Preheat your oven to 400°F (200°C). In a bowl, whisk together the soy sauce, honey, rice vinegar, sesame oil, garlic, and ginger to create the teriyaki marinade.
Place the chicken thighs in a large resealable bag or shallow dish and pour half of the marinade over the chicken, making certain it's well coated. Let it marinate for at least 30 minutes, or overnight for a deeper flavor.
On a large sheet pan, spread the uncooked rice evenly and pour the chicken broth over the rice. Remove the chicken from the marinade and place it on top of the rice.
Arrange the broccoli, bell pepper, and snap peas around the chicken. Drizzle the remaining marinade over the chicken and vegetables. Cover the sheet pan with aluminum foil and bake for 25-30 minutes.
Remove the foil and bake for an additional 10-15 minutes, or until the chicken is cooked through and the rice is tender. Garnish with sesame seeds and sliced green onions before serving.
Extra Tips: To guarantee even cooking, make sure the chicken thighs are of similar size. If you're using different vegetables, choose those that cook at a similar rate to avoid overcooking.
For added flavor, feel free to add a sprinkle of crushed red pepper flakes for some heat or swap out the vegetables based on what you have on hand. This dish reheats well, making it perfect for meal prep, so don't hesitate to double the recipe!
Baked Ziti With Spinach and Ricotta
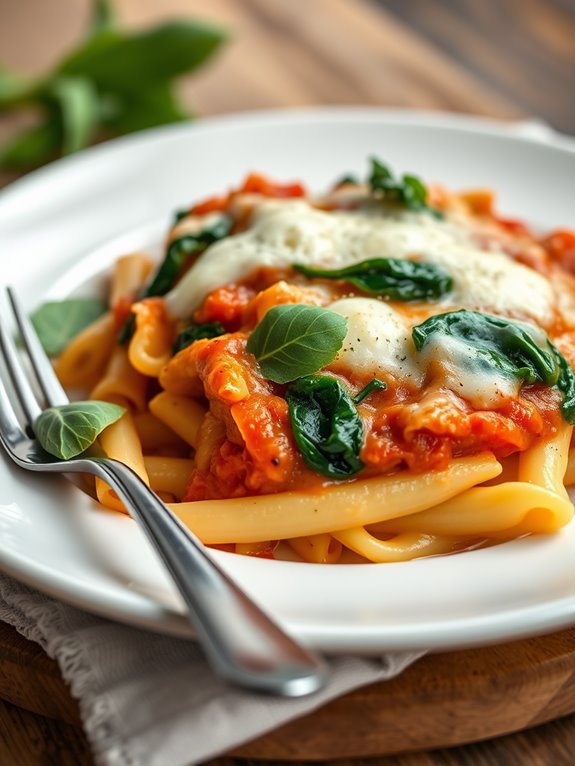
Baked Ziti with Spinach and Ricotta is a delightful and hearty dish that combines the comforting flavors of pasta, cheese, and fresh vegetables. This recipe is perfect for meal prep, as it can be made in advance and enjoyed throughout the week. The addition of spinach not only enhances the nutritional value but also adds a lovely burst of color to the dish, making it as visually appealing as it's delicious.
This dish is incredibly versatile; you can easily customize it by adding your favorite vegetables or proteins. Whether you're cooking for a family gathering or just want to have a healthy meal ready to go, this Baked Ziti with Spinach and Ricotta is sure to satisfy. With layers of creamy ricotta, tangy marinara sauce, and gooey mozzarella, it's a comforting meal that everyone will love.
Ingredients:
- 12 oz ziti pasta
- 2 cups marinara sauce
- 2 cups fresh spinach, chopped
- 15 oz ricotta cheese
- 1 cup shredded mozzarella cheese
- 1/2 cup grated Parmesan cheese
- 1 large egg
- 1 tsp garlic powder
- 1 tsp Italian seasoning
- Salt and pepper to taste
- Fresh basil for garnish (optional)
Cooking Instructions:
- Preheat your oven to 375°F (190°C). Cook the ziti pasta according to package instructions until al dente. Drain and set aside.
- In a large bowl, combine the ricotta cheese, egg, garlic powder, Italian seasoning, salt, and pepper. Mix until well combined. Stir in the chopped spinach and half of the marinara sauce.
- In a 9×13 inch baking dish, spread a thin layer of the remaining marinara sauce on the bottom. Add half of the cooked ziti, followed by the ricotta mixture, and then the remaining ziti. Top with the rest of the marinara sauce. Sprinkle with mozzarella and Parmesan cheese.
- Cover the dish with aluminum foil and bake for 25 minutes. Remove the foil and bake for an additional 15 minutes, or until the cheese is bubbly and golden. Allow to cool slightly before serving.
Extra Tips:
For an extra layer of flavor, consider adding sautéed onions or bell peppers to the ricotta mixture. You can also substitute the spinach with other greens like kale or Swiss chard.
If you're looking to make this dish ahead of time, it can be assembled and stored in the refrigerator for up to two days before baking. Additionally, Baked Ziti freezes well, so you can double the recipe and enjoy leftovers later on. Just be sure to thaw it in the refrigerator overnight before baking to perfection.
Italian Sausage and Potato Bake
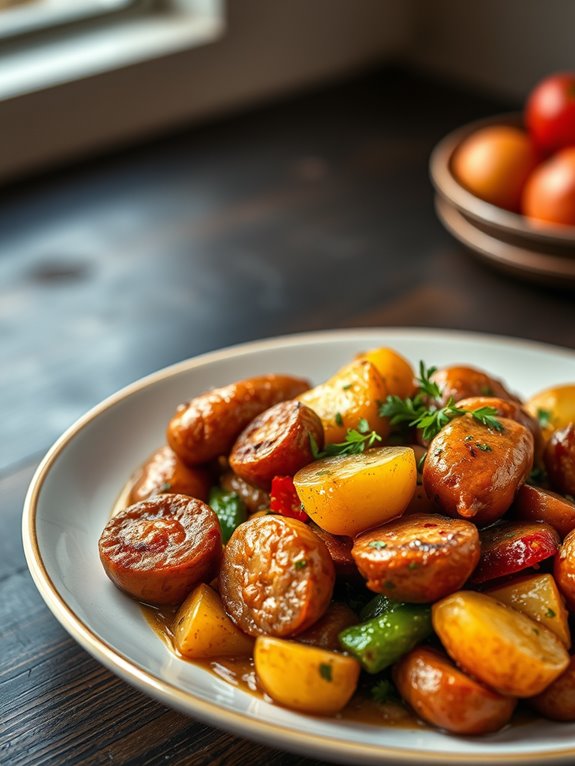
This dish is versatile, allowing for variations based on your preferences or what you have on hand. Feel free to add in your favorite vegetables, such as bell peppers or zucchini, to enhance the nutrition and flavor. The leftovers also make for a great lunch, as the flavors continue to develop and deepen over time.
Ingredients:
- 1 pound Italian sausage (mild or spicy, according to preference)
- 4 medium-sized potatoes, diced
- 1 large onion, sliced
- 3 cloves garlic, minced
- 2 tablespoons olive oil
- 1 teaspoon dried oregano
- 1 teaspoon dried basil
- Salt and pepper, to taste
- Fresh parsley, chopped (for garnish)
Instructions:
Preheat your oven to 400°F (200°C). In a large mixing bowl, combine the diced potatoes, sliced onion, and minced garlic. Drizzle with olive oil and sprinkle with oregano, basil, salt, and pepper. Toss everything together until the vegetables are well-coated.
In a separate skillet, cook the Italian sausage over medium heat until browned and cooked through, breaking it into bite-sized pieces as it cooks. Once done, add the sausage to the vegetable mixture and stir to combine.
Transfer the mixture to a large baking dish, spreading it evenly. Bake in the preheated oven for about 30-35 minutes, or until the potatoes are tender and golden brown. If desired, you can broil the dish for an additional 2-3 minutes at the end to get a nice crispy top.
Once cooked, remove from the oven and let it cool slightly before serving. Garnish with fresh parsley before enjoying.
Extra Tips:
For an extra layer of flavor, consider adding a splash of balsamic vinegar to the vegetable mixture before baking. You can also experiment with different types of sausage, such as chicken or turkey sausage, for a lighter option.
Don't forget to adjust the cooking time if you add more vegetables, as they may require additional time to cook through. This dish can be stored in the refrigerator for up to four days, making it ideal for meal prep!
Spinach and Feta Quiche
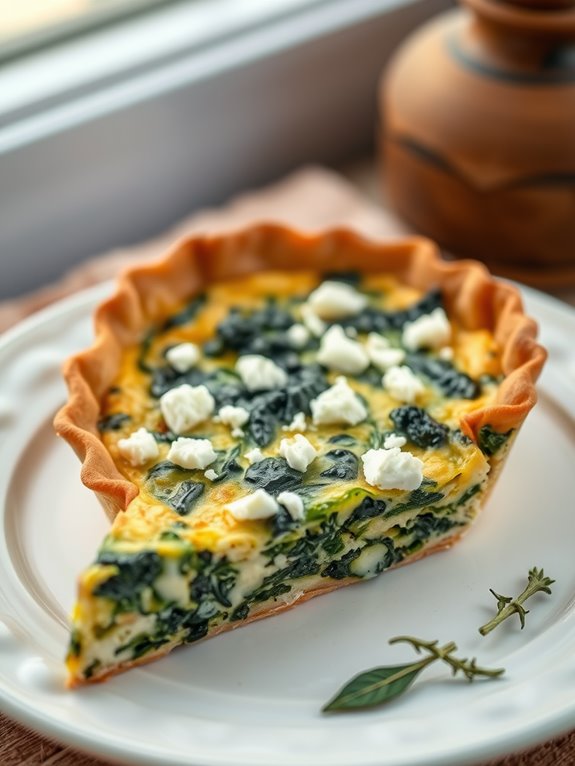
Spinach and feta quiche is a versatile dish that can be enjoyed for breakfast, lunch, or dinner. This savory pie combines the earthy flavors of fresh spinach with the tangy richness of feta cheese, all nestled in a flaky crust. Perfect for meal prep, you can make it in advance and simply reheat slices throughout the week, making it a fantastic option for busy individuals or families.
This quiche isn't only delicious but also packed with nutrients, making it a healthy choice for any meal. You can customize it by adding other ingredients such as sun-dried tomatoes, mushrooms, or different types of cheese according to your preference. With its simplicity and adaptability, this spinach and feta quiche is sure to become a staple in your meal prep routine.
Ingredients:
- 1 pre-made pie crust
- 2 cups fresh spinach, chopped
- 1 cup feta cheese, crumbled
- 4 large eggs
- 1 cup milk
- 1/2 teaspoon salt
- 1/4 teaspoon black pepper
- 1/4 teaspoon garlic powder
- 1/4 teaspoon onion powder
- Optional: 1/2 cup diced onions or other vegetables
To begin, preheat your oven to 375°F (190°C). Place the pre-made pie crust in a 9-inch pie pan and prick the bottom with a fork to prevent bubbling.
In a medium bowl, whisk together the eggs, milk, salt, pepper, garlic powder, and onion powder until well combined. Stir in the chopped spinach and crumbled feta cheese, making sure everything is evenly distributed. If you're adding any optional vegetables, mix them in at this stage.
Pour the egg and spinach mixture into the prepared pie crust. Bake in the preheated oven for 35-40 minutes or until the quiche is set in the center and lightly golden on top. Allow it to cool slightly before slicing. This quiche can be served warm or at room temperature and can be stored in the refrigerator for up to five days.
Extra Tips:
For a crispier crust, consider blind baking the pie crust for about 10 minutes before adding the filling. This will help to prevent a soggy bottom.
Additionally, feel free to experiment with different herbs and spices to enhance the flavor. Fresh herbs like dill or parsley can add a lovely touch to the quiche. Finally, don't hesitate to use leftover roasted vegetables or meats to make this dish even more hearty and satisfying!
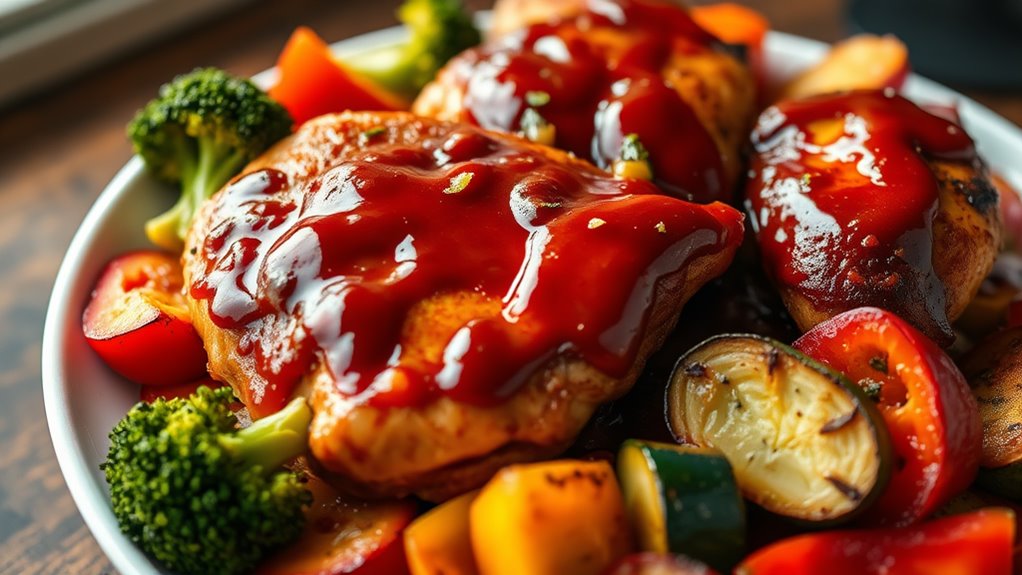
BBQ Chicken and Roasted Vegetable Bake
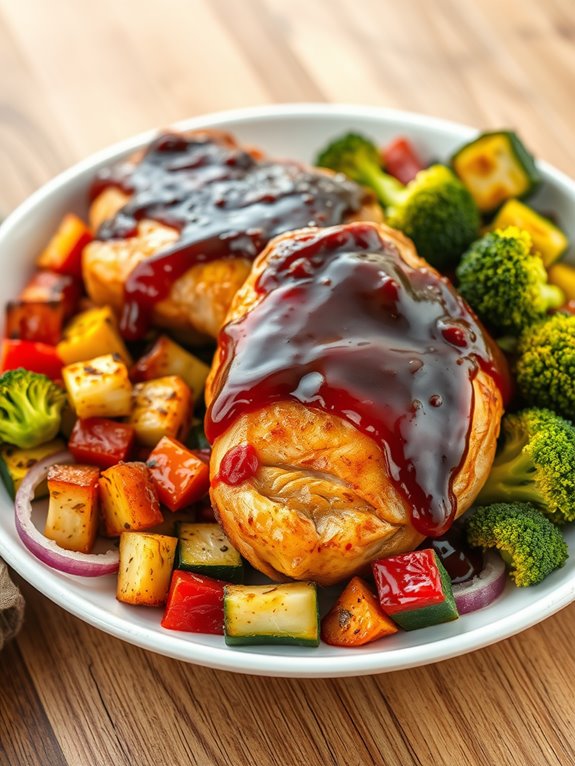
BBQ Chicken and Roasted Vegetable Bake is a delicious and nutritious meal that can easily be prepared in advance for those busy weekdays. This dish combines tender chicken thighs coated in a tangy BBQ sauce with a colorful array of seasonal vegetables roasted to perfection. Not only is it simple to make, but it also offers a fantastic combination of flavors and textures that everyone will love.
By preparing this meal in one pan, you save time on both cooking and cleanup, making it ideal for meal prepping. You can customize the vegetables based on what you have on hand or what's in season, ensuring you get the freshest produce possible. This versatile recipe is perfect for lunch or dinner and can be served alone or alongside your favorite grain for a complete meal.
Ingredients:
- 4 boneless, skinless chicken thighs
- 1 cup BBQ sauce (store-bought or homemade)
- 2 cups broccoli florets
- 1 red bell pepper, diced
- 1 yellow bell pepper, diced
- 1 zucchini, sliced
- 1 red onion, sliced
- 2 tablespoons olive oil
- Salt and pepper, to taste
- Fresh parsley, for garnish (optional)
Cooking Instructions:
Preheat your oven to 400°F (200°C). In a large mixing bowl, combine the chicken thighs with half of the BBQ sauce, making sure each piece is well coated.
In another bowl, toss the chopped vegetables with olive oil, salt, and pepper until evenly coated. Spread the vegetables out on a large baking sheet or a roasting pan, creating space for the chicken thighs.
Place the marinated chicken thighs on top of the vegetables and drizzle the remaining BBQ sauce over the chicken. Bake in the preheated oven for 25-30 minutes, or until the chicken reaches an internal temperature of 165°F (75°C) and the vegetables are tender and slightly caramelized.
Remove from the oven and let it rest for a few minutes before serving. Garnish with fresh parsley, if desired.
Extra Tips:
For added flavor, you can marinate the chicken in the BBQ sauce for a few hours or overnight before cooking. If you want a little heat, consider adding a pinch of red pepper flakes to the vegetables.
This dish is also great for leftovers; simply store it in an airtight container in the refrigerator for up to 4 days, and reheat when ready to enjoy.
Frequently Asked Questions
How Long Can I Store These Baked Meals in the Fridge?
You can store baked meals in the fridge for about three to four days. Make sure to keep them in airtight containers to maintain freshness and avoid spoilage. Always check for any signs of deterioration before eating.
Can I Freeze These Oven-Baked Dishes for Later Use?
Sure, you can tuck those delicious oven-baked dishes away in the freezer for future enjoyment! Just make sure they're cooled completely, and use airtight containers to keep them fresh and tasty for later feasting.
What Are Some Good Side Dishes for These Meals?
You can pair roasted vegetables, garlic bread, or a fresh salad as great side dishes. They complement your main meals nicely, adding flavor and variety, making your dinner experience more enjoyable and balanced overall.
Are There Vegetarian Options for These Recipes?
When it comes to vegetarian options, you've got plenty of choices! Toss in some hearty veggies, grains, or legumes to create delicious meals. It's a piece of cake to whip up satisfying vegetarian dishes.
How Do I Reheat Leftover Baked Meals Properly?
To reheat leftover baked meals properly, preheat your oven to 350°F. Place the meal in an oven-safe dish, cover it with foil, and heat for 20-30 minutes until it's warmed through. Enjoy your meal!