As an affiliate, we may earn a commission from qualifying purchases. We get commissions for purchases made through links on this website from Amazon and other third parties.
You might think meal prep is too time-consuming, but grab-and-go sandwiches can be quick and easy to prepare. These sandwiches not only save you time during busy weeks, but they also offer a variety of nutritious options. From classic combinations to creative wraps, there's something for every palate. Let's explore ten ideas that can keep your meals interesting and convenient throughout the week.
Key Takeaways
- Prepare classic sandwiches like Turkey and Avocado or Chicken Salad for nutritious, easy-to-eat options that can be made in bulk.
- Use whole grain wraps or pitas, such as Hummus and Veggie Wraps, for a healthy, portable meal that can be customized with various veggies.
- Make specialty sandwiches like Caprese or Roast Beef and Cheddar, which can be prepped ahead and stored for convenient lunches.
- Incorporate breakfast options like Peanut Butter and Banana Sandwiches or Smoked Salmon and Cream Cheese Bagels for varied meal prep choices.
- Store sandwich components separately to maintain freshness, and experiment with different toppings and bread types for personalized flavors.
Classic Turkey and Avocado Sandwich

A Classic Turkey and Avocado Sandwich is a delightful option for meal prep that combines wholesome ingredients with rich flavors. This sandwich not only offers a satisfying bite but also packs a nutritious punch, thanks to the lean turkey and creamy avocado. It's perfect for a quick lunch or a convenient snack throughout the week.
With just a few simple ingredients, you can whip up this sandwich in no time, making it an excellent choice for busy individuals looking to eat healthily.
Preparing this sandwich is straightforward and can even be customized based on your preferences. Whether you prefer whole grain bread, a sprinkle of fresh herbs, or additional toppings like spinach or tomatoes, this recipe allows for flexibility.
Plus, it's easy to make in bulk, so you have grab-and-go options ready for those hectic days.
Ingredients:
- 4 slices of whole grain bread
- 8 ounces of sliced turkey breast
- 1 ripe avocado
- 1 cup baby spinach
- 4 slices of tomato
- Salt and pepper to taste
- Optional: mayonnaise or mustard for spreading
Instructions:
- Start by toasting the whole grain bread slices until they're golden brown and crisp. This step adds texture and helps prevent the bread from becoming soggy when adding moist ingredients.
- While the bread is toasting, cut the avocado in half, remove the pit, and scoop the flesh into a bowl. Mash the avocado with a fork and season with salt and pepper to taste.
- Once the bread is ready, spread a thin layer of mayonnaise or mustard on one side of each slice, if desired. Then, on two of the slices, layer the sliced turkey, mashed avocado, baby spinach, and tomato slices. Top with the other two slices of bread to create a sandwich.
- Cut the sandwiches in half and wrap them in parchment paper or plastic wrap for easy grab-and-go meals.
Extra Tips:
When meal prepping these sandwiches, consider storing the components separately to keep the bread fresh and avoid sogginess.
You can also use a variety of bread types, such as sourdough or ciabatta, to add different flavors. Experiment with additional toppings like sprouts or cheese for extra nutrition and taste.
If you're preparing these sandwiches a few days in advance, keep the avocado from browning by adding a squeeze of lemon juice before mashing.
Hummus and Veggie Wrap
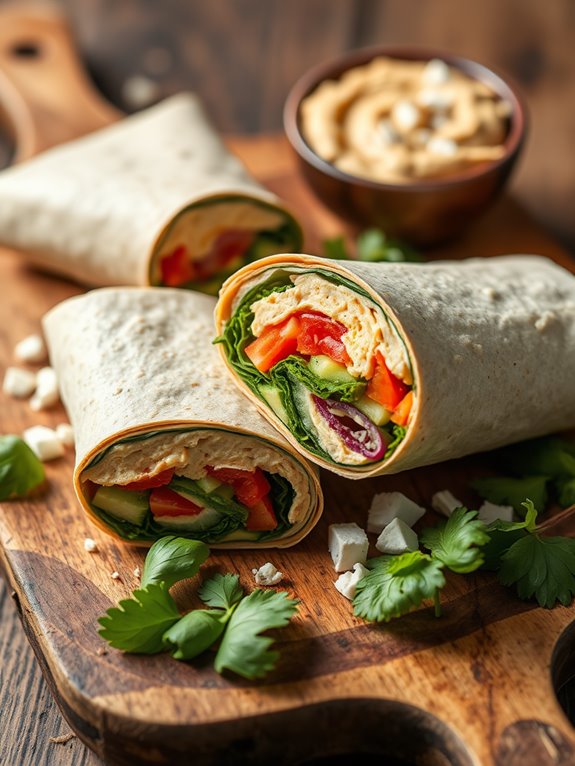
Hummus and veggie wraps are a delicious and healthy option for meal prep that can be enjoyed at lunch or as a snack. They're easy to make, packed with nutrients, and can be customized with your favorite vegetables. This recipe combines creamy hummus with fresh, crunchy vegetables wrapped in a whole grain tortilla, creating a satisfying meal that's both filling and nutritious.
Making these wraps ahead of time means you can grab one out of the fridge and enjoy it on the go. You can also experiment with different types of hummus—such as roasted red pepper, garlic, or even spicy varieties—to add some variety to your meal prep. These wraps will keep well in the fridge, making them a perfect choice for busy weekdays.
Ingredients:
- Whole grain tortillas
- 1 cup of hummus (your choice of flavor)
- 1 cup of spinach or mixed greens
- 1 medium cucumber, sliced
- 1 bell pepper, sliced (any color)
- 1 medium carrot, shredded
- ½ cup of cherry tomatoes, halved
- Salt and pepper to taste
- Optional: Feta cheese or olives for added flavor
To prepare the hummus and veggie wraps, start by laying a whole grain tortilla flat on a clean surface. Spread a generous layer of hummus evenly over the tortilla, leaving a small border around the edges.
Next, layer the spinach or mixed greens in the center of the tortilla, followed by the sliced cucumber, bell pepper, shredded carrot, and cherry tomatoes. Season the filling with a sprinkle of salt and pepper, and if you like, add feta cheese or olives for extra flavor.
Carefully roll the tortilla tightly from one end to the other, tucking in the sides as you go to create a secure wrap. Once you've rolled all the wraps, slice them in half diagonally and store them in an airtight container in the refrigerator for up to five days. This makes them easy to grab and go whenever hunger strikes!
Extra Tips:
To keep your wraps fresh for longer, consider wrapping each one in parchment paper or foil before placing them in an airtight container. This not only helps to maintain their shape but also prevents them from getting soggy.
You can also customize your wraps with seasonal vegetables or add protein like grilled chicken or chickpeas for a more filling meal. Enjoy experimenting with different combinations to keep your lunches exciting!
Caprese Sandwich With Pesto
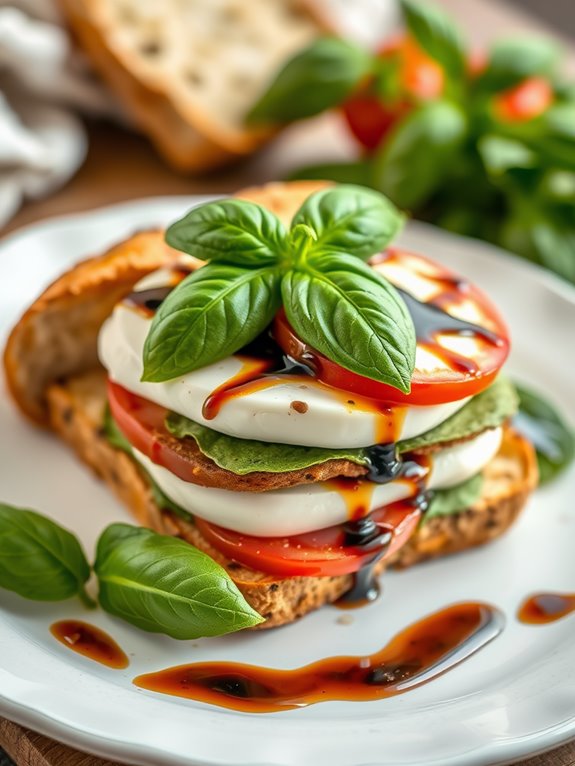
The Caprese Sandwich with Pesto is a delightful and invigorating option that brings together the classic flavors of Italy in a simple yet satisfying meal. This sandwich features fresh mozzarella, ripe tomatoes, and fragrant basil, all enhanced by a vibrant pesto spread. Perfect for meal prep, these sandwiches can be assembled quickly and stored for grab-and-go lunches or picnics.
Creating this sandwich not only satisfies your taste buds but also provides a nutritious option that's both vegetarian and wholesome. The combination of creamy mozzarella, juicy tomatoes, and zesty pesto is a match made in heaven. Let's plunge into the ingredients and get started on this delicious Caprese Sandwich with Pesto!
Ingredients:
- 1 ciabatta or baguette
- 8 ounces fresh mozzarella cheese, sliced
- 2 medium ripe tomatoes, sliced
- Fresh basil leaves
- 1/4 cup pesto
- Balsamic glaze (optional)
- Salt and pepper to taste
To prepare the Caprese Sandwich with Pesto, start by slicing your ciabatta or baguette in half lengthwise. Spread a generous layer of pesto on both sides of the bread. Layer the fresh mozzarella slices evenly on one side, followed by the sliced tomatoes. Season with a pinch of salt and pepper to enhance the flavors.
Add a handful of fresh basil leaves on top of the tomatoes, then close the sandwich with the other half of the bread. For added flavor, drizzle some balsamic glaze on the inside of the bread before assembling or after cutting the sandwich in half.
If you prefer a warm sandwich, you can grill it in a panini press or on a skillet for a few minutes until the cheese is slightly melted and the bread is golden and crispy. Slice the sandwich into manageable pieces, and it's ready to be enjoyed!
Extra Tips:
Feel free to customize your Caprese Sandwich by adding additional ingredients such as avocado, roasted red peppers, or arugula for added texture and flavor.
For meal prep, wrap each sandwich tightly in parchment paper or foil, and store them in the refrigerator for up to three days. When ready to eat, you can enjoy them cold or warm them up for a delicious, melty treat!
Chicken Salad on Whole Grain Bread
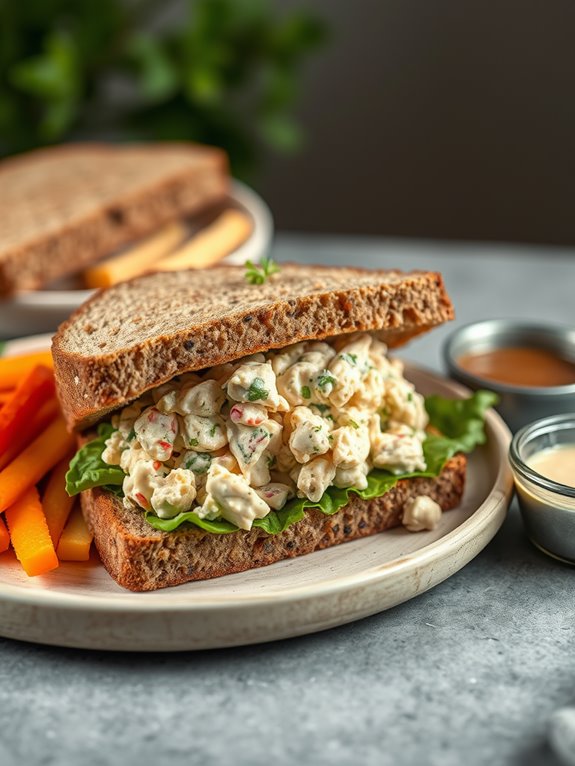
Preparing this chicken salad is simple and can be done in under 30 minutes. The ingredients are easy to find, and you can customize the recipe to suit your preferences by adding your favorite herbs or spices.
Serve it on slices of whole grain bread for a wholesome meal that will keep you energized throughout the day.
Ingredients:
- 2 cups cooked chicken, shredded or diced
- 1/2 cup plain Greek yogurt
- 1/4 cup mayonnaise
- 1/4 cup diced celery
- 1/4 cup diced red onion
- 1/4 cup diced bell pepper (any color)
- 1 tablespoon Dijon mustard
- 1 tablespoon lemon juice
- Salt and pepper to taste
- Whole grain bread slices
Cooking Instructions:
In a large mixing bowl, combine the shredded chicken, Greek yogurt, mayonnaise, diced celery, red onion, and bell pepper.
Add the Dijon mustard, lemon juice, and season with salt and pepper to taste. Mix all the ingredients thoroughly until well combined. If you prefer a creamier texture, you can add a bit more mayonnaise or yogurt according to your liking.
Once your chicken salad is ready, take slices of whole grain bread and generously spread the chicken salad mixture on one slice before topping it with another slice of bread.
You can also serve the chicken salad open-faced for a lighter option. For meal prep, store the chicken salad in an airtight container in the fridge, and assemble your sandwiches just before serving to keep the bread fresh.
Extra Tips:
For added flavor and texture, consider mixing in chopped nuts, such as walnuts or almonds, or throwing in some dried cranberries or grapes for a sweet touch.
If you want to make this dish even healthier, you can substitute half of the mayonnaise with more Greek yogurt.
Feel free to adjust the seasonings and ingredients to suit your taste—there are endless possibilities with chicken salad!
Mediterranean Tuna Salad Pita
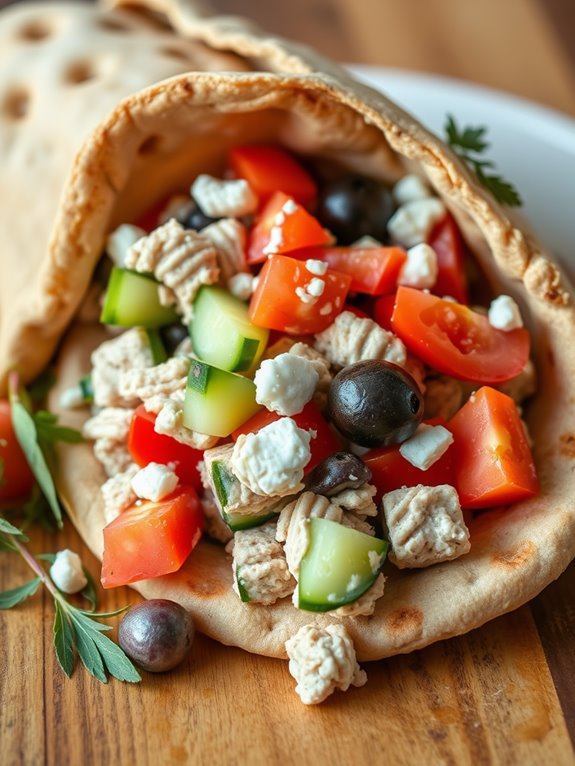
Mediterranean Tuna Salad Pita is a delightful and nutritious option for anyone looking for a quick meal that bursts with flavor. This dish combines fresh ingredients, zesty Mediterranean flavors, and protein-rich tuna, making it a perfect grab-and-go lunch or snack.
The best part is that it's easy to prepare, versatile, and can be stored for a few days in the refrigerator, ensuring you have delicious meals ready whenever hunger strikes.
To prepare this Mediterranean-inspired meal, you'll need just a few simple ingredients that aren't only healthy but also readily available. The combination of crunchy vegetables, creamy dressing, and hearty pita pockets creates a satisfying meal that can be enjoyed at home or on the go.
Perfect for meal prepping, this tuna salad can be made in advance and assembled when it's time to eat.
Ingredients:
- 1 can of tuna (drained)
- 1/4 cup Greek yogurt
- 1 tablespoon olive oil
- 1 tablespoon lemon juice
- 1/4 cup diced cucumber
- 1/4 cup diced tomatoes
- 2 tablespoons diced red onion
- 1/4 cup chopped Kalamata olives
- 1/4 cup crumbled feta cheese
- Salt and pepper to taste
- Whole wheat pita pockets
Cooking Instructions:
In a medium mixing bowl, combine the drained tuna, Greek yogurt, olive oil, and lemon juice. Stir well to combine until the mixture is creamy and evenly mixed.
Next, add in the diced cucumber, tomatoes, red onion, Kalamata olives, and crumbled feta cheese. Gently fold the ingredients together until everything is well incorporated. Season with salt and pepper to taste.
Once the salad is ready, slice the whole wheat pita pockets in half to create a pocket. Spoon the Mediterranean tuna salad into each pita half generously.
Serve immediately or store in an airtight container in the refrigerator for up to three days, allowing the flavors to meld together.
Extra Tips:
For added crunch, consider including some chopped bell peppers or shredded carrots into the salad mixture.
If you're short on time, you can use pre-packaged tuna salad mixes or even canned chickpeas for a vegetarian option. Additionally, consider serving the pita with a side of fresh veggies or a light salad to complete your meal.
Enjoy the fresh flavors and the convenience of this Mediterranean Tuna Salad Pita!
Peanut Butter and Banana Sandwich
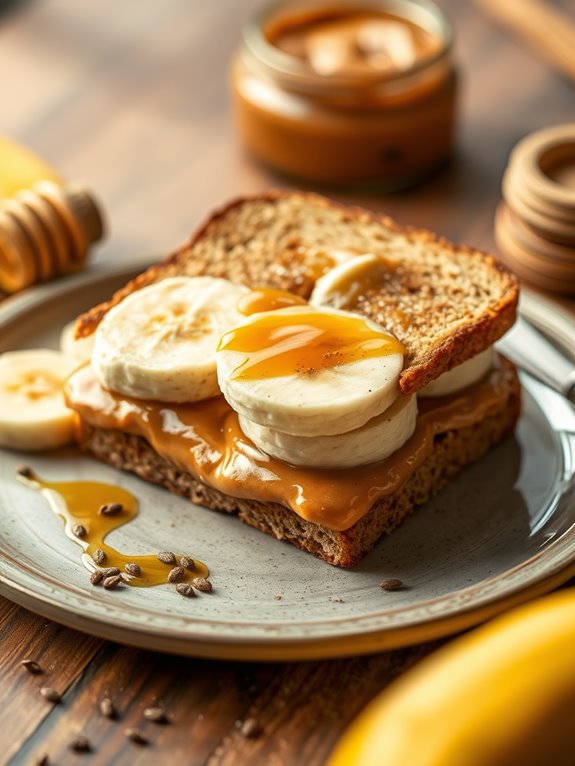
Peanut Butter and Banana Sandwich is a classic, wholesome option that combines the rich creaminess of peanut butter with the natural sweetness of bananas. This sandwich isn't only simple to make but also packed with energy and nutrients, making it a perfect grab-and-go meal for breakfast, lunch, or a snack.
The combination of protein from the peanut butter and carbohydrates from the banana guarantees you stay fueled throughout the day. Making this sandwich requires minimal effort, and you can prepare several in advance for an easy meal prep solution.
Simply layer your ingredients, and you'll have a delicious and satisfying sandwich ready to be enjoyed anytime. Not only is it a great source of energy, but it's also a kid-friendly option that can please even the pickiest eaters.
Ingredients:
- 2 slices of whole grain bread
- 2 tablespoons of peanut butter
- 1 ripe banana
- Honey (optional)
- Cinnamon (optional)
- Chia seeds or flaxseeds (optional)
To make the Peanut Butter and Banana Sandwich, start by spreading a generous amount of peanut butter on one side of each slice of bread. If you want to add a little sweetness, drizzle some honey over the peanut butter.
Next, peel the ripe banana and slice it into thin rounds. Layer the banana slices evenly on one slice of the bread, and sprinkle a dash of cinnamon and some chia or flaxseeds if desired for added nutrition. Place the other slice of bread on top, peanut butter side down, and gently press to secure the layers together.
For extra tips, consider making multiple sandwiches at once and wrapping them tightly in plastic wrap or aluminum foil for easy storage. You can also experiment with different types of nut butters, such as almond or cashew, for a unique flavor twist.
To keep your bananas from browning, you can add a little lemon juice to the slices before assembling the sandwich. Enjoy your delicious, nutritious sandwich on the go!
Roast Beef and Cheddar With Horseradish Mayo

When it comes to meal prep, sandwiches are a fantastic option for a quick, satisfying lunch or snack on the go. The Roast Beef and Cheddar with Horseradish Mayo sandwich is a classic combination that balances bold flavors with creamy textures.
With the zesty kick of horseradish mayo complementing the savory roast beef and sharp cheddar cheese, this sandwich is sure to become a favorite in your meal prep rotation.
Making this sandwich is as simple as gathering your ingredients and assembling everything to create a delicious grab-and-go meal. Preparing the horseradish mayo adds a personal touch that elevates the overall flavor profile.
In just a few easy steps, you can have a hearty sandwich ready for the week ahead.
Ingredients:
- 8 slices of rye or whole wheat bread
- 1 pound of thinly sliced roast beef
- 8 slices of sharp cheddar cheese
- 1/2 cup mayonnaise
- 2 tablespoons prepared horseradish
- Salt and pepper to taste
- Optional: lettuce, tomato slices, or pickles
Instructions:
- In a small bowl, mix the mayonnaise and prepared horseradish until well combined. Season with salt and pepper to taste. This will be your horseradish mayo spread.
- Lay out four slices of bread on a clean surface. Spread a generous portion of the horseradish mayo on each slice.
- Layer the roast beef evenly on top of the mayo spread, followed by the cheddar cheese. If you're adding any optional ingredients like lettuce or tomato, layer those on top as well.
- Top with the remaining slices of bread and press down gently to secure the sandwich. If desired, you can slice the sandwiches in half for easier handling.
- Wrap each sandwich individually in plastic wrap or store them in airtight containers for meal prep. Refrigerate until ready to enjoy.
Extra Tips:
To customize your Roast Beef and Cheddar sandwich, feel free to experiment with different types of bread or cheese.
You can also adjust the amount of horseradish in the mayo to suit your taste preferences. For added freshness, consider adding some arugula or spinach and swapping the cheddar for a more mild cheese if you prefer.
Make sure to store your sandwiches in the refrigerator, and they should stay fresh for up to four days, making them perfect for your busy week ahead!
Egg Salad With Spinach on Rye
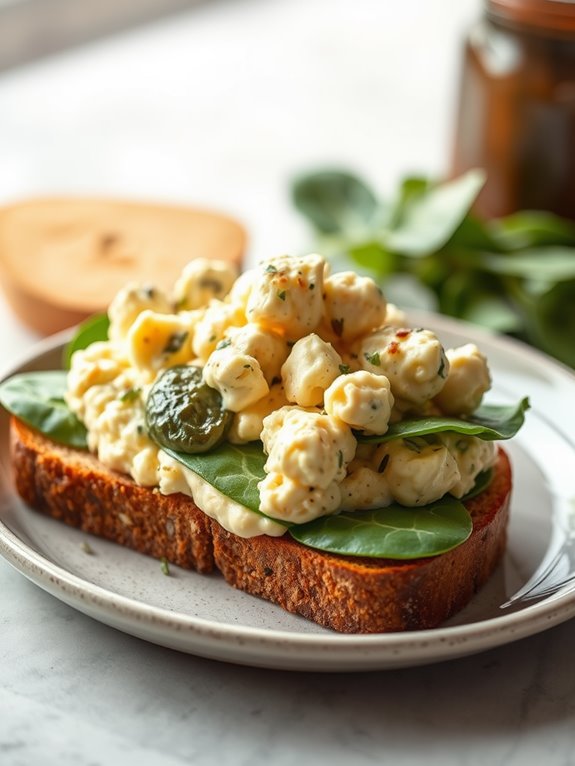
Egg salad is a classic sandwich filling that's both satisfying and versatile. When combined with fresh spinach and served on hearty rye bread, it becomes a nutritious meal option perfect for any time of day. This recipe isn't only easy to make but also allows you to prep in advance, making it an ideal grab-and-go option for busy lifestyles.
The creamy texture of the egg salad pairs perfectly with the slight earthiness of the spinach, while the rye adds a delightful crunch and depth of flavor.
To make this egg salad with spinach on rye, you'll need just a few simple ingredients that can easily be prepared ahead of time. Whether you're packing lunch for work, school, or a picnic, this sandwich will keep you satisfied and energized. Additionally, it can be customized with your favorite herbs and spices, allowing you to put your own twist on this timeless dish.
Ingredients:
- 6 hard-boiled eggs
- 1/4 cup mayonnaise
- 1 tablespoon Dijon mustard
- Salt and pepper to taste
- 1/4 cup finely chopped red onion
- 1/4 cup chopped fresh spinach
- 8 slices of rye bread
- Additional spinach leaves for layering
Instructions:
Start by peeling the hard-boiled eggs and placing them in a mixing bowl. Mash the eggs with a fork until they reach your desired consistency. Add in the mayonnaise, Dijon mustard, salt, and pepper, mixing well to combine.
Then, fold in the finely chopped red onion and fresh spinach, ensuring everything is evenly distributed. Taste and adjust seasoning if necessary.
Next, assemble your sandwiches by spreading a generous amount of the egg salad mixture onto four slices of rye bread. Layer fresh spinach leaves on top of the egg salad for added crunch and nutrition.
Finally, top each sandwich with another slice of rye bread, cut in half or quarters if desired, and enjoy right away or store in an airtight container in the refrigerator until ready to eat.
Extra Tips:
For added flavor, consider mixing in some herbs like dill or chives into the egg salad. You can also swap out the mayonnaise for Greek yogurt for a lighter version.
If you're looking to enhance the texture, try adding diced celery or pickles. This egg salad can be made a day in advance, which allows the flavors to meld beautifully, making it an excellent meal prep option.
Grilled Veggie and Goat Cheese Panini
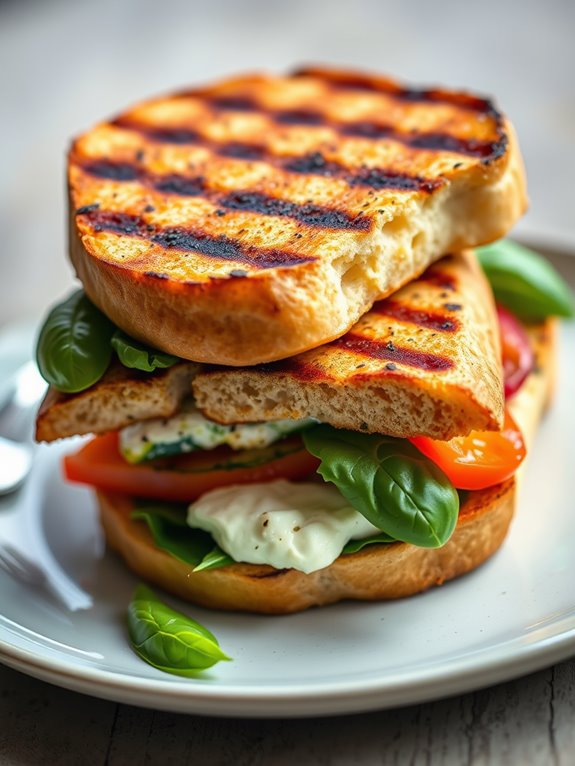
Grilled Veggie and Goat Cheese Panini is the perfect solution for a quick, healthy meal that packs a punch of flavor. This delightful sandwich combines the rich creaminess of goat cheese with a medley of grilled vegetables, creating a satisfying option that can be enjoyed hot or cold. Ideal for meal prep, these paninis can be made ahead of time and simply reheated when you're ready to eat, making them a great grab-and-go meal.
To achieve the best results, choosing fresh, seasonal vegetables will elevate your panini to the next level. Zucchini, bell peppers, and red onions are excellent choices that not only add depth of flavor but also vibrant color. The combination of the grilled veggies and tangy goat cheese is sure to impress even the pickiest of eaters. So grab your ingredients and let's get started on making these delicious sandwiches!
Ingredients:
- 4 slices of whole grain or ciabatta bread
- 1 cup zucchini, sliced
- 1 cup bell peppers, sliced (any color)
- 1 small red onion, sliced
- 4 oz goat cheese, softened
- 2 tablespoons olive oil
- Salt and pepper, to taste
- Fresh basil leaves (optional)
Cooking Instructions:
Begin by preheating your grill or grill pan over medium heat. In a bowl, toss the sliced zucchini, bell peppers, and red onion with olive oil, salt, and pepper.
Place the vegetables on the grill and cook for about 4-5 minutes on each side until they're tender and have nice grill marks. Remove the vegetables from the grill and set them aside to cool slightly.
To assemble the panini, spread a generous layer of goat cheese on one side of each slice of bread. Layer the grilled vegetables on two slices of bread, adding fresh basil leaves if desired.
Top with the remaining slices of bread, cheese side down. Grill the sandwiches on the panini press or grill pan for about 3-4 minutes on each side, or until the bread is golden brown and crispy. Remove from heat, slice, and serve warm or pack them for later.
Extra Tips:
For added flavor, consider marinating the vegetables in balsamic vinegar before grilling. This will enhance their sweetness and give your panini a depth of flavor.
Additionally, if you prefer a crispier finish, you can brush the outside of the bread with a little more olive oil before grilling. These paninis are versatile, so feel free to experiment with different veggies or add a layer of pesto for an extra kick!
Smoked Salmon and Cream Cheese Bagel

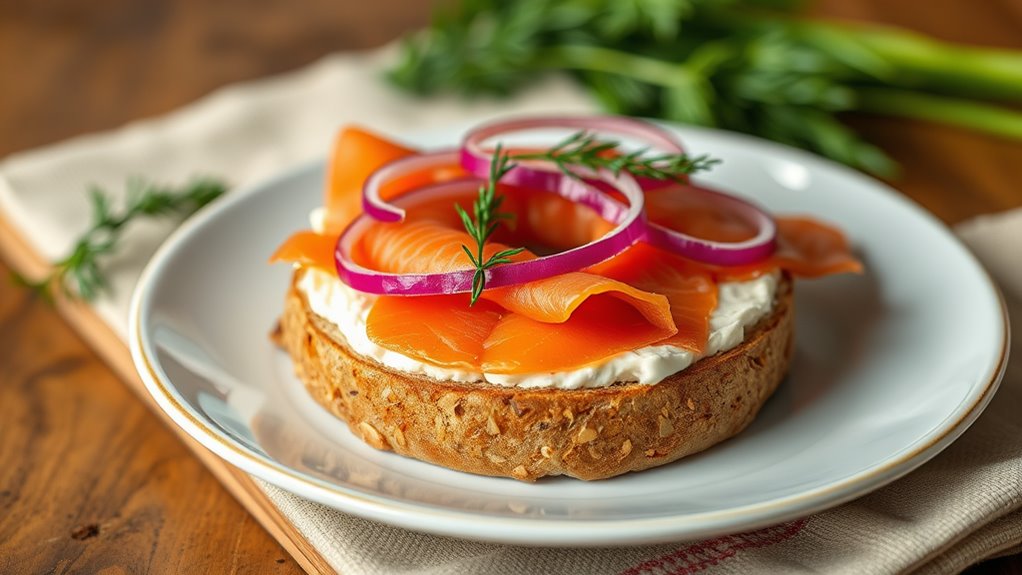
Smoked salmon and cream cheese bagels are a delicious and sophisticated option for meal prep that can be enjoyed for breakfast, lunch, or even a light dinner. This dish isn't only quick to make but also offers a perfect balance of flavors and textures. The creamy richness of the cream cheese combined with the savory, smoky notes of the salmon creates a satisfying meal that's both nutritious and filling.
Plus, assembling these bagels is simple, making them a fantastic grab-and-go option for busy days. To elevate your smoked salmon bagel, you can add various toppings such as capers, red onion, and fresh dill, which enhance the overall flavor profile.
These bagels can be made in advance and stored in the refrigerator, making them an ideal choice for meal prepping. When you're ready to enjoy, simply grab a bagel, and you're set for a quick and tasty meal.
Ingredients:
- 2 whole grain bagels
- 4 oz cream cheese, softened
- 4 oz smoked salmon
- 1/4 red onion, thinly sliced
- 1 tbsp capers, drained
- Fresh dill, for garnish
- Lemon wedges (optional)
Instructions:
Start by slicing the whole grain bagels in half and toasting them lightly until golden brown. In a mixing bowl, spread the softened cream cheese evenly over each half of the toasted bagels.
Next, layer the smoked salmon generously on top of the cream cheese. Add the thinly sliced red onions and sprinkle the capers over the salmon for an added burst of flavor. Finally, garnish with fresh dill for a pop of color and taste.
For meal prepping, you can store the assembled bagels in an airtight container in the refrigerator for up to 3 days. When ready to eat, consider adding a squeeze of fresh lemon juice to enhance the flavors even more.
Extra Tips:
To make the bagels even more flavorful, consider adding a touch of garlic powder or lemon zest to the cream cheese before spreading it on the bagels. If you're preparing these for later, keep the toppings (like onions and capers) separate until you're ready to eat to prevent the bagels from getting soggy.
Enjoy your smoked salmon and cream cheese bagels as a nutritious and satisfying option that's perfect for any meal!
Frequently Asked Questions
How Long Can I Store Prepared Sandwiches in the Fridge?
Like a well-planned heist, you want your sandwiches to stay fresh. You can store prepared sandwiches in the fridge for about three to four days. Just make sure they're properly wrapped to maintain their quality!
What Are the Best Bread Options for Meal Prep Sandwiches?
When choosing bread for meal prep sandwiches, opt for whole grain, sourdough, or ciabatta. These options hold up well over time, enhancing flavor and texture while still being easy to handle and delicious.
Can I Freeze These Sandwiches for Later Use?
Yes, you can freeze those sandwiches for later use. Just wrap them tightly in plastic wrap or foil, and store them in an airtight container. When you're ready, simply thaw and enjoy!
How Do I Prevent Bread From Getting Soggy?
To prevent bread from getting soggy, you can spread condiments on the inside of the bread, use sturdy bread types, and add ingredients like lettuce or cheese as barriers between wet fillings and the bread.
What Are Some Gluten-Free Alternatives for Sandwich Bread?
When bread's a no-show, you can embrace the wild world of gluten-free! Try lettuce wraps, rice cakes, or even quinoa patties. You'll have a sandwich that's more adventurous than your average loaf, trust me!