As an affiliate, we may earn a commission from qualifying purchases. We get commissions for purchases made through links on this website from Amazon and other third parties.
If you're looking to elevate your gluten-free cooking, cast iron skillets are a game changer. They not only distribute heat evenly but also offer the perfect platform for a variety of delicious dishes. From savory Skillet Chicken Fajitas to indulgent Chocolate Chip Skillet Cookies, these recipes showcase vibrant flavors and textures. Ready to explore some satisfying one-pan meals that could transform your dining experience? Let's get started.
Key Takeaways
- Skillet Chicken Fajitas feature marinated chicken and vibrant bell peppers, making a flavorful gluten-free meal with a fun sizzling presentation.
- Garlic Butter Shrimp and Asparagus combines succulent shrimp with tender asparagus in a rich garlic butter sauce, perfect for a quick gluten-free dinner.
- Sweet Potato and Black Bean Hash offers a nutritious and hearty option, easily customizable with spices or toppings for any meal of the day.
- Zucchini Noodles with Pesto serve as a gluten-free alternative to pasta, featuring fresh ingredients and retaining a delightful crunch.
- Chocolate Chip Skillet Cookie provides a warm, gooey dessert experience, perfect for sharing and made gluten-free with almond flour.
Skillet Chicken Fajitas
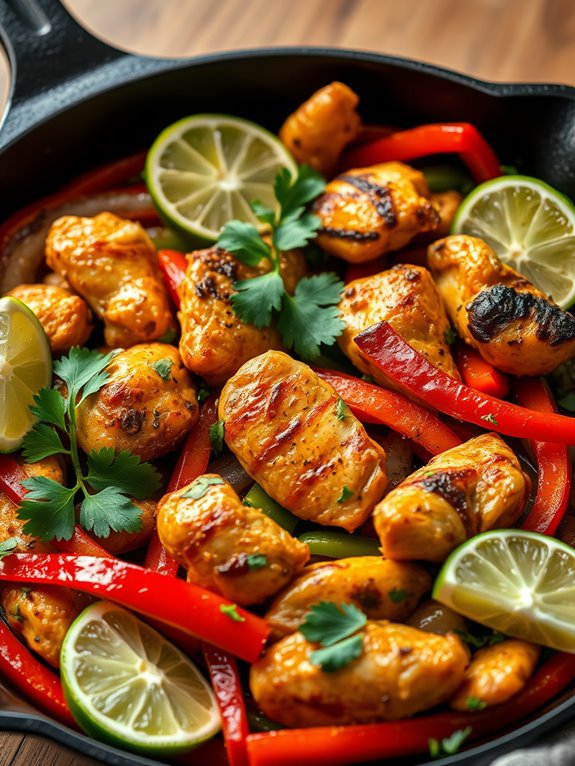
Skillet Chicken Fajitas are a delightful and flavorful dish that's easy to whip up in a cast iron skillet. The combination of marinated chicken, colorful bell peppers, and zesty spices creates a mouthwatering meal that's perfect for any night of the week. Not only are they gluten-free, but they also offer a vibrant presentation that will impress your family and friends.
This recipe isn't just about satisfying hunger; it's about bringing everyone together around the table. The sizzling sound of the chicken and vegetables in the skillet adds a fun element to the meal, making it feel like a special occasion. Serve these fajitas with your favorite gluten-free tortillas or over a bed of lettuce for a low-carb option.
Ingredients:
- 1 lb boneless, skinless chicken breasts
- 2 tablespoons olive oil
- 1 teaspoon chili powder
- 1 teaspoon cumin
- 1 teaspoon smoked paprika
- 1/2 teaspoon garlic powder
- 1/2 teaspoon onion powder
- Salt and pepper to taste
- 1 red bell pepper, sliced
- 1 green bell pepper, sliced
- 1 yellow onion, sliced
- Lime wedges (for serving)
- Fresh cilantro (for garnish)
To make Skillet Chicken Fajitas, start by slicing the chicken breasts into thin strips. In a bowl, combine olive oil, chili powder, cumin, smoked paprika, garlic powder, onion powder, salt, and pepper. Add the chicken strips to the marinade and mix until evenly coated. Allow the chicken to marinate for at least 15 minutes.
While the chicken is marinating, prepare the vegetables by slicing the bell peppers and onion. Heat your cast iron skillet over medium-high heat and add a splash of olive oil. Once the skillet is hot, add the marinated chicken and cook for about 5-7 minutes, or until the chicken is cooked through and golden brown.
Next, add the sliced bell peppers and onion to the skillet, stirring to combine. Cook for an additional 5-7 minutes until the vegetables are tender and slightly charred. Once everything is cooked, remove the skillet from heat and serve the fajitas with lime wedges and fresh cilantro on top. Enjoy them with gluten-free tortillas or on their own for a delicious and healthy meal.
Extra Tips: For an extra burst of flavor, consider adding some sliced jalapeños for heat or a sprinkle of feta cheese for creaminess. You can also customize the veggies based on what you have on hand, such as zucchini or mushrooms. Don't forget to let the skillet cool down properly before cleaning to maintain its seasoning and longevity.
Garlic Butter Shrimp and Asparagus
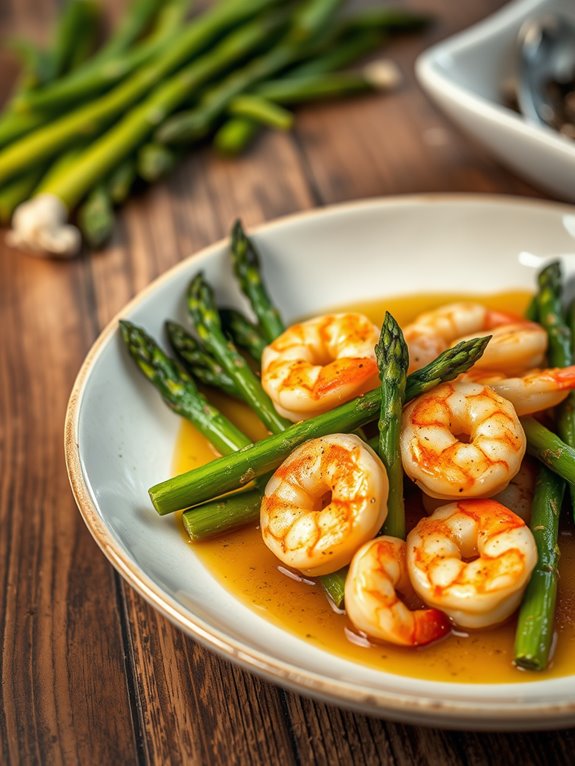
Garlic Butter Shrimp and Asparagus is a quick and flavorful dish that brings together succulent shrimp and tender asparagus in a rich garlic butter sauce. Perfect for a weeknight dinner or a special occasion, this recipe isn't only gluten-free but also bursting with fresh flavors.
The combination of garlic, lemon, and butter elevates the taste of the shrimp while the asparagus adds a delightful crunch, making it a balanced and satisfying meal.
Cooking this dish in a cast iron skillet guarantees even heat distribution, allowing the shrimp to cook perfectly while the asparagus stays crisp-tender. This recipe is simple enough for beginners yet impressive enough to wow guests. Serve it over rice or alongside a fresh salad for a complete meal that everyone will love.
Ingredients:
- 1 pound large shrimp, peeled and deveined
- 1 bunch of asparagus, trimmed and cut into 2-inch pieces
- 4 tablespoons unsalted butter
- 4 cloves garlic, minced
- 1 teaspoon red pepper flakes (optional)
- Juice of 1 lemon
- Salt and pepper to taste
- Fresh parsley, chopped (for garnish)
Cooking Instructions:
- In a cast iron skillet, melt 2 tablespoons of butter over medium heat. Add the minced garlic and red pepper flakes, sautéing for about 30 seconds until fragrant. Make sure not to burn the garlic.
- Add the shrimp to the skillet, seasoning them with salt and pepper. Cook for 2-3 minutes on one side until they turn pink. Flip the shrimp over and add the asparagus to the skillet. Pour in the lemon juice and the remaining butter, stirring to combine. Cook for an additional 3-4 minutes, or until the asparagus is tender and the shrimp are fully cooked.
Extra Tips:
For an extra burst of flavor, consider adding a splash of white wine to the skillet after cooking the shrimp. This will enhance the sauce and add depth to the dish.
Additionally, feel free to customize the vegetables based on what you have on hand—zucchini or bell peppers would also work beautifully in this recipe. Always remember to keep an eye on the shrimp, as they cook quickly and can become rubbery if overcooked.
Enjoy your Garlic Butter Shrimp and Asparagus!
Sweet Potato and Black Bean Hash
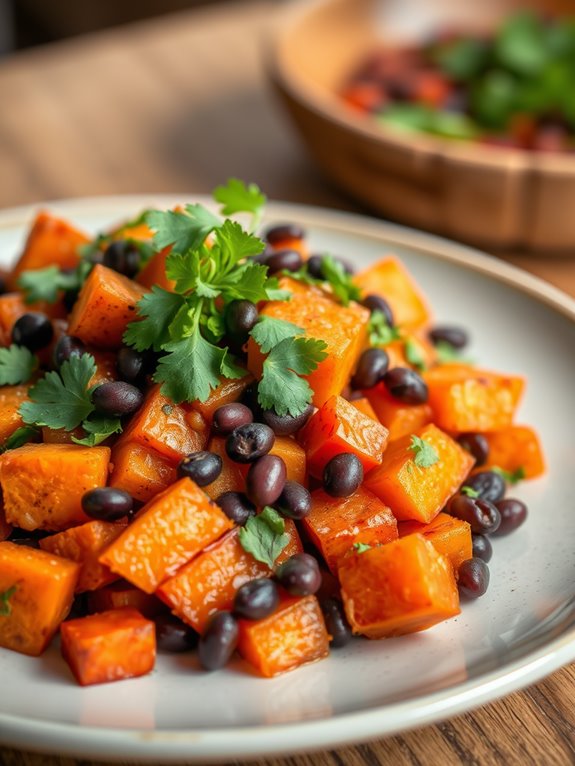
Sweet Potato and Black Bean Hash is a hearty and nutritious dish that can be enjoyed for breakfast, lunch, or dinner. The combination of sweet potatoes and black beans provides a balance of flavors and textures, making it a filling meal that's also gluten-free.
Cooking this dish in a cast iron skillet not only enhances the flavor but also allows for even cooking and a delightful crispy finish on the sweet potatoes.
This recipe is straightforward and quick to prepare, making it perfect for busy weeknights or leisurely weekend brunches. The vibrant colors and wholesome ingredients will make it a favorite at the dining table. Plus, it's versatile; you can easily customize it by adding your favorite spices or toppings, such as avocado or a sprinkle of feta cheese.
Ingredients:
- 2 medium sweet potatoes, peeled and diced
- 1 can (15 oz) black beans, drained and rinsed
- 1 small onion, diced
- 2 cloves garlic, minced
- 1 red bell pepper, diced
- 1 teaspoon cumin
- 1 teaspoon smoked paprika
- Salt and pepper, to taste
- 2 tablespoons olive oil
- Fresh cilantro, for garnish (optional)
Cooking Instructions:
Begin by heating the olive oil in a cast iron skillet over medium heat. Once hot, add the diced sweet potatoes and cook for about 10-12 minutes, stirring occasionally, until they begin to soften and develop a golden-brown crust.
Add the diced onion, red bell pepper, and minced garlic to the skillet, cooking for an additional 5 minutes until the vegetables are tender.
Next, stir in the black beans, cumin, smoked paprika, salt, and pepper. Cook for another 5 minutes, allowing the flavors to meld together.
Once everything is heated through and the sweet potatoes are fully cooked, remove from heat. Garnish with fresh cilantro if desired, and serve warm.
Extra Tips:
For added depth of flavor, consider roasting the sweet potatoes in the oven instead of sautéing them on the stovetop.
You can also experiment with different spices, such as chili powder or cayenne pepper, to give the dish an extra kick.
Don't forget to adjust the cooking time based on the size of your sweet potato cubes; uniform pieces will facilitate even cooking.
If you have leftovers, this hash makes for a delicious filling in a wrap or as a topping for a salad the next day!
Lemon Herb Grilled Salmon
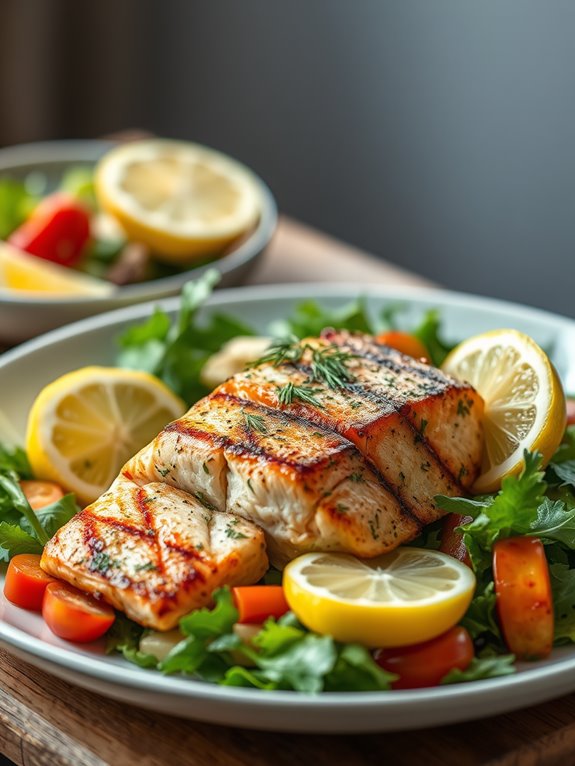
Lemon Herb Grilled Salmon is a delightful and healthy dish that brings together the vibrant flavors of fresh herbs and zesty lemon, making it a perfect option for a light dinner or a summer barbecue. Cooking this dish in a cast iron skillet not only enhances the flavor but also guarantees that the salmon retains its moisture, resulting in a tender and flaky texture.
The combination of herbs like dill and parsley with the acidity of the lemon adds an aromatic touch that elevates this dish to a whole new level. This recipe isn't only gluten-free but also incredibly simple to prepare, making it perfect for both novice and experienced cooks.
The cast iron skillet is ideal for achieving that perfect sear, while also allowing you to finish the cooking in the oven if needed. Serve it alongside fresh vegetables or a light salad for a complete meal that's both nutritious and delicious.
Ingredients:
- 2 salmon fillets
- 2 tablespoons olive oil
- 2 tablespoons fresh lemon juice
- Zest of 1 lemon
- 2 cloves garlic, minced
- 1 tablespoon fresh dill, chopped
- 1 tablespoon fresh parsley, chopped
- Salt and pepper to taste
- Lemon wedges, for serving
Cooking Instructions:
- Preheat your cast iron skillet over medium heat. While the skillet is heating, prepare the marinade by whisking together the olive oil, lemon juice, lemon zest, minced garlic, dill, parsley, salt, and pepper in a small bowl.
- Place the salmon fillets in a shallow dish and pour the marinade over them. Let them marinate for about 15-20 minutes. Once marinated, carefully remove the salmon from the dish, allowing any excess marinade to drip off.
- When the skillet is hot, add the salmon skin-side down. Cook for about 4-5 minutes until the skin is crispy and the salmon has cooked about halfway through. Carefully flip the salmon and cook for an additional 3-4 minutes, or until it reaches your desired doneness. If you prefer, you can finish cooking the salmon in a preheated oven at 400°F for an additional 5 minutes.
Extra Tips:
To guarantee your salmon cooks evenly, try to choose fillets that are of similar thickness. If you have leftover marinade, you can brush it over the salmon while it cooks for added flavor.
Also, let the salmon rest for a minute or two after cooking, as this allows the juices to redistribute, making each bite even more delicious. Enjoy your Lemon Herb Grilled Salmon with a side of your choice for a satisfying gluten-free meal!
Zucchini Noodles With Pesto
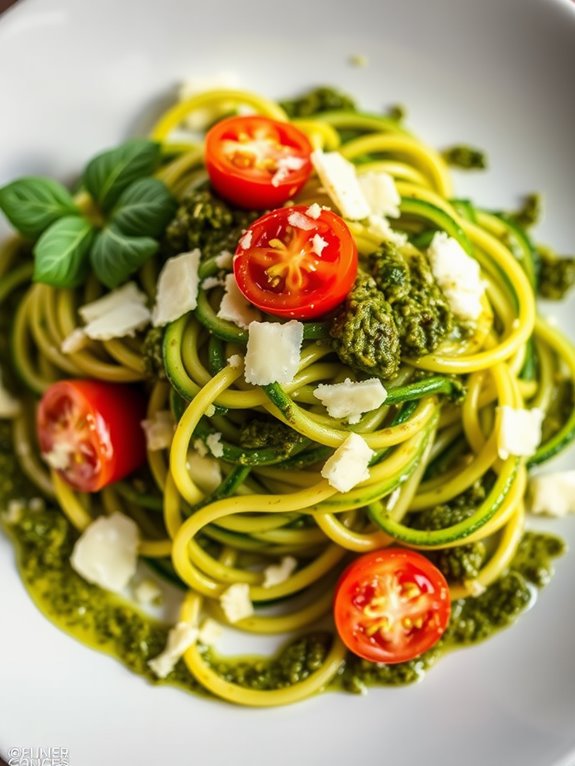
Zucchini noodles, or "zoodles," are a fantastic gluten-free alternative to traditional pasta. They aren't only low in calories but also packed with vitamins and antioxidants, making them a healthy choice for any meal.
When paired with a vibrant homemade pesto, these zoodles become a delightful dish that's both invigorating and satisfying. Cooking them in a cast iron skillet allows for even heat distribution, giving the noodles a slight char and enhancing their flavor.
This recipe for Zucchini Noodles with Pesto is easy to prepare and perfect for a quick weeknight dinner or a light lunch. The freshness of the zucchini combined with the aromatic basil and garlic from the pesto creates a delicious meal that's sure to please everyone at the table.
Grab your cast iron skillet, and let's get cooking!
Ingredients:
- 4 medium zucchinis
- 1 cup fresh basil leaves
- 1/4 cup pine nuts (or walnuts)
- 1/2 cup grated Parmesan cheese (or nutritional yeast for a vegan option)
- 2 cloves garlic, minced
- 1/4 cup extra-virgin olive oil
- Salt and pepper, to taste
- Cherry tomatoes, halved (optional, for garnish)
Cooking Instructions:
1. Begin by making the pesto. In a food processor, combine the basil, pine nuts, Parmesan cheese, and minced garlic. Pulse until finely chopped.
While the processor is running, slowly drizzle in the olive oil until the mixture is smooth. Season with salt and pepper to taste, then set aside.
2. Next, spiralize the zucchinis into noodles using a spiralizer. If you don't have one, you can use a vegetable peeler to create thin ribbons.
Heat your cast iron skillet over medium heat and add a drizzle of olive oil. Once hot, add the zucchini noodles and sauté for 2-3 minutes until they're just tender but still have a slight crunch.
Remove from heat and toss with the prepared pesto. Serve immediately, garnished with halved cherry tomatoes if desired.
Extra Tips:
When making zucchini noodles, be mindful not to overcook them as they can become mushy. It's best to sauté them just until they're slightly tender, retaining their crunch.
For added flavor, consider incorporating other vegetables like bell peppers or spinach into the skillet. Feel free to customize your pesto with different nuts or herbs to suit your taste.
Enjoy your dish fresh, as zoodles can release water if stored, making them less enjoyable the next day.
Cast Iron Pizza With Gluten-Free Crust
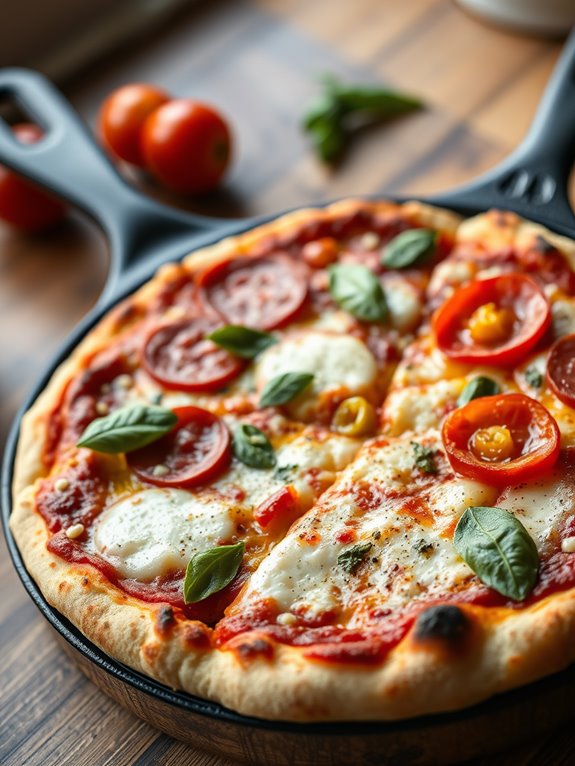
Creating a delicious cast iron pizza with a gluten-free crust is a fantastic way to enjoy a classic dish without the gluten. This recipe utilizes a blend of gluten-free flours to create a dough that's both sturdy and flavorful, giving you that satisfying bite you crave in pizza.
Cooking in a cast iron skillet enhances the crust's texture, making it crispy and golden brown while keeping the toppings perfectly melted.
With the addition of your favorite toppings, this gluten-free pizza can easily become a favorite for everyone at the table, regardless of dietary restrictions. Whether you prefer classic cheese and pepperoni or a veggie-loaded masterpiece, this recipe is adaptable to suit your tastes.
Gather your ingredients, heat your skillet, and let's get started on this delicious pizza night!
Ingredients:
- 1 ½ cups gluten-free all-purpose flour
- 1 teaspoon xanthan gum
- 1 teaspoon baking powder
- ½ teaspoon salt
- 1 teaspoon garlic powder
- 1 teaspoon dried oregano
- 1 tablespoon olive oil
- ¾ cup warm water
- 1 cup pizza sauce
- 1 ½ cups shredded mozzarella cheese
- Toppings of choice (pepperoni, vegetables, etc.)
Cooking Instructions:
1. Preheat your oven to 450°F (230°C) and place your cast iron skillet inside to heat up. In a mixing bowl, combine the gluten-free flour, xanthan gum, baking powder, salt, garlic powder, and dried oregano. Stir until well mixed.
2. Add the olive oil and warm water to the dry ingredients and mix until a dough forms. If the dough is too sticky, you can add a little more flour until it reaches a workable consistency. Once mixed, let the dough rest for about 10 minutes.
3. Carefully remove the hot cast iron skillet from the oven and lightly grease it with olive oil. Press the dough evenly into the bottom and up the sides of the skillet. Pre-bake the crust for about 10 minutes until it starts to set.
Remove it from the oven and spread the pizza sauce over the crust, followed by the mozzarella cheese and your chosen toppings.
4. Return the skillet to the oven and bake for an additional 15-20 minutes, or until the cheese is bubbly and the crust is golden brown.
Extra Tips:
When making gluten-free pizza crust, it's crucial to verify that your ingredients are truly gluten-free, as cross-contamination can occur.
If possible, let the dough sit for a bit longer before shaping it, as this can help improve the texture. Additionally, feel free to experiment with different gluten-free flours or add herbs and spices to the dough for extra flavor!
Enjoy your homemade cast iron pizza!
Spinach and Feta Stuffed Peppers
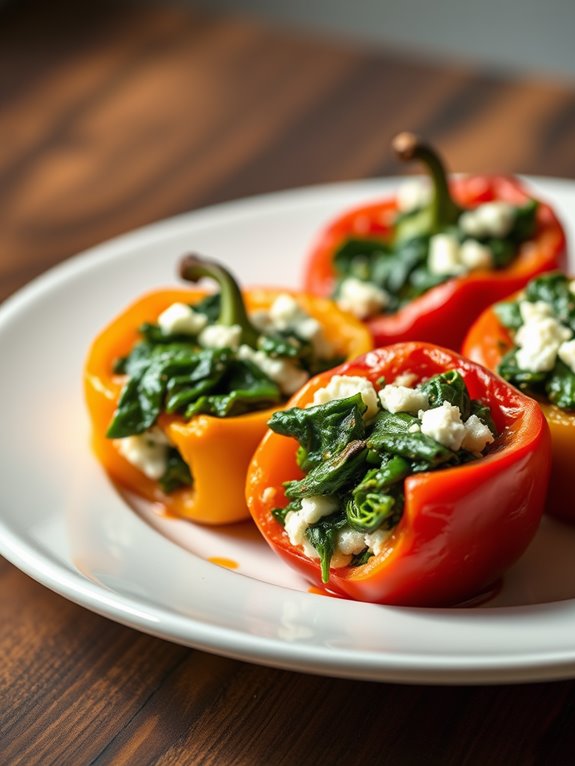
These stuffed peppers can serve as a perfect side dish or a main course, making them versatile for any meal. The combination of fresh ingredients and the ease of preparation will make this dish a favorite in your household.
It's a great way to enjoy the benefits of vegetables while indulging in the rich taste of feta cheese.
Ingredients:
- 4 medium bell peppers (any color)
- 2 cups fresh spinach, chopped
- 1 cup feta cheese, crumbled
- 1 cup cooked quinoa
- 1 small onion, finely chopped
- 2 cloves garlic, minced
- 2 tablespoons olive oil
- 1 teaspoon dried oregano
- Salt and pepper to taste
- 1/4 cup fresh parsley, chopped (for garnish)
Cooking Instructions:
1. Preheat your oven to 375°F (190°C). Begin by preparing the bell peppers: slice the tops off and remove the seeds and membranes. Place them upright in a cast iron skillet.
2. In a medium-sized skillet, heat the olive oil over medium heat. Add the chopped onion and garlic, sautéing until they become translucent. Stir in the chopped spinach and cook until wilted.
Remove from heat and mix in the cooked quinoa, crumbled feta, oregano, salt, and pepper until well combined.
3. Carefully spoon the spinach and feta mixture into each bell pepper, packing it down gently. Once all peppers are filled, cover the skillet with foil and bake for 25-30 minutes. Remove the foil for the last 10 minutes of cooking to allow the tops to brown slightly.
Extra Tips:
For an added layer of flavor, consider drizzling some balsamic glaze over the stuffed peppers just before serving.
You can also customize the filling by adding other vegetables or protein, such as black beans or diced tomatoes, depending on your taste preferences. If you want a spicier kick, sprinkle some crushed red pepper flakes into the filling.
Enjoy your delicious, healthy meal!
Quinoa and Vegetable Stir-Fry

Quinoa and vegetable stir-fry is a nutritious and delicious dish that can easily be made in a cast iron skillet. This dish not only highlights the versatility of quinoa but also allows you to incorporate a variety of colorful vegetables, making it both visually appealing and packed with flavors.
Perfect for a quick weeknight dinner or a healthy lunch, this stir-fry is gluten-free and can be customized based on your preferences.
To achieve the best texture and flavor, it's essential to properly prepare the quinoa and guarantee your vegetables are cut into uniform pieces. The cast iron skillet retains heat exceptionally well, allowing you to achieve a beautiful sear on your vegetables while keeping the quinoa fluffy.
Whether you're vegan, vegetarian, or simply looking to enjoy a wholesome meal, this quinoa and vegetable stir-fry is sure to satisfy your cravings.
Ingredients:
- 1 cup quinoa, rinsed
- 2 cups vegetable broth (or water)
- 1 tablespoon olive oil
- 1 small onion, diced
- 2 cloves garlic, minced
- 1 bell pepper, diced
- 1 zucchini, sliced
- 1 cup broccoli florets
- 1 carrot, julienned
- 2 tablespoons soy sauce (or tamari for gluten-free)
- 1 teaspoon sesame oil
- Salt and pepper to taste
- Fresh cilantro or green onions for garnish (optional)
Cooking Instructions:
Start by cooking the quinoa. In a medium pot, combine the rinsed quinoa and vegetable broth (or water) and bring it to a boil. Once it reaches a boil, reduce the heat to low, cover, and let it simmer for about 15 minutes or until all the liquid is absorbed.
Fluff the quinoa with a fork and set it aside.
While the quinoa is cooking, heat the olive oil in a cast iron skillet over medium-high heat. Add the diced onion and minced garlic and sauté until the onion becomes translucent.
Then, add the diced bell pepper, zucchini, broccoli, and carrots to the skillet. Stir-fry the vegetables for about 5-7 minutes or until they're tender but still crisp.
Once the vegetables are cooked, add the cooked quinoa to the skillet, followed by the soy sauce and sesame oil. Stir to combine everything well and season with salt and pepper to taste.
Cook for an additional 2-3 minutes to heat through.
Extra Tips:
When preparing your stir-fry, feel free to substitute or add any vegetables you have on hand, such as snap peas, mushrooms, or spinach.
Adjust the cooking time accordingly to guarantee all vegetables are cooked to your liking. For added protein, consider incorporating tofu or cooked chicken.
Additionally, if you prefer a spicier kick, add some red pepper flakes or a splash of sriracha when combining the quinoa with the vegetables.
Enjoy your vibrant and healthy stir-fry!
Savory Herb Cornbread

Savory Herb Cornbread is a delightful twist on traditional cornbread, infusing it with aromatic herbs and a savory flavor profile that makes it perfect for any meal. This gluten-free recipe is simple yet satisfying, ideal for pairing with soups, stews, or even as a standalone snack.
The crispy edges achieved by cooking in a cast iron skillet add a wonderful texture, while the fluffy interior guarantees that each bite is moist and flavorful. Using a blend of gluten-free cornmeal and almond flour, this cornbread isn't only delicious but also healthier than its conventional counterpart.
The combination of fresh herbs like rosemary and thyme elevates the dish, making it an excellent choice for gatherings or family dinners. Serve it warm with a pat of butter for an irresistible treat that everyone will love.
Ingredients:
- 1 cup gluten-free cornmeal
- 1 cup almond flour
- 1 tablespoon baking powder
- 1 teaspoon salt
- 1/2 teaspoon black pepper
- 2 tablespoons fresh rosemary, chopped
- 2 tablespoons fresh thyme, chopped
- 2 large eggs
- 1 cup milk (dairy or non-dairy)
- 1/4 cup melted butter or olive oil
Cooking Instructions:
Preheat your oven to 400°F (200°C) and place your cast iron skillet in the oven to heat up. In a large mixing bowl, combine the gluten-free cornmeal, almond flour, baking powder, salt, black pepper, rosemary, and thyme.
In another bowl, whisk together the eggs, milk, and melted butter or olive oil until well combined. Pour the wet ingredients into the dry ingredients and mix until just combined; be careful not to overmix.
Once the skillet is hot, carefully remove it from the oven and add a small amount of butter or oil to coat the bottom. Pour the cornbread batter into the skillet and spread it evenly. Return the skillet to the oven and bake for 20-25 minutes or until the top is golden brown and a toothpick inserted into the center comes out clean.
Let it cool slightly before slicing and serving.
Extra Tips:
For an extra burst of flavor, consider adding some shredded cheese or chopped jalapeños to the batter before baking. If you prefer a sweeter cornbread, you can add a tablespoon of honey or maple syrup to the wet mixture.
Store any leftovers in an airtight container, and reheat in the skillet for a crispy texture.
Chocolate Chip Skillet Cookie
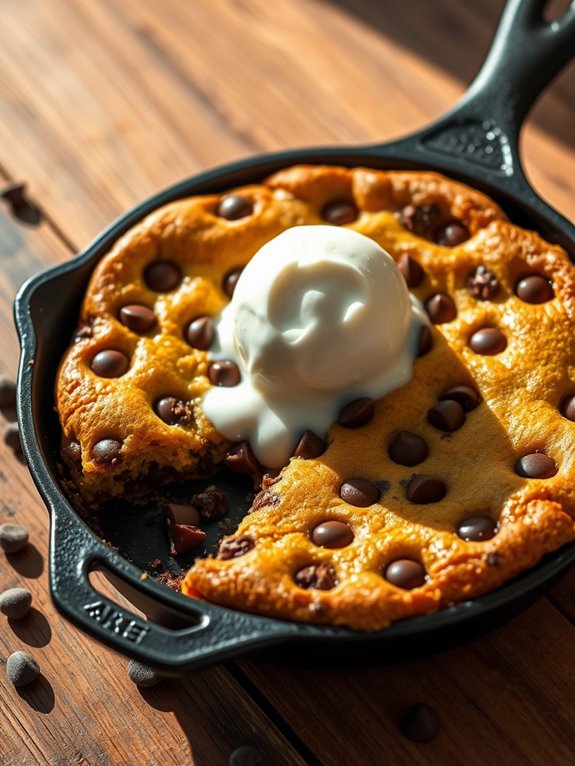
With just a few simple ingredients, you can whip up this delicious chocolate chip skillet cookie in no time. Whether you're hosting a dinner party or just looking for a cozy night in, this dessert will surely impress your guests and satisfy your sweet tooth.
So gather your ingredients and get ready to bake!
Ingredients:
- 1 cup gluten-free all-purpose flour
- 1/2 teaspoon baking soda
- 1/4 teaspoon salt
- 1/2 cup unsalted butter, melted
- 1/2 cup brown sugar, packed
- 1/4 cup granulated sugar
- 1 teaspoon vanilla extract
- 1 large egg
- 1 cup gluten-free chocolate chips
Instructions:
Preheat your oven to 350°F (175°C).
In a medium bowl, whisk together the gluten-free all-purpose flour, baking soda, and salt.
In a separate large bowl, combine the melted butter, brown sugar, and granulated sugar, mixing until well blended.
Stir in the vanilla extract and the egg until fully incorporated.
Gradually add the dry ingredients to the wet mixture, stirring until just combined.
Ultimately, fold in the gluten-free chocolate chips.
Pour the cookie dough into a preheated cast iron skillet, spreading it evenly.
Bake in the oven for 20-25 minutes or until the edges are golden brown and the center is set but still slightly soft.
Remove from the oven and allow to cool for a few minutes before serving.
For an extra treat, serve warm with a scoop of vanilla ice cream on top!
Extra Tips:
For added flavor, consider mixing in some chopped nuts or using different types of chocolate chips, such as dark or white chocolate.
Make sure to keep an eye on the cookie while it bakes, as ovens can vary in temperature.
If you prefer a thicker cookie, you can chill the dough for about 30 minutes before baking.
Ultimately, remember that the cookie will continue to cook slightly in the skillet even after you take it out of the oven, so it's best to underbake it slightly for that perfect chewy texture!
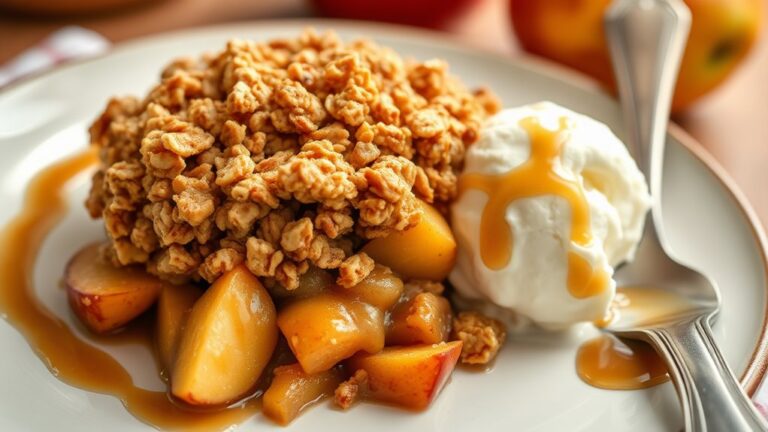
Apple Crisp With Oat Topping
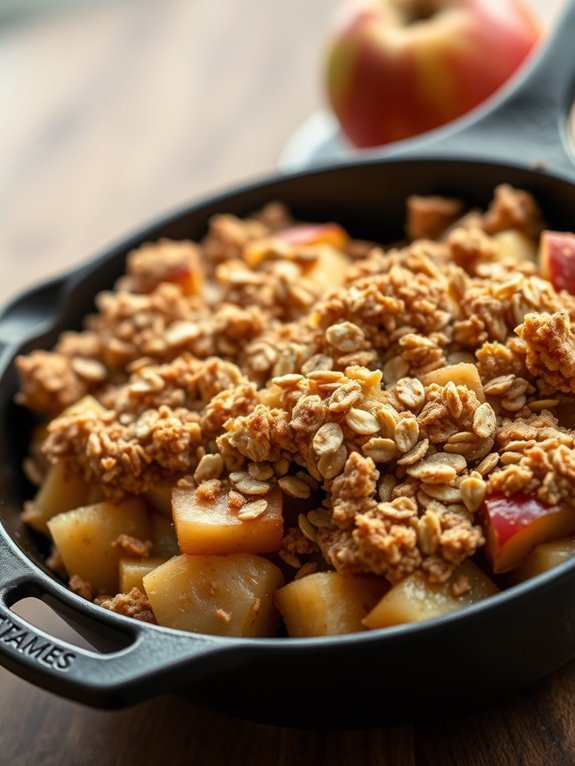
Apple Crisp With Oat Topping is a delightful dessert that combines the natural sweetness of apples with a crunchy, buttery topping. This gluten-free version utilizes oats and almond flour, making it a perfect treat for those with gluten sensitivities.
The warm, spiced apples paired with the crispy oat topping create a harmonious blend of textures and flavors, making it a favorite for gatherings or cozy nights at home. Cooking this dish in a cast iron skillet not only guarantees even heat distribution but also adds a rustic charm to your presentation.
The skillet can go from stovetop to oven seamlessly, making it an ideal choice for this comforting dessert. Serve it warm with a scoop of vanilla ice cream or a dollop of whipped cream for an extra indulgence.
Ingredients:
- 4 cups of peeled and sliced apples (such as Granny Smith or Honeycrisp)
- 1 tablespoon of lemon juice
- 1 teaspoon of ground cinnamon
- ½ cup of almond flour
- 1 cup of gluten-free oats
- ½ cup of brown sugar or coconut sugar
- ¼ cup of melted coconut oil or butter
- ½ teaspoon of salt
- ¼ teaspoon of nutmeg (optional)
Instructions:
Preheat your oven to 350°F (175°C). In a large cast iron skillet, combine the sliced apples with lemon juice and ground cinnamon, tossing to coat the apples evenly.
Spread the apple mixture evenly across the bottom of the skillet. In a separate bowl, mix together the almond flour, gluten-free oats, brown sugar, melted coconut oil, salt, and nutmeg (if using) until crumbly.
Sprinkle the oat topping generously over the apples. Place the skillet in the preheated oven and bake for about 30-35 minutes, or until the apples are tender and the topping is golden brown.
Once done, remove the skillet from the oven and allow it to cool slightly before serving.
Extra Tips:
For the best flavor, use a mix of sweet and tart apples, and feel free to add nuts or dried fruits to the oat topping for added texture.
If you want a touch of extra sweetness, drizzle some honey or maple syrup over the apples before adding the topping. Enjoy your delicious gluten-free apple crisp straight from the skillet for a rustic serving style!
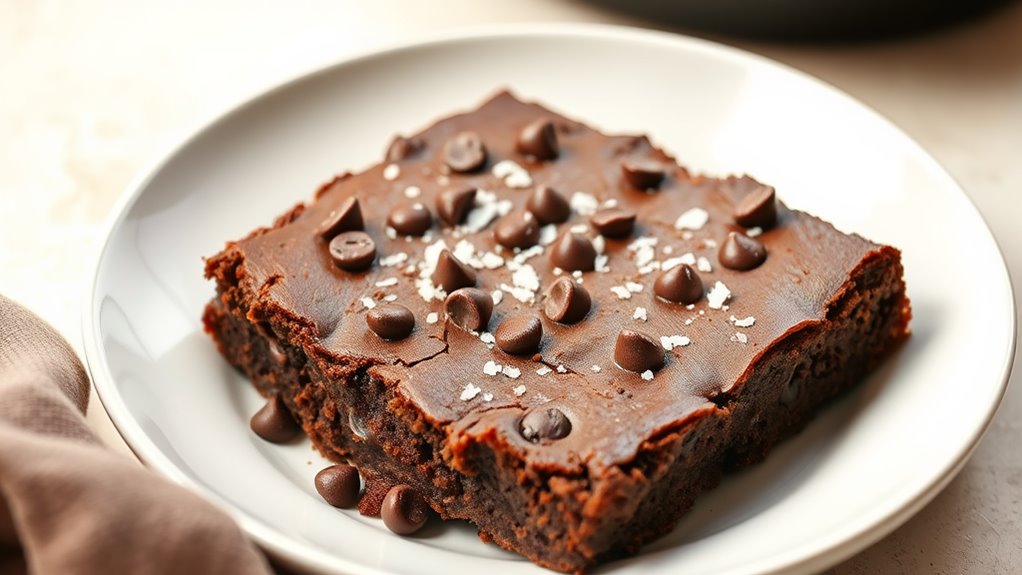
Skillet Brownies With Sea Salt
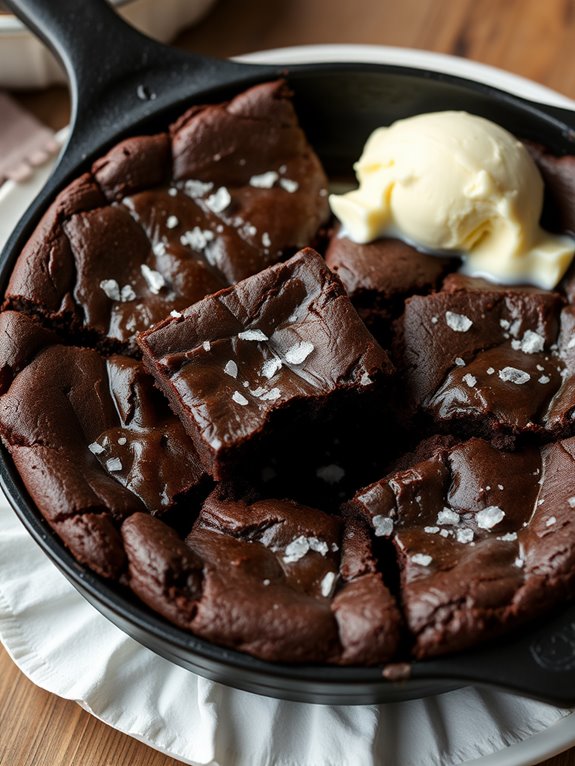
Skillet brownies are a delightful treat that combines the rich, fudgy texture of traditional brownies with the added charm of cooking them in a cast iron skillet. This method not only simplifies the baking process but also creates a beautifully crisp edge while keeping the center soft and gooey. Topped with a sprinkle of sea salt, these brownies offer an irresistible contrast of flavors that will have everyone reaching for seconds.
Making skillet brownies in a cast iron skillet is perfect for gatherings or simply satisfying your chocolate cravings. The best part is that you can whip them up in no time, and they require minimal cleanup. Whether you're hosting friends or just looking for a sweet indulgence after dinner, these gluten-free brownies are sure to impress.
Ingredients:
- 1 cup almond flour
- 1/2 cup unsweetened cocoa powder
- 1/2 teaspoon baking soda
- 1/4 teaspoon salt
- 1/2 cup coconut oil, melted
- 1/2 cup maple syrup or honey
- 2 large eggs
- 1 teaspoon vanilla extract
- 1/2 cup chocolate chips
- Sea salt for topping
To prepare your skillet brownies, start by preheating your oven to 350°F (175°C) and greasing your cast iron skillet with coconut oil. In a mixing bowl, combine the almond flour, cocoa powder, baking soda, and salt.
In another bowl, whisk together the melted coconut oil, maple syrup (or honey), eggs, and vanilla extract until well combined. Gradually fold the dry ingredients into the wet mixture until just combined, then stir in the chocolate chips. Pour the batter into the prepared skillet and smooth the top.
Bake in the preheated oven for 20-25 minutes, or until a toothpick inserted into the center comes out with a few moist crumbs. Remove the skillet from the oven and let the brownies cool for a few minutes before sprinkling sea salt on top. Serve warm, preferably with a scoop of vanilla ice cream for an extra treat.
Extra Tips:
For an added depth of flavor, consider mixing in chopped nuts or using dark chocolate chips for a richer taste. If you prefer a more cake-like texture, you can bake them a few minutes longer. Always keep an eye on the brownies towards the end of the baking time to prevent overcooking. Enjoy your delicious, gluten-free skillet brownies!
Frequently Asked Questions
Can I Use a Non-Stick Spray on My Cast Iron Skillet?
You can use non-stick spray on your cast iron skillet, but it's better to season it properly. A well-seasoned skillet provides natural non-stick properties, reducing the need for sprays and enhancing flavor in your dishes.
How Do I Properly Season My Cast Iron Skillet?
Imagine the warmth of a well-loved skillet. To properly season yours, scrub it clean, dry it thoroughly, and coat it with oil. Bake it upside down in the oven, letting the magic happen. Enjoy the results!
What Is the Best Way to Clean a Cast Iron Skillet?
To clean your cast iron skillet, scrub it with hot water and a stiff brush. Avoid soap, and dry it immediately. Apply a thin layer of oil to prevent rust and keep it seasoned.
Are There Any Specific Brands of Gluten-Free Flour Recommended?
When choosing gluten-free flour, brands like Bob's Red Mill and King Arthur Flour are popular. They offer versatile options that work well in various recipes, ensuring you get the best texture and flavor in your dishes.
Can I Use Frozen Vegetables in These Recipes?
Yes, you can definitely use frozen vegetables in your recipes! They're convenient and often just as nutritious. Just adjust cooking times to guarantee they heat through properly, and you'll enjoy a delicious meal.