As an affiliate, we may earn a commission from qualifying purchases. We get commissions for purchases made through links on this website from Amazon and other third parties.
While modern gadgets promise convenience, nothing beats the timeless charm of a cast iron roaster. Its ability to retain heat transforms simple ingredients into hearty, flavorful dishes. Whether you're craving a classic beef stew or a rustic vegetable medley, there's a recipe here that'll suit your taste. Let's explore these satisfying meals that not only nourish but also bring a sense of comfort to your table.
Key Takeaways
- Cast iron roasters provide even heat distribution, perfect for browning meats and achieving tender, flavorful dishes.
- Versatile recipes include classic beef stew, herb-roasted chicken, and savory pork tenderloin, showcasing various meats.
- Flavorful vegetable dishes like rustic vegetable medley and Moroccan-spiced vegetable tagine offer healthy, satisfying options.
- One-pan dishes such as baked ziti and cider-braised pork belly simplify cooking and cleanup while delivering hearty meals.
- Experiment with ingredients and seasonings to customize recipes and enhance flavor profiles in your cast iron roaster.
Classic Beef Stew
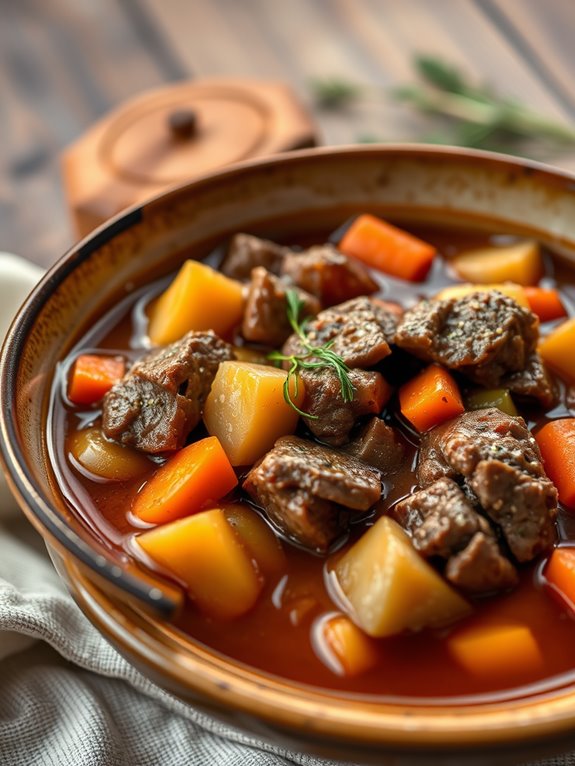
This beef stew isn't only comforting and satisfying, but it's also highly versatile. You can easily adapt the ingredients to include your favorite vegetables or adjust the seasoning to your taste. Gather your ingredients and prepare to create a dish that will have your family coming back for seconds!
Ingredients:
- 2 pounds beef chuck, cut into 1-inch cubes
- 3 tablespoons vegetable oil
- 1 large onion, chopped
- 3 cloves garlic, minced
- 4 cups beef broth
- 2 cups carrots, sliced
- 2 cups potatoes, diced
- 1 cup celery, chopped
- 2 tablespoons tomato paste
- 1 teaspoon dried thyme
- 1 teaspoon dried rosemary
- Salt and pepper to taste
- 1 bay leaf
- 2 tablespoons all-purpose flour (optional, for thickening)
Cooking Instructions:
Preheat your cast iron roaster over medium-high heat. Add the vegetable oil, then brown the beef cubes in batches, ensuring they're seared on all sides. Remove the beef and set aside.
In the same pot, add the chopped onion and garlic, cooking until they're soft and fragrant. Stir in the tomato paste, then return the beef to the pot along with the beef broth, carrots, potatoes, celery, thyme, rosemary, bay leaf, and season with salt and pepper.
Bring the stew to a boil, then reduce the heat to low. Cover and let it simmer for about 2 to 3 hours, or until the beef is tender and the flavors meld together beautifully.
If you prefer a thicker stew, you can whisk the flour with a small amount of water to create a slurry and stir it into the stew in the final 30 minutes of cooking.
Extra Tips:
For an even richer flavor, consider adding a splash of red wine to the beef broth. Additionally, feel free to experiment with other vegetables like peas or mushrooms, or even add some fresh herbs right before serving for an extra burst of flavor.
Remember to taste the stew before serving and adjust the seasoning as necessary, ensuring every bowl is perfectly seasoned and satisfying!
Herb-Roasted Chicken
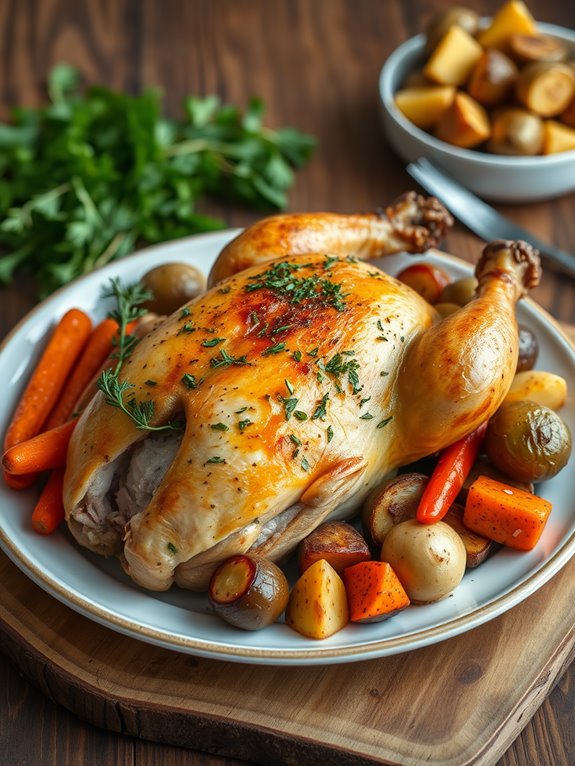
Using a cast iron roaster allows the chicken to cook evenly and retain moisture, resulting in tender meat that falls off the bone. The high heat guarantees that the skin crisps up beautifully while the herbs provide an aromatic touch that elevates the dish. This herb-roasted chicken is sure to become a staple in your home cooking repertoire.
Ingredients:
- 1 whole chicken (about 4-5 pounds)
- 2 tablespoons olive oil
- 1 tablespoon salt
- 1 teaspoon black pepper
- 1 tablespoon fresh rosemary, chopped
- 1 tablespoon fresh thyme, chopped
- 1 tablespoon fresh parsley, chopped
- 1 lemon, quartered
- 4 cloves garlic, crushed
- 1 onion, quartered
Instructions:
Preheat your oven to 425°F (220°C).
Begin by preparing the chicken: pat it dry with paper towels, which will help guarantee a crispy skin. In a small bowl, mix together the olive oil, salt, pepper, and chopped herbs. Rub this mixture all over the chicken, including under the skin for maximum flavor.
Stuff the cavity of the chicken with the lemon quarters, crushed garlic, and onion.
Place the seasoned chicken breast-side up in the cast iron roaster. Roast in the preheated oven for about 1 hour and 15 minutes, or until the internal temperature reaches 165°F (74°C) in the thickest part of the thigh. Baste the chicken with its juices halfway through cooking to keep it moist.
Once done, remove from the oven and let it rest for about 10-15 minutes before carving.
Extra Tips:
For an added flavor boost, consider marinating the chicken in the herb mixture for a few hours or overnight in the refrigerator. This allows the herbs to penetrate the meat more deeply.
Additionally, feel free to experiment with different herbs and spices based on your preference, and don't forget to save the pan drippings for a delicious gravy!
Rustic Vegetable Medley
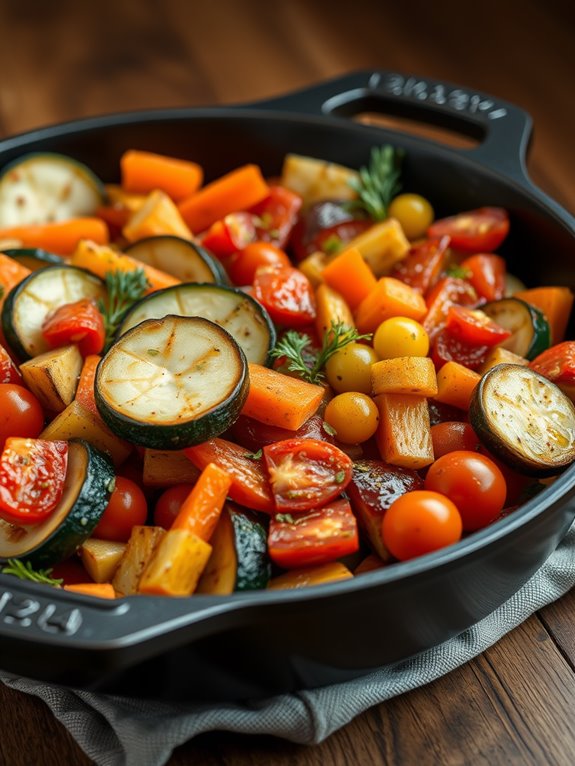
The beauty of this recipe lies in its versatility. You can use any combination of vegetables you have on hand or prefer, making it an ideal way to clean out your fridge.
Roasting the vegetables allows their natural sweetness to come through while providing a slightly caramelized exterior. Serve it alongside your favorite protein or enjoy it as a hearty vegetarian main dish.
Ingredients:
- 2 medium zucchinis, sliced
- 2 carrots, peeled and chopped
- 1 bell pepper (any color), diced
- 1 red onion, chopped
- 1 cup cherry tomatoes, halved
- 4 cloves garlic, minced
- 2 tablespoons olive oil
- 1 teaspoon dried thyme
- 1 teaspoon dried rosemary
- Salt and pepper to taste
Cooking Instructions:
Preheat your cast iron roaster in the oven at 425°F (220°C). While the oven is heating, prepare your vegetables by cutting them into uniform pieces to guarantee even cooking.
In a large mixing bowl, combine the zucchini, carrots, bell pepper, red onion, cherry tomatoes, and minced garlic. Drizzle the olive oil over the vegetables and add the thyme, rosemary, salt, and pepper. Toss everything together until the vegetables are well-coated with the oil and seasonings.
Once the oven is ready, carefully remove the hot cast iron roaster and add the vegetable mixture. Spread the vegetables out evenly in the roaster. Return the roaster to the oven and roast for about 25-30 minutes, or until the vegetables are tender and slightly caramelized, stirring halfway through for even cooking.
Extra Tips:
For an added burst of flavor, consider sprinkling some grated Parmesan cheese or crumbled feta over the vegetables during the last few minutes of roasting.
You can also experiment with different herbs and spices according to your taste preference. If you want a bit of heat, throw in some red pepper flakes or diced jalapeños along with the other vegetables.
Enjoy your rustic vegetable medley as a versatile side dish or as a main course!
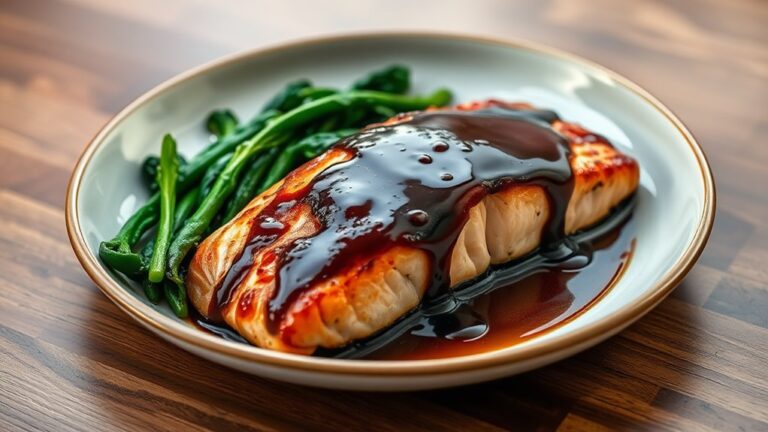
Savory Pork Tenderloin
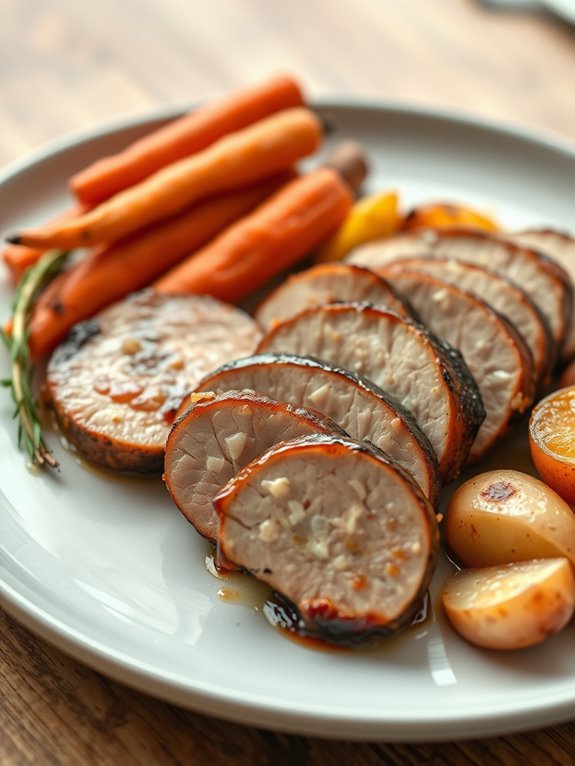
Cooking a savory pork tenderloin in a cast iron roaster is a delightful way to bring out the rich flavors of this tender cut of meat. The cast iron not only provides an even heat distribution but also helps achieve a beautiful sear on the outside, locking in the juices and enhancing the overall taste. This dish pairs perfectly with seasonal vegetables and a side of creamy mashed potatoes, making it an ideal centerpiece for any family gathering or special occasion.
To elevate the flavors even further, marinating the pork tenderloin prior to cooking can be advantageous. A simple mixture of herbs, garlic, and olive oil creates a delicious crust that complements the natural sweetness of the pork. Allowing the meat to rest after cooking is also vital to guarantee that the juices redistribute, resulting in a succulent and flavorful dish that will impress your guests.
Ingredients:
- 1 pork tenderloin (about 1-1.5 pounds)
- 2 tablespoons olive oil
- 3 cloves garlic, minced
- 1 tablespoon fresh rosemary, chopped
- 1 tablespoon fresh thyme, chopped
- 1 teaspoon salt
- 1/2 teaspoon black pepper
- 1 tablespoon Dijon mustard
- 1 tablespoon apple cider vinegar
- Optional: vegetables (carrots, potatoes, and onions) for roasting alongside
Cooking Instructions:
- Preheat your oven to 400°F (200°C). In a small bowl, mix together the olive oil, minced garlic, rosemary, thyme, salt, pepper, Dijon mustard, and apple cider vinegar to create a marinade. Rub this mixture all over the pork tenderloin, making sure it's well coated. For ideal flavor, let it marinate in the refrigerator for at least 30 minutes, or up to overnight.
- Heat your cast iron roaster over medium-high heat on the stovetop. Once hot, sear the pork tenderloin for about 2-3 minutes on each side until it develops a golden-brown crust. If you're adding vegetables, toss them into the roaster around the tenderloin at this point.
- Transfer the roaster to the preheated oven and roast for 20-25 minutes, or until the internal temperature of the pork reaches 145°F (63°C). Remove from the oven and let the meat rest for 5-10 minutes before slicing.
Extra Tips:
When cooking pork tenderloin, using a meat thermometer is essential to guarantee that you achieve the perfect doneness without overcooking. Also, feel free to experiment with different herbs and spices to tailor the flavor profile to your liking. Adding a splash of white wine or broth to the roaster can also create a lovely sauce that can be drizzled over the sliced pork before serving. Enjoy your hearty meal!
Creamy Mushroom Risotto
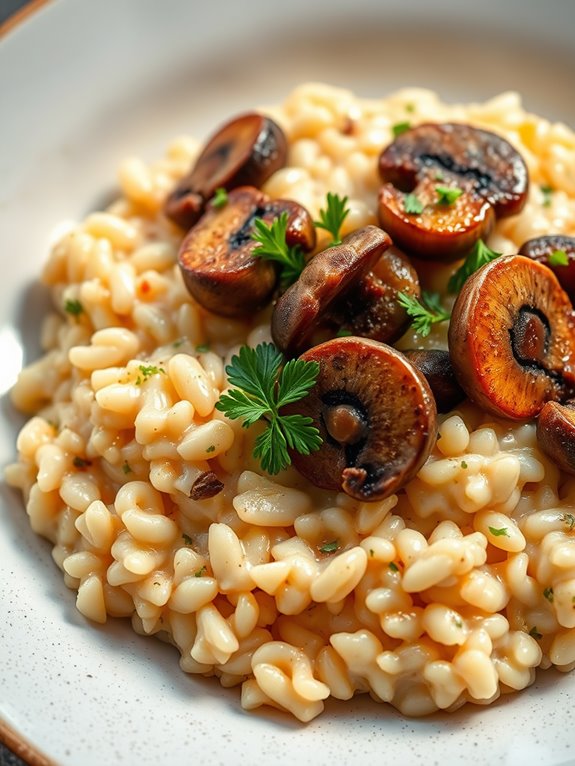
This risotto is rich and satisfying, yet it's surprisingly simple to prepare. The key to achieving the perfect creamy consistency lies in the technique of gradually adding broth and stirring continuously. With a little patience and the right ingredients, you can create a restaurant-quality dish right in your kitchen.
Ingredients:
- 1 cup Arborio rice
- 4 cups vegetable or chicken broth
- 1 cup sliced mushrooms (like cremini or shiitake)
- 1 small onion, finely chopped
- 2 cloves garlic, minced
- 1/2 cup dry white wine (optional)
- 1/2 cup grated Parmesan cheese
- 2 tablespoons unsalted butter
- 2 tablespoons olive oil
- Salt and pepper to taste
- Fresh parsley, chopped for garnish
Cooking Instructions:
In your cast iron roaster, heat the olive oil and butter over medium heat. Add the chopped onion, cooking until it becomes translucent, about 3-4 minutes.
Stir in the minced garlic and sliced mushrooms, cooking until the mushrooms are tender and have released their moisture. Add the Arborio rice, stirring to coat each grain in the oil and butter, allowing it to toast slightly for about 2 minutes.
If using, pour in the white wine, stirring until it's mostly absorbed.
Next, gradually add the warm broth, one ladle at a time, stirring frequently. Allow the rice to absorb the broth before adding more. This process should take about 18-20 minutes until the rice is creamy and al dente.
Once the rice has reached the desired consistency, stir in the grated Parmesan cheese and season with salt and pepper to taste. Garnish with fresh parsley before serving.
Extra Tips:
For an extra layer of flavor, consider adding a splash of truffle oil just before serving or topping the risotto with sautéed wild mushrooms.
Additionally, make sure that your broth is warm when adding it to the rice; this helps maintain the cooking temperature and promotes even cooking.
Don't rush the stirring process; it's key to achieving that signature creamy texture. Enjoy your delicious homemade risotto!
Mediterranean Lamb Chops
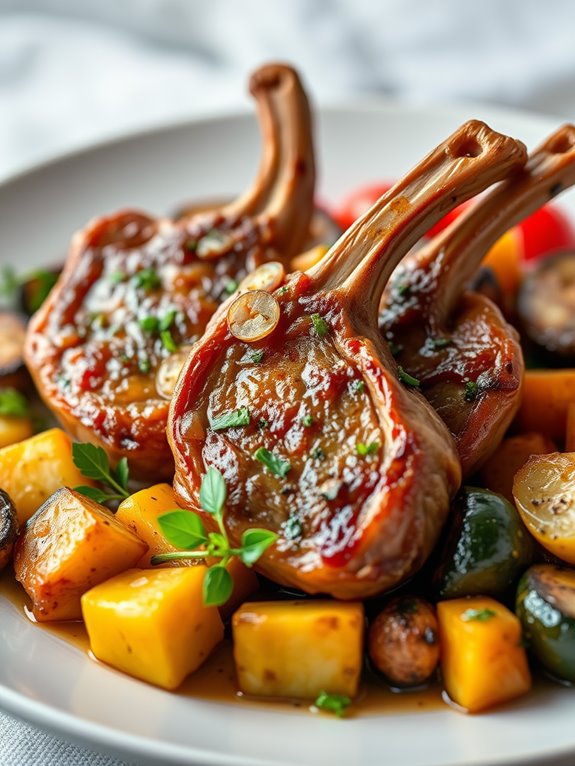
To achieve the best results, it's vital to marinate the lamb chops ahead of time. This allows the flavors to penetrate the meat, resulting in tender and flavorful chops.
Using a cast iron roaster guarantees even cooking and a beautiful crust, making it an excellent tool for this recipe. Pair the lamb with roasted vegetables or a revitalizing salad for a complete meal.
Ingredients:
- 4 lamb chops, about 1-inch thick
- 4 tablespoons olive oil
- 2 cloves garlic, minced
- 1 tablespoon fresh rosemary, chopped
- 1 tablespoon fresh thyme, chopped
- 1 teaspoon dried oregano
- Juice of 1 lemon
- Salt and pepper, to taste
Cooking Instructions:
Begin by preparing the marinade for the lamb chops. In a bowl, combine olive oil, minced garlic, chopped rosemary, thyme, oregano, lemon juice, salt, and pepper. Mix well until all the ingredients are incorporated.
Place the lamb chops in a resealable plastic bag or a shallow dish and pour the marinade over them. Confirm the chops are well coated, then seal the bag or cover the dish and refrigerate for at least 1 hour, preferably overnight for maximum flavor.
Once marinated, preheat your cast iron roaster over medium-high heat. Remove the lamb chops from the marinade, letting any excess marinade drip off.
Place the chops in the hot roaster and sear for about 3-4 minutes on each side, or until they reach your desired level of doneness. For medium-rare, aim for an internal temperature of 145°F.
Once cooked, remove the chops from the heat and let them rest for a few minutes before serving.
Extra Tips:
For an enhanced flavor profile, consider adding a pinch of smoked paprika or a dash of red pepper flakes to the marinade for a subtle kick.
Additionally, allowing the lamb to come to room temperature before cooking can help achieve a more even cook.
Don't forget to let your lamb chops rest after cooking; this step is vital for retaining the juices within the meat, making sure every bite is succulent. Enjoy your Mediterranean feast!
Spicy Chili Con Carne
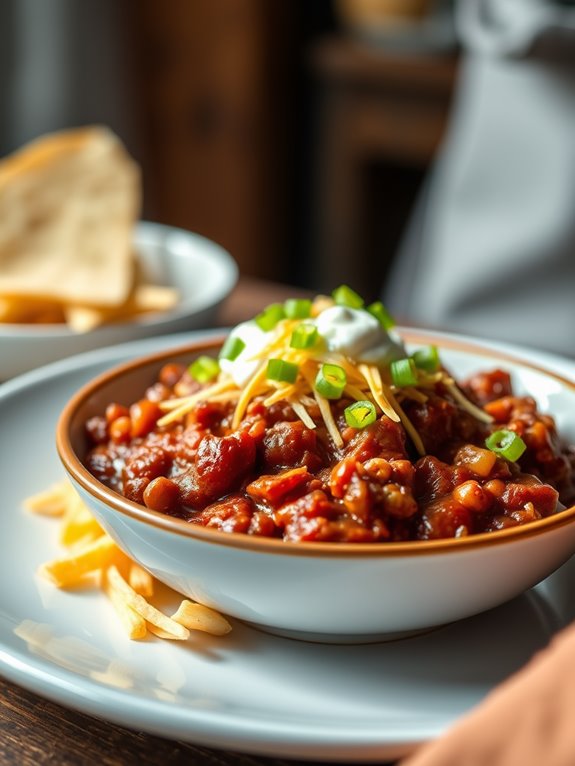
This chili is versatile and can be adjusted to suit your spice tolerance or ingredient preferences. It can be served with cornbread, over rice, or simply topped with cheese and sour cream. Whichever way you choose to enjoy it, this recipe is bound to become a favorite in your home.
Ingredients:
- 2 pounds ground beef
- 1 large onion, diced
- 3 cloves garlic, minced
- 2 bell peppers (red and green), diced
- 1 can (28 ounces) crushed tomatoes
- 2 cans (15 ounces each) kidney beans, drained and rinsed
- 2 tablespoons chili powder
- 1 tablespoon cumin
- 1 teaspoon paprika
- 1 teaspoon cayenne pepper (adjust to taste)
- Salt and pepper to taste
- 2 tablespoons olive oil
- 1 cup beef broth
- Optional toppings: shredded cheese, sour cream, chopped green onions
Cooking Instructions:
In a cast iron roaster, heat the olive oil over medium heat. Add the diced onion and bell peppers, sautéing until softened, about 5-7 minutes.
Stir in the minced garlic and cook for another minute until fragrant. Then, increase the heat to medium-high and add the ground beef, cooking until browned and fully cooked. Drain any excess fat if necessary.
Once the beef is cooked, stir in the crushed tomatoes, kidney beans, chili powder, cumin, paprika, cayenne pepper, salt, and pepper.
Pour in the beef broth and mix everything well. Bring the chili to a simmer, then reduce the heat to low and cover. Let it cook for at least 30 minutes, stirring occasionally to prevent sticking and guarantee even cooking. For a deeper flavor, consider letting it simmer for an hour or longer.
Extra Tips:
To enhance the flavors of your chili con carne, consider letting it sit for a few hours or even overnight in the refrigerator before serving. This allows the spices to meld beautifully.
Additionally, if you prefer a thicker chili, you can let it simmer uncovered for the last 15-20 minutes to reduce the liquid. Finally, feel free to experiment with different types of beans or additional vegetables like corn or zucchini for a unique twist!
Ratatouille With Fresh Herbs
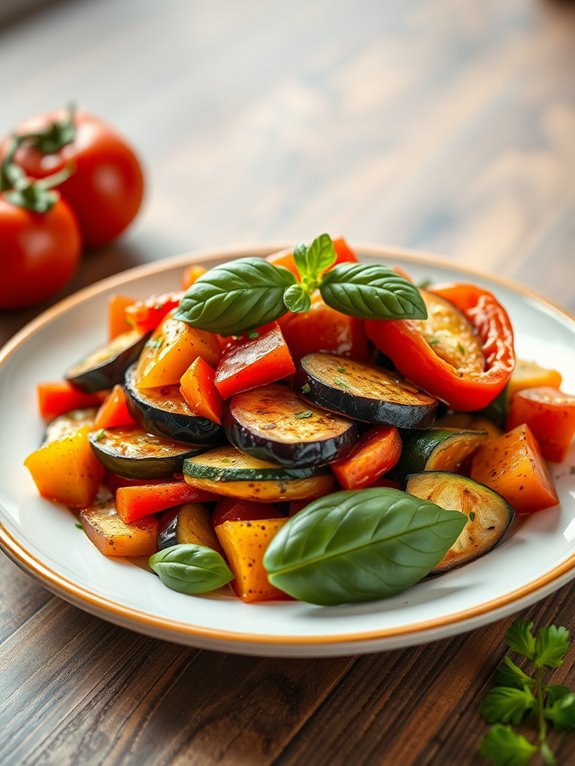
Ratatouille is a classic French dish that beautifully showcases the vibrant flavors of summer vegetables, making it a perfect choice for a hearty meal. Cooking it in a cast iron roaster not only enhances the dish's flavor but also allows for even cooking and a deliciously caramelized finish.
The combination of eggplant, zucchini, bell peppers, and tomatoes, paired with fresh herbs, creates a colorful and aromatic dish that's as visually appealing as it's tasty. This ratatouille recipe is simple yet rewarding, allowing the natural flavors of the vegetables to shine through while the fresh herbs add a delightful aromatic touch.
Whether served as a main dish, a side, or layered with pasta or grains, this ratatouille is versatile and can be enjoyed any time of year. Let's gather our ingredients and get started!
Ingredients:
- 1 medium eggplant, diced
- 2 medium zucchini, sliced
- 1 red bell pepper, chopped
- 1 yellow bell pepper, chopped
- 1 large onion, chopped
- 3 cloves garlic, minced
- 4 ripe tomatoes, chopped (or 1 can of diced tomatoes)
- 1/4 cup olive oil
- 1 teaspoon dried thyme
- 1 teaspoon dried basil
- Salt and pepper to taste
- Fresh basil and parsley for garnish
Cooking Instructions:
Preheat your cast iron roaster in the oven at 375°F (190°C). In a large bowl, combine the diced eggplant, zucchini, bell peppers, onion, and garlic.
Add the chopped tomatoes, olive oil, dried thyme, and basil, then season with salt and pepper. Toss everything together until the vegetables are well-coated.
Transfer the mixture to the preheated cast iron roaster, spreading it out evenly. Cover with a lid or aluminum foil and bake for about 30 minutes.
After 30 minutes, remove the lid and bake for an additional 15-20 minutes, allowing the vegetables to caramelize slightly and the flavors to meld beautifully. Once done, garnish with fresh basil and parsley before serving.
Extra Tips:
For the best flavor, let your ratatouille sit for a few minutes after taking it out of the oven; this allows the flavors to deepen.
You can also experiment with different vegetables based on what you have on hand or what's in season. Serving it with a drizzle of balsamic glaze or a sprinkle of feta cheese can elevate the dish even further. Enjoy your hearty ratatouille warm or at room temperature!
Garlic Butter Shrimp and Rice
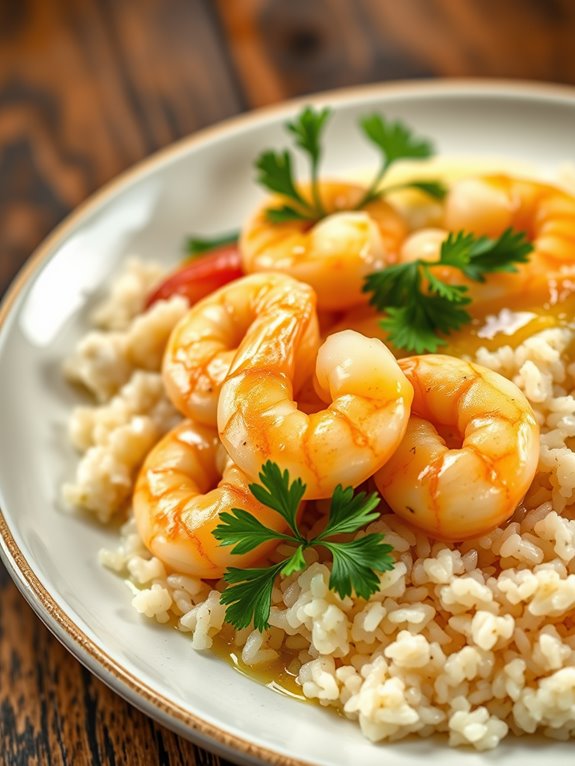
Garlic butter shrimp and rice is a delectable dish that combines succulent shrimp with aromatic garlic and rich butter, served over a bed of fluffy rice. This one-pot recipe is perfect for a weeknight dinner or a special occasion, as it's both quick to prepare and loaded with flavor.
The beauty of using a cast iron roaster lies in its ability to evenly distribute heat, ensuring that the shrimp cook perfectly while infusing the rice with all the delicious flavors from the garlic butter sauce.
The dish isn't only delicious but also visually appealing, making it a great choice for entertaining. Paired with a side of fresh vegetables or a light salad, this garlic butter shrimp and rice meal is sure to impress your family and guests alike. With just a few simple ingredients, you can whip up this delightful dish in no time!
Ingredients:
- 1 pound large shrimp, peeled and deveined
- 2 cups jasmine rice
- 4 tablespoons unsalted butter
- 4 cloves garlic, minced
- 1 teaspoon red pepper flakes (optional)
- 2 cups chicken broth
- 1 tablespoon lemon juice
- Salt and pepper to taste
- Fresh parsley, chopped (for garnish)
To begin, preheat your cast iron roaster over medium heat. Add the butter and let it melt, then stir in the minced garlic and red pepper flakes (if using), cooking for about 1 minute until fragrant.
Next, add the shrimp to the pan, seasoning with salt and pepper. Cook the shrimp for 2-3 minutes on each side until they turn pink and opaque. Remove the shrimp from the pan and set aside.
In the same roaster, add the rice and toast it for a couple of minutes, stirring frequently to prevent sticking. Pour in the chicken broth and lemon juice, bringing the mixture to a boil.
Once boiling, reduce the heat to low, cover the roaster, and let it simmer for 15-20 minutes until the rice is tender and has absorbed the liquid. Once the rice is cooked, gently fold in the cooked shrimp and garnish with fresh parsley before serving.
Extra Tips:
For an added depth of flavor, consider marinating the shrimp in a bit of lemon juice, olive oil, and garlic before cooking.
Additionally, feel free to customize the dish by adding vegetables such as bell peppers, peas, or spinach, which can be cooked alongside the shrimp for a nutritious boost. Ensuring that you don't overcook the shrimp is key, as they can become tough; just cook until they're opaque and tender.
Enjoy your hearty garlic butter shrimp and rice!
Maple-Glazed Carrots and Parsnips
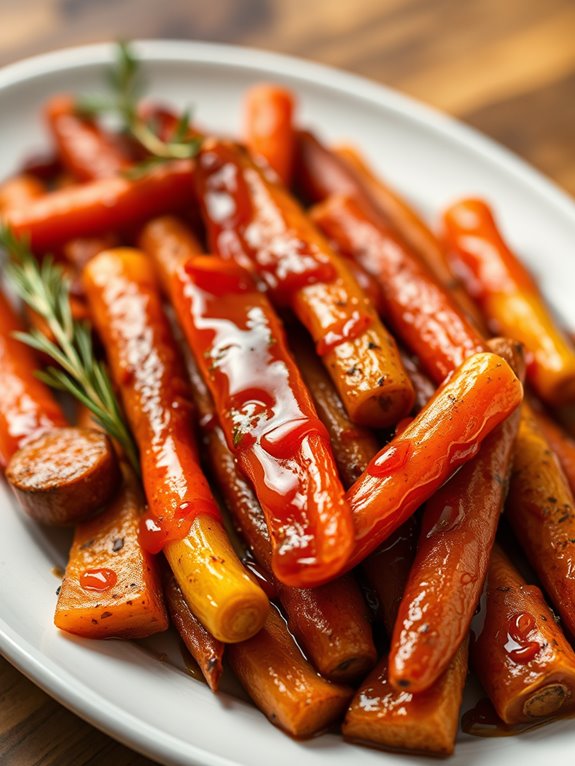
Maple-glazed carrots and parsnips are a delightful side dish that brings a touch of sweetness and warmth to any meal. The natural sugars in these root vegetables caramelize beautifully when roasted, creating a deliciously sticky glaze that enhances their earthy flavors. This dish isn't only visually appealing but also packed with nutrients, making it a perfect addition to your table.
Using a cast iron roaster guarantees even cooking and helps achieve that perfect golden-brown exterior. The combination of maple syrup, butter, and a hint of thyme elevates these simple vegetables into a dish that feels both rustic and refined.
Whether served alongside roasted meats or as part of a vegetarian feast, these maple-glazed carrots and parsnips are sure to impress.
Ingredients:
- 4 large carrots, peeled and cut into 1-inch pieces
- 4 large parsnips, peeled and cut into 1-inch pieces
- 3 tablespoons maple syrup
- 2 tablespoons unsalted butter, melted
- 1 tablespoon olive oil
- 1 teaspoon fresh thyme leaves (or ½ teaspoon dried thyme)
- Salt and pepper, to taste
To prepare the maple-glazed carrots and parsnips, preheat your oven to 400°F (200°C). In your cast iron roaster, combine the peeled and chopped carrots and parsnips.
In a small bowl, whisk together the maple syrup, melted butter, olive oil, thyme, salt, and pepper. Pour this mixture over the vegetables and toss until they're well coated. Spread the carrots and parsnips out in an even layer in the roaster.
Roast the vegetables in the preheated oven for 25-30 minutes, stirring halfway through, until they're tender and caramelized. If you prefer a deeper glaze, you can broil them for an additional 2-3 minutes at the end, keeping a close eye to avoid burning.
Extra Tips: For an added depth of flavor, consider sprinkling some chopped nuts, like pecans or walnuts, over the vegetables during the last few minutes of roasting.
Additionally, you can experiment with spices such as cinnamon or nutmeg for a warm, aromatic twist. Always taste before serving and adjust the seasoning as needed for the best results. Enjoy your deliciously glazed dish!
Braised Short Ribs
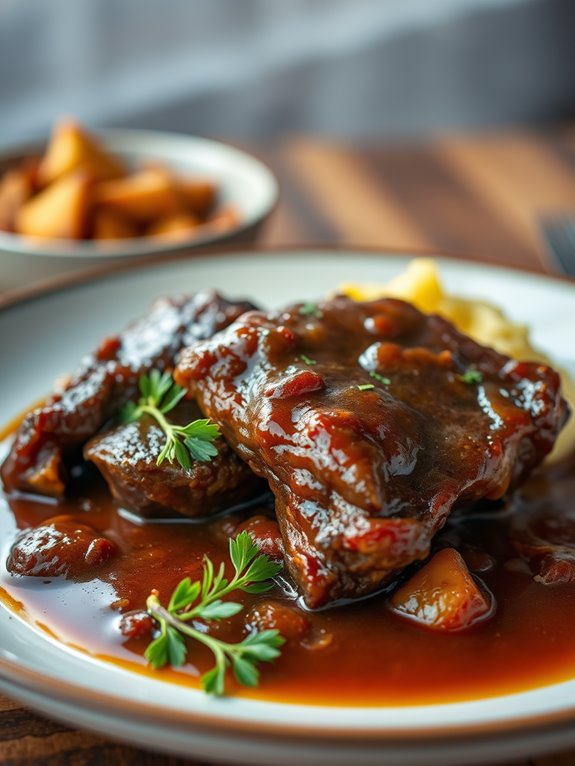
Braised short ribs are a comforting and rich dish that exemplifies the art of slow cooking. The process allows the meat to become incredibly tender, soaking up the flavors of aromatic vegetables and a robust braising liquid.
Using a cast iron roaster not only enhances the cooking experience but also promotes even heat distribution, ensuring the short ribs come out perfectly every time. This dish is ideal for gatherings or a cozy family dinner, as it can be prepared ahead of time and served with your favorite sides.
The combination of red wine, beef broth, and herbs creates a luscious sauce that elevates the short ribs to a whole new level. Pair this dish with creamy mashed potatoes or polenta to soak up the delicious sauce, and you have a meal that will warm both your heart and soul.
Let's explore the ingredients and cooking process for these mouthwatering braised short ribs.
Ingredients:
- 4 pounds of beef short ribs
- Salt and pepper, to taste
- 2 tablespoons olive oil
- 1 onion, diced
- 2 carrots, diced
- 2 celery stalks, diced
- 4 cloves garlic, minced
- 2 cups red wine
- 2 cups beef broth
- 2 tablespoons tomato paste
- 2 sprigs fresh thyme
- 1 bay leaf
Cooking Instructions:
Preheat your oven to 325°F (163°C). Season the short ribs generously with salt and pepper.
In a cast iron roaster, heat the olive oil over medium-high heat. Once hot, sear the short ribs on all sides until they're browned, about 3-4 minutes per side. Remove the ribs and set them aside.
In the same pot, add the diced onion, carrots, and celery, sautéing until the vegetables are softened, about 5 minutes. Stir in the minced garlic and cook for an additional minute.
Return the short ribs to the pot, and add the red wine, beef broth, tomato paste, thyme, and bay leaf. Bring the mixture to a simmer, then cover the pot and transfer it to the preheated oven. Braise for about 2.5 to 3 hours, or until the meat is fork-tender.
Once ready, remove the pot from the oven and let it rest for a few minutes before serving.
Extra Tips:
For an even richer flavor, consider marinating the short ribs in red wine and herbs overnight before cooking.
Additionally, you can skim off any excess fat from the surface of the braising liquid after cooking for a lighter sauce. Serve with fresh herbs sprinkled on top for a pop of color, and enjoy the hearty warmth of this delightful dish!
One-Pan Baked Ziti
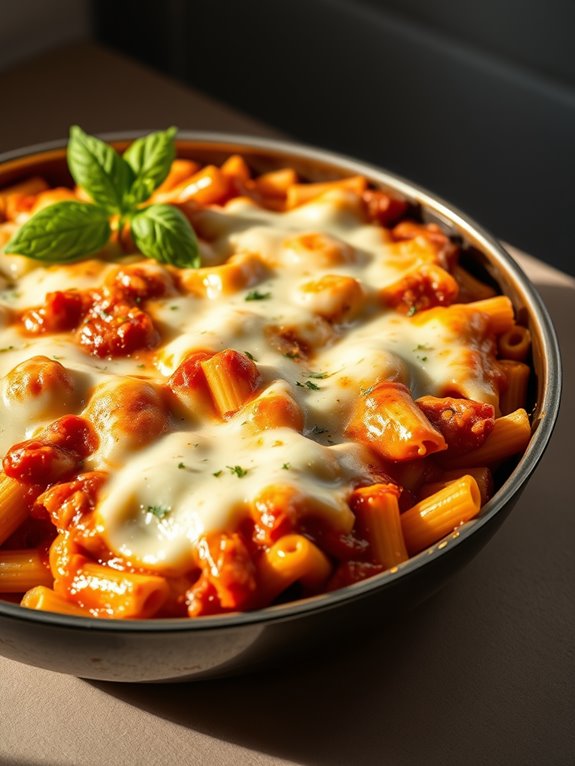
With minimal cleanup and maximum flavor, this recipe is sure to become a staple in your kitchen. Whether you're a seasoned cook or a beginner, the steps are simple and the results are absolutely delicious. Gather your ingredients and get ready to enjoy a classic Italian-American dish that will warm your heart and satisfy your taste buds.
Ingredients:
- 1 pound ziti pasta
- 1 tablespoon olive oil
- 1 onion, chopped
- 3 cloves garlic, minced
- 1 pound ground beef or Italian sausage
- 2 cups marinara sauce
- 1 teaspoon dried oregano
- 1 teaspoon dried basil
- Salt and pepper to taste
- 2 cups ricotta cheese
- 2 cups shredded mozzarella cheese
- 1 cup grated Parmesan cheese
- Fresh basil leaves for garnish (optional)
Instructions:
Preheat your oven to 375°F (190°C). In your cast iron roaster, heat the olive oil over medium heat. Add the chopped onion and garlic, sautéing until the onion is translucent.
Add the ground beef or Italian sausage, breaking it apart with a spoon, and cook until browned. Drain any excess fat if necessary, and then stir in the marinara sauce, oregano, basil, salt, and pepper. Bring the mixture to a simmer.
Meanwhile, cook the ziti pasta according to package instructions until al dente, then drain. Add the pasta to the meat sauce mixture, stirring to combine.
In a separate bowl, mix the ricotta cheese with half of the mozzarella cheese and half of the Parmesan cheese. Layer half of the pasta mixture in the cast iron roaster, dollop the ricotta mixture on top, and then add the remaining pasta.
Finish by topping with the remaining mozzarella and Parmesan cheese. Cover with foil and bake for 25 minutes, then remove the foil and bake for an additional 15 minutes or until the cheese is bubbly and golden.
Extra Tips:
For an extra layer of flavor, consider adding sautéed vegetables like bell peppers or mushrooms to the meat mixture.
You can also experiment with different cheeses, such as provolone or feta, for a unique twist on this classic dish. If you have leftovers, baked ziti keeps well in the refrigerator for up to three days and can be reheated in the oven for a delightful meal any time. Enjoy your delicious one-pan baked ziti!
Moroccan-Spiced Vegetable Tagine
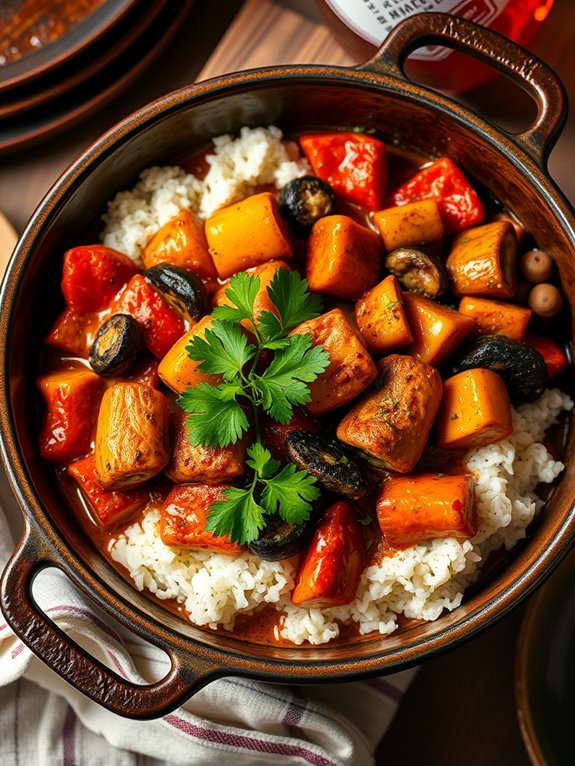
The preparation is simple and allows for flexibility with seasonal vegetables. The tagine is traditionally slow-cooked to enhance the flavors, but using a cast iron roaster makes it accessible for all home cooks.
Serve it over fluffy couscous or with crusty bread to soak up the delicious sauce—your taste buds will thank you!
Ingredients:
- 1 onion, chopped
- 2 garlic cloves, minced
- 1 bell pepper, diced
- 2 carrots, sliced
- 1 zucchini, chopped
- 1 cup butternut squash, diced
- 1 can chickpeas, drained and rinsed
- 1 can diced tomatoes
- 1 cup vegetable broth
- 2 tablespoons olive oil
- 1 tablespoon ground cumin
- 1 tablespoon ground coriander
- 1 teaspoon paprika
- 1 teaspoon ground cinnamon
- 1 teaspoon turmeric
- Salt and pepper, to taste
- Fresh cilantro or parsley, for garnish
Cooking Instructions:
In your cast iron roaster, heat the olive oil over medium heat. Add the chopped onion and minced garlic, sautéing until they're soft and fragrant.
Next, introduce the bell pepper, carrots, zucchini, and butternut squash to the pot, cooking for about 5-7 minutes until they begin to soften.
Stir in the spices—cumin, coriander, paprika, cinnamon, and turmeric—allowing them to toast for a minute before adding the chickpeas, diced tomatoes, and vegetable broth.
Stir everything together and bring to a gentle simmer. Cover the roaster with its lid and reduce the heat.
Let the tagine cook for about 30-40 minutes, stirring occasionally, until the vegetables are tender and the flavors are well combined.
Adjust salt and pepper to taste, and finish with a sprinkle of fresh cilantro or parsley before serving.
Extra Tips:
When making Moroccan-Spiced Vegetable Tagine, feel free to swap in any seasonal vegetables you have on hand, such as sweet potatoes, eggplant, or peas.
To enhance the dish's flavor, consider adding a handful of dried fruits like apricots or raisins during cooking.
For an added depth, serve with a dollop of yogurt or a squeeze of lemon juice to elevate the dish's freshness.
Enjoy your culinary adventure!
Cider-Braised Pork Belly
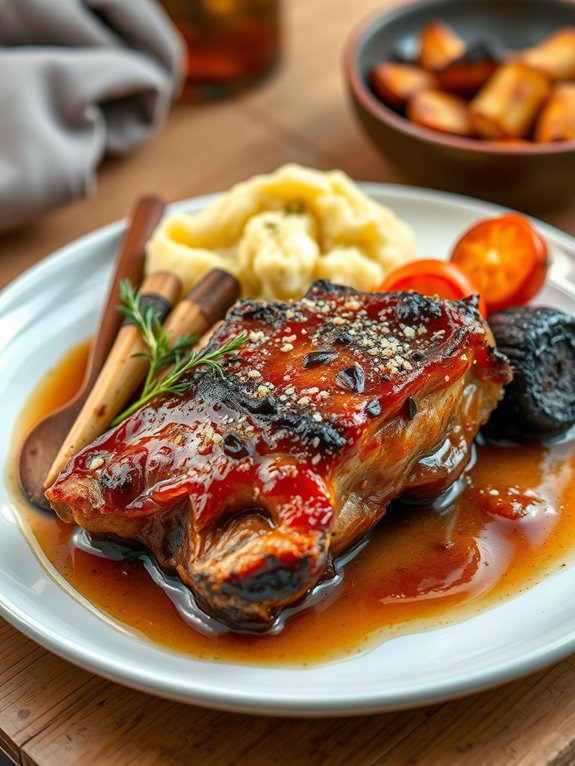
To prepare this dish, you'll need a few simple ingredients that come together beautifully. The cooking process is straightforward, and the result is a hearty meal that can be served with various sides, such as mashed potatoes or roasted vegetables. The combination of spices and cider adds depth to the dish, making it a perfect centerpiece for any dinner table.
Ingredients:
- 2 pounds pork belly, skin scored
- 2 cups apple cider
- 1 onion, diced
- 4 cloves garlic, minced
- 2 tablespoons brown sugar
- 1 tablespoon Dijon mustard
- 1 teaspoon thyme, dried
- 1 teaspoon rosemary, dried
- 1 teaspoon salt
- 1/2 teaspoon black pepper
- 2 tablespoons olive oil
Cooking Instructions:
Start by preheating your oven to 300°F (150°C). In a cast iron roaster, heat the olive oil over medium heat. Sear the pork belly on all sides until golden brown, about 4-5 minutes per side. Remove the pork belly from the pot and set it aside.
In the same pot, add the diced onion and garlic, sautéing until they become translucent and fragrant. Next, stir in the apple cider, brown sugar, Dijon mustard, thyme, rosemary, salt, and pepper.
Return the seared pork belly to the pot, skin side up, and bring the mixture to a gentle simmer. Cover the pot and transfer it to the oven. Braise for about 2 to 3 hours, or until the pork is tender and the flavors have melded beautifully.
Once done, let it rest for a few minutes before slicing and serving.
Extra Tips:
For an extra layer of flavor, consider adding a few slices of apple or a splash of apple brandy to the braising liquid. If you prefer a crispy skin, you can place the pork belly under the broiler for a few minutes after braising to achieve that desired crunch.
Serve the dish with a drizzle of the reduced braising liquid for an added touch of richness. Enjoy your hearty cider-braised pork belly!
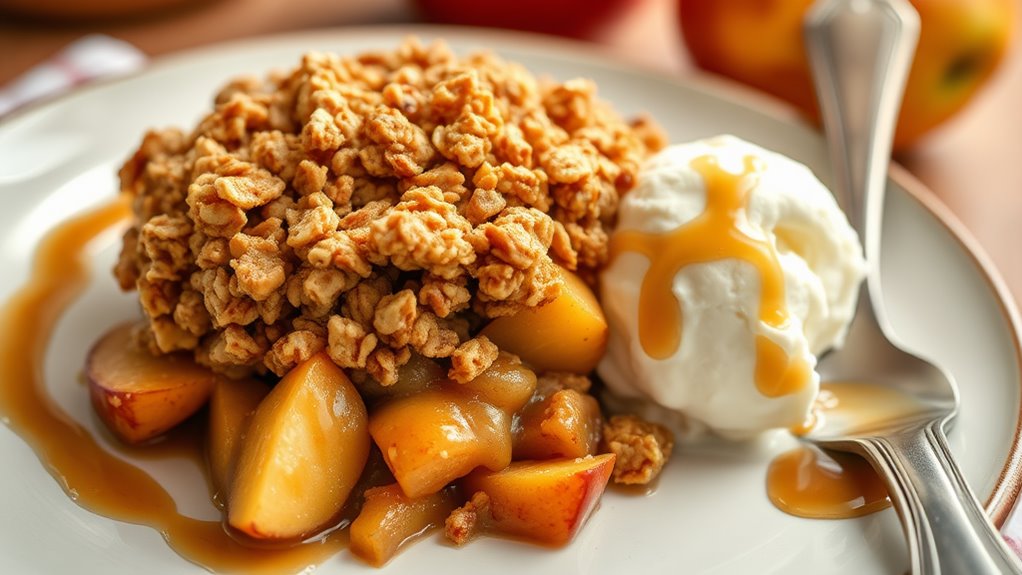
Cast Iron Apple Crisp
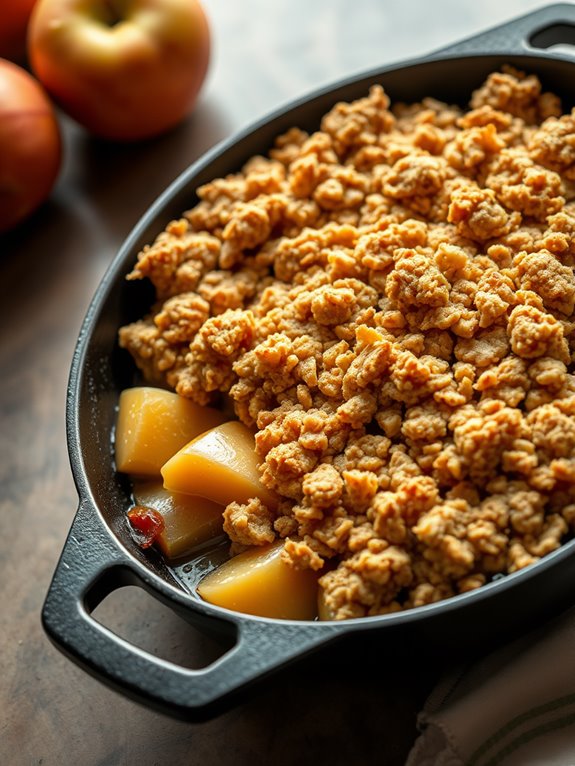
To elevate your apple crisp, you can experiment with different apple varieties, mixing sweet and tart apples for a more complex flavor profile.
Additionally, the cast iron roaster makes it easy to serve directly from the oven to the table, providing a rustic charm that enhances the overall experience of this classic dessert.
Gather your ingredients and get ready to indulge in this delightful dish.
Ingredients:
- 6 cups of peeled and sliced apples (such as Granny Smith and Honeycrisp)
- 1 cup granulated sugar
- 1 teaspoon ground cinnamon
- 1/2 teaspoon ground nutmeg
- 1 tablespoon lemon juice
- 1 cup rolled oats
- 1 cup all-purpose flour
- 1 cup packed brown sugar
- 1/2 cup unsalted butter (melted)
- 1/2 teaspoon salt
Cooking Instructions:
Preheat your oven to 350°F (175°C).
In a large bowl, combine the sliced apples, granulated sugar, cinnamon, nutmeg, and lemon juice, mixing well to coat the apples evenly.
Pour the apple mixture into the cast iron roaster, spreading it out evenly.
In another bowl, combine the oats, flour, brown sugar, melted butter, and salt, mixing until the ingredients are well blended and crumbly.
Sprinkle the oat mixture evenly over the apples in the cast iron roaster.
Bake in the preheated oven for 45-50 minutes, or until the apples are tender and the topping is golden brown and crisp.
Remove from the oven and let it cool slightly before serving.
Extra Tips:
For an added layer of flavor, consider incorporating a handful of chopped nuts, such as walnuts or pecans, into the topping mixture.
This will provide a delightful crunch and enhance the overall texture of your apple crisp.
Additionally, serving it warm with a scoop of vanilla ice cream or a drizzle of caramel sauce will elevate this classic dessert to new heights.
Enjoy!
Frequently Asked Questions
Can I Use My Cast Iron Roaster in the Oven and on the Stovetop?
Absolutely, you can use your cast iron roaster both in the oven and on the stovetop. Just make sure to adjust your heat settings and keep an eye on cooking times for best results.
How Do I Properly Season My Cast Iron Roaster?
To properly season your cast iron roaster, clean it thoroughly, apply a thin layer of vegetable oil, and bake it upside down in the oven at high heat for an hour. Repeat as needed for best results.
What Is the Best Way to Clean a Cast Iron Roaster?
To clean your cast iron roaster, scrub it with a stiff brush and hot water. Avoid soap, and dry it immediately to prevent rust. For tough residue, use coarse salt as an abrasive scrub.
Are There Any Specific Recipes That Work Best in a Cast Iron Roaster?
Isn't it amazing how a cast iron roaster transforms simple ingredients? You'll find that stews, roasted meats, and baked casseroles thrive in it, yielding rich flavors and tender textures that'll delight any palate. Enjoy experimenting!
Can I Use Metal Utensils on My Cast Iron Roaster?
You shouldn't use metal utensils on your cast iron roaster, as they can scratch the surface and damage its seasoning. Opt for wooden, silicone, or plastic utensils to keep your roaster in great condition.