As an affiliate, we may earn a commission from qualifying purchases. We get commissions for purchases made through links on this website from Amazon and other third parties.
If you're looking to simplify your lunch routine, cast iron skillets can be your best friend. With their ability to deliver even heat and create a perfect crust, you can whip up satisfying meals with ease. From hearty frittatas to savory stir-fries, there are plenty of options to explore. Let's take a closer look at some delicious recipes that can elevate your lunchtime experience. You might just find your new favorite dish.
Key Takeaways
- A Hearty Vegetable Frittata is versatile, packed with nutrients, and perfect for meal prep or picnics.
- Sweet Potato Hash with Eggs offers a comforting, customizable breakfast or lunch option cooked in one skillet.
- Mediterranean Chickpea Salad combines fresh vegetables and chickpeas, making it a nutritious and quick lunch choice.
- Savory Chicken and Broccoli Stir-Fry is a quick, flavorful meal that can be served over rice or noodles.
- One-Pan Cheesy Pasta Bake allows for various customizations and is ideal for gatherings, all made in a cast iron skillet.
Hearty Vegetable Frittata

A hearty vegetable frittata is a perfect dish for a satisfying lunch, packed with flavor and nutrients. This versatile recipe allows you to use an array of fresh vegetables and herbs, making it a great way to clean out your fridge.
Cooking in a cast iron skillet not only provides even heat distribution but also gives the frittata a beautiful golden crust. Whether you're serving it warm or at room temperature, this dish is sure to impress.
To create a frittata, you'll need to whisk together eggs with your choice of vegetables, cheese, and seasonings. The beauty of this dish lies in its flexibility; feel free to customize it according to your preferences. From bell peppers to spinach, the options are endless. Serve it with a side salad or some crusty bread for a complete meal.
Ingredients:
- 6 large eggs
- 1 cup of chopped spinach
- 1 cup of diced bell peppers (any color)
- 1 small onion, diced
- 1 cup of cherry tomatoes, halved
- ½ cup of shredded cheese (cheddar or feta work well)
- 2 tablespoons of olive oil
- Salt and pepper, to taste
- Fresh herbs (such as basil or parsley) for garnish
Cooking Instructions:
- Preheat your oven to 375°F (190°C). In a large bowl, whisk together the eggs, salt, and pepper until well combined. Set aside.
- Heat the olive oil in a cast iron skillet over medium heat. Add the diced onion and bell peppers, cooking until softened, about 3-4 minutes. Stir in the spinach and cherry tomatoes, cooking until the spinach wilts.
- Pour the egg mixture over the sautéed vegetables, gently stirring to combine. Sprinkle the shredded cheese on top. Allow the frittata to cook on the stovetop for about 3-4 minutes until the edges begin to set. Transfer the skillet to the preheated oven and bake for 15-20 minutes, or until the frittata is puffed and the center is set.
For serving, let the frittata cool slightly before slicing. You can enjoy it warm or at room temperature, making it an excellent choice for meal prep or picnics.
Extra Tips:
When making your frittata, feel free to experiment with different vegetables and cheeses based on what you have on hand. Leftover roasted vegetables work wonderfully, and adding fresh herbs can elevate the flavor even further.
To guarantee even cooking, avoid overcrowding the skillet with too many ingredients. If you're unsure about the doneness, a toothpick inserted in the center should come out clean. Enjoy your hearty vegetable frittata!
Savory Chicken and Broccoli Stir-Fry
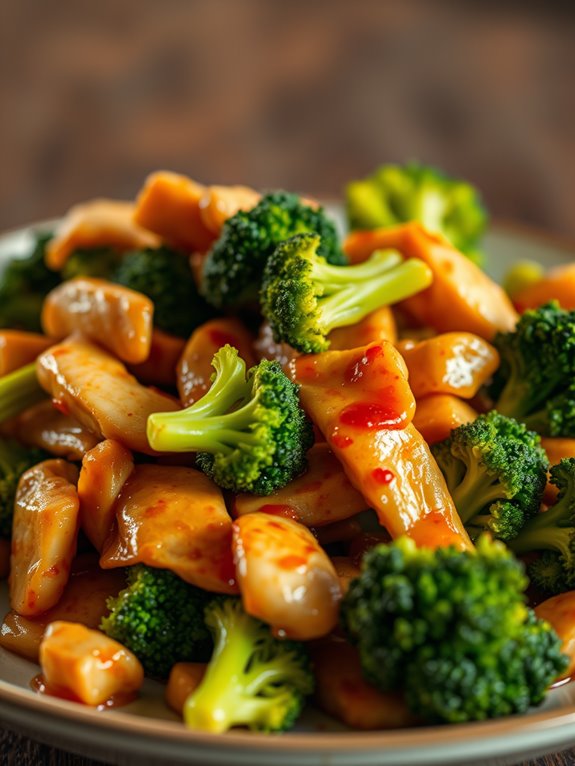
Savory Chicken and Broccoli Stir-Fry is a quick and delicious meal that brings together tender chicken, vibrant broccoli, and a flavorful sauce. This dish is perfect for a busy lunch, offering a satisfying combination of protein and vegetables all in one skillet.
Cooking it in a cast iron skillet guarantees even heat distribution, enhancing the flavors and giving the chicken a lovely sear. With its simplicity and speed, this stir-fry can be whipped up in under 30 minutes.
It's not only a great choice for a wholesome lunch but also a fantastic way to use up any leftover vegetables in your fridge. Serve it over rice or noodles for a complete meal that will keep you fueled for the rest of the day.
Ingredients:
- 1 lb boneless, skinless chicken breast, sliced into thin strips
- 2 cups broccoli florets
- 3 tablespoons soy sauce
- 2 tablespoons oyster sauce
- 1 tablespoon sesame oil
- 2 cloves garlic, minced
- 1 teaspoon ginger, minced
- 2 tablespoons vegetable oil
- Salt and pepper to taste
- Cooked rice or noodles for serving (optional)
Cooking Instructions:
- Heat the vegetable oil in a cast iron skillet over medium-high heat. Once hot, add the sliced chicken and season with salt and pepper. Cook for about 5-7 minutes, stirring occasionally, until the chicken is golden brown and cooked through. Remove the chicken from the skillet and set it aside.
- In the same skillet, add the minced garlic and ginger, sautéing for about 30 seconds until fragrant. Add the broccoli florets and stir-fry for 3-4 minutes until they're bright green and tender-crisp.
Return the chicken to the skillet, and pour in the soy sauce and oyster sauce. Toss everything together until well combined and heated through, about 2 minutes. Serve hot over rice or noodles if desired.
Extra Tips:
To enhance the flavor of your stir-fry, consider marinating the chicken in the soy sauce and sesame oil for about 15-20 minutes before cooking. This will infuse the chicken with extra flavor.
Additionally, feel free to add other vegetables such as bell peppers or snap peas for more color and nutrition. Adjust the sauce to your taste by adding a bit of honey for sweetness or a splash of hot sauce for a kick!
One-Pan Cheesy Pasta Bake

This recipe isn't only delicious but also versatile; you can easily customize it by adding your choice of vegetables, proteins, or spices.
Whether you're making lunch for yourself or a gathering of friends, this cheesy pasta bake will impress your guests and satisfy your cravings. Get ready to dig into a comforting bowl of cheesy goodness!
Ingredients:
- 2 cups pasta (penne, rotini, or your choice)
- 3 cups vegetable or chicken broth
- 1 cup marinara sauce
- 1 cup shredded mozzarella cheese
- 1 cup shredded cheddar cheese
- 1 cup fresh spinach (optional)
- 1 teaspoon garlic powder
- 1 teaspoon onion powder
- Salt and pepper to taste
- Fresh basil for garnish (optional)
Instructions:
- Preheat your oven to 375°F (190°C). In a large cast iron skillet, combine the uncooked pasta, broth, marinara sauce, garlic powder, onion powder, salt, and pepper. Stir well to guarantee the pasta is evenly coated with the sauce.
- Bring the mixture to a simmer over medium heat, then reduce the heat to low. Cover the skillet and let it cook for about 10-12 minutes, or until the pasta is al dente, stirring occasionally to prevent sticking.
- Once the pasta is cooked, add the spinach (if using) and half of the mozzarella and cheddar cheeses. Stir until melted and well combined. Top with the remaining cheese and transfer the skillet to the preheated oven. Bake for 10-15 minutes, or until the cheese is bubbly and golden brown. Garnish with fresh basil before serving.
Extra Tips:
For added flavor, consider mixing in cooked proteins like chicken or sausage, or toss in your favorite vegetables such as bell peppers or zucchini.
If you prefer a little heat, a pinch of red pepper flakes can elevate the dish. Make sure to keep an eye on the pasta while it simmers to prevent it from overcooking.
Enjoy your One-Pan Cheesy Pasta Bake straight from the skillet for a cozy dining experience!
Spicy Shrimp Tacos With Avocado Salsa
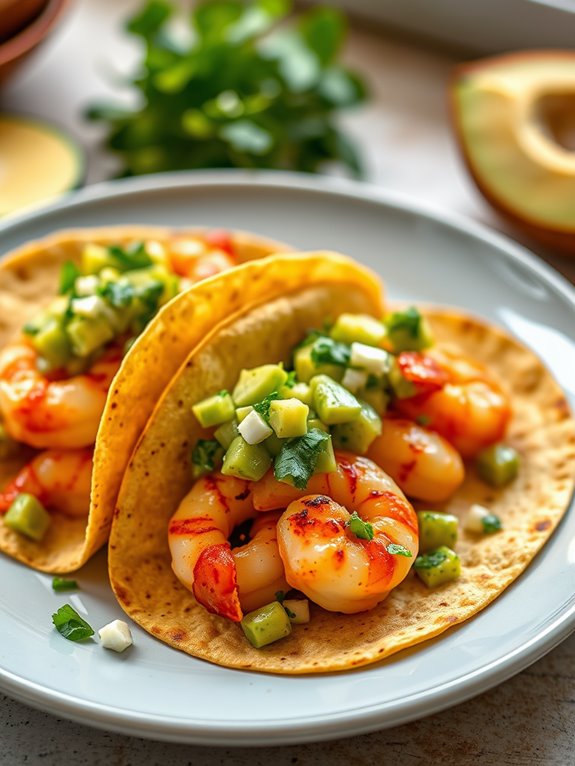
Spicy shrimp tacos with avocado salsa are a delightful way to enjoy a quick and flavorful lunch that packs a punch. The combination of succulent shrimp seasoned with bold spices, paired with a revitalizing and creamy avocado salsa, creates a delicious contrast that's hard to resist. Cooking these tacos in a cast iron skillet not only enhances the flavor but also gives them a wonderful char that elevates the overall experience.
This dish is perfect for those busy days when you need something easy yet impressive. The shrimp cooks quickly, making it a great choice for a weekday lunch. With just a handful of ingredients, you can whip up these tacos in no time, ensuring that you savor every bite while enjoying the vibrant flavors.
Ingredients:
- 1 pound shrimp, peeled and deveined
- 2 tablespoons olive oil
- 1 teaspoon chili powder
- 1 teaspoon paprika
- 1/2 teaspoon cayenne pepper (optional for extra heat)
- Salt and pepper to taste
- 8 small corn or flour tortillas
- 1 avocado, diced
- 1/2 cup diced tomatoes
- 1/4 cup chopped red onion
- 1 tablespoon lime juice
- Fresh cilantro for garnish
Cooking Instructions:
Begin by seasoning the shrimp with chili powder, paprika, cayenne pepper, salt, and pepper. In a cast iron skillet, heat the olive oil over medium-high heat. Once hot, add the seasoned shrimp and cook for about 2-3 minutes on each side, or until they're pink and opaque. Remove the shrimp from the skillet and set aside.
In the same skillet, warm the tortillas for about 30 seconds on each side until they're soft and pliable. While the tortillas are warming, prepare the avocado salsa by combining the diced avocado, tomatoes, red onion, lime juice, and a pinch of salt in a bowl.
To assemble the tacos, place a few shrimp on each tortilla, top with avocado salsa, and garnish with fresh cilantro. Serve immediately.
Extra Tips:
For an added flavor boost, try marinating the shrimp in the spices and olive oil for 15-30 minutes before cooking. This will allow the flavors to penetrate the shrimp more deeply.
You can also customize the toppings by adding your favorite ingredients, such as shredded cabbage, jalapeños, or a drizzle of sour cream or hot sauce for an extra kick. Enjoy your spicy shrimp tacos with avocado salsa as a satisfying lunch or a fun dinner option!
Classic Cast Iron Grilled Cheese
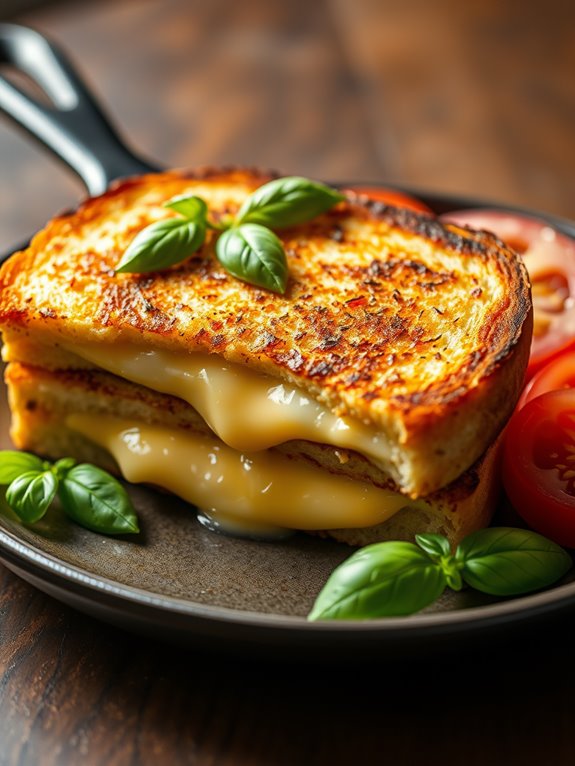
Grilled cheese is a timeless classic that brings comfort and satisfaction in every bite. Made with simple ingredients, it's a versatile dish that can be easily customized to suit your taste. Cooking it in a cast iron skillet not only guarantees even heat distribution but also gives the sandwich that perfect golden crust that's crispy on the outside and gooey on the inside.
Using a cast iron skillet also allows for a unique flavor profile to develop, as the pan retains heat exceptionally well. Whether you prefer sharp cheddar, creamy mozzarella, or a blend of your favorite cheeses, this recipe will guide you to make the ultimate grilled cheese sandwich that's sure to impress.
Ingredients:
- 2 slices of bread (your choice)
- 2-3 slices of cheese (cheddar, mozzarella, or your favorite)
- 2 tablespoons of butter
- Optional: sliced tomatoes, bacon, or herbs for extra flavor
To begin, preheat your cast iron skillet over medium heat. While the skillet is heating, spread butter evenly on one side of each slice of bread. Place one slice, butter-side down, onto the skillet. Layer the cheese on top, and if you're adding any extras like tomatoes or bacon, place them on before topping with the second slice of bread, butter-side up.
Cook for about 3-4 minutes or until the bottom is golden and crispy. Carefully flip the sandwich with a spatula and cook for another 3-4 minutes on the other side until the cheese is melted and the second side is golden brown.
Once done, remove the sandwich from the skillet and let it cool for a minute before slicing in half. This will help avoid any cheese spillage while cutting. Serve it warm with your favorite soup or salad for a complete meal.
Extra Tips:
For an extra crispy crust, consider using mayonnaise instead of butter on the outer sides of the bread. It adds a different flavor and helps achieve an even more golden color.
Additionally, keep the heat at medium to guarantee that the cheese melts thoroughly without burning the bread.
Easy Beef and Mushroom Skillet
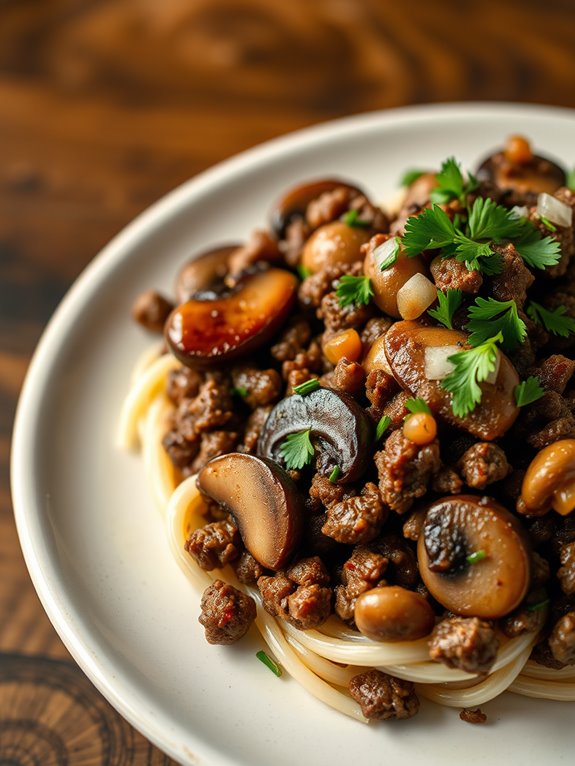
This recipe isn't only easy to prepare but also requires minimal ingredients, making it a fantastic option for a busy day.
In just under 30 minutes, you can have a hearty meal that's bursting with flavor. Let's get cooking!
Ingredients:
- 1 lb ground beef
- 8 oz mushrooms, sliced
- 1 medium onion, diced
- 2 cloves garlic, minced
- 1 tablespoon soy sauce
- 1 teaspoon Worcestershire sauce
- 1 teaspoon salt
- 1/2 teaspoon black pepper
- 1 tablespoon olive oil
- Fresh parsley for garnish (optional)
Instructions:
- Heat the olive oil in a cast iron skillet over medium-high heat. Add the diced onion and minced garlic, sautéing until the onion becomes translucent, about 3-4 minutes.
- Add the ground beef to the skillet, breaking it apart with a spatula. Cook until browned, about 5-7 minutes. Drain any excess fat if necessary.
- Stir in the sliced mushrooms, soy sauce, Worcestershire sauce, salt, and pepper. Cook for an additional 5-7 minutes, or until the mushrooms are tender and have released their moisture.
- Taste and adjust seasoning if needed. Garnish with fresh parsley before serving.
Extra Tips:
For an extra flavor boost, consider adding a splash of balsamic vinegar or a pinch of red pepper flakes for some heat.
You can also customize this dish by including other vegetables like bell peppers or spinach, which can be added along with the mushrooms.
If you're meal prepping, this dish keeps well in the fridge for up to three days, making it a great option for lunches throughout the week!
Mediterranean Chickpea Salad
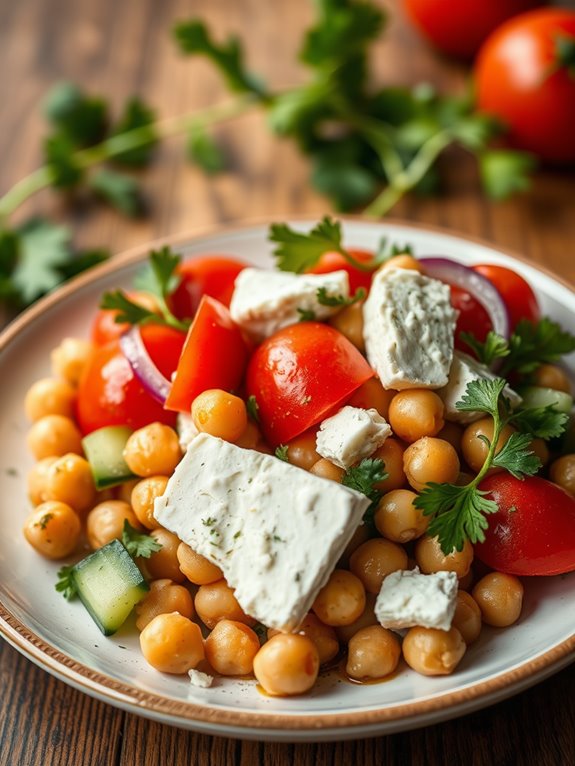
This salad isn't only delicious but also packed with protein and fiber, thanks to the chickpeas. The combination of cucumbers, tomatoes, red onion, and parsley provides a revitalizing crunch, while the olive oil and lemon juice dressing adds a tangy kick.
Serve it on its own, or as a side dish to grilled meats or fish for a complete meal.
Ingredients:
- 1 can (15 oz) chickpeas, rinsed and drained
- 1 cup cherry tomatoes, halved
- 1 cucumber, diced
- 1/2 red onion, finely chopped
- 1/4 cup fresh parsley, chopped
- 1/4 cup feta cheese, crumbled (optional)
- 3 tablespoons olive oil
- 2 tablespoons lemon juice
- Salt and pepper to taste
- 1 teaspoon dried oregano (optional)
Cooking Instructions:
In a large mixing bowl, combine the rinsed chickpeas, cherry tomatoes, cucumber, red onion, and parsley. If you're using feta cheese, add it to the bowl as well.
In a separate small bowl, whisk together the olive oil, lemon juice, salt, pepper, and oregano until well combined. Pour the dressing over the chickpea mixture and toss everything together until well coated.
Allow the salad to sit for about 10 minutes to let the flavors meld before serving. This dish can be enjoyed immediately or stored in the refrigerator for a few hours, making it a great option for meal prep.
Extra Tips:
For an extra layer of flavor, consider adding diced bell peppers or olives to your salad. You can also enhance the freshness by including other herbs such as mint or basil.
If you want to make it heartier, serve it over a bed of mixed greens or with whole grain pita bread on the side. Adjust the seasoning according to your taste, and feel free to experiment with different dressings or additional ingredients to suit your preferences!
Zucchini and Corn Quesadillas

Zucchini and Corn Quesadillas are a delightful and wholesome lunch option that can easily be prepared in a cast iron skillet. The combination of fresh zucchini and sweet corn wrapped in a crispy tortilla and melted cheese creates a satisfying meal that's both quick to make and enjoyable to eat. This dish is perfect for using up summer produce and can be customized with your favorite toppings or additional ingredients.
These quesadillas can be served as a main dish or as an appetizer, making them versatile for any occasion. They're also a hit with both kids and adults, making them a great choice for family lunches. The best part is that they can be whipped up in under 30 minutes, allowing you to enjoy a delicious homemade meal without spending hours in the kitchen.
Ingredients:
- 2 medium zucchinis, grated
- 1 cup fresh corn kernels (or canned)
- 1 cup shredded cheese (cheddar or Monterey Jack)
- 4 large flour tortillas
- 1 tablespoon olive oil
- 1 teaspoon chili powder
- Salt and pepper to taste
- Optional toppings: salsa, sour cream, or avocado
To prepare the quesadillas, start by heating the olive oil in your cast iron skillet over medium heat. Add the grated zucchini and corn to the skillet, then sprinkle in the chili powder, salt, and pepper. Sauté the mixture for about 5-7 minutes, or until the zucchini is tender and the corn is slightly golden.
Remove the skillet from heat and let the mixture cool slightly before assembling the quesadillas.
Place one tortilla in the skillet, then layer half of the cheese, followed by the zucchini and corn mixture, and top with the remaining cheese. Place a second tortilla on top and cook for about 3-4 minutes, or until the bottom is golden brown.
Carefully flip the quesadilla and cook for an additional 3-4 minutes until the other side is golden and the cheese is melted. Repeat with the remaining tortillas and filling, slicing the quesadillas into wedges before serving.
Extra Tips:
For added flavor, consider mixing in some chopped fresh herbs like cilantro or basil, or adding sautéed onions or bell peppers to the filling.
You can also experiment with different types of cheese or spices to suit your taste. If you prefer a crunchier quesadilla, press down gently with a spatula while cooking, and feel free to serve with your favorite dipping sauces for an extra kick!
Creamy Spinach and Artichoke Dip
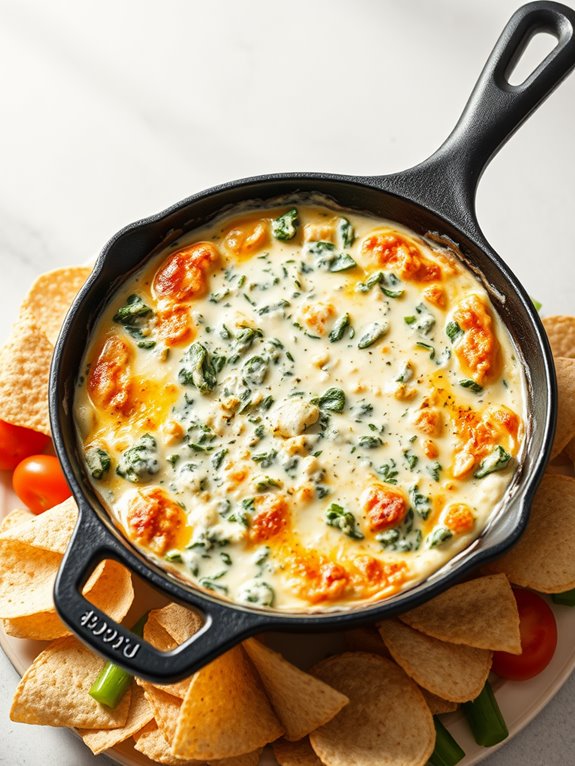
Creamy Spinach and Artichoke Dip is a classic appetizer that brings together the rich flavors of spinach, artichokes, and a creamy cheese blend. It's perfect for serving at gatherings or enjoying on a cozy afternoon. The best part? You can easily whip it up in your trusty cast iron skillet, which not only helps in evenly distributing heat but also allows for a beautiful presentation straight from oven to table.
This dish is incredibly versatile and can be enjoyed with a variety of dippers such as tortilla chips, pita bread, or fresh vegetables. The combination of creamy cheeses, savory artichokes, and fresh spinach creates a comforting dip that's hard to resist. Whether you're hosting a party or just looking for a midday snack, this Creamy Spinach and Artichoke Dip is sure to impress!
Ingredients:
- 1 cup fresh spinach, chopped
- 1 cup canned artichoke hearts, drained and chopped
- 1 cup cream cheese, softened
- 1/2 cup sour cream
- 1/2 cup mayonnaise
- 1 cup shredded mozzarella cheese
- 1/2 cup grated Parmesan cheese
- 2 cloves garlic, minced
- 1 teaspoon onion powder
- Salt and pepper to taste
- Tortilla chips or bread for serving
To prepare the dip, preheat your oven to 375°F (190°C). In a large mixing bowl, combine the cream cheese, sour cream, and mayonnaise, and mix until smooth.
Stir in the chopped spinach, artichokes, garlic, onion powder, mozzarella, and Parmesan cheese. Season with salt and pepper to taste. Transfer the mixture into a preheated cast iron skillet, spreading it evenly.
Bake in the oven for about 20-25 minutes, or until the dip is hot and bubbly with a golden brown top. For an extra touch, consider broiling the dip for the last 2-3 minutes to achieve a crispy, golden finish. Just keep a close eye on it to prevent burning.
Serve the dip warm with tortilla chips, pita bread, or fresh veggies for dipping.
Extra Tips:
To enhance the flavor of your Creamy Spinach and Artichoke Dip, try adding a pinch of red pepper flakes for a touch of heat or some chopped sun-dried tomatoes for added depth.
You can also substitute Greek yogurt for sour cream for a healthier twist, or mix in some cooked chicken for a heartier version. Enjoy your delicious creation!
Sweet Potato Hash With Eggs
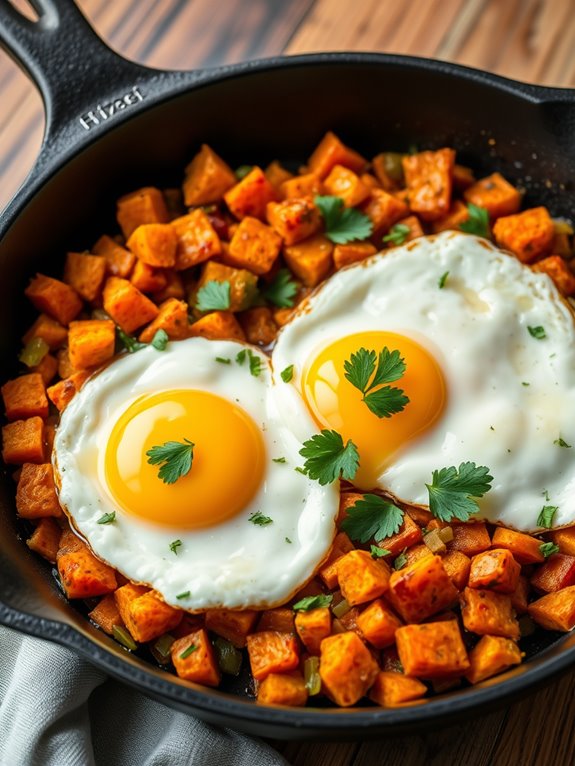
Sweet Potato Hash with Eggs is a hearty and satisfying dish that makes for a perfect lunch or brunch option. This colorful and nutritious meal combines the natural sweetness of sweet potatoes with savory vegetables and protein-rich eggs.
It's not only delicious but also easy to prepare, making it a go-to recipe for busy weekdays or leisurely weekends. Cooking this hash in a cast iron skillet allows for even heat distribution and creates a beautiful, crispy texture.
The combination of spices and fresh ingredients enhances the flavors, while the runny yolks of the eggs add a creamy richness that ties everything together. Serve it warm, and you've got a comforting meal that everyone will love.
Ingredients:
- 2 medium sweet potatoes, peeled and diced
- 1 small onion, chopped
- 1 bell pepper, chopped (any color)
- 2 tablespoons olive oil
- 1 teaspoon paprika
- 1 teaspoon garlic powder
- Salt and pepper to taste
- 4 large eggs
- Fresh parsley, chopped (for garnish)
Cooking Instructions:
- In a large cast iron skillet, heat the olive oil over medium heat. Add the diced sweet potatoes and cook for about 10-12 minutes, stirring occasionally until they start to soften and develop a golden-brown color.
- Add the chopped onion and bell pepper to the skillet, followed by the paprika, garlic powder, salt, and pepper. Continue cooking for another 5-7 minutes, until the vegetables are tender and the sweet potatoes are fully cooked through.
- Create four small wells in the hash and crack an egg into each well. Cover the skillet and reduce the heat to low. Cook for about 5-8 minutes, or until the eggs are cooked to your liking. For runny yolks, keep an eye on them to avoid overcooking.
Extra Tips:
For a bit of heat, consider adding diced jalapeños or a sprinkle of red pepper flakes to the hash while cooking.
You can also customize this dish by incorporating other vegetables such as spinach, zucchini, or mushrooms. If you prefer your eggs scrambled, simply beat them in a bowl and pour them into the skillet after the vegetables have cooked.
Enjoy your Sweet Potato Hash with Eggs with a side of avocado or crusty bread for a complete meal!
Cast Iron Pizza With Your Favorite Toppings

Cast iron pizza is an incredibly versatile and delicious way to enjoy a homemade pizza experience. The beauty of using a cast iron skillet is that it evenly distributes heat, creating a perfectly crispy crust while keeping the toppings gooey and flavorful.
Plus, you can easily customize your pizza with your favorite toppings, from classic pepperoni and cheese to more adventurous combinations like goat cheese and arugula.
To make cast iron pizza, you don't need any fancy equipment or techniques—just a good quality cast iron skillet and a few fresh ingredients. This recipe allows you to get creative with flavors while enjoying the satisfaction of making your own pizza from scratch.
So preheat your oven, gather your ingredients, and let's get started!
Ingredients
- 1 lb pizza dough (store-bought or homemade)
- 1 cup pizza sauce
- 2 cups shredded mozzarella cheese
- 1 cup assorted toppings (pepperoni, bell peppers, onions, mushrooms, olives, etc.)
- 2 tablespoons olive oil
- 1 teaspoon dried oregano
- 1 teaspoon garlic powder
- Fresh basil leaves (for garnish, optional)
Cooking Instructions
- Preheat your oven to 475°F (245°C). Heat a 10 or 12-inch cast iron skillet on the stovetop over medium heat and add the olive oil, swirling it around to coat the bottom of the skillet.
- On a lightly floured surface, stretch or roll out the pizza dough to fit the skillet. Carefully place the dough in the hot skillet, pressing it against the sides and bottom. Cook for about 2-3 minutes until the bottom starts to set and turn golden.
- Remove the skillet from the heat and spread the pizza sauce evenly across the dough. Sprinkle the mozzarella cheese on top, followed by your desired toppings. Add dried oregano and garlic powder for extra flavor.
- Transfer the skillet to the preheated oven and bake for 12-15 minutes, or until the cheese is bubbly and the crust is golden brown. Remove from the oven and let it cool for a few minutes before slicing.
Extra Tips
For an even better pizza experience, consider pre-baking the crust for a few minutes before adding the sauce and toppings. This helps to guarantee a crispier base.
Additionally, feel free to experiment with different sauces like pesto or barbecue, and try out various cheeses for unique flavor profiles.
Don't forget to let your pizza cool slightly before slicing, as this will help the cheese set and make for easier serving. Enjoy your homemade cast iron pizza!
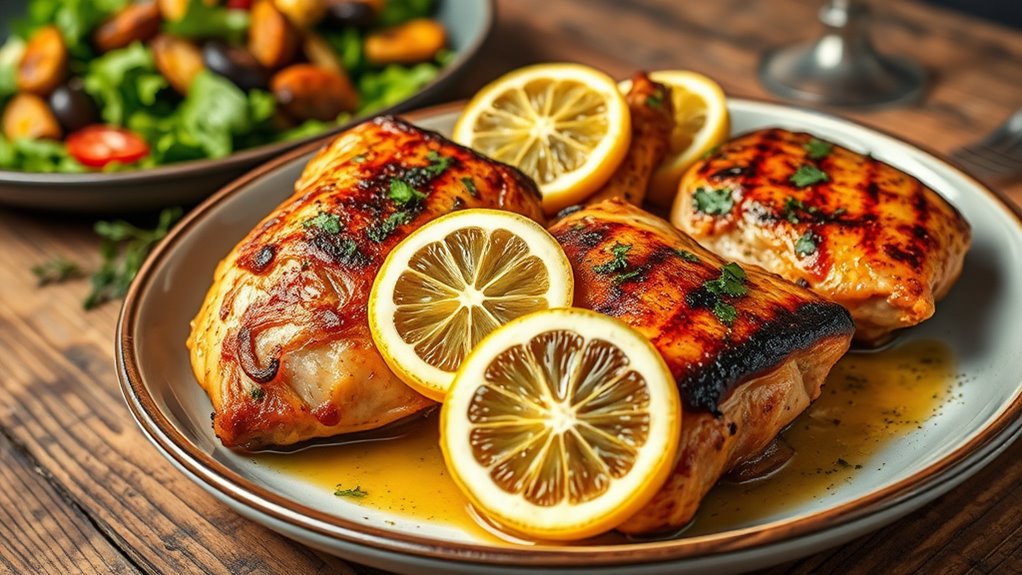
Lemon Garlic Herb Chicken Thighs
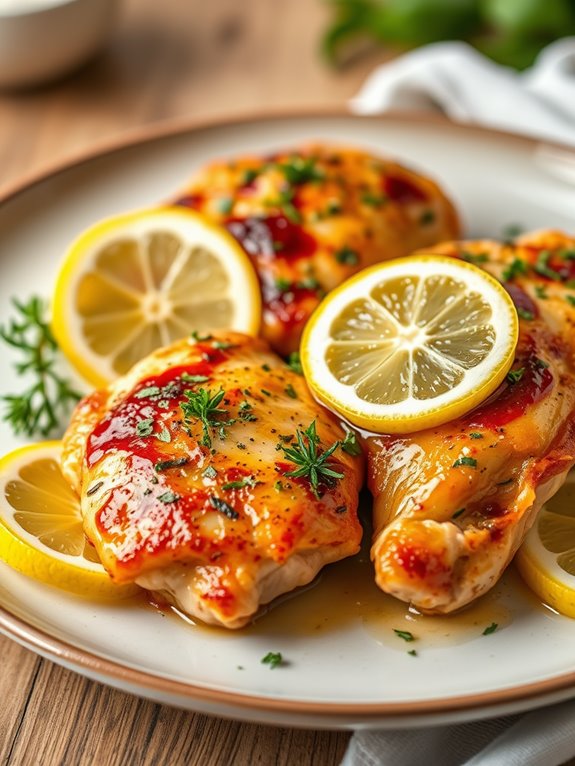
Lemon Garlic Herb Chicken Thighs are a delightful dish that brings together the zesty brightness of lemon, the aromatic goodness of garlic, and the fresh flavors of herbs. This recipe is perfect for a quick lunch or dinner, and using a cast iron skillet guarantees that the chicken thighs get a beautifully crispy skin while keeping them moist and tender on the inside.
Ideal for both novice and experienced cooks, this dish will have your taste buds dancing with joy. The simplicity of this recipe makes it a must-try. With just a few pantry staples, you can create a meal that feels gourmet.
Pair these chicken thighs with a light salad or roasted vegetables for a complete meal that's satisfying and flavorful. Let's explore the ingredients and cooking steps that will bring this dish to your table.
Ingredients:
- 4 bone-in, skin-on chicken thighs
- 3 tablespoons olive oil
- 4 cloves garlic, minced
- Juice and zest of 1 lemon
- 1 tablespoon fresh rosemary, chopped
- 1 tablespoon fresh thyme, chopped
- Salt and pepper, to taste
- Lemon slices for garnish (optional)
Cooking Instructions:
- Preheat your oven to 400°F (200°C). While the oven is heating, pat the chicken thighs dry with paper towels and season generously with salt and pepper on both sides.
- In a cast iron skillet, heat the olive oil over medium-high heat. Once hot, add the chicken thighs skin-side down. Sear for about 5-7 minutes until the skin is golden brown and crispy. Flip the thighs over and add the minced garlic, lemon juice, lemon zest, rosemary, and thyme to the skillet.
- Transfer the skillet to the preheated oven and bake for 25-30 minutes or until the chicken reaches an internal temperature of 165°F (74°C). Remove from the oven and let rest for a few minutes before serving. Garnish with lemon slices if desired.
Extra Tips:
For an extra layer of flavor, you can marinate the chicken thighs in the lemon juice, garlic, and herbs for a few hours or overnight before cooking. This will enhance the taste even more.
Additionally, using a meat thermometer guarantees that your chicken is perfectly cooked without being dry. Feel free to experiment with different herbs according to your preference, as fresh herbs can elevate the dish in delightful ways. Enjoy your delicious Lemon Garlic Herb Chicken Thighs!
Frequently Asked Questions
Can I Use a Non-Stick Spray in My Cast Iron Skillet?
You can use non-stick spray in your cast iron skillet, but it's generally not necessary. Seasoning your skillet properly creates a natural non-stick surface, enhancing flavor and maintaining the skillet's longevity.
How Do I Properly Season My Cast Iron Skillet?
To put your best foot forward, start by scrubbing your skillet with soap and water. Dry it well, apply a thin layer of oil, and bake it upside down at 375°F for an hour. Enjoy!
What Cookware Is Safe to Use With Cast Iron Skillets?
You can safely use wooden, silicone, or plastic utensils with cast iron skillets to avoid scratching the surface. Avoid metal utensils, as they can damage the seasoning. Always choose cookware that's heat-resistant and non-reactive.
How Do I Clean My Cast Iron Skillet After Cooking?
Cleaning your cast iron skillet is like giving it a rejuvenating spa day. After cooking, rinse it with warm water, scrub gently with a brush, and dry it thoroughly. Your skillet will thank you!
Can I Cook Acidic Foods in a Cast Iron Skillet?
Yes, you can cook acidic foods in a cast iron skillet, but it's best to avoid prolonged cooking. Shorter cooking times help prevent the skillet from losing its seasoning, ensuring your meals taste great.