As an affiliate, we may earn a commission from qualifying purchases. We get commissions for purchases made through links on this website from Amazon and other third parties.
Cast iron skillets are incredibly versatile, making them perfect for creating a variety of crunchy snacks. Whether you're hosting a gathering or just craving something delicious, these recipes offer a delightful mix of flavors and textures. From cheesy garlic bread bites to crispy roasted chickpeas, there's something for everyone. You'll want to discover how each dish brings a unique twist to your snack time experience.
Key Takeaways
- Cheesy Garlic Bread Bites offer a savory snack with gooey cheese and rich garlic, perfect for gatherings and served with marinara sauce.
- Crispy Roasted Chickpeas provide a healthy, crunchy option that can be seasoned with various spices for a flavorful snack.
- Skillet Nachos create an interactive dish, layering tortilla chips and toppings for a customizable and fun appetizer enjoyed fresh from the oven.
- Sweet and Spicy Popcorn combines sweet and heat in a classic snack, made easily in a cast iron skillet for a crispy texture.
- Skillet Potato Wedges are seasoned and cooked for a hearty snack, achieving a golden brown crispiness in a cast iron skillet.
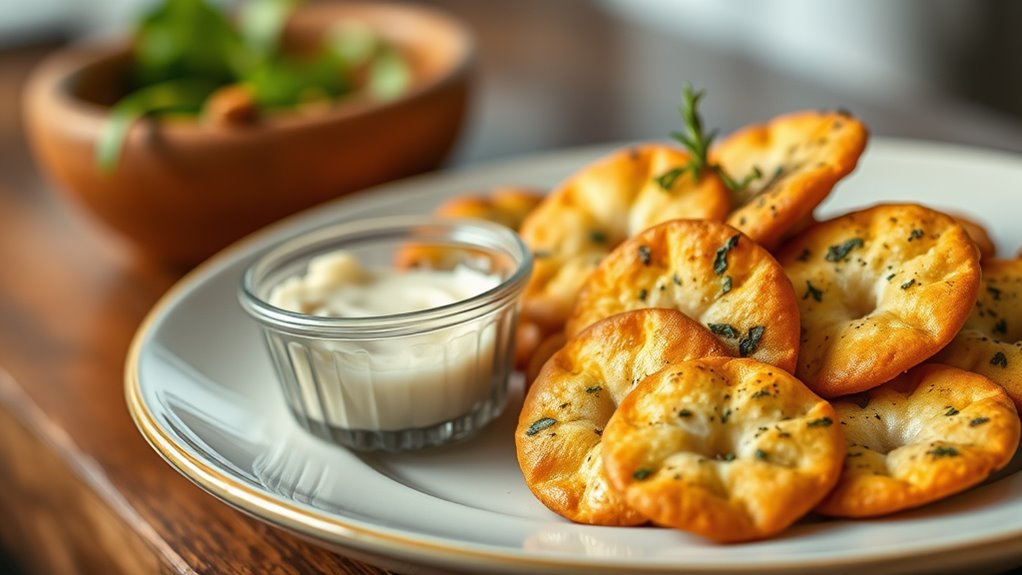
Cheesy Garlic Bread Bites

Cheesy Garlic Bread Bites are a delightful snack that will elevate any gathering or cozy night in. With the perfect combination of gooey cheese, rich garlic flavor, and a crispy crust, these bites are bound to be a hit for both kids and adults alike.
Using a cast iron skillet guarantees an even heat distribution, making the bread perfectly toasted while allowing the cheese to melt beautifully.
This easy-to-follow recipe isn't only quick to prepare but also requires minimal ingredients, making it a great option for unexpected guests or a late-night craving. Serve these cheesy bites with marinara sauce for dipping, and you'll have a scrumptious treat that everyone will love.
Ingredients:
- 1 loaf of French bread or Italian bread
- 1/2 cup unsalted butter, softened
- 4 cloves garlic, minced
- 1 teaspoon dried parsley
- 1/2 teaspoon salt
- 1 cup shredded mozzarella cheese
- 1/2 cup grated Parmesan cheese
Instructions:
- Preheat your oven to 375°F (190°C). In a small bowl, mix together the softened butter, minced garlic, dried parsley, and salt until well combined.
- Slice the loaf of bread in half lengthwise and spread the garlic butter mixture evenly on both halves. Sprinkle the shredded mozzarella and grated Parmesan cheese generously over the buttered sides.
- Place the bread halves cut side up in a preheated cast iron skillet and bake in the oven for about 10-12 minutes, or until the cheese is melted and bubbly, and the edges are golden brown. For an extra crisp, you can broil for an additional 1-2 minutes, keeping a close eye to avoid burning.
Extra Tips:
For added flavor, consider mixing in some chopped fresh herbs, like basil or oregano, into the garlic butter.
If you're looking to spice things up, a pinch of red pepper flakes can also add a nice kick. These cheesy garlic bread bites are best enjoyed fresh out of the skillet, so be sure to serve them immediately for the ultimate taste experience!
Crispy Roasted Chickpeas

Crispy roasted chickpeas are a delightful snack that can easily be made in a cast iron skillet. This recipe transforms humble chickpeas into a crunchy treat that's perfect for munching on while watching a movie or as a healthy addition to salads.
With the right spices and a little bit of time in the oven, you can achieve a satisfying texture that's both nutritious and delicious. The process is straightforward and requires minimal preparation. Once you have your ingredients ready, you'll simply season the chickpeas to your liking, roast them until they're golden and crunchy, and enjoy the satisfying crunch in every bite.
This snack isn't only easy to make but also customizable, allowing you to experiment with different flavor profiles based on your palate.
Ingredients:
- 1 can (15 oz) chickpeas, drained and rinsed
- 2 tablespoons olive oil
- 1 teaspoon paprika
- 1 teaspoon garlic powder
- 1 teaspoon onion powder
- ½ teaspoon cumin
- Salt and pepper to taste
Cooking Instructions:
Preheat your oven to 400°F (200°C). After draining and rinsing the chickpeas, spread them out on a clean kitchen towel and pat them dry thoroughly. This step is essential to achieve maximum crispiness.
In your cast iron skillet, combine the dried chickpeas with olive oil, paprika, garlic powder, onion powder, cumin, salt, and pepper. Toss until the chickpeas are evenly coated with the oil and spices.
Place the skillet in the preheated oven and roast the chickpeas for about 20-30 minutes, stirring every 10 minutes to guarantee even cooking. Remove them from the oven once they're golden brown and crispy. Allow them to cool slightly before enjoying your homemade crispy roasted chickpeas.
Extra Tips:
To enhance the flavor of your roasted chickpeas, consider experimenting with different spices such as cayenne pepper for a kick, or nutritional yeast for a cheesy flavor.
Make sure to store any leftovers in an airtight container to maintain their crispiness, but they're best enjoyed fresh. If you want to make a larger batch, simply double the recipe and use a larger skillet or two separate skillets to guarantee even cooking.
Skillet Nachos

This dish not only tastes great but also provides a fun and interactive way to enjoy nachos. Gather your friends and family around the skillet, and watch as they plunge into this cheesy, savory delight.
With just a few simple steps, you can create a mouthwatering appetizer that will have everyone reaching for seconds.
Ingredients:
- Tortilla chips
- Shredded cheese (cheddar, Monterey Jack, or a blend)
- Black beans (drained and rinsed)
- Jalapeños (sliced, fresh or pickled)
- Diced tomatoes
- Green onions (sliced)
- Sour cream
- Guacamole
- Fresh cilantro (optional)
- Olive oil (for greasing)
Instructions:
- Preheat your oven to 400°F (200°C). While the oven is heating, lightly grease your cast iron skillet with olive oil to prevent sticking.
- Layer a generous amount of tortilla chips evenly across the bottom of the skillet. Sprinkle a layer of shredded cheese over the chips, followed by black beans, sliced jalapeños, and diced tomatoes.
- Repeat the layering process until all of the ingredients are used, finishing with a top layer of cheese.
- Place the skillet in the preheated oven and bake for about 10-15 minutes, or until the cheese is melted and bubbly.
- Once done, remove the skillet from the oven and let it cool slightly before serving. Top with sliced green onions, sour cream, guacamole, and fresh cilantro, if desired.
Extra Tips:
For an extra kick, consider adding cooked ground beef, shredded chicken, or chorizo to your nachos before baking.
You can also experiment with different types of cheese or add a drizzle of hot sauce on top for added flavor.
Remember to keep an eye on the nachos while they bake to avoid burning; every oven is different! Enjoy your skillet nachos fresh out of the oven for the best texture and flavor.
Sweet and Spicy Popcorn

Sweet and Spicy Popcorn is a delightful twist on a classic snack that's perfect for movie nights or casual gatherings. The combination of sweet and spicy flavors makes every bite an exciting experience.
Cooking popcorn in a cast iron skillet not only delivers a wonderfully crispy texture but also allows for easy flavor customization. This recipe is straightforward and can be whipped up in just a matter of minutes.
To make this popcorn even more special, you can experiment with different spice levels and sweetness according to your preference. The heat from the spices balances beautifully with the sweetness of the sugar, creating a harmonious blend that tantalizes your taste buds.
Get your skillet ready, and let's plunge into this delicious recipe!
Ingredients:
- 1/2 cup popcorn kernels
- 2 tablespoons vegetable oil (or coconut oil)
- 2 tablespoons unsalted butter
- 1/4 cup brown sugar
- 1 teaspoon chili powder
- 1/2 teaspoon cayenne pepper (adjust for spice preference)
- 1/2 teaspoon salt
- 1 teaspoon vanilla extract (optional)
Cooking Instructions:
Begin by heating the cast iron skillet over medium heat. Add the vegetable oil and popcorn kernels to the skillet, ensuring the kernels are in a single layer.
Cover the skillet with a lid and allow the popcorn to pop, shaking the skillet occasionally to prevent burning. Once the popping slows down (about 2-3 seconds between pops), remove the skillet from the heat and transfer the popcorn to a large bowl.
In the same skillet, melt the butter over low heat. Stir in the brown sugar, chili powder, cayenne pepper, and salt until it forms a smooth sauce. If you prefer a hint of vanilla, add it to the mixture.
Pour the sweet and spicy sauce over the popped popcorn and toss it gently until the popcorn is evenly coated. Allow the popcorn to cool slightly before serving.
Extra Tips:
For an extra crunch, consider adding nuts or seeds to the popcorn while tossing in the sauce.
You can also adjust the spices to your liking; if you prefer a milder flavor, reduce the cayenne pepper or omit it altogether. Experiment with different sweeteners, like honey or maple syrup, for a unique twist on this recipe.
Enjoy your Sweet and Spicy Popcorn fresh for the best taste!
Skillet Potato Wedges
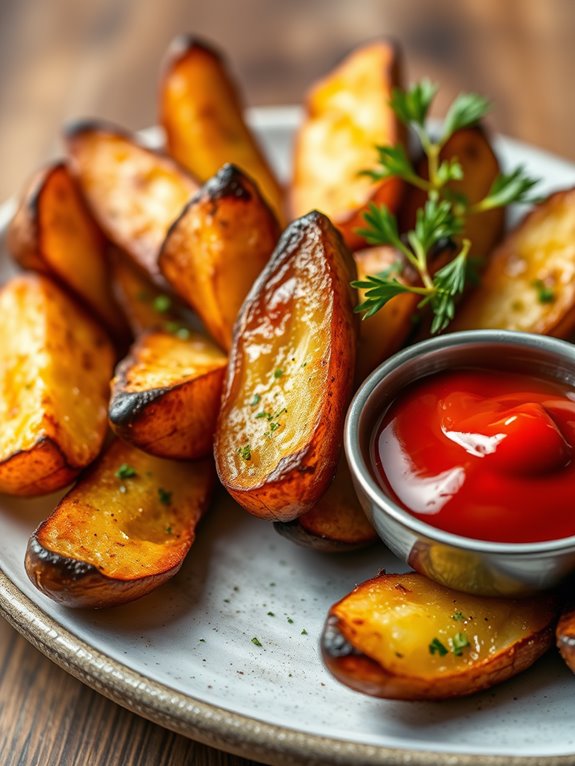
Skillet potato wedges are a delicious and easy snack that can be made in a cast iron skillet, perfect for sharing with friends or enjoying on your own. With their crispy exterior and fluffy interior, these wedges are an irresistible treat that can be customized with your favorite seasonings. Whether you're serving them as a side dish or a late-night snack, these skillet potato wedges are bound to impress.
The beauty of cooking potato wedges in a cast iron skillet lies in the even heat distribution, which guarantees that every wedge gets perfectly crispy. You can experiment with different spices and herbs to create your own signature flavor. Serve them with a dipping sauce of your choice, such as ketchup, ranch, or a zesty aioli, for an extra touch of deliciousness.
Ingredients:
- 4 medium-sized russet potatoes
- 3 tablespoons olive oil
- 1 teaspoon garlic powder
- 1 teaspoon paprika
- 1 teaspoon onion powder
- 1 teaspoon dried oregano
- Salt and pepper to taste
- Fresh parsley (for garnish, optional)
To prepare the skillet potato wedges, start by preheating your cast iron skillet over medium heat. While the skillet heats, wash and scrub the potatoes thoroughly, then cut them into wedges.
In a large bowl, combine the potato wedges with olive oil, garlic powder, paprika, onion powder, oregano, salt, and pepper. Toss the wedges until they're evenly coated with the oil and spices.
Once the skillet is hot, carefully place the seasoned wedges in a single layer, making sure they aren't overcrowded. Cook for about 15-20 minutes, turning occasionally, until they're golden brown and crispy on the outside.
For extra crispiness, you can finish them off under the broiler for 2-3 minutes, but keep an eye on them to prevent burning. Once done, remove the wedges from the skillet and let them cool for a few minutes. Garnish with freshly chopped parsley if desired, and serve hot with your favorite dipping sauce.
Extra Tips:
For the best results, choose potatoes that are firm and not sprouted. You can also soak the potato wedges in cold water for about 30 minutes before seasoning to help remove excess starch, leading to a crispier texture.
Feel free to get creative with your seasonings—try adding parmesan cheese, chili powder, or even fresh herbs for a unique twist on the classic recipe. Enjoy your delicious skillet potato wedges!
Garlic Parmesan Brussels Sprouts
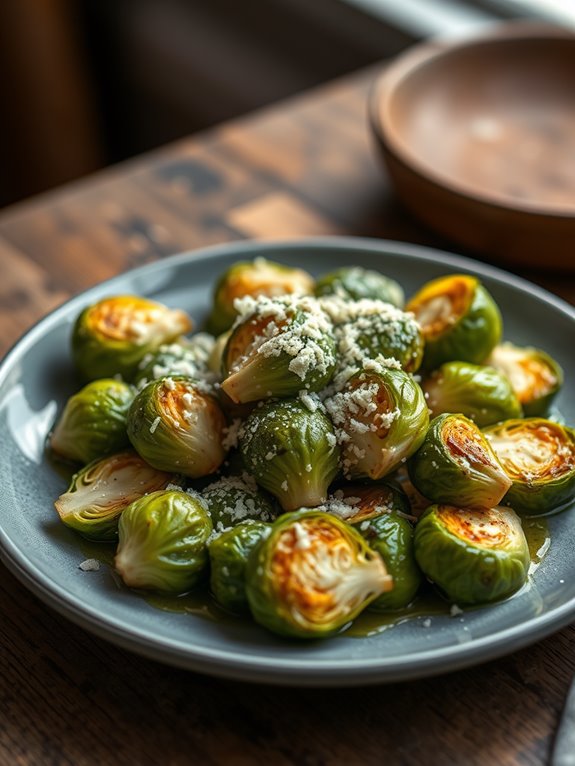
Garlic Parmesan Brussels Sprouts are a delicious and healthy snack that can be easily prepared in a cast iron skillet. The combination of garlic and Parmesan cheese elevates the natural flavors of the Brussels sprouts, making them a delectable addition to any meal or a satisfying snack on their own. With a crispy exterior and tender interior, these sprouts are bound to impress even the pickiest of eaters.
Cooking Brussels sprouts in a cast iron skillet allows for even heat distribution and a perfect sear, resulting in a mouthwatering dish. This recipe isn't only simple but requires minimal ingredients, making it a convenient option for busy days. Whether you're hosting a gathering or enjoying a quiet evening at home, Garlic Parmesan Brussels Sprouts will be a hit.
Ingredients:
- 1 lb Brussels sprouts, halved
- 3 tablespoons olive oil
- 4 cloves garlic, minced
- 1/2 cup grated Parmesan cheese
- Salt and pepper, to taste
- Optional: red pepper flakes for a kick
To prepare the Garlic Parmesan Brussels Sprouts, start by preheating your oven to 400°F (200°C). In a cast iron skillet, heat the olive oil over medium heat. Add the halved Brussels sprouts to the skillet, cut side down, and season with salt and pepper. Allow them to cook for about 5 minutes, until they begin to brown.
Add the minced garlic and stir everything together, cooking for an additional 2-3 minutes. Once the garlic is fragrant, sprinkle the grated Parmesan cheese evenly over the Brussels sprouts. Transfer the skillet to the preheated oven and roast for 15-20 minutes, or until the Brussels sprouts are tender and crispy.
If you desire a more golden crust, you can broil them for an additional 2-3 minutes at the end. When cooking Garlic Parmesan Brussels Sprouts, it's important to monitor the cooking time closely, as Brussels sprouts can vary in size. Adjust the roasting time based on their size to guarantee they become tender without burning.
For added flavor, consider experimenting with different cheeses or adding a squeeze of lemon juice before serving. Enjoy your deliciously crispy and cheesy snack!
Cornbread Muffins
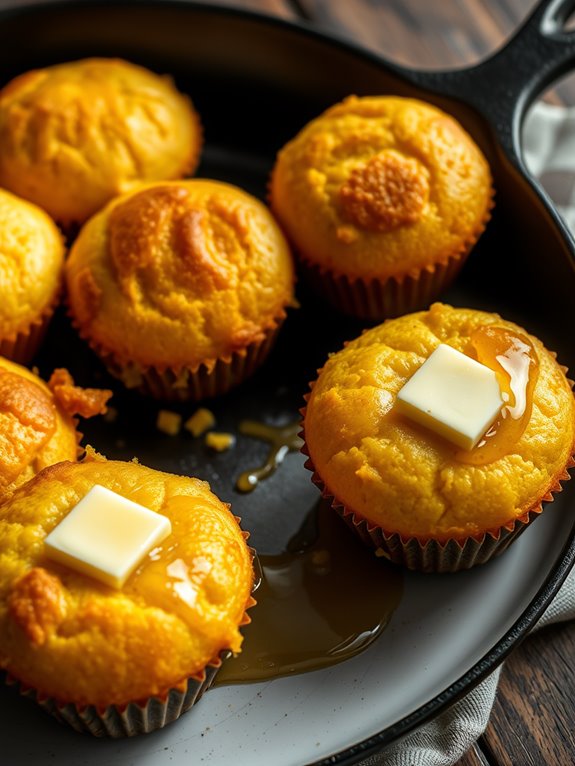
Cornbread muffins are a delightful and versatile snack that can be enjoyed with a variety of meals or on their own. They're perfect for breakfast, served alongside chili, or as a tasty treat with butter and honey. The use of a cast iron skillet guarantees that your cornbread muffins have a beautifully golden crust while remaining soft and fluffy on the inside.
With just a few simple ingredients, you'll have a warm batch of cornbread muffins that will impress family and friends alike. Making cornbread muffins in a cast iron skillet is a straightforward process that allows the skillet to absorb and distribute heat evenly. This method gives the muffins a lovely texture and flavor that you won't get from a traditional muffin tin.
Preheating the skillet before adding the batter is key to achieving that perfect rise and crust. Let's gather our ingredients and get started on this delicious snack!
Ingredients:
- 1 cup yellow cornmeal
- 1 cup all-purpose flour
- 1/4 cup granulated sugar
- 1 tablespoon baking powder
- 1/2 teaspoon salt
- 1 cup buttermilk
- 1/4 cup unsalted butter, melted
- 2 large eggs
Cooking Instructions:
- Preheat your cast iron skillet in the oven at 400°F (200°C) for about 10-15 minutes. This will help create a crispy crust on the muffins.
- In a large mixing bowl, combine the cornmeal, flour, sugar, baking powder, and salt. Whisk these dry ingredients together until well combined.
- In a separate bowl, mix the buttermilk, melted butter, and eggs until smooth. Pour the wet ingredients into the dry ingredients and stir until just combined. Be careful not to overmix.
- Remove the hot skillet from the oven and carefully pour the batter into the skillet, spreading it evenly. Bake for 20-25 minutes, or until golden brown and a toothpick inserted into the center comes out clean.
Extra Tips:
To enhance the flavor of your cornbread muffins, consider adding extras like shredded cheese, diced jalapeños, or fresh herbs to the batter.
You can also serve them warm with a pat of butter or drizzle of honey for a sweet touch. To store any leftovers, keep them in an airtight container at room temperature for up to two days or freeze for longer storage. Enjoy your delicious cornbread muffins!
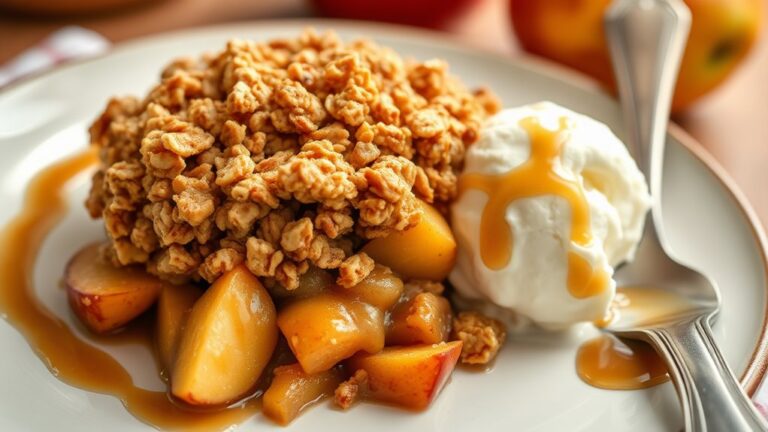
Skillet Apple Crisp
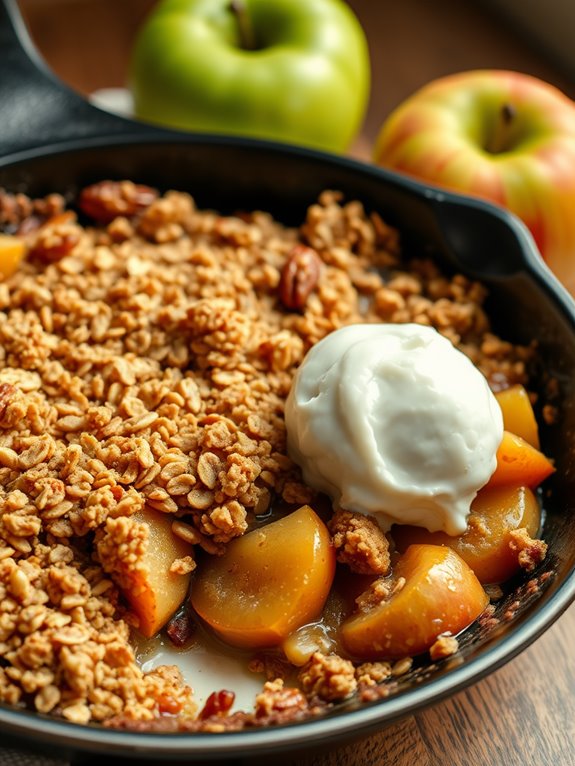
The beauty of this skillet apple crisp lies in its simplicity. With just a handful of ingredients, you can whip up a delightful dessert that showcases the natural sweetness of apples.
Serve it warm, topped with a scoop of vanilla ice cream or a dollop of whipped cream for an indulgent treat that will satisfy any sweet tooth.
Ingredients:
- 4 cups of peeled and sliced apples (Granny Smith or Honeycrisp work well)
- 1/2 cup granulated sugar
- 1 teaspoon ground cinnamon
- 1 tablespoon lemon juice
- 1 cup rolled oats
- 1/2 cup all-purpose flour
- 1/2 cup packed brown sugar
- 1/3 cup unsalted butter, melted
- 1/4 teaspoon salt
- Optional: chopped nuts (such as walnuts or pecans)
Cooking Instructions:
Preheat your oven to 350°F (175°C). In a large mixing bowl, combine the sliced apples, granulated sugar, cinnamon, and lemon juice.
Mix well to guarantee the apples are evenly coated, then transfer the apple mixture into a greased cast iron skillet.
In a separate bowl, mix together the rolled oats, flour, brown sugar, melted butter, and salt until crumbly.
Sprinkle this topping evenly over the apples in the skillet. Bake in the preheated oven for about 30-35 minutes or until the apples are bubbly and the topping is golden brown.
Extra Tips:
For added flavor, consider incorporating spices such as nutmeg or ginger into the apple mixture.
You can also experiment with different types of apples to find your favorite combination. If you prefer a thicker topping, double the oat mixture for a heartier crunch.
Leftovers can be stored in the fridge for a few days, and this dish is best enjoyed warm, so feel free to reheat it before serving!
Savory Herb Crackers
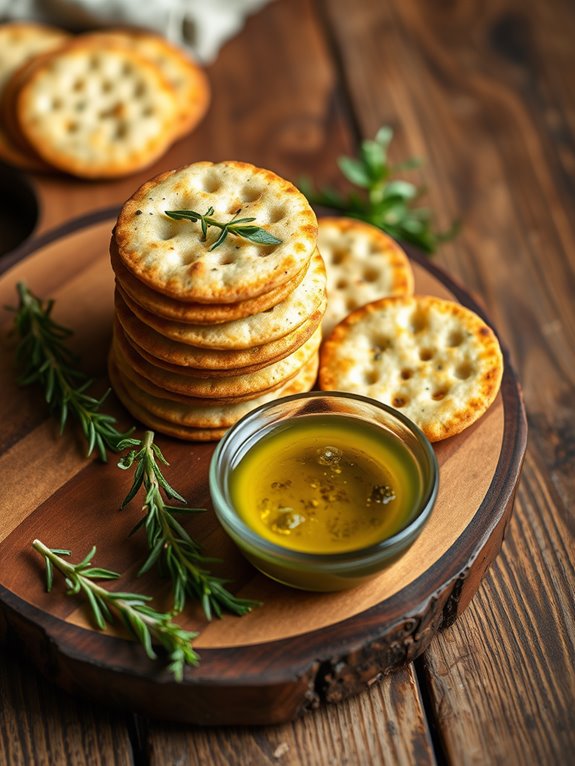
Savory Herb Crackers are a delightful snack that you can easily whip up in your cast iron skillet. The combination of fresh herbs and a touch of cheese makes these crackers not only flavorful but also incredibly aromatic. Perfect for serving at parties or enjoying as a midday treat, they're a great way to impress your guests with homemade goodness.
Plus, with a satisfying crunch, these crackers will have everyone reaching for more. Making your own crackers isn't only rewarding but also allows you to customize the flavors to suit your taste. With a few simple ingredients and minimal effort, you can create a batch of savory herb crackers that are crispy, flavorful, and perfect for dipping or pairing with cheese.
Your cast iron skillet will help achieve that desired golden-brown color and texture, giving your crackers a professional finish.
Ingredients:
- 1 cup all-purpose flour
- 1 teaspoon salt
- 1 teaspoon dried herbs (such as rosemary, thyme, or oregano)
- 1/2 teaspoon garlic powder
- 1/4 cup grated Parmesan cheese
- 1/4 cup olive oil
- 1/4 cup cold water
Cooking Instructions:
In a mixing bowl, combine the flour, salt, dried herbs, garlic powder, and Parmesan cheese. Stir until well mixed, then add the olive oil and cold water. Mix until a dough forms; it should be slightly sticky but manageable. Knead the dough on a lightly floured surface for about 2-3 minutes until smooth.
Preheat your cast iron skillet over medium heat. Roll out the dough to about 1/8 inch thickness and cut into desired shapes using a knife or cookie cutter. Place the cut crackers in the skillet in a single layer, cooking for about 2-3 minutes on each side or until they're golden brown and crispy.
Repeat with the remaining dough, adjusting the heat as necessary to prevent burning.
Extra Tips:
For added flavor, experiment with different herbs or spices to create your own unique cracker blend. You can also sprinkle coarse sea salt on top before cooking for an extra crunch.
If you prefer a cheesy version, try adding more cheese into the dough or topping the crackers with additional cheese just before finishing in the skillet. Store any leftovers in an airtight container to keep them fresh and crunchy!
Frequently Asked Questions
Can I Use a Non-Stick Spray on My Cast Iron Skillet?
Your cast iron skillet is like a seasoned warrior, built to endure. While you can use non-stick spray, it's best to stick with oils that enhance its natural seasoning for ideal flavor and longevity.
How Do I Properly Season My Cast Iron Skillet?
To properly season your cast iron skillet, clean it thoroughly, apply a thin layer of vegetable oil, and bake it upside down at a high temperature for an hour. Let it cool before using.
What Is the Best Way to Clean My Cast Iron Skillet?
Cleaning a cast iron skillet is like nurturing a loyal friend. You scrub it with warm water and a brush, avoiding soap. Dry it immediately, then rub in some oil to keep it seasoned and happy.
Are There Any Snacks That Require No Cooking in a Skillet?
You can whip up snacks like cheese platters, fresh fruit, or nuts without cooking. Simply arrange your favorite items on a plate, and you've got a delicious, no-cook snack ready to enjoy.
Can I Use Frozen Vegetables in These Recipes?
Using frozen vegetables is like adding colorful paint to a blank canvas; you can absolutely use them in your recipes. Just remember to thaw and drain them first, ensuring they're perfectly crisp and flavorful!