As an affiliate, we may earn a commission from qualifying purchases. We get commissions for purchases made through links on this website from Amazon and other third parties.
Did you know that nearly 70% of people find meal prep stressful? If you're among them, you might want to explore 12+ must-try Instant Pot 3-quart recipes that can transform your cooking routine. These recipes not only save time but also elevate the flavors of everyday meals. From hearty beef stew to delightful desserts, there's something for everyone. Curious about how to make your weeknights easier and more delicious?
Key Takeaways
- Discover hearty main dishes like Beef Stew and Creamy Chicken and Rice, perfect for quick, comforting meals in your 3-quart Instant Pot.
- Try Vegetarian Chili or Teriyaki Salmon for flavorful, nutritious options that utilize the pressure cooking method for enhanced taste and texture.
- Explore easy side dishes such as Garlic Mashed Potatoes, which can be made creamy and delicious in a fraction of the time.
- Consider light meals like Quinoa and Black Bean Salad or Apple Cinnamon Oatmeal, ideal for quick lunches or breakfasts.
- Don't forget desserts like Chocolate Lava Cake, effortlessly made in the Instant Pot for a delightful treat after dinner.
Hearty Beef Stew
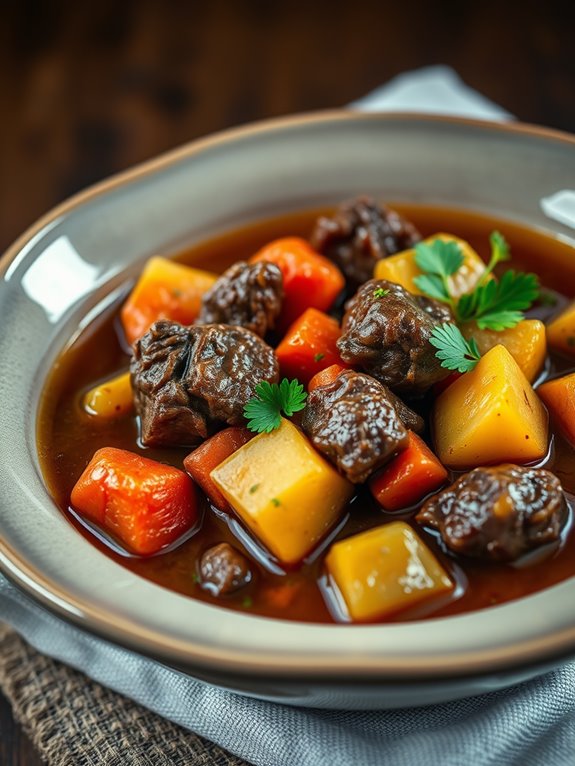
Hearty Beef Stew is a classic comfort food that warms the soul and fills the belly. This dish is perfect for chilly nights or any time you crave something hearty and satisfying. The Instant Pot makes the cooking process fast and convenient, allowing the flavors to meld beautifully in a fraction of the time compared to traditional methods.
With tender beef, root vegetables, and a rich broth, this stew is sure to become a family favorite. Using the Instant Pot not only speeds up cooking but also enhances the flavors through pressure cooking. The result is a deeply flavorful and tender stew that you can enjoy with crusty bread or over a bed of rice.
Follow this simple recipe to create a delicious Hearty Beef Stew that will impress your family and friends.
Ingredients:
- 1.5 pounds beef chuck, cut into 1-inch pieces
- 2 tablespoons olive oil
- 1 onion, chopped
- 3 cloves garlic, minced
- 4 carrots, sliced
- 3 potatoes, diced
- 2 cups beef broth
- 1 tablespoon tomato paste
- 1 teaspoon dried thyme
- 1 teaspoon dried rosemary
- Salt and pepper to taste
- 1 bay leaf
Cooking Instructions:
Start by selecting the "Sauté" function on the Instant Pot. Add the olive oil and let it heat up. Once hot, add the chopped onion and minced garlic, sautéing until the onion becomes translucent.
Next, add the beef chuck pieces and brown them on all sides. This step adds depth to the flavor of the stew. Once browned, turn off the sauté function.
Add the sliced carrots, diced potatoes, beef broth, tomato paste, dried thyme, dried rosemary, salt, pepper, and bay leaf to the pot. Stir to combine all the ingredients.
Secure the lid on the Instant Pot, making sure the valve is set to "Sealing." Select the "Manual" or "Pressure Cook" function and set the timer for 35 minutes. Once the cooking time is complete, allow the pressure to release naturally for 10 minutes before performing a quick release to let out any remaining steam.
Carefully remove the lid and give the stew a good stir before serving.
Extra Tips:
For an extra layer of flavor, consider browning the beef in batches, which helps avoid overcrowding the pot and guarantees even cooking.
Feel free to customize the vegetables according to your preference; adding peas or green beans towards the end of cooking can enhance the stew's texture and color.
If you prefer a thicker stew, you can mix a tablespoon of cornstarch with water and stir it in after cooking, then use the sauté function for a few minutes until it thickens.
Enjoy your Hearty Beef Stew!
Creamy Chicken and Rice

Creamy Chicken and Rice is a comforting dish that's perfect for busy weeknights. With the Instant Pot, you can have this hearty meal ready in no time, thanks to the pressure cooking feature that infuses the chicken and rice with rich flavors. The creamy sauce adds a delightful touch that makes this dish irresistible.
Whether you're cooking for your family or preparing a meal for guests, this recipe is sure to please everyone at the table. This one-pot meal combines tender chicken, fluffy rice, and a luscious creamy sauce, making it a go-to recipe for any occasion.
The Instant Pot takes the hassle out of cooking by allowing you to sauté, pressure cook, and even keep the dish warm all in one appliance. With minimal prep time and easy cleanup, you can enjoy a delicious homemade meal without spending hours in the kitchen.
Ingredients:
- 1 lb boneless, skinless chicken breasts
- 1 cup long-grain white rice
- 1 small onion, diced
- 2 cloves garlic, minced
- 2 cups chicken broth
- 1 cup heavy cream
- 1 cup frozen peas and carrots
- 1 teaspoon dried thyme
- Salt and pepper to taste
- 2 tablespoons olive oil
- Fresh parsley, chopped (for garnish)
Instructions:
Start by setting the Instant Pot to the sauté mode. Add the olive oil and let it heat up, then add the diced onion and garlic. Sauté for about 2-3 minutes until the onion becomes translucent.
Season the chicken breasts with salt and pepper, then add them to the pot, browning them on both sides for about 3-4 minutes each. Once browned, remove the chicken from the pot and set it aside.
Next, add the rice to the pot, followed by the chicken broth, thyme, and the frozen peas and carrots. Stir to combine everything. Place the chicken back on top of the rice mixture, securing the lid on the Instant Pot.
Set it to manual high pressure for 10 minutes. Once the cooking time is complete, allow for a natural pressure release for about 10 minutes, followed by a quick release for any remaining pressure.
Open the lid, stir in the heavy cream, and let it sit for a few minutes to thicken. Garnish with fresh parsley before serving.
Extra Tips:
For added flavor, consider marinating the chicken in your favorite herbs and spices before cooking. You can also substitute the heavy cream with half-and-half or a dairy-free alternative if you're looking for a lighter version.
If you prefer a thicker sauce, you can use a cornstarch slurry (1 tablespoon cornstarch mixed with 2 tablespoons of water) after pressure cooking to thicken the sauce further. Enjoy your rich and creamy dish!
Vegetarian Chili
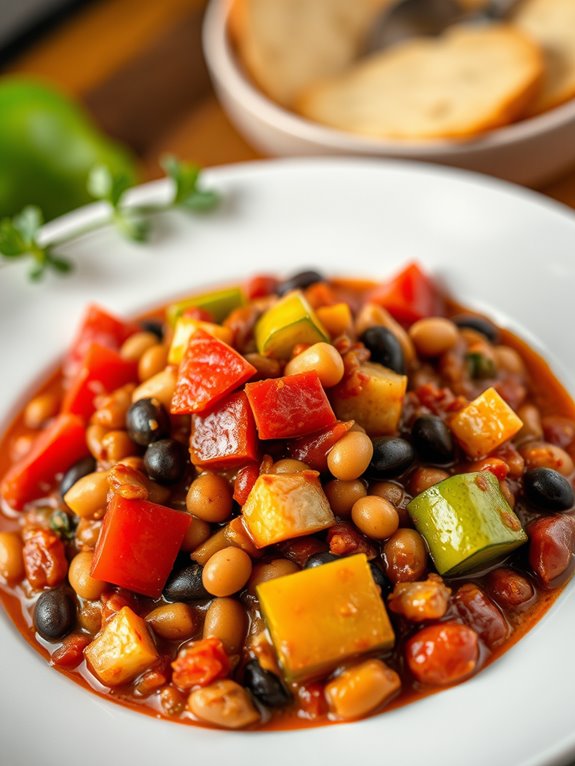
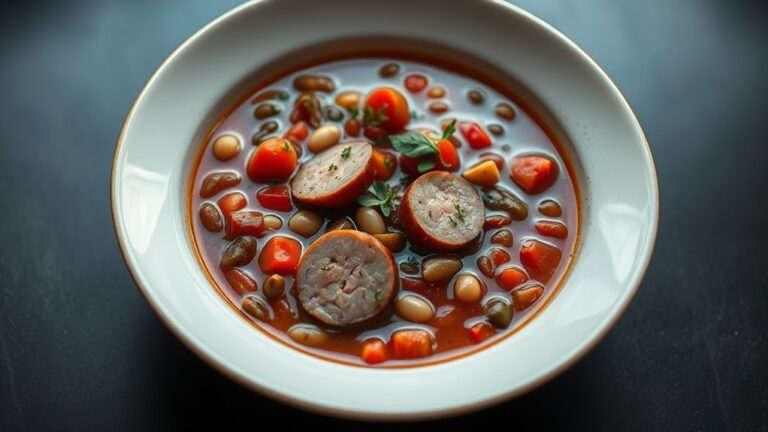
Vegetarian chili is a hearty and flavorful dish that's perfect for any occasion, whether it's a cozy family dinner or a gathering with friends. This recipe utilizes the Instant Pot to bring together a variety of beans, vegetables, and spices, creating a comforting meal that's both nutritious and satisfying. Packed with protein and fiber, this vegetarian chili is a great way to enjoy a meatless meal without sacrificing taste.
With the convenience of the Instant Pot, you can have this delicious vegetarian chili ready in no time. The pressure cooking method allows the flavors to meld together beautifully, resulting in a rich and savory dish that will warm you from the inside out. Serve it with your favorite toppings, such as avocado, shredded cheese, or sour cream, for an extra touch of deliciousness.
Ingredients:
- 1 tablespoon olive oil
- 1 medium onion, chopped
- 3 cloves garlic, minced
- 1 bell pepper, chopped
- 2 medium carrots, diced
- 1 zucchini, diced
- 1 can (15 oz) black beans, drained and rinsed
- 1 can (15 oz) kidney beans, drained and rinsed
- 1 can (15 oz) diced tomatoes, with juice
- 2 cups vegetable broth
- 2 tablespoons chili powder
- 1 teaspoon cumin
- 1 teaspoon smoked paprika
- Salt and pepper to taste
- Optional toppings: avocado, shredded cheese, sour cream, cilantro
To begin, set your Instant Pot to the sauté function and heat the olive oil. Add the chopped onion and sauté for about 3-4 minutes until it becomes translucent.
Stir in the minced garlic, bell pepper, carrots, and zucchini, and cook for an additional 5 minutes. Once the vegetables are slightly softened, add the black beans, kidney beans, diced tomatoes (with juice), vegetable broth, chili powder, cumin, smoked paprika, salt, and pepper. Stir everything together until well combined.
Secure the lid on the Instant Pot and set it to cook on high pressure for 15 minutes. Once the cooking time is complete, allow for a natural release of pressure for about 10 minutes before carefully performing a quick release for any remaining steam.
Open the lid and give the chili a good stir. Adjust seasoning if necessary and serve hot with your choice of toppings.
Extra Tips: For a thicker chili, you can mash some of the beans with a fork or blend a portion of the chili before serving. Feel free to experiment with different vegetables or spices to make the chili your own.
This dish also freezes well, so you can make a double batch and enjoy it later on busy nights.
Garlic Mashed Potatoes
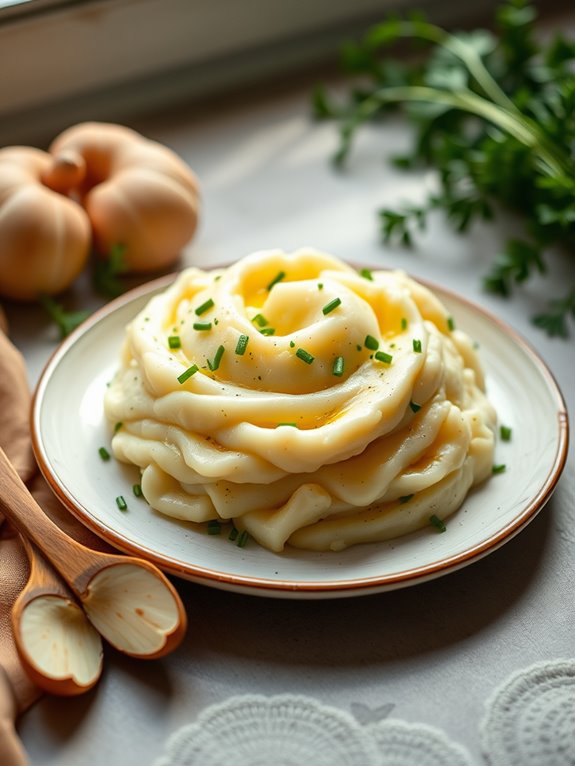
Garlic mashed potatoes are a delightful twist on the classic side dish, bringing a rich, savory flavor that pairs perfectly with a variety of meals. Made in the Instant Pot, this recipe guarantees that your potatoes are cooked to creamy perfection in a fraction of the time it would take using traditional methods.
The combination of garlic and butter elevates the taste, making these mashed potatoes a favorite at family dinners, holiday gatherings, or even a casual weeknight meal. Using the Instant Pot not only saves time but also allows the flavors to meld beautifully. The pressure cooking method steams the potatoes, assuring they remain moist and tender without the risk of overcooking.
You can easily customize this recipe by adding herbs or substituting different types of potatoes to suit your taste preferences. Get ready to enjoy a comforting dish that's simple to prepare and sure to impress!
Ingredients:
- 2 pounds of russet or Yukon Gold potatoes
- 4 cloves of garlic, peeled and minced
- 1 cup of chicken or vegetable broth
- 1/2 cup of milk (or heavy cream for a richer flavor)
- 1/4 cup of unsalted butter
- Salt and pepper to taste
- Chopped chives or parsley for garnish (optional)
Instructions:
- Start by peeling and cubing the potatoes into even-sized chunks, about 1-2 inches thick. This will help them cook evenly in the Instant Pot. Place the cubed potatoes in the Instant Pot along with the minced garlic and pour in the chicken or vegetable broth.
- Close the lid of the Instant Pot, ensuring the valve is set to sealing, and set the manual pressure to cook on high for 10 minutes. Once the cooking time is up, allow the pressure to release naturally for about 5 minutes before performing a quick release for any remaining pressure. Carefully open the lid and drain any excess liquid if necessary.
- Add the butter and milk (or heavy cream) to the cooked potatoes and garlic. Use a potato masher or hand mixer to mash until smooth and creamy. Season with salt and pepper to taste. If you prefer a thicker mash, add more butter or less milk. Once the desired consistency is reached, serve hot, garnished with chopped chives or parsley if desired.
Extra Tips:
For an even richer flavor, consider roasting the garlic instead of using it raw; this will add a lovely sweetness to your mashed potatoes. You can also experiment with different herbs like rosemary or thyme for an aromatic touch.
If you're serving a larger crowd, simply double the ingredients and adjust the cooking time accordingly, as the Instant Pot can accommodate larger batches without any issues.
Teriyaki Salmon
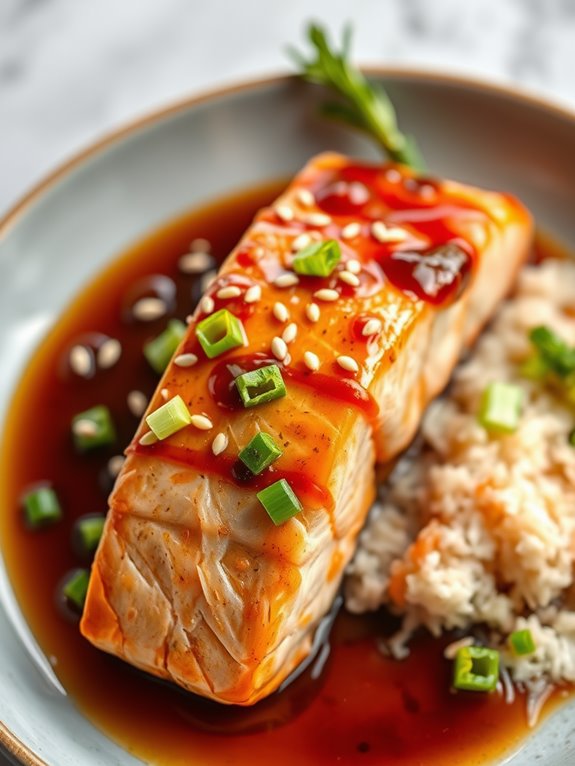
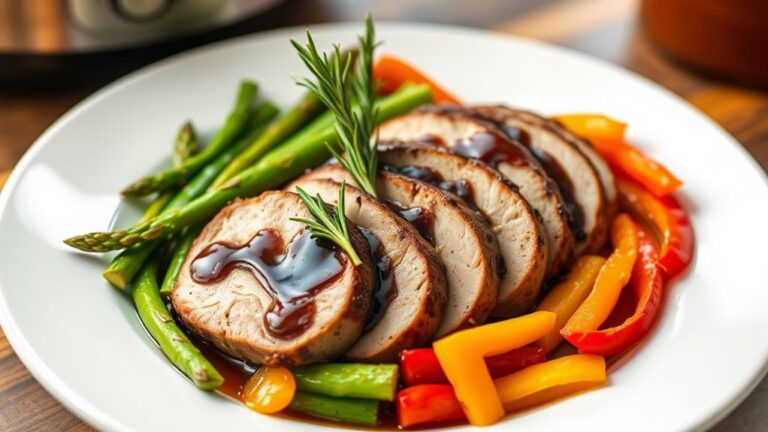
Teriyaki Salmon is a delightful dish that combines the rich flavors of soy sauce, ginger, and garlic with tender, flaky salmon fillets. Cooking it in the Instant Pot not only speeds up the process but also locks in moisture, ensuring the salmon remains juicy and flavorful.
This dish is perfect for a quick weeknight dinner or a special occasion, and it pairs beautifully with rice or steamed vegetables.
Using the Instant Pot, you can prepare Teriyaki Salmon in just a few minutes, making it an ideal choice for those busy evenings when you want a healthy meal without spending hours in the kitchen.
The combination of sweet and savory flavors in the teriyaki sauce complements the natural richness of the salmon, creating a mouthwatering dish that everyone will love.
Ingredients:
- 2 salmon fillets (about 6 oz each)
- 1/4 cup soy sauce
- 2 tablespoons honey or brown sugar
- 1 tablespoon rice vinegar
- 1 tablespoon sesame oil
- 2 cloves garlic, minced
- 1 teaspoon fresh ginger, grated
- 1 tablespoon cornstarch (optional, for thickening)
- 1 tablespoon water (optional, for thickening)
- Sesame seeds and green onions for garnish
Cooking Instructions:
- In a small bowl, whisk together the soy sauce, honey (or brown sugar), rice vinegar, sesame oil, minced garlic, and grated ginger to create the teriyaki sauce.
- Place the salmon fillets in the Instant Pot and pour the sauce over them, ensuring they're well coated.
- Close the lid of the Instant Pot, set the valve to sealing, and select the "Manual" or "Pressure Cook" setting. Cook on high pressure for 3 minutes.
- Once the cooking time is complete, perform a quick release of the pressure. Carefully remove the salmon from the pot and set it aside on a plate.
If you prefer a thicker sauce, you can create a cornstarch slurry by mixing the cornstarch with water in a small bowl.
Turn the Instant Pot to the sauté setting, add the slurry to the remaining sauce, and cook for a few minutes until the sauce thickens. Pour the thickened sauce over the salmon before serving.
Extra Tips:
For the best flavor, consider marinating the salmon in the teriyaki sauce for 30 minutes before cooking.
If you're short on time, this step can be skipped, but marinating can enhance the taste. Additionally, you can serve the Teriyaki Salmon with steamed broccoli or jasmine rice for a complete meal.
Don't forget to sprinkle sesame seeds and sliced green onions on top for a beautiful presentation and added texture!
Spaghetti and Meatballs
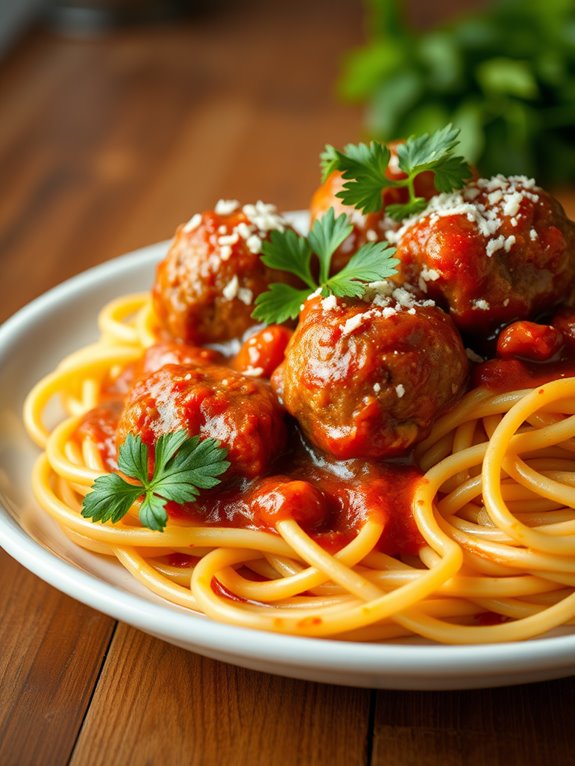
Spaghetti and meatballs is a classic dish that combines the comforting flavors of Italian cuisine with the convenience of modern cooking. Using an Instant Pot to prepare this meal not only saves time but also brings out the rich flavors of the ingredients in a unique way. The pressure cooking method helps the meatballs become tender and juicy while allowing the spaghetti to cook perfectly in the same pot, absorbing all the delicious sauce.
This easy-to-follow recipe will guide you through the process of making spaghetti and meatballs in your 3-quart Instant Pot. With just a few simple ingredients and minimal prep time, you can enjoy a satisfying meal that will please the whole family. Let's explore the ingredients and cooking instructions!
Ingredients:
- 1 pound ground beef (or a mix of beef and pork)
- 1/4 cup breadcrumbs
- 1/4 cup grated Parmesan cheese
- 1/4 cup chopped fresh parsley (or 1 tablespoon dried)
- 1 clove garlic, minced
- 1 egg
- Salt and pepper to taste
- 1 jar (24 ounces) marinara sauce
- 2 cups uncooked spaghetti
- 2 cups water
Cooking Instructions:
In a large bowl, combine the ground beef, breadcrumbs, Parmesan cheese, parsley, garlic, egg, salt, and pepper. Mix until just combined. Shape the mixture into 1-inch meatballs.
Set your Instant Pot to the "Sauté" function, and add a little olive oil. Brown the meatballs in batches, turning them occasionally until they're golden on all sides. Remove the meatballs and set them aside.
Next, add the marinara sauce and water to the pot, scraping up any browned bits from the bottom. Break the spaghetti in half and add it to the pot, making sure it's submerged in the sauce. Gently place the browned meatballs on top of the spaghetti.
Close the lid, set the valve to sealing, and cook on high pressure for 8 minutes. Once done, allow for a natural release for 5 minutes, then carefully switch to quick release to let out any remaining pressure. Serve hot, garnished with additional Parmesan cheese if desired.
Extra Tips:
When making spaghetti and meatballs in the Instant Pot, it's crucial to avoid overcooking the spaghetti, as it can become mushy. Breaking the pasta in half helps it fit better in the pot and guarantees even cooking.
Feel free to customize the meatball mixture by adding your favorite herbs or spices or using ground turkey for a lighter option. Additionally, you can make your own marinara sauce for a fresher flavor or add vegetables like bell peppers or mushrooms for extra nutrition. Enjoy your delicious and comforting meal!
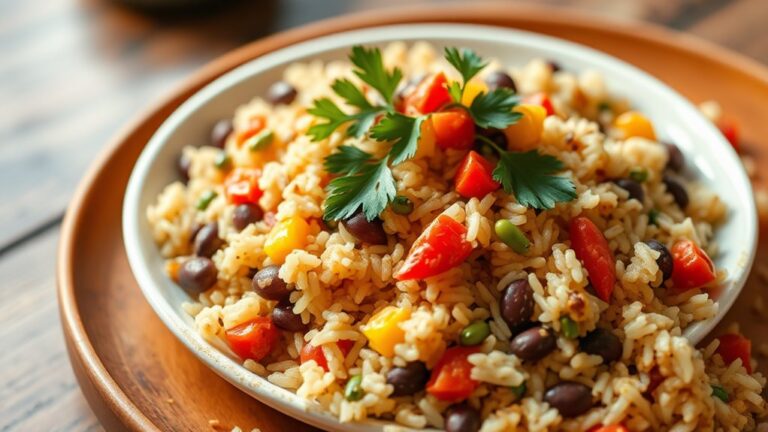
Quinoa and Black Bean Salad
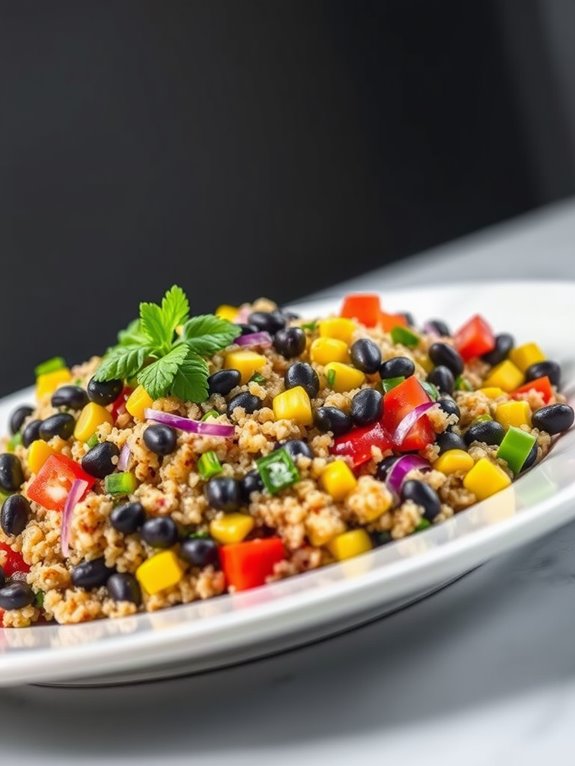
Quinoa and Black Bean Salad is a nutritious and flavorful dish that's perfect for a quick lunch or as a side for dinner. Packed with protein, fiber, and essential vitamins, this salad isn't only satisfying but also incredibly easy to prepare using your Instant Pot.
With the right balance of spices and fresh ingredients, it can be a revitalizing addition to any meal. This dish is highly versatile and can be customized with various toppings and dressings to suit your taste preferences.
Whether you enjoy it cold or warm, the combination of quinoa, black beans, and fresh vegetables creates a delightful explosion of flavors in every bite. Let's explore this simple recipe that will have you enjoying a wholesome meal in no time!
Ingredients:
- 1 cup quinoa, rinsed
- 1 can (15 oz) black beans, drained and rinsed
- 1 bell pepper, diced
- 1 small red onion, diced
- 1 cup corn (fresh, frozen, or canned)
- 1 teaspoon cumin
- 1 teaspoon chili powder
- 1 lime, juiced
- 2 tablespoons olive oil
- Salt and pepper to taste
- Fresh cilantro for garnish (optional)
Instructions:
- Begin by adding the rinsed quinoa and 2 cups of water to the Instant Pot. Seal the lid and set it to cook on high pressure for 1 minute.
- Once the cooking time is complete, allow for a natural pressure release for about 10 minutes before carefully releasing any remaining pressure.
- After the quinoa is cooked, fluff it with a fork and transfer it to a large mixing bowl. Add the black beans, diced bell pepper, red onion, corn, cumin, chili powder, lime juice, and olive oil.
- Toss all the ingredients together until well combined. Season with salt and pepper to taste.
For an added touch, garnish with fresh cilantro before serving. This salad can be enjoyed immediately or stored in the fridge for a few hours to let the flavors meld even more.
Extra Tips:
When preparing this Quinoa and Black Bean Salad, feel free to experiment with additional ingredients such as avocado, diced tomatoes, or jalapeños for an extra kick.
You can also swap out the lime juice for lemon juice if you prefer a different citrus flavor. This salad is great for meal prep, as it keeps well in the refrigerator and can be eaten cold or reheated. Enjoy your healthy and delicious creation!
Apple Cinnamon Oatmeal
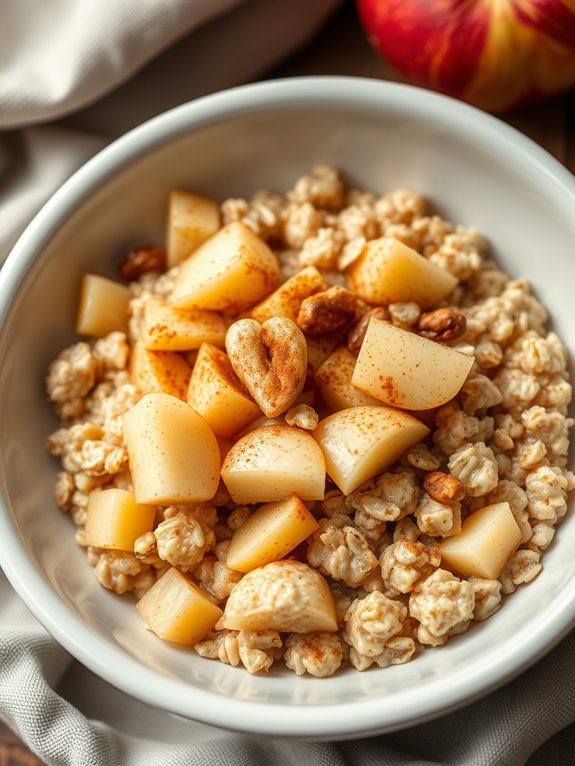
Making Apple Cinnamon Oatmeal in your Instant Pot is a quick and delicious way to start your morning. This comforting dish combines the sweetness of apples with the warm spice of cinnamon, creating a hearty breakfast that will keep you satisfied until lunchtime.
With the Instant Pot, you can prepare a creamy and flavorful oatmeal in just a matter of minutes, making it perfect for busy mornings or leisurely weekends alike.
This recipe isn't only easy to make, but it's also highly customizable. Feel free to adjust the sweetness or add in your favorite toppings, such as nuts, dried fruits, or a drizzle of maple syrup. Whether you're cooking for yourself or the entire family, this Apple Cinnamon Oatmeal is sure to become a go-to breakfast option.
Ingredients:
- 1 cup rolled oats
- 2 cups water or milk (or a combination)
- 1 medium apple, peeled and diced
- 1 teaspoon ground cinnamon
- 1 tablespoon brown sugar or maple syrup (optional)
- 1/4 teaspoon salt
- 1/2 teaspoon vanilla extract (optional)
Cooking Instructions:
- Begin by adding the rolled oats, water or milk, diced apple, ground cinnamon, brown sugar (if using), salt, and vanilla extract to the Instant Pot. Stir to combine all the ingredients evenly.
- Secure the lid on the Instant Pot, ensuring the valve is set to the sealing position. Select the "Porridge" or "Manual" setting and set the timer for 4 minutes. Once cooking is complete, allow the pressure to release naturally for about 10 minutes before carefully switching the valve to venting to release any remaining pressure.
Extra Tips:
To enhance the flavor and texture of your Apple Cinnamon Oatmeal, consider adding a handful of chopped nuts or a sprinkle of raisins during cooking.
You can also experiment with different types of apples for varying levels of sweetness and tartness. For a creamier oatmeal, use milk or a milk alternative instead of water. If you prefer a thicker consistency, reduce the liquid slightly or increase the cooking time by one minute.
Enjoy this nutritious breakfast with a dollop of yogurt or a drizzle of honey for added richness!
Lemon Herb Roasted Chicken
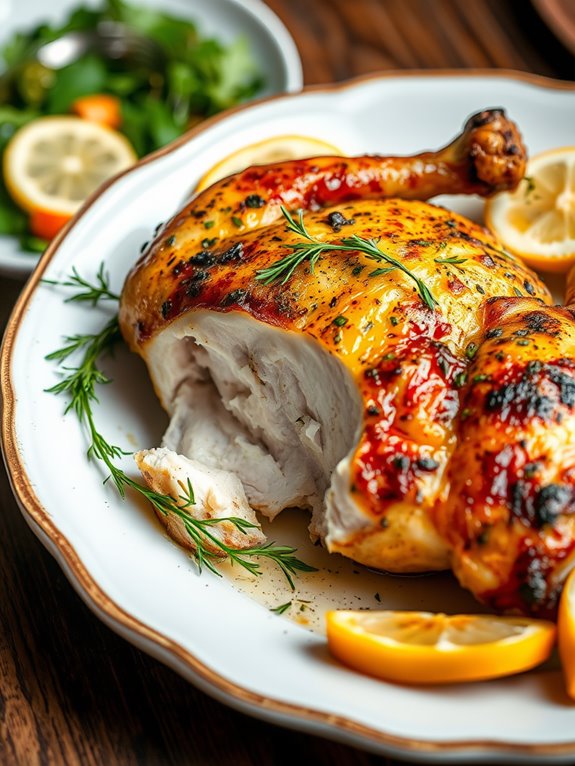
Lemon Herb Roasted Chicken in the Instant Pot is a delightful dish that brings together fresh flavors and tender meat, making it perfect for a family dinner or a special gathering. The combination of lemon, herbs, and garlic creates a fragrant aroma that fills your kitchen, while the Instant Pot guarantees that the chicken is juicy and succulent.
This recipe is simple to follow, making it accessible for both seasoned cooks and beginners alike. The beauty of using an Instant Pot is that it greatly reduces the cooking time without compromising taste or texture. With just a few ingredients and one pot, you can achieve a restaurant-quality meal in no time.
Serve this lemon herb roasted chicken with your favorite sides, such as roasted vegetables or a light salad, to complete the meal.
Ingredients:
- 3 lbs whole chicken, cleaned and patted dry
- 2 lemons, zested and juiced
- 4 cloves garlic, minced
- 2 tablespoons olive oil
- 1 tablespoon fresh rosemary, chopped
- 1 tablespoon fresh thyme, chopped
- 1 tablespoon fresh parsley, chopped
- Salt and pepper to taste
- 1 cup chicken broth
Cooking Instructions:
Start by seasoning the whole chicken generously with salt and pepper, both inside and out. In a bowl, combine the lemon juice, lemon zest, minced garlic, olive oil, rosemary, thyme, and parsley to create a marinade.
Rub this mixture all over the chicken, making sure it gets into all the nooks and crannies for maximum flavor. Allow the chicken to marinate for at least 30 minutes, or up to overnight in the refrigerator for deeper flavor.
Once marinated, add the chicken broth to the Instant Pot and place the chicken on the trivet inside the pot. Close the lid and set the valve to sealing. Cook on high pressure for 25 minutes, then allow for a natural release for 10 minutes before performing a quick release of any remaining steam.
For an extra crispy skin, you can finish the chicken under the broiler in your oven for 5-7 minutes after it has cooked in the Instant Pot.
Extra Tips:
For added flavor, consider stuffing the cavity of the chicken with lemon halves and additional herbs before cooking. Make sure to adjust the cooking time if your chicken is larger or smaller than 3 lbs, as this can affect the tenderness.
Additionally, using an Instant Pot with a sauté function allows you to brown the chicken directly in the pot before pressure cooking, enhancing the overall flavor of the dish. Enjoy your delicious lemon herb roasted chicken!
Chocolate Lava Cake

Indulging in a rich and gooey chocolate lava cake is a delightful experience, and making it in an Instant Pot is easier than you think! This dessert is perfect for impressing guests or treating yourself after a long day. The Instant Pot creates a moist and tender cake with a luscious molten center that oozes chocolate goodness with every bite.
With just a few simple ingredients and minimal prep time, you can whip up this decadent dessert in no time. This recipe yields a single serving, but you can easily multiply the ingredients to make more cakes. The beauty of the Instant Pot is that it cooks evenly and locks in moisture, resulting in a cake that's perfectly cooked every time.
Just make sure to let the cake rest for a couple of minutes before digging in to allow the lava to settle slightly. So, gather your ingredients and get ready for a chocolaty treat that will leave you wanting more!
Ingredients:
- 1/4 cup unsalted butter
- 1/4 cup semi-sweet chocolate chips
- 1/4 cup powdered sugar
- 1 large egg
- 1 large egg yolk
- 2 tablespoons all-purpose flour
- 1/2 teaspoon vanilla extract
- Pinch of salt
- Cooking spray or butter for greasing the ramekin
Instructions:
- Begin by greasing a 6-ounce ramekin with cooking spray or butter. Set it aside. In a microwave-safe bowl, melt the butter and chocolate chips together in the microwave in 20-second intervals, stirring until smooth.
- Stir in the powdered sugar until well combined. Then, add the egg, egg yolk, vanilla extract, and salt, mixing until fully incorporated. Finally, fold in the flour until just combined. Pour the batter into the prepared ramekin.
- Pour 1 cup of water into the Instant Pot and place the trivet inside. Carefully place the ramekin on the trivet. Close the lid and set the steam release valve to the sealing position. Cook on high pressure for 10 minutes. Once the cooking time is up, allow for a natural release for 5 minutes, then perform a quick release to release any remaining steam.
- Carefully remove the ramekin from the Instant Pot and let it cool for about 2 minutes. Run a knife around the edge, then invert it onto a plate. Serve warm and enjoy the gooey chocolate center!
Extra Tips:
For an extra touch of indulgence, consider serving your chocolate lava cake with a scoop of vanilla ice cream or a dollop of whipped cream. You can also sprinkle some powdered sugar on top for added sweetness and presentation.
If you want to experiment with flavors, try adding a tablespoon of espresso powder to enhance the chocolate or a pinch of cinnamon for a warm spice note. Remember, every Instant Pot is slightly different, so keep an eye on your cooking time if you're trying this recipe for the first time!
Frequently Asked Questions
Can I Use Frozen Ingredients in These Instant Pot Recipes?
Yes, you can use frozen ingredients in your Instant Pot recipes. Just remember to adjust cooking times, as frozen items may require a bit longer to cook thoroughly, but it'll still yield delicious results!
How Do I Clean My Instant Pot After Cooking?
To clean your Instant Pot, unplug it, remove the inner pot, and wash it with warm soapy water. Wipe the lid and housing with a damp cloth. Make sure everything's dry before reassembling.
What Is the Best Way to Store Leftovers?
Think of your leftovers as treasures waiting to be preserved. Once cooled, store them in airtight containers, label with dates, and refrigerate. This way, you'll keep them fresh and ready for your next meal adventure.
Are There Gluten-Free Options for These Recipes?
Yes, there are plenty of gluten-free options available for these recipes. You can easily substitute gluten-containing ingredients with gluten-free alternatives, ensuring you enjoy delicious meals while adhering to your dietary needs without sacrificing flavor.
Can I Double the Recipes Without Changing the Cooking Time?
Imagine a garden blooming with flavor. You can't simply double the seeds and expect the same growth time. For your recipes, adjust the cooking time; otherwise, you might end up with a half-baked creation.