As an affiliate, we may earn a commission from qualifying purchases. We get commissions for purchases made through links on this website from Amazon and other third parties.
If you think cheesecake can't get any better, think again. The combination of creamy cheesecake and bold espresso is a game-changer. Whether you're a coffee aficionado or just someone with a sweet tooth, these Instant Pot espresso cheesecake recipes promise to elevate your dessert game. From rich chocolate swirls to delightful hazelnut variations, there's something for everyone. Get ready to explore these indulgent treats that will leave you craving more.
Key Takeaways
- Instant Pot cheesecakes ensure moist, creamy textures and prevent cracks, perfect for espresso lovers.
- Classic Espresso Cheesecake combines cream cheese and brewed espresso for a rich flavor.
- Variations like Chocolate Espresso Swirl and Tiramisu-Inspired Cheesecake add unique twists to the classic recipe.
- Cooking methods include high-pressure cooking with natural release for optimal results.
- Toppings like cocoa powder, chocolate shavings, or whipped cream enhance presentation and flavor.
Classic Espresso Cheesecake

Classic Espresso Cheesecake is a delightful dessert that combines the rich, creamy texture of traditional cheesecake with the bold flavor of espresso. This recipe is perfect for coffee lovers and will surely impress your guests with its decadent taste.
Using an Instant Pot to create this cheesecake helps to achieve a perfectly moist and creamy texture that can be hard to replicate in a conventional oven. Preparing the cheesecake in an Instant Pot isn't only efficient but also makes it easier to manage the cooking process. The pressure cooking method guarantees even cooking and prevents cracking, resulting in a beautiful dessert that you can be proud to serve.
Get ready to immerse yourself in the world of luscious espresso cheesecake that melts in your mouth!
Ingredients:
- 1 ½ cups graham cracker crumbs
- ½ cup unsalted butter, melted
- 2 cups cream cheese, softened
- ¾ cup granulated sugar
- 2 large eggs
- 1 cup sour cream
- ¼ cup brewed espresso (cooled)
- 1 teaspoon vanilla extract
- ¼ teaspoon salt
- 1 tablespoon cornstarch
Instructions:
- Begin by preparing the crust. In a mixing bowl, combine the graham cracker crumbs and melted butter. Mix until the crumbs are evenly coated. Press the mixture firmly into the bottom of a 7-inch springform pan to form an even layer. Set aside.
- In another large bowl, beat the softened cream cheese and granulated sugar together until smooth and creamy. Add the eggs one at a time, mixing well after each addition. Then, add the sour cream, cooled espresso, vanilla extract, salt, and cornstarch. Beat until everything is fully combined and smooth.
- Pour the cream cheese mixture over the prepared crust in the springform pan. Cover the pan tightly with aluminum foil to prevent moisture from seeping in during the cooking process.
- Pour 1 cup of water into the Instant Pot and place the trivet inside. Carefully lower the springform pan onto the trivet. Close the lid, making sure the steam release valve is in the sealing position. Set the Instant Pot to cook on high pressure for 35 minutes. Once cooking is complete, allow for a natural pressure release for about 10 minutes before carefully releasing any remaining pressure.
- Remove the cheesecake from the Instant Pot and let it cool to room temperature. Once cooled, refrigerate for at least 4 hours or overnight before serving.
Extra Tips:
For the best results, confirm that all your ingredients are at room temperature before mixing to achieve a creamy consistency. You can also enhance the coffee flavor by adding a bit of coffee liqueur to the filling if desired.
Remember to release the pressure slowly and carefully, as the cheesecake will be delicate. For added flair, consider topping your cheesecake with a drizzle of chocolate sauce or a sprinkle of cocoa powder before serving.
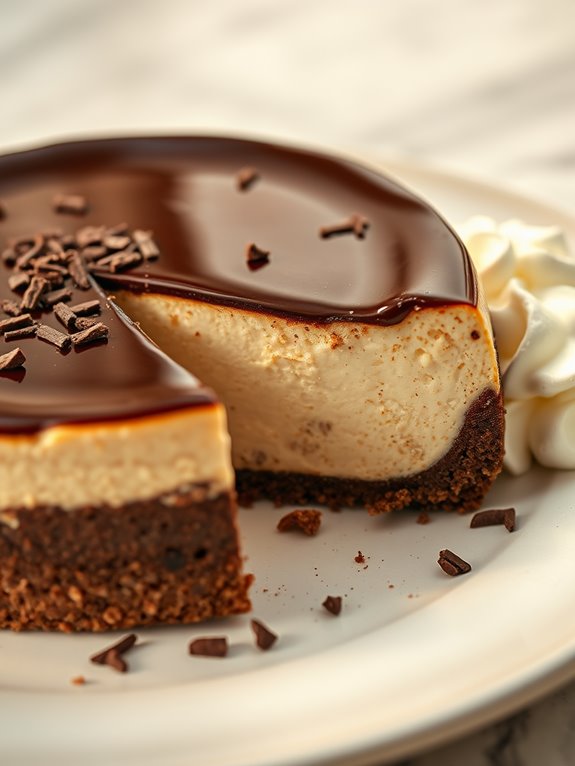
Chocolate Espresso Swirl Cheesecake
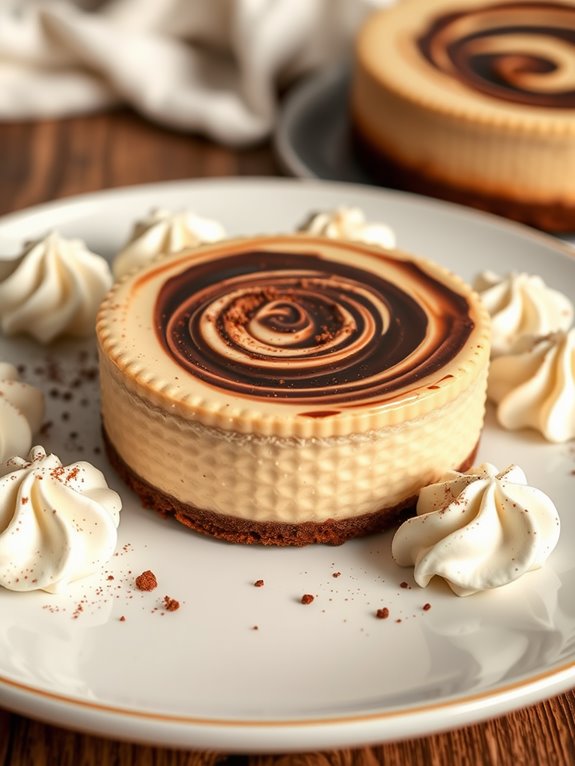
Indulge in the rich and decadent flavors of a Chocolate Espresso Swirl Cheesecake made effortlessly in your Instant Pot. This luscious dessert combines the boldness of espresso with the sweetness of chocolate, creating a delightful treat that's perfect for any occasion. The creamy texture of the cheesecake pairs beautifully with the chocolate espresso swirl, making each bite a heavenly experience.
The Instant Pot not only makes this cheesecake easy to prepare but also guarantees it cooks evenly and retains moisture. The pressure cooking method produces a velvety, smooth cheesecake that's sure to impress your family and friends. Serve it chilled with a dollop of whipped cream or a sprinkle of cocoa powder for an extra touch of elegance.
Ingredients:
- 1 ½ cups crushed graham crackers
- ½ cup unsalted butter, melted
- 2 cups cream cheese, softened
- 1 cup granulated sugar
- 3 large eggs
- 1 teaspoon vanilla extract
- ½ cup sour cream
- 1 tablespoon instant espresso powder
- ½ cup semi-sweet chocolate chips, melted
- ¼ cup cocoa powder
Instructions:
Start by preparing the crust. In a medium bowl, combine the crushed graham crackers with the melted butter until well mixed. Press this mixture firmly into the bottom of a 7-inch springform pan to form an even layer. Set aside.
In a large mixing bowl, use an electric mixer to beat the cream cheese until smooth. Gradually add in the sugar, followed by the eggs, one at a time, confirming each is fully incorporated before adding the next. Mix in the vanilla extract, sour cream, and espresso powder until well blended.
Pour half of the cream cheese mixture over the prepared crust. Drizzle half of the melted chocolate over this layer, then gently swirl it with a knife to create a marbled effect. Repeat with the remaining cream cheese mixture and chocolate.
Cover the springform pan tightly with aluminum foil to prevent water from seeping in during cooking. Add 1 cup of water to the Instant Pot and place the trivet inside. Carefully lower the cheesecake onto the trivet, then seal the lid and set to cook on high pressure for 35 minutes. Allow a natural release for 10 minutes before quick-releasing any remaining pressure. Once cooled, refrigerate for at least 4 hours before serving.
Extra Tips:
For the best results, make sure all your ingredients are at room temperature to create a smooth batter without lumps. If you prefer a more pronounced coffee flavor, you can increase the amount of espresso powder. Additionally, let the cheesecake cool completely in the pan before refrigerating, as this helps prevent cracks on the surface. Remember to slice the cheesecake with a hot, dry knife for clean cuts!
Tiramisu-Inspired Espresso Cheesecake
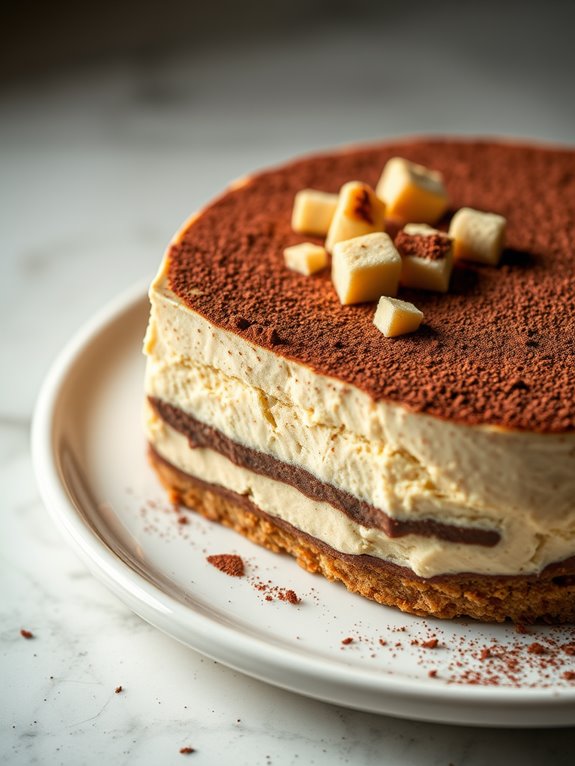
Tiramisu-inspired espresso cheesecake is a delightful fusion of two beloved desserts, combining the rich, creamy texture of cheesecake with the bold flavors of espresso and the classic elements of tiramisu. This Instant Pot recipe allows for a quicker preparation time while still delivering that decadent taste that makes it a favorite for any gathering or special occasion.
The use of the Instant Pot also guarantees that your cheesecake remains moist and perfectly cooked, making it a foolproof dessert option. The layers of coffee-soaked ladyfingers, smooth mascarpone cheese, and a hint of cocoa create a beautiful and delicious dessert that's sure to impress your guests.
Whether you're an espresso lover or just looking for a unique twist on traditional cheesecake, this recipe won't disappoint. Plus, it's ideal for those who prefer a no-bake option, as the Instant Pot does most of the work for you.
Ingredients:
- 1 ½ cups graham cracker crumbs
- ½ cup unsalted butter, melted
- 1 cup mascarpone cheese
- 16 oz cream cheese, softened
- 1 cup granulated sugar
- 3 large eggs
- ½ cup heavy cream
- ¼ cup espresso or strong brewed coffee, cooled
- 1 tsp vanilla extract
- 2 tbsp cocoa powder (for dusting)
- 6-8 ladyfingers, crushed (optional)
Cooking Instructions:
- Begin by preparing the crust. In a mixing bowl, combine the graham cracker crumbs and melted butter, then mix until well combined. Press this mixture into the bottom of a greased 7-inch springform pan to form an even layer. Set aside.
- In a separate large bowl, beat the mascarpone cheese and cream cheese together until smooth. Gradually add in the granulated sugar, followed by the eggs, one at a time, mixing well after each addition. Incorporate the heavy cream, espresso, and vanilla extract, and mix until everything is well blended.
- Pour the cheesecake filling over the prepared crust, smoothing the top with a spatula.
- Add 1 cup of water to the Instant Pot and place the trivet inside. Carefully lower the springform pan onto the trivet, then secure the lid. Set the Instant Pot to cook on high pressure for 35 minutes.
- Once the cooking time is complete, allow for a natural release for 10 minutes before carefully releasing any remaining pressure.
- Remove the cheesecake from the Instant Pot and let it cool in the pan for about 30 minutes before transferring it to the refrigerator. Chill for at least 4 hours or overnight.
- Before serving, dust the top with cocoa powder and sprinkle with crushed ladyfingers for added texture and flavor.
Extra Tips:
For the best results, make sure all your ingredients are at room temperature before starting. This will help achieve a smooth and creamy consistency for your cheesecake.
Additionally, if you want a stronger coffee flavor, you can adjust the amount of espresso to your preference. Remember to let the cheesecake chill thoroughly for the best texture, and consider serving it with a dollop of whipped cream for an extra indulgent treat!
Espresso Hazelnut Cheesecake
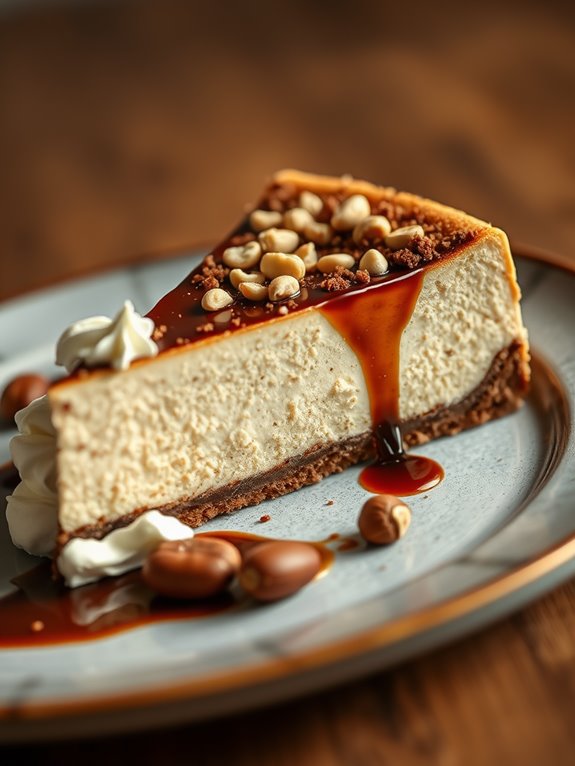
Indulge in the rich and delightful flavors of an Espresso Hazelnut Cheesecake, perfectly crafted using your Instant Pot. This dessert combines the creamy texture of traditional cheesecake with the robust notes of espresso and the nutty crunch of hazelnuts, making it a decadent treat for coffee lovers.
It's not only easy to make but also guarantees a moist and velvety cheesecake that will leave your guests raving about your culinary skills. The Instant Pot's pressure cooking capabilities allow for even cooking and a hassle-free baking experience, eliminating the common pitfalls of traditional oven baking.
With a few simple steps and a handful of ingredients, you can create a show-stopping dessert that makes any occasion feel special, whether it's a dinner party, holiday gathering, or just a sweet indulgence for yourself.
Ingredients:
- 1 ½ cups graham cracker crumbs
- ½ cup unsalted butter, melted
- 2 cups cream cheese, softened
- 1 cup granulated sugar
- 3 large eggs
- ½ cup sour cream
- 1 tablespoon vanilla extract
- 2 tablespoons instant espresso powder
- ½ cup finely chopped hazelnuts
Cooking Instructions:
- Start by preparing the crust. In a bowl, mix graham cracker crumbs and melted butter until well combined. Press the mixture firmly into the bottom of a 7-inch springform pan to create an even layer. Set aside.
- In a mixing bowl, beat together the softened cream cheese and granulated sugar until smooth and creamy. Add the eggs one at a time, mixing well after each addition. Then, mix in the sour cream, vanilla extract, and instant espresso powder until fully incorporated. Gently fold in the chopped hazelnuts.
- Pour the cheesecake filling over the prepared crust in the springform pan. Cover the pan tightly with aluminum foil to prevent moisture from entering during cooking.
- Pour 1 cup of water into the Instant Pot and place the trivet inside. Carefully lower the springform pan onto the trivet. Close the lid and set the Instant Pot to cook on high pressure for 40 minutes. Once the cooking time is complete, allow the pressure to release naturally for 10 minutes before performing a quick release.
- Carefully remove the cheesecake from the Instant Pot and let it cool at room temperature. Once cooled, refrigerate for at least 4 hours or overnight before serving.
Extra Tips:
For the best results, make certain that all your ingredients are at room temperature before starting, as this will help achieve a smooth and creamy texture.
If you prefer a stronger coffee flavor, you can adjust the amount of espresso powder to taste. Additionally, consider topping your cheesecake with whipped cream and a sprinkle of crushed hazelnuts for an elegant presentation. Enjoy your delicious Espresso Hazelnut Cheesecake!
Vanilla Bean Espresso Cheesecake
This cheesecake isn't only a feast for the taste buds but also a visual masterpiece, with its beautiful vanilla bean specks and glossy espresso topping.
Whether you're hosting a dinner party or simply craving something sweet, this dessert will surely become a favorite. So gather your ingredients and get ready to create a stunning Vanilla Bean Espresso Cheesecake that everyone will rave about!
Ingredients:
- 2 cups cream cheese, softened
- 1 cup granulated sugar
- 1/2 cup sour cream
- 1/4 cup heavy cream
- 3 large eggs
- 1 tablespoon vanilla bean paste
- 1 tablespoon espresso powder
- 1/2 cup crushed graham crackers
- 1/4 cup unsalted butter, melted
- Pinch of salt
Instructions:
Start by preparing the crust. In a mixing bowl, combine the crushed graham crackers, melted butter, and a pinch of salt. Press the mixture into the bottom of a 7-inch springform pan to create an even layer. Set aside while you prepare the cheesecake filling.
In another large mixing bowl, beat the softened cream cheese with granulated sugar until smooth and creamy. Add in the sour cream, heavy cream, vanilla bean paste, and espresso powder, mixing until well incorporated. Finally, add the eggs one at a time, blending just until combined.
Pour the cheesecake filling over the prepared crust in the springform pan. Cover the pan tightly with aluminum foil to prevent moisture from entering. Place the trivet in the Instant Pot and add 1 cup of water. Carefully lower the cheesecake pan onto the trivet.
Secure the lid and set the Instant Pot to cook on high pressure for 40 minutes. Once the cooking time is complete, allow for a natural pressure release for 10 minutes before carefully releasing any remaining pressure. Remove the cheesecake from the Instant Pot and let it cool to room temperature before chilling in the refrigerator for at least 4 hours or overnight.
Extra Tips:
For the best flavor, use high-quality espresso powder and fresh vanilla bean paste. If you prefer a sweeter cheesecake, feel free to adjust the sugar to your taste.
To add a decorative touch, consider topping the cheesecake with a sprinkle of cocoa powder or chocolate shavings before serving. Always verify your cheesecake is completely cooled and chilled before slicing for the cleanest cuts. Enjoy your delicious creation!
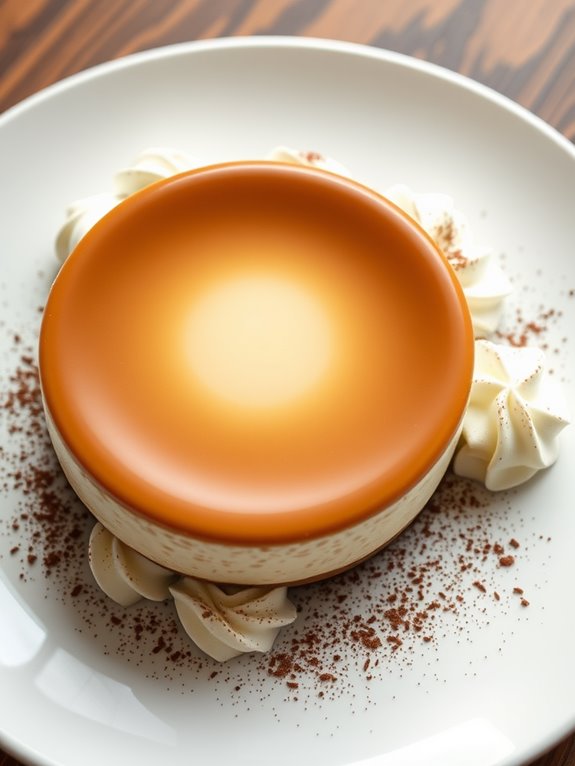
Espresso Caramel Cheesecake
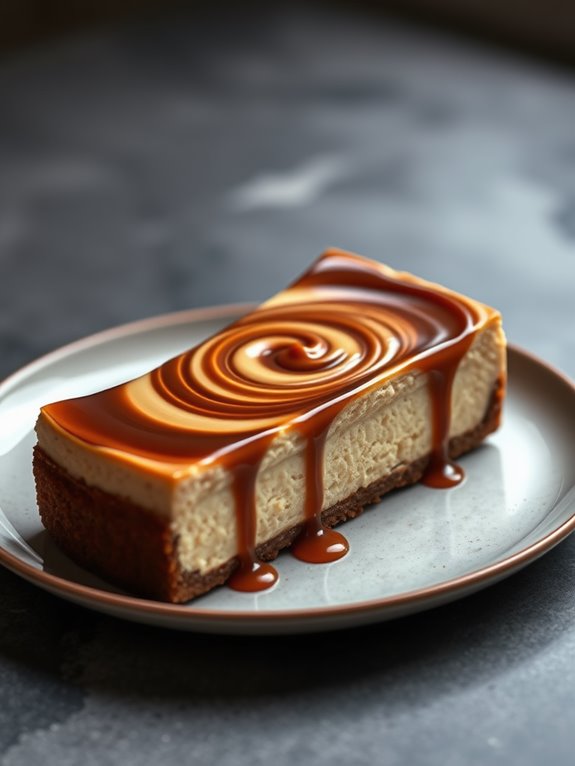
Espresso Caramel Cheesecake is a delightful dessert that combines the rich flavors of espresso and creamy cheesecake with a luscious caramel swirl. This decadent treat is perfect for coffee lovers and cheesecake enthusiasts alike.
Using an Instant Pot to prepare this dessert not only simplifies the cooking process but also guarantees a perfectly moist and creamy texture. With its smooth espresso flavor and the sweet, buttery notes of caramel, this cheesecake is sure to impress at any gathering.
The Instant Pot steams the cheesecake while it cooks, creating a silky custard-like consistency that melts in your mouth. Whether you're celebrating a special occasion or just treating yourself, this Espresso Caramel Cheesecake is a must-try.
Ingredients:
- 2 cups cream cheese, softened
- 3/4 cup granulated sugar
- 1/4 cup brown sugar
- 1 teaspoon vanilla extract
- 2 large eggs
- 1/2 cup sour cream
- 1/4 cup brewed espresso, cooled
- 1/2 cup caramel sauce (store-bought or homemade)
- 1/4 teaspoon salt
- 1 cup graham cracker crumbs
- 1/4 cup melted butter
Instructions:
1. Begin by preparing the crust. In a medium bowl, mix together the graham cracker crumbs, melted butter, and 2 tablespoons of granulated sugar until well combined. Press the mixture firmly into the bottom of a 7-inch springform pan to create an even layer. Set aside.
2. In a large mixing bowl, beat the softened cream cheese with the remaining granulated sugar and brown sugar until smooth and creamy. Add in the vanilla extract, eggs (one at a time), sour cream, brewed espresso, and salt. Mix until everything is well combined and smooth.
Pour half of the cheesecake batter over the crust in the springform pan. Drizzle half of the caramel sauce over the batter, then use a knife to swirl it gently. Pour the remaining cheesecake batter on top and repeat the caramel swirl.
3. Pour 1 cup of water into the Instant Pot and place the trivet inside. Carefully place the prepared springform pan on top of the trivet. Secure the lid and set the Instant Pot to cook on high pressure for 40 minutes. Once the cooking time is complete, allow the pressure to release naturally for 10 minutes before performing a quick release.
4. Carefully remove the springform pan from the Instant Pot and let it cool at room temperature for about 30 minutes. Once cooled, refrigerate the cheesecake for at least 4 hours or overnight to set fully. Before serving, drizzle additional caramel sauce on top for garnish.
Extra Tips:
For the best results, confirm that all your ingredients are at room temperature before mixing, as this helps to create a smoother batter.
If you prefer a stronger coffee flavor, you can increase the espresso amount slightly, but be cautious not to overpower the other flavors. When serving, consider adding a dollop of whipped cream for extra sweetness and a sprinkle of espresso powder for an elegant touch.
Enjoy your indulgent Espresso Caramel Cheesecake!
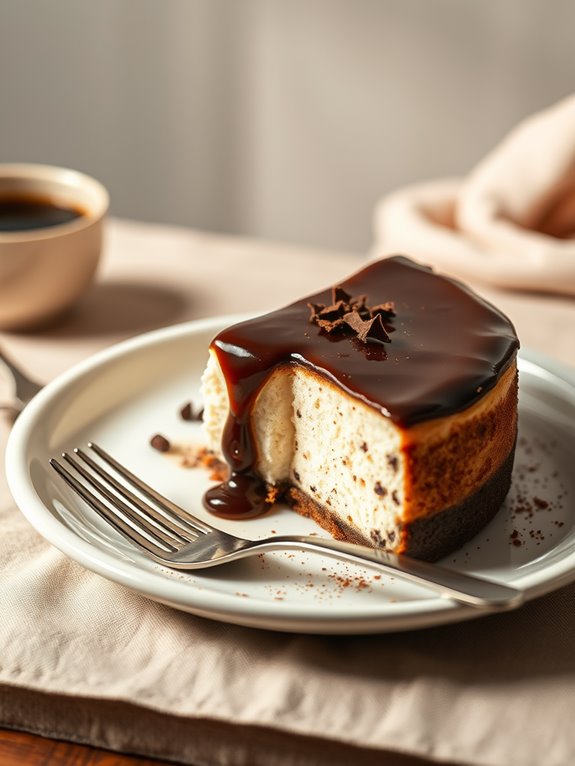
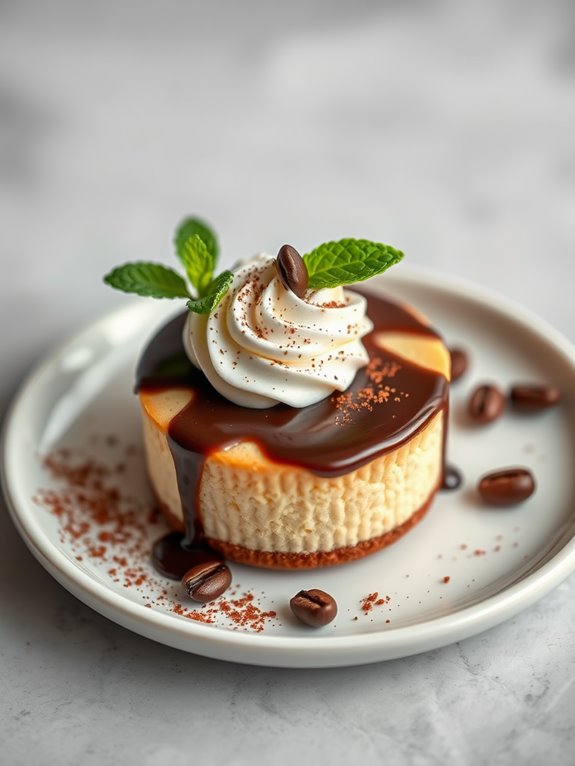
Mocha Espresso Cheesecake
Mocha Espresso Cheesecake is a decadent dessert that combines the rich flavors of cream cheese, coffee, and chocolate into a creamy delight. Perfect for coffee lovers, this cheesecake has a smooth texture and a hint of espresso that elevates it beyond the ordinary.
The Instant Pot method guarantees a perfectly cooked cheesecake without the risk of cracks and dryness that often come from traditional baking. This recipe not only saves time but also infuses the cheesecake with a moistness that makes it irresistible.
Whether you're serving it at a gathering or enjoying a slice after dinner, the Mocha Espresso Cheesecake is sure to impress. Pair it with a dollop of whipped cream or a sprinkle of cocoa powder to enhance its presentation.
Ingredients:
- 2 cups graham cracker crumbs
- 1/2 cup unsalted butter, melted
- 1/4 cup granulated sugar
- 24 oz cream cheese, softened
- 1 cup granulated sugar
- 1 cup sour cream
- 3 large eggs
- 1/2 cup brewed espresso, cooled
- 1/2 cup unsweetened cocoa powder
- 1 tsp vanilla extract
- 1/2 tsp salt
- Whipped cream, for serving (optional)
Instructions:
1. Start by preparing the crust. In a medium bowl, combine graham cracker crumbs, melted butter, and 1/4 cup granulated sugar. Mix until the crumbs are well coated. Press the mixture firmly into the bottom of a 7-inch springform pan to create an even layer. Set aside.
2. In a large mixing bowl, beat the softened cream cheese with an electric mixer until smooth. Gradually add in 1 cup of granulated sugar, mixing until fully incorporated.
Add sour cream, espresso, cocoa powder, vanilla extract, and salt, mixing until smooth. Finally, add the eggs one at a time, mixing just until combined. Pour the cheesecake batter over the crust in the springform pan.
3. Pour 1 cup of water into the Instant Pot. Place the springform pan on a trivet and carefully lower it into the pot. Close the lid and set the pressure valve to sealing. Cook on high pressure for 35 minutes.
Once done, allow for a natural release of pressure for about 10 minutes before manually releasing any remaining pressure. Carefully remove the pan from the pot and let the cheesecake cool to room temperature, then refrigerate for at least 4 hours or overnight before serving.
Extra Tips:
To achieve the best flavor, use high-quality espresso and unsweetened cocoa powder. Allow the cheesecake to chill thoroughly, as it will set better and enhance the flavors over time.
You can also customize the topping—try adding chocolate shavings or a drizzle of chocolate sauce for an extra indulgent touch. If you find the cheesecake is too soft after chilling, it may need a bit longer in the refrigerator to fully set.
Espresso Pumpkin Cheesecake
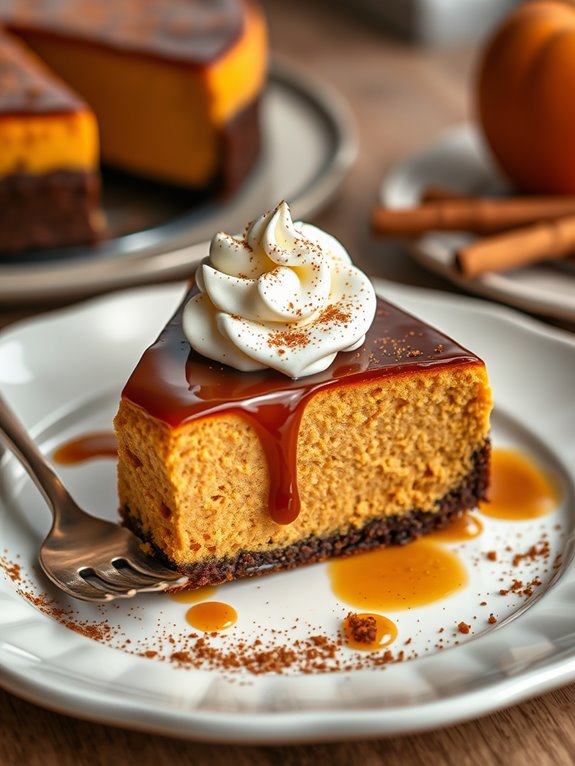
Espresso Pumpkin Cheesecake is a delicious fusion that combines the rich, creamy texture of cheesecake with the warm, comforting flavors of pumpkin and a hint of espresso. This delightful dessert is perfect for fall gatherings, holiday celebrations, or whenever you're craving something sweet and indulgent.
The Instant Pot makes it easy to achieve a perfectly smooth and creamy cheesecake without the need for a traditional water bath, ensuring even cooking and a velvety texture. With its unique blend of spices and coffee, this cheesecake will impress your family and friends. The espresso enhances the pumpkin flavor, creating a harmonious balance that's both satisfying and delicious.
Serve it with a dollop of whipped cream and a sprinkle of cinnamon for an extra touch of sweetness.
Ingredients:
- 1 ½ cups graham cracker crumbs
- ½ cup unsalted butter, melted
- 1 cup cream cheese, softened
- 1 cup pumpkin puree
- ¾ cup granulated sugar
- 2 large eggs
- 1 tablespoon vanilla extract
- 1 tablespoon espresso powder
- ½ teaspoon ground cinnamon
- ¼ teaspoon ground nutmeg
- ¼ teaspoon salt
- Whipped cream for serving (optional)
To begin, prepare the crust by combining the graham cracker crumbs and melted butter in a bowl. Press the mixture into the bottom of a 7-inch springform pan to form an even layer.
In a separate bowl, combine the cream cheese, pumpkin puree, granulated sugar, eggs, vanilla extract, espresso powder, cinnamon, nutmeg, and salt. Beat the mixture until it's smooth and creamy, ensuring no lumps remain. Pour the pumpkin filling over the crust in the springform pan.
Next, add 1 cup of water to the Instant Pot and place a trivet in the bottom. Carefully lower the springform pan onto the trivet. Close the lid and set the vent to sealing. Cook on high pressure for 40 minutes, then allow for a natural release for 10 minutes before manually releasing any remaining pressure.
Once done, carefully remove the cheesecake and let it cool at room temperature for about an hour before refrigerating for at least 4 hours or overnight to set fully.
Extra Tips:
For the best flavor, use fresh pumpkin puree rather than canned, if possible. You can also experiment with different coffee strengths by adjusting the amount of espresso powder to suit your taste.
Make sure the cheesecake is completely cooled before refrigerating to avoid condensation forming on the surface. For a richer flavor, consider serving the cheesecake with a drizzle of caramel sauce or a sprinkle of chocolate shavings. Enjoy your delightful Espresso Pumpkin Cheesecake!
Nutella Espresso Cheesecake
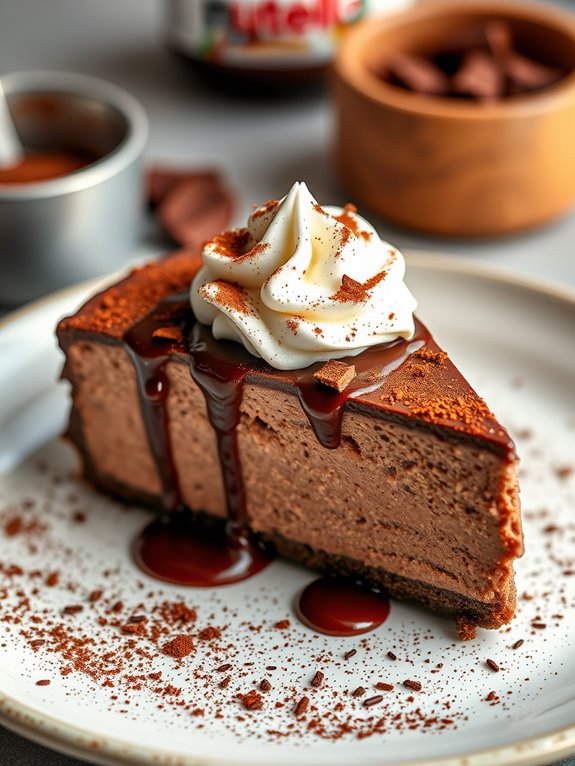
Nutella Espresso Cheesecake is a delightful and indulgent dessert that combines the rich flavor of Nutella with the bold taste of espresso. This creamy cheesecake, cooked in an Instant Pot, is perfect for special occasions or simply when you want to treat yourself.
The combination of chocolate and coffee creates a unique flavor profile that will impress your family and friends. Plus, the Instant Pot makes the cooking process quick and easy, guaranteeing a perfectly baked cheesecake every time.
This recipe is designed to be straightforward, even for those who may not have a lot of baking experience. With just a few simple steps, you can create a luscious Nutella Espresso Cheesecake that's sure to satisfy your sweet tooth.
The structure of this recipe allows for a smooth and creamy filling, complemented by a buttery graham cracker crust. Gather your ingredients, and let's get started on this delicious dessert!
Ingredients:
- 1 ½ cups graham cracker crumbs
- ½ cup unsalted butter, melted
- 2 cups cream cheese, softened
- 1 cup Nutella
- ¾ cup granulated sugar
- 2 large eggs
- 1 tablespoon espresso powder
- 1 teaspoon vanilla extract
- ⅓ cup sour cream
Instructions:
- In a mixing bowl, combine the graham cracker crumbs and melted butter until well mixed. Press the mixture firmly into the bottom of a 7-inch springform pan to form the crust. Set aside.
- In a large mixing bowl, beat the softened cream cheese until smooth and creamy. Add the Nutella, granulated sugar, espresso powder, and vanilla extract, and continue to mix until well combined. Incorporate the eggs one at a time, mixing just until blended after each addition. Finally, fold in the sour cream until the mixture is smooth.
- Pour the Nutella espresso filling over the prepared crust in the springform pan. Tap the pan gently on the counter to release any air bubbles. Cover the pan tightly with aluminum foil to prevent moisture from getting in during cooking.
- Add 1 cup of water to the Instant Pot and place the trivet inside. Carefully lower the cheesecake onto the trivet. Seal the lid and set the Instant Pot to manual high pressure for 35 minutes. Once the cooking time is complete, allow for a natural release for 10 minutes, then carefully quick release the remaining pressure.
- Once the cheesecake is done, remove it from the Instant Pot and let it cool at room temperature. Refrigerate for at least 4 hours, or overnight, before serving.
Extra Tips:
For the best results, verify that all your ingredients are at room temperature before mixing. This helps create a smooth and creamy cheesecake without lumps.
If you want to enhance the flavor, consider adding a dollop of whipped cream and a sprinkle of cocoa powder or chocolate shavings on top when serving. Additionally, if you're a coffee lover, a shot of espresso on the side will elevate the dessert experience even further. Enjoy your Nutella Espresso Cheesecake!
Espresso Cheesecake Bites
Espresso cheesecake bites are a delightful treat that combines the rich flavors of espresso and creamy cheesecake into bite-sized portions, perfect for any occasion. These little morsels aren't only easy to prepare in your Instant Pot, but they also make for an impressive dessert that will wow your guests.
The velvety texture of the cheesecake, combined with a hint of coffee, creates a harmonious balance that's sure to satisfy your sweet tooth. With just a few simple ingredients and your Instant Pot, you can create these delectable espresso cheesecake bites in no time.
Whether you're hosting a party, looking for a sweet treat after dinner, or simply craving something delicious, these bites are a fantastic choice. Let's plunge into the ingredients and get started on this delightful dessert!
Ingredients:
- 8 oz cream cheese, softened
- 1/2 cup granulated sugar
- 1/4 cup sour cream
- 2 large eggs
- 1 tsp vanilla extract
- 2 tbsp espresso powder
- 1/2 cup graham cracker crumbs
- 3 tbsp unsalted butter, melted
- Pinch of salt
Instructions:
- Start by preparing the crust for your cheesecake bites. In a medium bowl, combine the graham cracker crumbs, melted butter, and a pinch of salt. Mix until the crumbs are evenly coated. Press this mixture firmly into the bottom of silicone molds or a greased muffin tin to form the crust layer.
- In a large mixing bowl, beat the softened cream cheese until smooth. Add in the granulated sugar, sour cream, eggs, vanilla extract, and espresso powder. Mix until the batter is well combined and creamy. Pour the cheesecake mixture over the prepared crusts, filling each mold about 3/4 full.
- Pour one cup of water into the bottom of the Instant Pot and place the trivet inside. Carefully arrange the filled molds on top of the trivet. Secure the lid and set the Instant Pot to cook on high pressure for 10 minutes. Once the cooking time is complete, allow for a natural pressure release for about 10 minutes before manually releasing any remaining pressure.
- Carefully remove the molds from the Instant Pot and let them cool at room temperature for a bit before transferring them to the refrigerator to chill for at least 4 hours or overnight for the best results.
Extra Tips:
When preparing your espresso cheesecake bites, be sure to use room temperature cream cheese for a smooth batter, as cold cream cheese can lead to lumps.
Additionally, feel free to customize your bites by adding chocolate chips or a chocolate drizzle on top once they're set. For an extra coffee kick, you can also substitute some of the granulated sugar with coffee-flavored liqueur for an adult version of these delicious treats!
Coconut Espresso Cheesecake
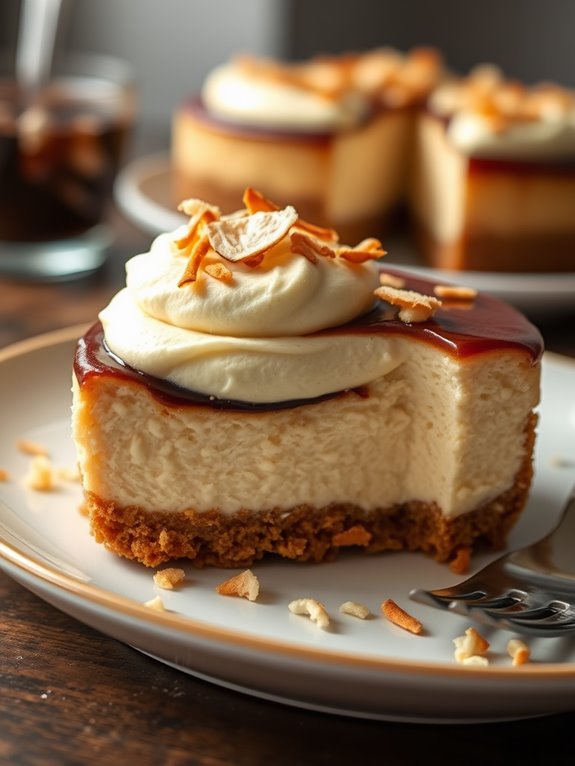
Coconut Espresso Cheesecake is a delightful fusion of rich coffee flavor and tropical coconut essence, perfect for those who crave a unique dessert experience. This cheesecake isn't only easy to prepare in your Instant Pot but also offers a creamy texture that melts in your mouth.
With the addition of a buttery graham cracker crust and a luscious coconut topping, this dessert will surely impress your guests and satisfy your sweet tooth. The combination of espresso and coconut creates a harmonious balance that will awaken your taste buds.
The Instant Pot helps achieve a perfectly cooked cheesecake by providing a moist environment, preventing cracks, and guaranteeing even cooking. Whether you're hosting a dinner party or simply indulging yourself, this Coconut Espresso Cheesecake is the perfect ending to any meal.
Ingredients:
- 1 ½ cups graham cracker crumbs
- ½ cup unsweetened shredded coconut
- ½ cup unsalted butter, melted
- 2 cups cream cheese, softened
- 1 cup granulated sugar
- 3 large eggs
- 1 tablespoon vanilla extract
- 1 tablespoon espresso powder
- ½ cup coconut cream
- ½ cup sour cream
- ½ cup toasted coconut flakes (for topping)
Instructions:
- Begin by preparing the crust. In a mixing bowl, combine the graham cracker crumbs, shredded coconut, and melted butter until the mixture resembles wet sand. Press this mixture firmly into the bottom of a 7-inch springform pan to create an even layer. Set aside.
- In a separate large bowl, beat the cream cheese and sugar together until smooth and creamy. Add the eggs, one at a time, mixing well after each addition. Then, stir in the vanilla extract, espresso powder, coconut cream, and sour cream until well combined.
- Pour the cream cheese mixture over the prepared crust in the springform pan. Cover the pan tightly with aluminum foil to prevent moisture from seeping in during cooking. Pour 1 cup of water into the Instant Pot insert, then place the trivet inside. Carefully lower the springform pan onto the trivet.
- Secure the lid on the Instant Pot and set it to cook on high pressure for 55 minutes. Once the cooking time is up, allow for a natural release for about 10 minutes before carefully releasing any remaining pressure. Remove the lid and let the cheesecake cool in the pot for an additional 10 minutes before transferring it to the refrigerator to chill for at least 4 hours or overnight.
Before serving, sprinkle the top with toasted coconut flakes for added texture and flavor.
Extra Tips:
When making Coconut Espresso Cheesecake, confirm that all ingredients are at room temperature for a smoother batter. Be careful not to overmix the batter once the eggs are added, as this can incorporate too much air and lead to cracks.
If you prefer a stronger coffee flavor, feel free to adjust the espresso powder to your taste. Finally, for an added touch of elegance, consider drizzling melted chocolate or a coconut glaze over the cheesecake before serving. Enjoy your delicious creation!
Espresso White Chocolate Cheesecake
Espresso White Chocolate Cheesecake is a decadent dessert that combines the rich flavors of espresso and white chocolate, creating a delightful experience for your taste buds. This creamy cheesecake isn't only easy to make in the Instant Pot but also offers an elegant finish to any meal.
The smooth texture and luxurious taste make it perfect for special occasions or simply to indulge yourself. Preparing this cheesecake in your Instant Pot guarantees that it stays moist and flavorful while being cooked to perfection. The pressure cooking method helps to create a creamy, luscious texture that traditional baking methods often struggle to achieve.
With just a few simple ingredients, you can whip up a dessert that will impress your family and friends alike.
Ingredients:
- 1 ½ cups graham cracker crumbs
- ½ cup unsalted butter, melted
- 2 tablespoons sugar
- 16 oz cream cheese, softened
- ½ cup white chocolate chips, melted
- ½ cup granulated sugar
- 3 large eggs
- 1 tablespoon espresso powder
- 1 teaspoon vanilla extract
- ½ cup sour cream
Instructions:
- Begin by preparing the crust. In a mixing bowl, combine the graham cracker crumbs, melted butter, and sugar. Mix until the crumbs are evenly coated. Press the mixture firmly into the bottom of a 7-inch springform pan to create an even layer. Set aside.
- In a separate bowl, beat the softened cream cheese until smooth. Slowly add the melted white chocolate, granulated sugar, eggs, espresso powder, and vanilla extract, mixing until well incorporated. Finally, fold in the sour cream until smooth. Pour this mixture over the prepared crust in the springform pan.
- Pour 1 cup of water into the Instant Pot and place the trivet at the bottom. Carefully lower the springform pan onto the trivet. Secure the lid and set the Instant Pot to cook on high pressure for 35 minutes. Allow the pressure to release naturally for 10 minutes before performing a quick release.
Once the pressure is fully released, carefully remove the pan from the pot and let it cool completely at room temperature. Refrigerate for at least 4 hours before serving.
Extra Tips:
For the best results, make sure all your ingredients are at room temperature before mixing. This helps to achieve a smoother batter and prevents lumps in your cheesecake.
If you want a stronger coffee flavor, consider adding a bit more espresso powder to taste. Additionally, for an elegant presentation, you can garnish the cheesecake with whipped cream and a sprinkle of cocoa powder or grated white chocolate before serving.
Enjoy your delicious Espresso White Chocolate Cheesecake!
Espresso Cheesecake With Oreo Crust
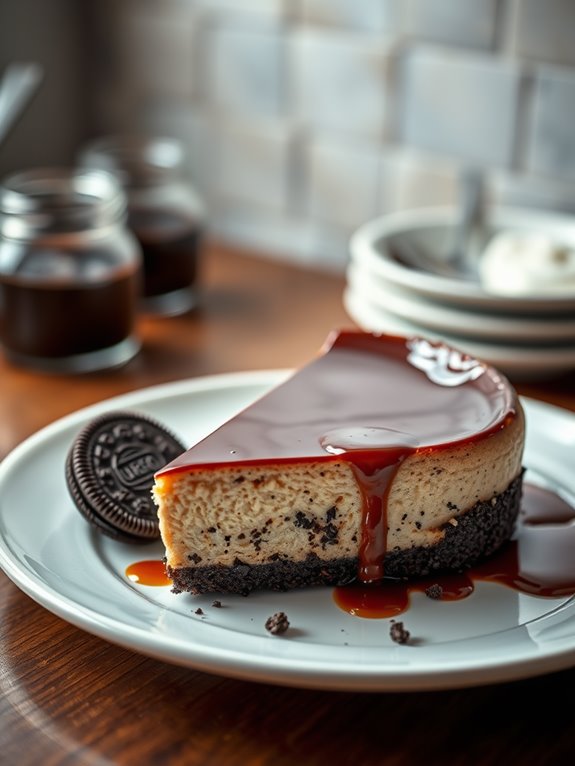
Espresso Cheesecake with an Oreo Crust is a delectable dessert that combines the rich, creamy texture of cheesecake with the bold flavor of espresso. This indulgent treat is perfect for coffee lovers and makes an impressive addition to any gathering or special occasion.
The combination of the crunchy Oreo crust and the smooth espresso filling creates a delightful contrast that's sure to please your taste buds.
Using an Instant Pot to prepare this cheesecake not only simplifies the process but also guarantees a perfectly moist and creamy texture. The pressure cooking method allows the cheesecake to cook evenly and prevents cracking, which is often a challenge when baking traditional cheesecakes in the oven.
Follow this easy recipe to create a luxurious Espresso Cheesecake with an Oreo Crust that will leave everyone asking for seconds.
Ingredients:
- 24 Oreo cookies, crushed
- 5 tablespoons unsalted butter, melted
- 24 oz cream cheese, softened
- 1 cup granulated sugar
- 1 teaspoon vanilla extract
- 3 large eggs
- 1 cup sour cream
- 1/2 cup brewed espresso, cooled
- 2 teaspoons instant coffee granules (optional)
- Pinch of salt
Instructions:
Begin by preparing the Oreo crust. In a medium bowl, combine the crushed Oreo cookies and melted butter. Mix until the crumbs are well coated. Press the mixture firmly into the bottom of a 7-inch springform pan to create an even layer. Set aside.
In a large mixing bowl, beat the softened cream cheese and granulated sugar together until smooth and creamy. Add the vanilla extract, followed by the eggs, one at a time, mixing well after each addition.
Gently fold in the sour cream, cooled espresso, instant coffee granules (if using), and a pinch of salt until fully incorporated.
Pour the cheesecake batter over the prepared Oreo crust, smoothing the top with a spatula. Cover the pan tightly with aluminum foil to prevent condensation from dripping onto the cheesecake during cooking.
Add one cup of water to the Instant Pot and place the trivet inside. Carefully lower the springform pan onto the trivet. Close the lid and set the Instant Pot to manual high pressure for 40 minutes.
Once the cooking time is complete, allow the pressure to release naturally for about 10-15 minutes before carefully performing a quick release. Remove the cheesecake from the Instant Pot and let it cool to room temperature before refrigerating for at least 4 hours or overnight to set.
Extra Tips:
To achieve the best flavor and texture, make sure that all your ingredients, especially the cream cheese and eggs, are at room temperature before mixing. This helps to create a smooth batter without lumps.
Additionally, for an extra coffee kick, you can sprinkle some cocoa powder or additional espresso on top of the cheesecake before serving.
Don't forget to run a knife around the edges of the cheesecake before releasing the springform pan to prevent sticking. Enjoy your delicious Espresso Cheesecake with Oreo Crust!
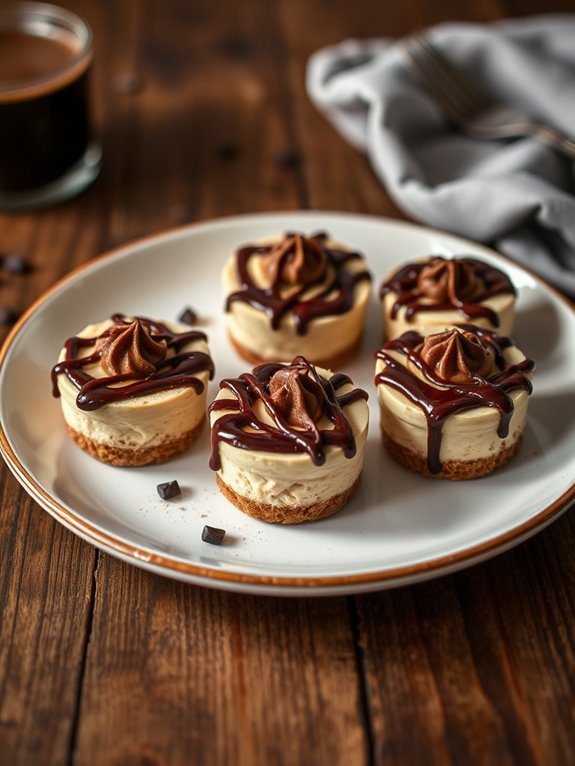
Instant Pot Mini Espresso Cheesecakes
Making mini cheesecakes in the Instant Pot is a breeze. You can whip up a batch in no time, and the best part is that they can be made ahead of time and stored in the refrigerator until you're ready to serve them.
With a few simple ingredients and a little bit of time, you can impress your guests or treat yourself to this delicious dessert that's sure to satisfy your sweet tooth and caffeine cravings.
Ingredients:
- 1 cup graham cracker crumbs
- 2 tablespoons sugar
- 4 tablespoons unsalted butter, melted
- 16 ounces cream cheese, softened
- 1 cup sugar
- 3 large eggs
- 1 tablespoon vanilla extract
- 2 tablespoons espresso powder
- 1/2 cup sour cream
Instructions:
- Begin by mixing the graham cracker crumbs, sugar, and melted butter in a bowl until well combined. Press this mixture into the bottom of each of the mini cheesecake molds or silicone cups to form a crust. Set aside.
- In a large mixing bowl, beat the softened cream cheese until smooth and creamy. Gradually add the sugar, mixing until fully incorporated. Add the eggs one at a time, mixing well after each addition.
- Then, stir in the vanilla extract and espresso powder until everything is well combined. Finally, fold in the sour cream until smooth.
- Pour the cream cheese mixture over the prepared crusts in the molds, filling each one to about 3/4 full. Cover each cheesecake with aluminum foil to prevent moisture from getting in during cooking.
- Pour 1 cup of water into the Instant Pot, place the trivet in the bottom, and then stack the cheesecake molds on top of the trivet. Seal the lid and set the Instant Pot to cook on high pressure for 25 minutes.
- Once cooking is complete, allow for a natural release for 10 minutes before releasing any remaining pressure.
Extra Tips:
When making mini espresso cheesecakes, confirm that all your ingredients, especially the cream cheese, are at room temperature for the best blending results.
You can experiment with different toppings such as chocolate ganache, whipped cream, or a sprinkle of cocoa powder to elevate the dessert further.
Additionally, these mini cheesecakes can be made a couple of days in advance, making them a great make-ahead option for parties or special occasions. Enjoy your delicious creations!
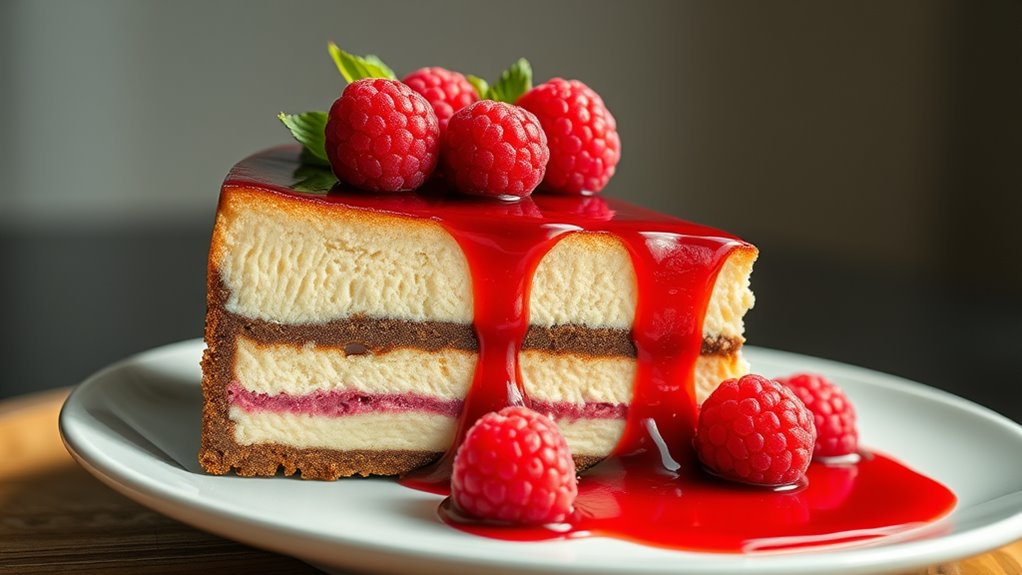
Espresso Cheesecake With Raspberry Sauce
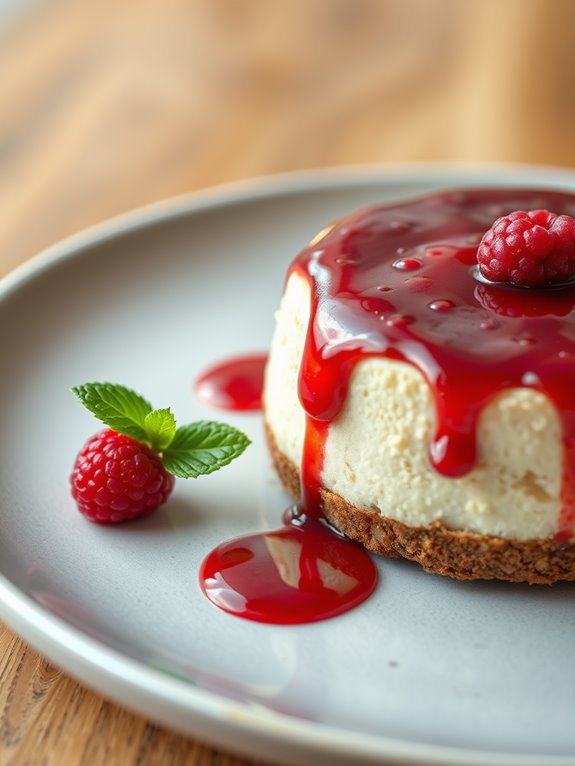
Indulge in the rich, creamy delight of Espresso Cheesecake with Raspberry Sauce, a perfect combination of bold espresso flavors and the sweet tang of fresh raspberries. This recipe utilizes the Instant Pot, guaranteeing a perfectly cooked cheesecake with a smooth texture and minimal fuss.
The raspberry sauce adds a vibrant touch, making it an ideal dessert for special occasions or a delightful treat for coffee lovers. The Instant Pot not only speeds up the cooking process but also helps to prevent cracking in the cheesecake, resulting in a beautiful presentation.
The unique combination of espresso and raspberry creates a delightful contrast that will impress your guests and leave them craving more. Get ready to savor each bite of this luscious dessert!
Ingredients:
- 2 cups cream cheese, softened
- 1 cup granulated sugar
- 3 large eggs
- 1/2 cup sour cream
- 1/2 cup heavy cream
- 1 tablespoon vanilla extract
- 1 tablespoon espresso powder
- 1 tablespoon all-purpose flour
- 1 cup fresh raspberries
- 1/4 cup raspberry jam
- 1 tablespoon lemon juice
Cooking Instructions:
1. In a large mixing bowl, beat the softened cream cheese and granulated sugar together until smooth and creamy. Add in the eggs, one at a time, mixing well after each addition.
Then, incorporate the sour cream, heavy cream, vanilla extract, espresso powder, and flour until everything is well combined and smooth.
2. Prepare your Instant Pot by placing the trivet inside and adding 1 cup of water to the bottom. Pour the cheesecake batter into a greased 7-inch springform pan, cover it tightly with aluminum foil, and place it on top of the trivet.
Seal the Instant Pot lid and set it to cook on high pressure for 35 minutes. After the cooking time is up, allow the pressure to release naturally for 10 minutes before performing a quick release for any remaining pressure.
Carefully remove the cheesecake and let it cool in the refrigerator for at least 4 hours or overnight.
3. To prepare the raspberry sauce, combine the fresh raspberries, raspberry jam, and lemon juice in a small saucepan over medium heat. Simmer for about 5-7 minutes until the raspberries break down and the sauce thickens slightly.
Strain the sauce through a fine mesh sieve to remove the seeds if desired.
Extra Tips:
For the best results, verify that all your ingredients are at room temperature before starting the recipe. This helps achieve a smoother batter and a creamier texture.
Additionally, be careful not to overmix the batter once the eggs are added, as this can incorporate too much air and lead to cracks during baking.
Finally, when serving, drizzle the raspberry sauce over individual slices for a beautiful presentation and added flavor. Enjoy!
Frequently Asked Questions
Can I Use Decaf Coffee for These Cheesecake Recipes?
Yes, you can use decaf coffee for cheesecake recipes. It'll still provide that rich coffee flavor without the caffeine kick. Just make sure it's brewed strong enough to enhance the overall taste of your cheesecake.
How Long Do Leftovers Last in the Fridge?
Leftovers typically last about three to four days in the fridge. Make sure you store them in an airtight container to maintain freshness. If you're unsure, always check for any signs of spoilage before enjoying!
Can I Substitute Cream Cheese With a Dairy-Free Option?
Yes, you can substitute cream cheese with a dairy-free option. Look for vegan cream cheese or cashew-based alternatives. Just make certain the texture and flavor complement your recipe, and you'll achieve a delicious result!
What Is the Best Way to Store Cheesecakes?
To store cheesecakes, let them cool completely, then cover them tightly with plastic wrap or foil. Refrigerate for up to a week, or freeze for longer storage. Just remember to thaw in the fridge before serving!
Can I Freeze Instant Pot Espresso Cheesecakes?
You can freeze instant pot espresso cheesecakes for up to three months. Just wrap 'em tightly in plastic wrap and place 'em in an airtight container. Thaw them in the fridge before serving!