As an affiliate, we may earn a commission from qualifying purchases. We get commissions for purchases made through links on this website from Amazon and other third parties.
Did you know that the Instant Pot can transform even the simplest vegetables into gourmet side dishes in minutes? With a variety of flavors and textures, these recipes can elevate your meals without adding stress to your cooking routine. Imagine serving creamy mashed potatoes or zesty lemon garlic asparagus alongside your favorite entrees. Curious about how to make the most of your Instant Pot for side dishes? Let's explore some delicious options together.
Key Takeaways
- Explore creamy mashed potatoes with variations like garlic and cheese for a classic side dish that pairs well with any main course.
- Try zesty lemon garlic asparagus for a vibrant, nutrient-packed dish that adds bright flavors to your meal.
- Enjoy savory garlic Parmesan rice as a delicious and quick side that complements chicken, steak, or vegetables beautifully.
- Consider cheesy broccoli casserole for a comforting, creamy side dish that can be customized with different cheeses or proteins.
- Utilize the Instant Pot for quick cooking, retaining flavors and nutrients while minimizing cleanup after preparing delicious side dishes.
Creamy Mashed Potatoes
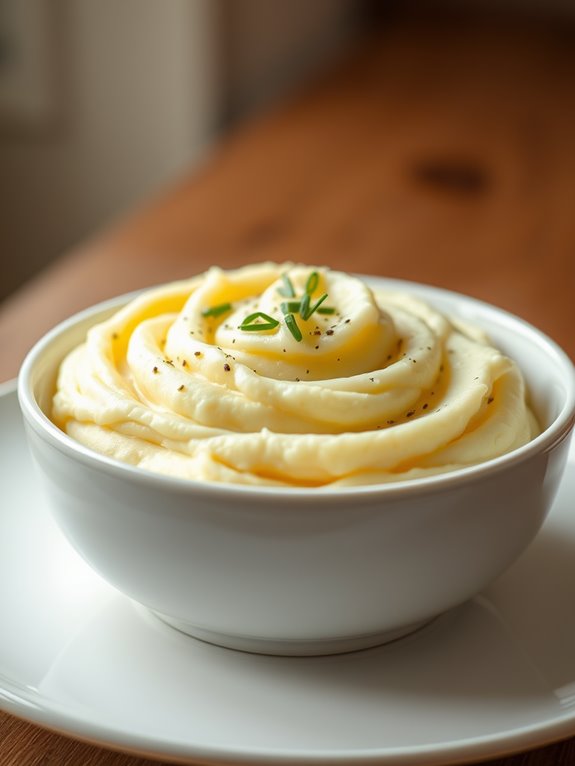
Creamy mashed potatoes are a classic side dish that pairs wonderfully with a variety of main courses, from roasted meats to grilled vegetables.
Using an Instant Pot makes this dish not only quick to prepare but also guarantees that your potatoes come out perfectly creamy and flavorful. In just a fraction of the time it would take to boil and mash potatoes on the stovetop, you can achieve a delicious, buttery mash that's sure to impress your family and guests.
The beauty of making mashed potatoes in an Instant Pot lies in the ability to infuse them with flavors while cooking. You can easily customize your mashed potatoes by adding ingredients such as garlic, cheese, or herbs.
The pressure cooking method retains moisture, resulting in a creamy texture that's hard to replicate with traditional methods. Let's plunge into this simple yet satisfying recipe!
Ingredients:
- 2 pounds of Yukon Gold potatoes
- 1 cup of chicken or vegetable broth
- 1/2 cup of heavy cream
- 4 tablespoons of unsalted butter
- 1 teaspoon of garlic powder (optional)
- Salt and pepper to taste
- Chives or parsley for garnish (optional)
Instructions:
- Start by peeling and cutting the Yukon Gold potatoes into evenly sized chunks. This will help them cook uniformly. Place the potatoes into the Instant Pot and add the chicken or vegetable broth.
- Close the lid and set the Instant Pot to pressure cook on high for 10 minutes. Once the cooking time is complete, carefully perform a quick release of the pressure.
- After the pressure has been released, open the lid and add the heavy cream, butter, garlic powder (if using), salt, and pepper. Using a potato masher or an electric mixer, mash the potatoes until smooth and creamy. Adjust the seasoning as needed, adding more salt or pepper if desired.
Extra Tips:
For an even richer flavor, consider roasting some garlic and adding it to the mashed potatoes for a delightful twist.
You can also experiment with different types of potatoes; Russet potatoes can give a fluffier texture, while red potatoes can add a bit of color and a creamier consistency.
If you're looking to make these mashed potatoes ahead of time, they can be stored in the refrigerator for up to 3 days and reheated gently with a splash of milk or broth to restore creaminess.
Enjoy your creamy mashed potatoes as the perfect accompaniment to your favorite dishes!
Zesty Lemon Garlic Asparagus
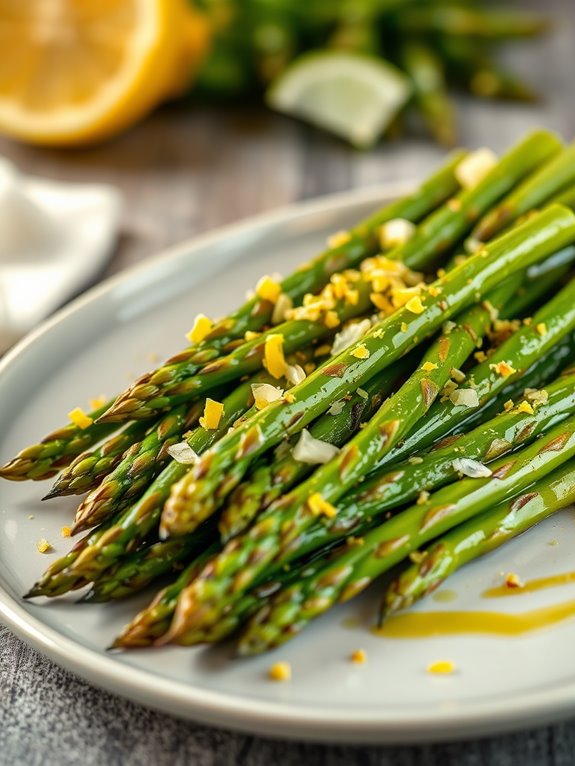
Zesty Lemon Garlic Asparagus is a vibrant and invigorating side dish that perfectly complements a variety of main courses. The bright flavors of lemon and garlic enhance the natural taste of asparagus, making it an ideal addition to any dinner table. This dish isn't only quick to prepare but also packed with nutrients, making it a healthy choice for your family or guests.
Cooking asparagus in the Instant Pot allows for a tender yet crisp texture that retains the vegetable's vibrant green color. With just a few simple ingredients, you can whip up this delightful side dish in no time. The combination of zesty lemon juice and fragrant garlic infuses the asparagus with flavor, making it a hit for both kids and adults alike.
Ingredients:
- 1 pound fresh asparagus, trimmed
- 2 tablespoons olive oil
- 3 cloves garlic, minced
- Zest of 1 lemon
- Juice of 1 lemon
- Salt and pepper, to taste
- Optional: grated Parmesan cheese for serving
To prepare the Zesty Lemon Garlic Asparagus, start by adding 1 cup of water to the Instant Pot. Place a steamer basket or trivet inside the pot and arrange the trimmed asparagus on top.
In a small bowl, mix the olive oil, minced garlic, lemon zest, lemon juice, salt, and pepper together. Drizzle this mixture over the asparagus, making sure it's well-coated. Secure the lid on the Instant Pot, set the valve to sealing, and cook on high pressure for 2 minutes.
Once the cooking time is complete, perform a quick release of the pressure. Carefully remove the asparagus and transfer it to a serving dish.
For an added touch, you can sprinkle grated Parmesan cheese over the asparagus before serving. This dish pairs wonderfully with grilled chicken, fish, or pasta, providing a zesty contrast that enhances the overall meal experience.
Extra Tips: When selecting asparagus, look for firm, bright green stalks with tightly closed tips to guarantee freshness. If you prefer a bit more crunch, you can reduce the cooking time to 1 minute.
Additionally, feel free to experiment with other seasonings, such as red pepper flakes for a spicy kick or fresh herbs like parsley for extra flavor.
Savory Garlic Parmesan Rice
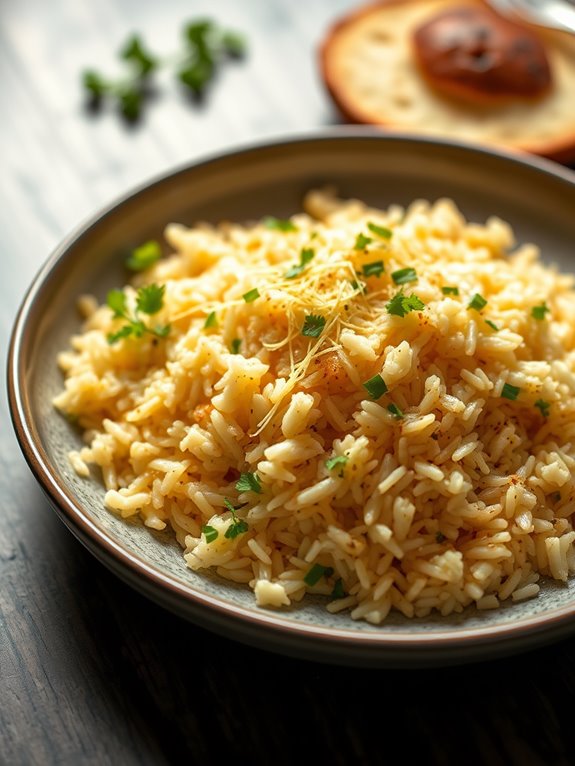
Savory Garlic Parmesan Rice is a delightful side dish that perfectly complements a variety of main courses. The combination of garlic, Parmesan cheese, and fluffy rice creates a savory flavor profile that will tantalize your taste buds. This dish isn't only easy to prepare but also quick to cook in the Instant Pot, making it a fantastic option for busy weeknights or family gatherings.
In addition to its rich and comforting taste, this rice is versatile enough to pair with chicken, steak, or even roasted vegetables. With just a few simple ingredients, you can whip up a delicious side that will impress your guests and leave your family asking for seconds. Let's explore the ingredients and get started on this mouthwatering recipe!
Ingredients:
- 1 cup long-grain white rice
- 2 tablespoons butter
- 4 cloves garlic, minced
- 2 cups chicken broth (or vegetable broth)
- 1/2 cup grated Parmesan cheese
- Salt and pepper to taste
- Chopped parsley for garnish (optional)
Cooking Instructions:
Begin by rinsing the rice under cold water until the water runs clear to remove excess starch. Set the Instant Pot to the sauté function and melt the butter. Add the minced garlic and sauté for about a minute until fragrant, being careful not to let it burn.
Stir in the rinsed rice and sauté for an additional 2-3 minutes, allowing the rice to absorb the flavors. Next, pour in the chicken broth and stir to combine. Secure the lid on the Instant Pot, making sure the valve is set to "sealing." Cook on high pressure for 4 minutes.
Once the cooking time is complete, allow for a natural release for 10 minutes before switching the valve to "venting" to release any remaining pressure. Carefully remove the lid, fluff the rice with a fork, and stir in the grated Parmesan cheese. Season with salt and pepper to taste and garnish with chopped parsley if desired.
Extra Tips:
For an extra layer of flavor, consider adding some sautéed onions or bell peppers along with the garlic. Additionally, you can customize the dish by incorporating cooked vegetables or herbs like thyme or rosemary.
This Savory Garlic Parmesan Rice can be stored in an airtight container in the fridge for up to 3 days, making it great for meal prepping!
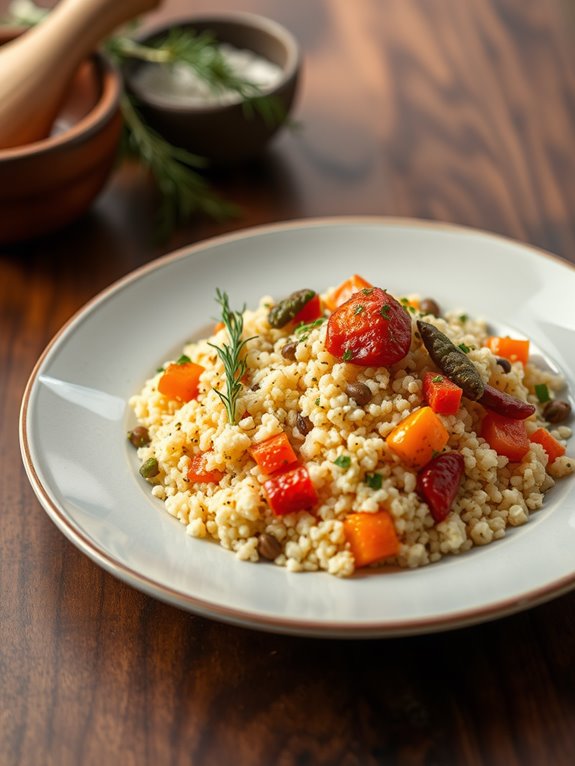
Flavorful Quinoa Pilaf
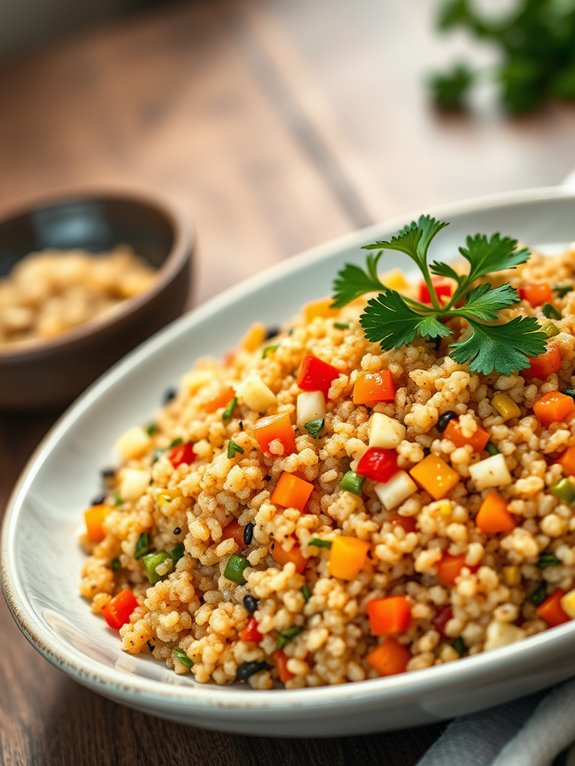
Flavorful Quinoa Pilaf is a delightful and nutritious side dish that can elevate any meal. Packed with protein and fiber, quinoa serves as a perfect base for a variety of flavors. This dish combines aromatic spices, fresh vegetables, and herbs to create a vibrant pilaf that complements both meat and vegetarian dishes alike.
Cooking quinoa in the Instant Pot guarantees a fluffy texture and saves time, making it an ideal choice for busy weeknights or special occasions.
In addition to being delicious, this quinoa pilaf is highly customizable. You can easily adjust the ingredients based on what you have on hand or your personal taste preferences. Add some nuts for crunch, dried fruits for sweetness, or even switch up the spices for a different flavor profile.
Let's get started with this simple recipe!
Ingredients:
- 1 cup quinoa, rinsed
- 2 cups vegetable or chicken broth
- 1 small onion, finely chopped
- 2 cloves garlic, minced
- 1 carrot, diced
- 1 celery stalk, diced
- 1 bell pepper, diced
- 1 teaspoon ground cumin
- 1 teaspoon paprika
- Salt and pepper to taste
- 2 tablespoons olive oil
- Fresh parsley, chopped (for garnish)
Cooking Instructions:
- Set your Instant Pot to the sauté function and heat the olive oil. Add the chopped onion, garlic, carrot, celery, and bell pepper, and sauté for about 3-4 minutes until the vegetables are softened.
- Stir in the rinsed quinoa, ground cumin, paprika, salt, and pepper. Then pour in the broth and give everything a gentle stir to combine. Close the Instant Pot lid, making sure the valve is set to sealing.
- Cook on high pressure for 1 minute. Once the cooking time is up, allow for a natural pressure release for 10 minutes before carefully switching to a quick release to let out any remaining steam.
- Fluff the quinoa with a fork and adjust seasoning if necessary. Garnish with fresh parsley before serving.
Extra Tips:
For a more pronounced flavor, consider toasting the quinoa in the Instant Pot on the sauté setting for a couple of minutes before adding the broth. This enhances its nutty taste.
Additionally, feel free to experiment with different vegetables or spices based on the season or your preference. Leftovers can be stored in the refrigerator for up to 4 days and make for a great lunch option!
Honey Glazed Carrots
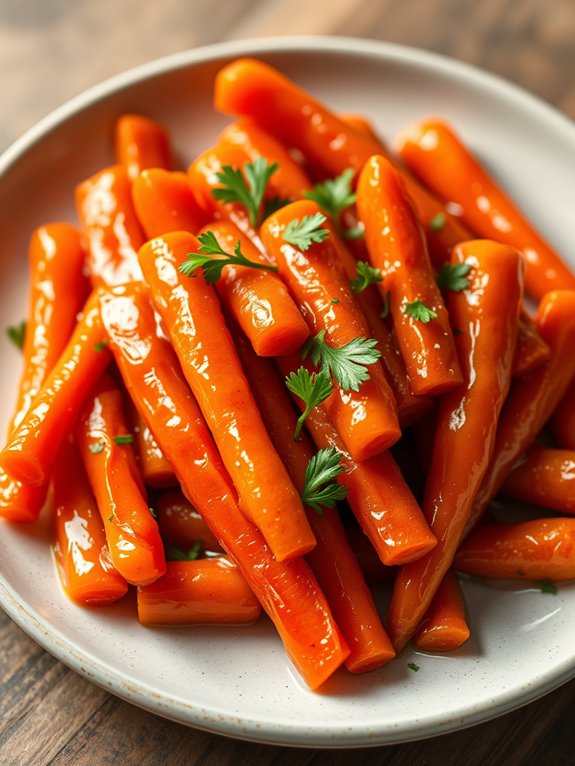
Honey glazed carrots are a delightful side dish that brings a touch of sweetness to your meal while still being nutritious. The Instant Pot makes it incredibly easy to whip up this dish in a fraction of the time it would take using traditional methods. With just a few simple ingredients, you can create a colorful and flavorful addition to your dinner table that the whole family will love.
The natural sweetness of the carrots is enhanced by the honey, creating a caramelized finish that's simply irresistible. Not only do these honey glazed carrots taste fantastic, but they also retain their vibrant color and nutrients, making them a healthy choice for any occasion. Whether you're serving them with roasted meats or a vegetarian dish, these carrots are sure to impress.
Ingredients:
- 1 pound baby carrots (or regular carrots, peeled and sliced)
- 2 tablespoons unsalted butter
- 3 tablespoons honey
- 1/2 teaspoon salt
- 1/4 teaspoon black pepper
- 1/4 cup water
- Fresh parsley for garnish (optional)
To prepare the honey glazed carrots, start by pouring the water into the Instant Pot and adding the carrots. Close the lid, ensuring the valve is set to sealing, and select the manual setting. Cook on high pressure for 3 minutes, then perform a quick release.
Once the pressure is released, carefully open the lid and drain any excess water from the pot. Next, add the butter, honey, salt, and pepper to the cooked carrots. Stir well to coat the carrots evenly with the buttery honey mixture.
Select the sauté function and cook for an additional 2-3 minutes, stirring occasionally until the sauce thickens and the carrots are beautifully glazed.
When cooking honey glazed carrots, consider using fresh, high-quality honey for the best flavor. You can also customize the recipe by adding herbs such as thyme or rosemary for an extra layer of taste.
If you prefer a bit of spice, a pinch of cayenne pepper can add an interesting kick. Finally, for a more caramelized finish, allow the carrots to sauté a little longer, keeping an eye on them to prevent burning. Enjoy your delicious side dish!
Cheesy Broccoli Casserole
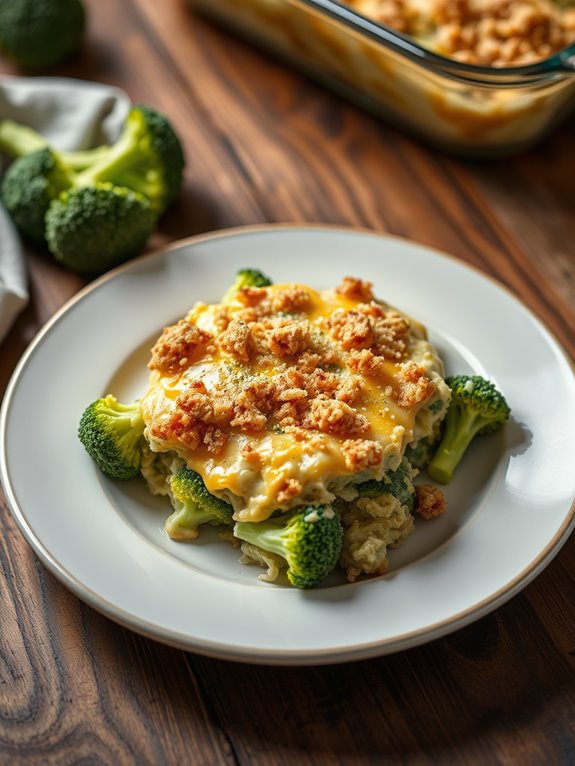
Cheesy Broccoli Casserole is a delightful side dish that combines the vibrant flavor of fresh broccoli with a creamy, cheesy sauce, all cooked conveniently in an Instant Pot. This dish is perfect for family gatherings or weeknight dinners, as it isn't only quick to prepare but also packed with nutrients.
With its comforting taste and appealing texture, this casserole will surely be a hit at your dining table.
Preparing this Cheesy Broccoli Casserole in your Instant Pot means you can save time without sacrificing flavor. The steam-infused cooking method retains the broccoli's nutrients while allowing the cheese to melt perfectly.
Whether you're serving it alongside grilled chicken, a roast, or simply as a standalone dish, this casserole is versatile and satisfying.
Ingredients
- 4 cups fresh broccoli florets
- 1 cup shredded cheddar cheese
- 1 cup cream of mushroom soup
- 1/2 cup milk
- 1 cup cooked rice (optional, for added heartiness)
- 1/2 teaspoon garlic powder
- 1/2 teaspoon onion powder
- Salt and pepper to taste
- 1/2 cup breadcrumbs (for topping)
- 2 tablespoons butter, melted
Cooking Instructions
- Start by washing the broccoli florets and setting them aside. In your Instant Pot, combine the cream of mushroom soup, milk, garlic powder, onion powder, salt, and pepper to create a creamy base. If you're using cooked rice, add it to the mixture as well.
- Layer the broccoli florets on top of the sauce mixture. Close the lid of the Instant Pot, ensuring the steam release valve is set to sealing. Select the "Steam" function and set the timer for 3 minutes. Once the cooking time is complete, use a quick release to release the steam.
- After releasing the steam, carefully open the lid and stir in the shredded cheddar cheese until it's melted and well combined. In a small bowl, mix the breadcrumbs with the melted butter. Sprinkle the breadcrumb mixture on top of the casserole, then use the "Sauté" function for a few minutes to crisp the topping.
Extra Tips
For an added layer of flavor, feel free to experiment with different types of cheese such as mozzarella or pepper jack. You can also toss in some cooked chicken or bacon for more protein.
If you prefer a lighter version, consider replacing the cream of mushroom soup with a homemade white sauce or a healthier alternative. Always keep an eye on the cooking time, as overcooking can lead to mushy broccoli.
Enjoy your deliciously cheesy side dish!
Spicy Roasted Brussels Sprouts

Spicy Roasted Brussels Sprouts are a fantastic side dish that brings a burst of flavor to any meal. These little green gems aren't only packed with nutrients, but they also take on a delightful crispy texture when roasted. The addition of spices elevates their natural earthiness, making them a perfect accompaniment to roasted meats, pasta dishes, or even a hearty grain salad.
With the convenience of the Instant Pot, you can whip up these tasty Brussels sprouts in no time. The beauty of this recipe lies in its simplicity. The Instant Pot allows for a quick sauté followed by a roasting process that locks in flavors while ensuring even cooking. You can easily adjust the spice level to suit your taste preferences, making this dish versatile enough for any occasion.
Whether you're hosting a family dinner or meal prepping for the week, these Spicy Roasted Brussels Sprouts are sure to impress.
Ingredients:
- 1 pound Brussels sprouts, trimmed and halved
- 2 tablespoons olive oil
- 1 teaspoon smoked paprika
- 1/2 teaspoon cayenne pepper (adjust to taste)
- 3 cloves garlic, minced
- Salt and pepper to taste
- 1 tablespoon balsamic vinegar (optional)
Cooking Instructions:
- Begin by setting your Instant Pot to the "Sauté" mode. Add the olive oil to the pot and allow it to heat up. Once hot, add the halved Brussels sprouts, cut side down, and sauté for about 5 minutes until they start to brown.
- Stir in the minced garlic, smoked paprika, cayenne pepper, salt, and pepper, mixing well to coat the Brussels sprouts evenly. Press "Cancel" to stop the sautéing. If desired, you can add the balsamic vinegar at this stage for an extra layer of flavor.
- Secure the Instant Pot lid and set the steam release valve to the sealing position. Select the "Manual" or "Pressure Cook" setting and cook for 3 minutes. Once the cooking time is complete, perform a quick release of the steam by turning the valve to the venting position.
- After the steam has fully released, carefully remove the lid and transfer the Brussels sprouts to a baking sheet. Broil them in the oven for 5-7 minutes, or until they reach your desired level of crispiness.
When cooking Spicy Roasted Brussels Sprouts, feel free to experiment with different spices and seasonings based on your preferences. Adding a sprinkle of Parmesan cheese or a squeeze of lemon juice before serving can enhance the flavors even more.
Additionally, if you want extra crunch, consider tossing in some chopped nuts like walnuts or almonds just before broiling. Enjoy your deliciously spicy side dish!
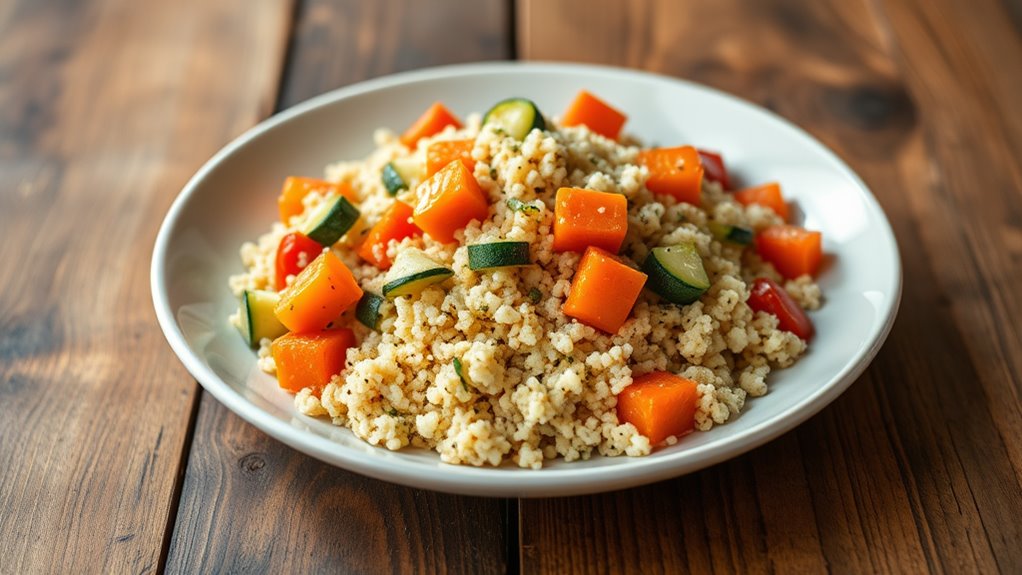
Herbed Couscous With Vegetables
Herbed Couscous with Vegetables is a quick and flavorful side dish that complements a variety of main courses. This dish combines fluffy couscous with an assortment of colorful vegetables and fresh herbs, making it not only visually appealing but also packed with nutrients.
The Instant Pot makes this recipe even easier, allowing you to prepare it in a fraction of the time compared to traditional methods. This recipe is perfect for busy weeknights or when you have guests over. The combination of garlic, onion, and fresh herbs infuses the couscous with delightful flavors, while the vegetables add texture and nutrition.
Plus, it's a one-pot dish, which means less cleanup for you!
Ingredients:
- 1 cup couscous
- 1 cup vegetable broth or water
- 1 cup mixed vegetables (such as bell peppers, zucchini, and carrots)
- 1 small onion, diced
- 2 cloves garlic, minced
- 2 tablespoons olive oil
- 1 teaspoon dried thyme
- 1 teaspoon dried oregano
- Salt and pepper to taste
- Fresh parsley or basil for garnish (optional)
Instructions:
- Set your Instant Pot to the sauté function and add olive oil. Once hot, add the diced onion and minced garlic. Sauté for about 2-3 minutes until the onion is translucent.
- Add the mixed vegetables and sauté for another 2-3 minutes. Then, add the couscous, vegetable broth (or water), dried thyme, and dried oregano. Stir to combine, and season with salt and pepper to taste.
- Close the Instant Pot lid, set the valve to sealing, and cook on high pressure for 5 minutes. Once the cooking time is up, allow for a natural pressure release for about 5 minutes, then carefully switch the valve to venting to release any remaining pressure.
- Open the lid and fluff the couscous with a fork. Garnish with fresh parsley or basil before serving.
For extra tips, feel free to customize the vegetables based on your preference or what you have on hand. You can also add a splash of lemon juice before serving for a bright, zesty flavor.
If you're looking for a protein boost, consider adding cooked chickpeas or beans to the dish. Enjoy this versatile side dish with your favorite main courses!
Frequently Asked Questions
Can I Prepare These Side Dishes in Advance?
You can definitely prepare those side dishes in advance! Studies show that meal prepping can save you up to 10 hours a week. Just store them properly, and you'll enjoy fresh flavors anytime you need them.
What Types of Meals Pair Well With These Side Dishes?
You'll find these side dishes pair wonderfully with grilled meats, roasted vegetables, and hearty soups. They complement flavors beautifully, balancing richness with freshness, making any meal more satisfying and enjoyable for you and your guests.
Are These Recipes Suitable for Meal Prepping?
Yes, these recipes are perfect for meal prepping. You can cook, store, and reheat them easily. They save time, enhance flavors, and guarantee you've got delicious sides ready for any meal throughout the week.
Can I Substitute Ingredients in These Recipes?
Absolutely, you can substitute ingredients in these recipes! Just keep in mind the flavors and textures you want to achieve. Experimenting can lead to delicious results, so don't hesitate to get creative with your substitutions.
How Long Do Leftovers Last in the Fridge?
Leftovers can be a comforting reminder of delicious meals. You'll want to use them within three to four days in the fridge. After that, their quality might fade, so enjoy them while they're still fresh!