As an affiliate, we may earn a commission from qualifying purchases. We get commissions for purchases made through links on this website from Amazon and other third parties.
Like a modern-day alchemist, you can transform simple ingredients into culinary gold with the Ninja Foodi 10-in-1 Pressure Cooker and Air Fryer. Imagine whipping up crispy Air Fryer Chicken Wings or a comforting Beef Stew in no time, all while enjoying the convenience of quick cleanup. This kitchen marvel offers an array of recipes that can cater to both healthy meals and indulgent treats. Curious about how to make the most of your Foodi? Let's explore some standout options that could revolutionize your cooking routine.
Key Takeaways
- The Ninja Foodi excels in versatility, allowing you to prepare a range of dishes from appetizers to desserts using pressure cooking and air frying.
- Quick meals like air fryer chicken wings and tender beef stew can be made in under 35 minutes, perfect for busy weeknights.
- Healthy options, such as perfectly cooked salmon and fluffy hard-boiled eggs, are easy to make, enhancing your diet with minimal effort.
- Comfort foods, including creamy risotto and delicious mac and cheese, are simplified with the Ninja Foodi's one-pot cooking capabilities.
- Desserts like decadent chocolate cake can be crafted effortlessly, utilizing pressure cooking for moist texture and air frying for a crispy finish.
Crispy Air Fryer Chicken Wings

Crispy Air Fryer Chicken Wings are a game-changer for anyone looking to enjoy a deliciously crunchy snack without the guilt of deep frying. The Ninja Foodi makes it easy to achieve that perfect crispy exterior while keeping the inside tender and juicy.
Whether you're hosting a game day party or just satisfying a craving, these chicken wings are sure to impress your guests and family alike.
The beauty of cooking chicken wings in the air fryer is that they can be seasoned to your liking and cooked in a fraction of the time it would take in a traditional oven. With minimal oil and maximum flavor, you can indulge in this classic appetizer without compromising on health. Air fryer chicken dishes provide a crispy texture with reduced oil use, making them a healthier option for snacking.
Let's plunge into this simple recipe that will have your wings coming out crispy and full of flavor.
Ingredients:
- 2 pounds chicken wings
- 1 tablespoon olive oil
- 1 teaspoon garlic powder
- 1 teaspoon onion powder
- 1 teaspoon paprika
- 1 teaspoon salt
- 1/2 teaspoon black pepper
- Optional: hot sauce or your favorite wing sauce for tossing
Cooking Instructions:
1. Preheat your Ninja Foodi on the air fry setting to 400°F (200°C). Pat the chicken wings dry with paper towels to remove excess moisture, which will help them become crispy.
In a large bowl, combine the chicken wings with olive oil, garlic powder, onion powder, paprika, salt, and black pepper. Toss until all wings are evenly coated with the seasoning mixture.
2. Place the seasoned wings in the air fryer basket in a single layer, making sure not to overcrowd. Cook for 25-30 minutes, flipping the wings halfway through to guarantee even cooking.
Once the wings are golden brown and crispy, remove them from the air fryer and toss them in hot sauce or your favorite wing sauce if desired. Serve immediately with your favorite dipping sauce.
Extra Tips:
For even crispier wings, consider letting them rest in the refrigerator for an hour after seasoning and before cooking. This helps to dry out the skin, which contributes to that ultra-crispy texture.
Additionally, you can experiment with different seasonings and sauces to personalize your wings to your taste. Enjoy your delicious creation!
Tender Beef Stew
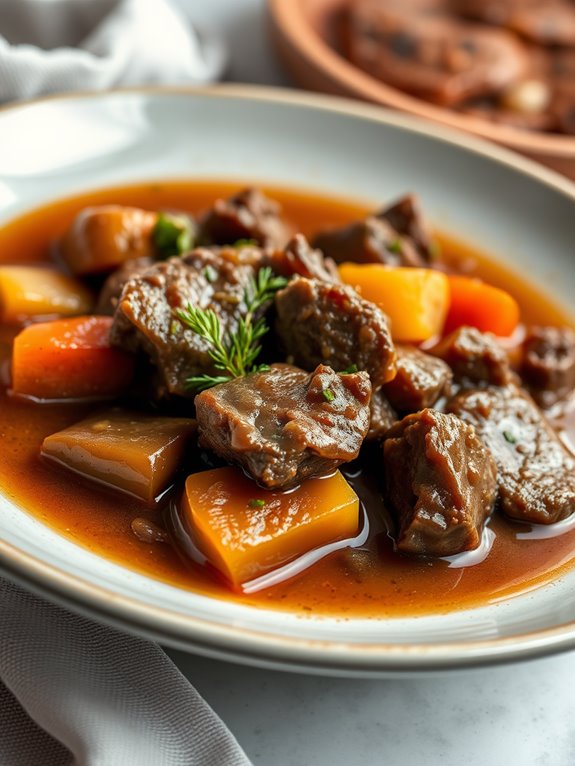
Tender Beef Stew
Beef stew is a classic comfort food that warms the heart and fills the belly. When prepared in a Ninja Foodi, the flavors meld beautifully, and the meat becomes incredibly tender. This one-pot dish is perfect for a cozy night in or to impress guests at a dinner party.
With the pressure cooking function, you can achieve that slow-cooked taste in a fraction of the time, making it an ideal recipe for busy weeknights.
In this recipe, you'll find a blend of hearty vegetables and savory herbs that elevate the flavor profile of the beef stew. The Ninja Foodi's versatility allows you to sauté your ingredients before pressure cooking, ensuring that every bite is packed with flavor.
Gather your ingredients, and let's plunge into this delicious and satisfying meal!
Ingredients:
- 2 lbs beef chuck, cut into 1-inch cubes
- 3 tablespoons olive oil
- 1 onion, chopped
- 3 cloves garlic, minced
- 4 carrots, sliced
- 3 potatoes, diced
- 2 cups beef broth
- 1 tablespoon Worcestershire sauce
- 1 teaspoon dried thyme
- 1 teaspoon dried rosemary
- Salt and pepper to taste
- 2 tablespoons cornstarch (optional, for thickening)
Cooking Instructions:
- Turn on the Ninja Foodi and select the 'Sauté' function. Add olive oil and heat until shimmering. Add the chopped onion and minced garlic, cooking until the onion is translucent.
- Add the beef cubes to the pot, season with salt and pepper, and brown them on all sides. This step enhances the flavor of the stew.
- Once browned, add the carrots, potatoes, beef broth, Worcestershire sauce, thyme, and rosemary to the pot. Stir to combine.
- Close the lid and seal the vent. Select the 'Pressure Cook' function and set the time for 35 minutes.
- Once the cooking time is complete, allow the pressure to release naturally for about 10 minutes, then perform a quick release for any remaining pressure.
- If you prefer a thicker stew, mix cornstarch with a little bit of water and stir it into the stew while on the 'Sauté' function until thickened to your liking.
Extra Tips:
For an even richer flavor, consider browning the beef in batches to avoid overcrowding the pot.
You can also customize your stew by adding your favorite vegetables or herbs. If you have leftovers, they can be stored in an airtight container in the refrigerator for up to three days and taste even better the next day as the flavors continue to develop.
Enjoy your tender beef stew!
Creamy Risotto
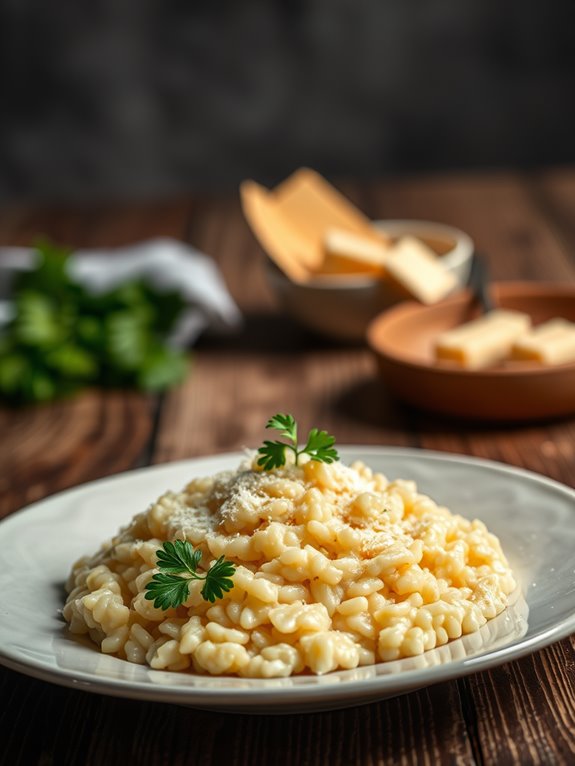
Creamy risotto is a classic Italian dish that's both comforting and indulgent. Traditionally, it requires constant stirring and careful attention, but with the Ninja Foodi, you can achieve that creamy texture with much less effort.
This recipe harnesses the power of the Ninja Foodi to deliver a delicious risotto that's rich and flavorful, all while saving you time and energy.
In this recipe, we'll be using Arborio rice, known for its high starch content, which gives risotto its signature creaminess. The Ninja Foodi allows you to sauté the onions and garlic, then pressure cook the rice, ensuring perfectly cooked grains without the typical labor-intensive process.
Serve your creamy risotto as a main course or as a delightful side dish to elevate any meal.
Ingredients:
- 1 tablespoon olive oil
- 1 small onion, finely chopped
- 2 cloves garlic, minced
- 1 cup Arborio rice
- 4 cups vegetable or chicken broth
- 1/2 cup white wine (optional)
- 1/2 cup grated Parmesan cheese
- 1/2 cup heavy cream
- Salt and pepper to taste
- Fresh parsley for garnish (optional)
Cooking Instructions:
- Start by selecting the "Sauté" function on your Ninja Foodi. Add the olive oil, and once it's hot, sauté the chopped onion until it becomes translucent, about 3-4 minutes.
- Add the minced garlic and sauté for an additional minute, ensuring it doesn't burn. Stir in the Arborio rice and cook for another 2 minutes, allowing the rice to slightly toast.
- Pour in the white wine (if using) and let it cook until mostly absorbed. Then, add the broth and stir well.
- Close the lid of the Ninja Foodi, ensuring the pressure valve is set to seal. Select the "Pressure Cook" function and set the timer for 6 minutes on high pressure.
- Once the cooking cycle is complete, carefully quick release the pressure. Open the lid and stir in the heavy cream and Parmesan cheese until the risotto is creamy and well combined. Season with salt and pepper to taste.
Extra Tips:
For an even creamier risotto, feel free to add more heavy cream or cheese.
You can also customize your risotto by adding vegetables such as peas or mushrooms during the sauté stage. Additionally, if you prefer a little more texture, consider stirring in some sautéed shrimp or chicken right before serving.
Enjoy experimenting with flavors to make this dish your own!
Perfectly Cooked Salmon
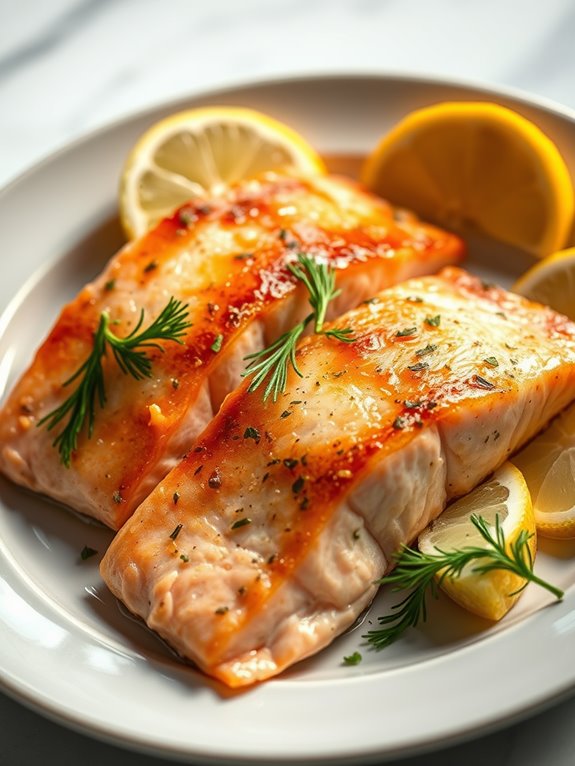
Cooking salmon in the Ninja Foodi is a fantastic way to achieve perfectly cooked, flaky fish with minimal effort. The combination of pressure cooking and air crisping allows for a tender interior and a beautifully crispy exterior, making it a favorite method for many home cooks. With just a few simple ingredients and a quick cooking time, you can enjoy a delicious salmon dish that's both healthy and satisfying.
The versatility of salmon makes it suitable for a variety of flavor profiles. Whether you prefer a simple seasoning of salt and pepper or a more elaborate marinade, the Ninja Foodi can easily accommodate your taste. This recipe will guide you through the process of cooking salmon that isn't only delicious but also visually appealing, making it perfect for a weeknight meal or a special occasion. Additionally, using an air fryer for cooking can help retain nutrients while offering a crispy texture, as seen in various Keto Air Fryer Recipes.
Ingredients:
- 2 salmon fillets (about 6 oz each)
- 1 tablespoon olive oil
- Salt, to taste
- Black pepper, to taste
- 1 teaspoon garlic powder
- 1 teaspoon paprika
- Lemon wedges, for serving
- Fresh herbs (such as dill or parsley), for garnish (optional)
Instructions:
- Begin by patting the salmon fillets dry with paper towels. Season both sides of the fillets with olive oil, salt, black pepper, garlic powder, and paprika. Allow the seasoned salmon to rest for about 10 minutes to absorb the flavors.
- Add 1 cup of water to the Ninja Foodi pot and place the trivet inside. Arrange the salmon fillets on the trivet, skin-side down. Close the lid and set the Ninja Foodi to pressure cook on high for 3 minutes. Once the cooking time is complete, quickly release the pressure.
- After releasing the pressure, carefully remove the salmon from the pot. Rinse the pot and dry it, then switch to the air crisp function. Place the salmon back into the pot and air crisp at 400°F for an additional 4-6 minutes, or until the skin is crispy and the salmon is cooked through.
Extra Tips:
For the best results, choose fresh, high-quality salmon fillets. If you prefer a different flavor, feel free to experiment with various herbs and spices or use a marinade of your choice. Always check for doneness with a fork; the salmon should flake easily and have an internal temperature of 145°F.
To enhance the dish, serve with a squeeze of fresh lemon juice and a sprinkle of chopped herbs for added freshness and flavor. Enjoy your perfectly cooked salmon!
Vegetable Medley Stir-Fry
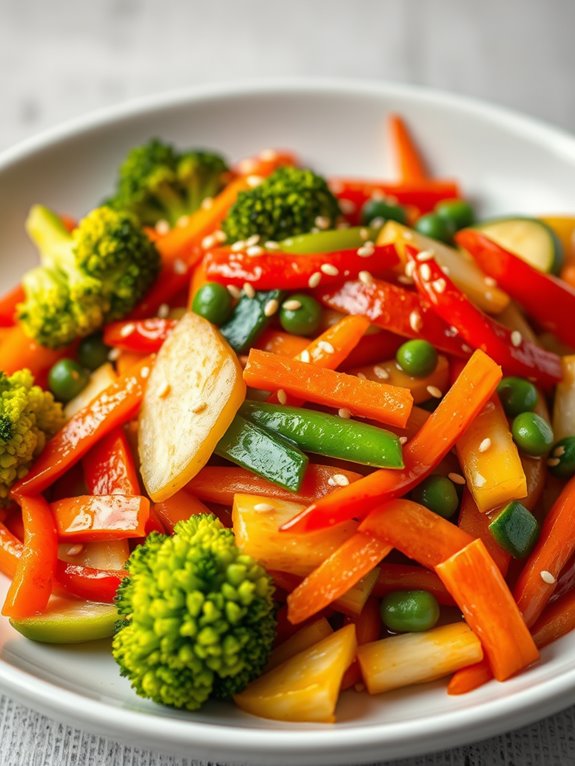
Vegetable medley stir-fry is a vibrant and healthy dish that brings together an array of fresh vegetables, all cooked to perfection in the Ninja Foodi. This quick and easy recipe is perfect for busy weeknights, guaranteeing you can serve a nutritious meal without spending hours in the kitchen.
With the combination of colorful vegetables and a simple sauce, this stir-fry isn't only visually appealing but also loaded with flavor. The versatility of this dish allows you to use whatever vegetables you have on hand, making it a great way to reduce food waste and experiment with different tastes. Additionally, incorporating air-fried air fryer side dishes can complement this dish and enhance your meal variety.
Whether served as a main course or a side dish, this vegetable medley stir-fry is sure to please everyone at the table. Plus, with the Ninja Foodi's unique cooking capabilities, you'll achieve that perfect tender-crisp texture that makes stir-fried vegetables so delightful.
Ingredients:
- 1 cup broccoli florets
- 1 cup bell peppers (red, yellow, or green), sliced
- 1 cup snap peas
- 1 cup carrots, julienned
- 1 cup zucchini, sliced
- 2 tablespoons soy sauce
- 2 tablespoons olive oil
- 2 cloves garlic, minced
- 1 teaspoon ginger, grated
- Salt and pepper to taste
- Optional: sesame seeds for garnish
Cooking Instructions:
- Start by preheating your Ninja Foodi on the sauté setting. Add the olive oil and allow it to heat up for a minute. Once the oil is shimmering, add the minced garlic and grated ginger, sautéing for about 30 seconds until fragrant.
- Next, add the broccoli, bell peppers, snap peas, carrots, and zucchini to the pot. Stir well to coat the vegetables in the oil and aromatics. Sauté for about 5-7 minutes, stirring occasionally until the vegetables are tender-crisp.
- Pour in the soy sauce and season with salt and pepper to taste. Continue to cook for an additional 2-3 minutes, making sure all vegetables are coated in the sauce. If desired, sprinkle sesame seeds over the top before serving.
Extra Tips:
Feel free to customize this stir-fry with your favorite vegetables or whatever you have in your fridge. Cauliflower, mushrooms, and green beans work wonderfully in this recipe.
For added protein, consider tossing in some cooked chicken, shrimp, or tofu towards the end of cooking. Always remember to adjust the cooking time based on the thickness of the vegetables to guarantee everything is cooked perfectly without losing that delightful crunch!
Savory Stuffed Peppers

Savory stuffed peppers are a delightful and nutritious dish that combines colorful bell peppers with a hearty filling. This recipe is perfect for a family dinner or meal prep, as the peppers can be made ahead of time and reheated for a quick meal. The flavors of seasoned ground meat, rice, and vegetables meld beautifully in the Ninja Foodi, creating a satisfying option that pleases both the palate and the eye. With the versatility of the Ninja Foodi, you can easily switch up the ingredients to suit your taste preferences or dietary needs. Whether you prefer beef, turkey, or a vegetarian option, these stuffed peppers can be customized to match any flavor profile. Serve them with a side salad or some crusty bread for a complete meal that everyone will enjoy. Additionally, cooking the stuffed peppers in a pressure cooker like the Ninja Foodi ensures optimal cooking times for tender vegetables and a flavorful filling.
Ingredients:
- 4 large bell peppers (any color)
- 1 pound ground beef or turkey
- 1 cup cooked rice (white or brown)
- 1 can (15 oz) diced tomatoes, drained
- 1 small onion, diced
- 2 cloves garlic, minced
- 1 teaspoon Italian seasoning
- 1 teaspoon salt
- 1/2 teaspoon black pepper
- 1 cup shredded cheese (cheddar or mozzarella)
- Fresh parsley, for garnish (optional)
Cooking Instructions:
- Begin by preparing the bell peppers. Slice the tops off the peppers and remove the seeds and membranes. Rinse them under cold water and set aside.
- In the Ninja Foodi, select the sauté function. Add the diced onion and minced garlic, cooking until the onion is translucent. Then, add the ground meat and cook until browned. Drain any excess fat.
- Stir in the cooked rice, diced tomatoes, Italian seasoning, salt, and pepper. Mix well and allow the filling to heat through for about 3-4 minutes.
- Stuff each bell pepper with the meat mixture and place them upright in the pot of the Ninja Foodi. Add a cup of water to the pot, then close the lid and set it to high pressure for 8 minutes.
- When the cooking time is complete, carefully release the pressure. Open the lid, sprinkle the shredded cheese on top of each pepper, and close the lid again for a few minutes to allow the cheese to melt.
Extra Tips:
For a unique twist, try adding different spices or vegetables to the filling, such as corn, black beans, or jalapeños for a spicy kick.
If you're looking for a vegetarian version, substitute the meat with lentils or quinoa, and add extra veggies like zucchini or mushrooms.
To make the prep even easier, you can prepare the filling ahead of time and store it in the refrigerator until you're ready to stuff the peppers. Enjoy your savory stuffed peppers!
Sweet Potato Mash

Sweet Potato Mash is a delicious and nutritious side dish that can elevate any meal. This creamy mash isn't only a great source of vitamins, but it also offers a naturally sweet flavor that pairs well with a variety of proteins. The Ninja Foodi makes the cooking process simple and efficient, allowing you to whip up this comforting dish in no time.
Whether you're preparing for a holiday feast or just a weeknight dinner, Sweet Potato Mash is sure to please.
To achieve the perfect consistency and flavor, it's important to use fresh sweet potatoes and the right spices. The Ninja Foodi's versatile cooking capabilities, including pressure cooking and air frying, help to enhance the natural sweetness of the potatoes while keeping them tender and fluffy.
Serve this dish alongside your favorite meats or as a part of a vegetarian meal for a satisfying addition to your table.
Ingredients:
- 2 large sweet potatoes
- 2 tablespoons butter
- 1/4 cup milk (or plant-based milk)
- Salt to taste
- Pepper to taste
- Optional: cinnamon or nutmeg for extra flavor
Instructions:
- Peel the sweet potatoes and cut them into evenly sized chunks. Place them in the Ninja Foodi pot and add enough water to cover the potatoes. Close the lid and set the valve to the sealing position. Select the pressure cook function and set the timer for 10 minutes.
- Once the cooking time is complete, perform a quick release by moving the valve to the venting position. Carefully remove the lid and drain any excess water. Add the butter, milk, salt, and pepper to the pot. Mash the sweet potatoes with a potato masher or use an immersion blender for a smoother texture. Adjust seasoning as needed and add optional spices if desired.
Extra Tips:
For an even creamier Sweet Potato Mash, consider using half-and-half or heavy cream instead of milk. You can also experiment with different flavorings, such as garlic or herbs, to customize the dish to your liking.
If you have leftovers, store them in an airtight container in the refrigerator for up to three days, and reheat gently on the stovetop or in the microwave. Enjoy your delicious and healthy Sweet Potato Mash!
Delicious Mac and Cheese
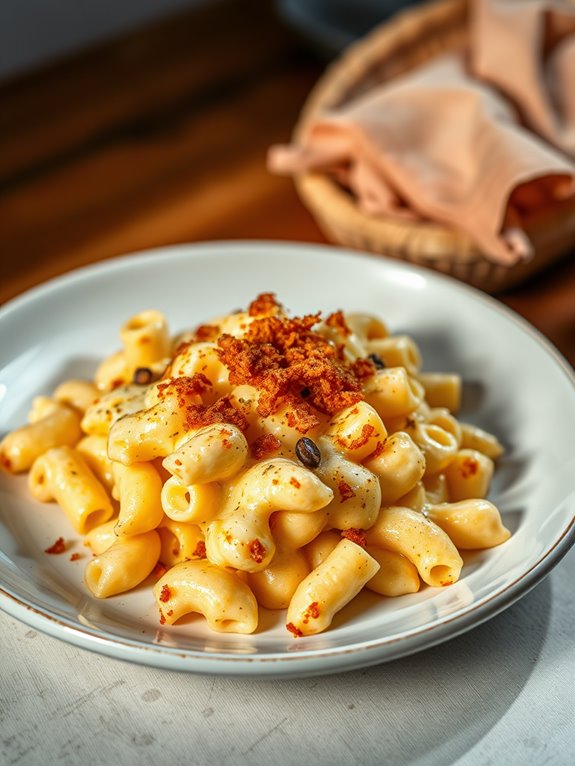
Delicious Mac and Cheese
Mac and cheese is a beloved comfort food that can be easily prepared in a Ninja Foodi. This creamy, cheesy dish is perfect for family dinners, potlucks, or even a cozy night in.
The Ninja Foodi not only makes the cooking process easier but also allows for a rich flavor and perfect texture that will have everyone coming back for seconds. Using the Ninja Foodi, you can combine the convenience of pressure cooking with the deliciousness of a cheesy sauce that coats each macaroni shell. This recipe will guide you through a simple process that results in a luscious mac and cheese that's sure to impress. Additionally, the use of air fryers can provide a crispy topping for a unique texture contrast.
Get ready to indulge in a dish that's both quick and satisfying!
Ingredients:
- 8 ounces elbow macaroni
- 4 cups water
- 1 teaspoon salt
- 2 tablespoons butter
- 2 cups shredded sharp cheddar cheese
- 1 cup shredded mozzarella cheese
- 1 cup milk
- 1 teaspoon garlic powder
- 1 teaspoon onion powder
- ½ teaspoon black pepper
- ½ teaspoon paprika
Cooking Instructions:
- Begin by adding the elbow macaroni, water, and salt to the Ninja Foodi pot. Close the lid and set the pressure valve to the sealing position.
- Select the pressure cook function and cook on high for 4 minutes. Once the cooking time is up, perform a quick release of the pressure by carefully turning the valve to the venting position.
- After the pressure has released, open the lid and stir in the butter, shredded cheddar, and mozzarella cheese.
- Add the milk, garlic powder, onion powder, black pepper, and paprika. Mix everything well until the cheese is melted and the sauce is creamy. If the mixture seems too thick, you can add a little more milk to reach your desired consistency.
Extra Tips:
For an even more indulgent mac and cheese, consider adding cooked bacon, sautéed onions, or your favorite vegetables to the mix before serving.
Additionally, if you prefer a crispy topping, transfer the mac and cheese to a baking dish, sprinkle with breadcrumbs, and broil in the oven for a few minutes until golden brown.
Enjoy your delicious homemade mac and cheese!
Fluffy Hard-Boiled Eggs
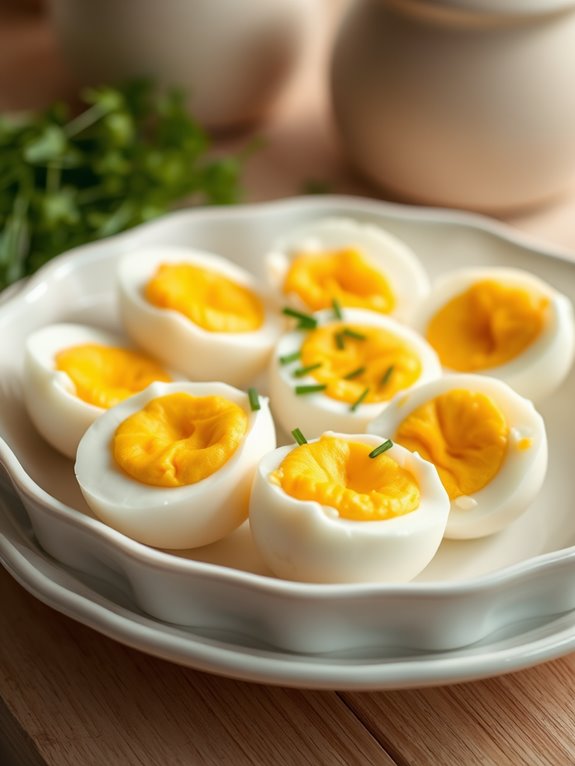
Cooking fluffy hard-boiled eggs in the Ninja Foodi is a simple and effective way to achieve perfectly cooked eggs with minimal fuss. The pressure cooking feature of the Ninja Foodi not only speeds up the cooking process but also guarantees that the eggs are evenly cooked, resulting in a creamy yolk and tender whites. Regular use of air frying can promote healthier eating habits, making this method an excellent choice for nutritious meal preparation.
Whether you're preparing eggs for breakfast, salads, or a snack, this method will have you enjoying delicious hard-boiled eggs in no time.
To get started, gather your ingredients and prepare your Ninja Foodi. The versatility of this kitchen appliance makes it a favorite among home cooks, and hard-boiled eggs are just one of the many things you can create with it.
Once you have everything ready, follow the straightforward instructions below to whip up your fluffy hard-boiled eggs.
Ingredients:
- Eggs (as many as you need)
- Water (1 cup)
- Ice (for ice bath)
Cooking Instructions:
Begin by adding one cup of water to the Ninja Foodi pot.
Place the reversible rack inside the pot, or if you don't have one, you can use the egg rack if included. Gently place the eggs on the rack, ensuring they don't touch the water directly.
Close the lid and set the pressure release valve to the sealing position. Select the pressure cook function and set the timer for 5-6 minutes, depending on how firm you like your yolks.
Once the cooking time is up, perform a quick release by carefully turning the pressure release valve to venting, allowing the steam to escape.
After releasing the pressure, carefully remove the eggs from the Ninja Foodi and transfer them to a bowl filled with ice water.
Let them sit in the ice bath for about 5-10 minutes to stop the cooking process and make peeling easier. Once cooled, gently tap the eggs on a hard surface and peel them under running water for an easier experience.
Extra Tips:
For the best results, use older eggs rather than fresh ones, as they tend to peel more easily.
If you prefer a softer yolk, adjust the cooking time down to around 4-5 minutes. Additionally, experimenting with different cooking times can help you find your perfect hard-boiled egg consistency.
Enjoy your fluffy hard-boiled eggs as they are, or add them to salads, sandwiches, or deviled egg recipes for a delightful treat!
Decadent Chocolate Cake
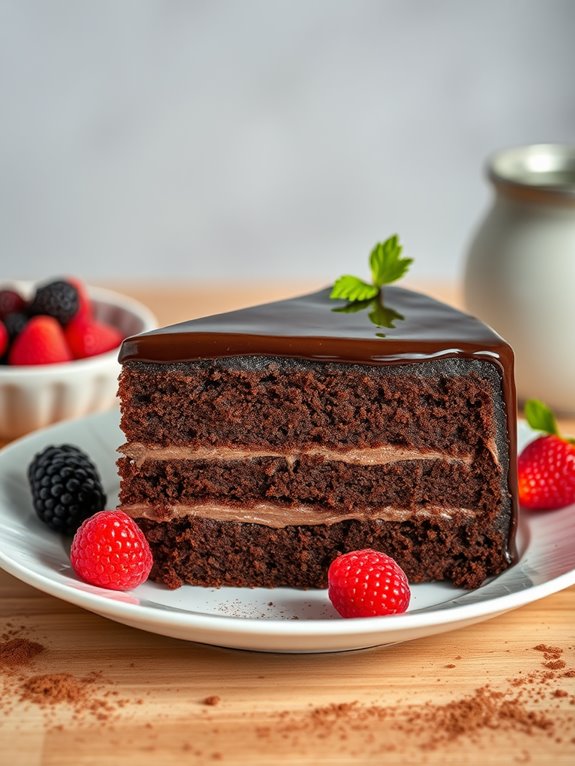
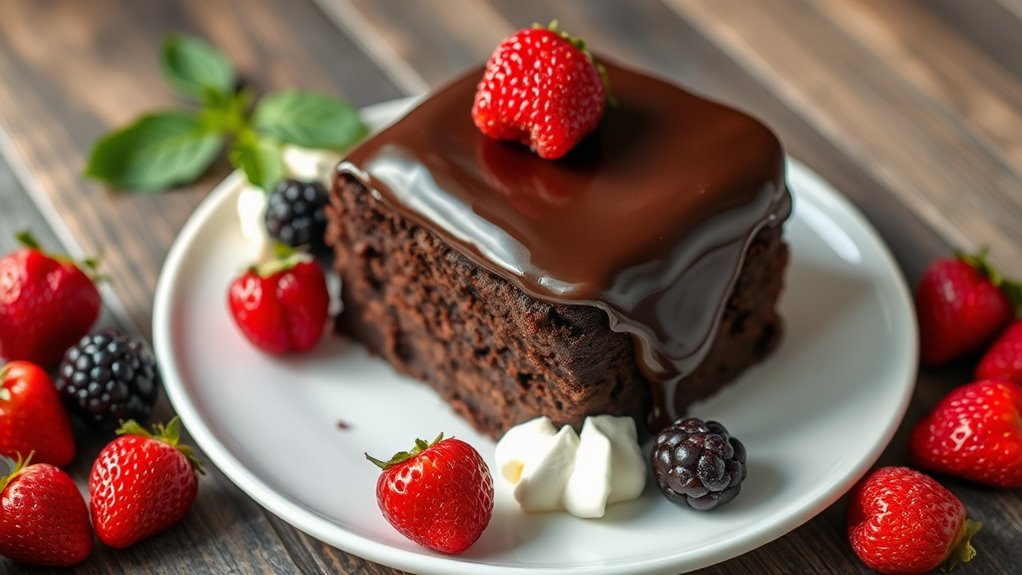
Indulging in a decadent chocolate cake is a delightful experience that can bring joy to any occasion. This recipe leverages the power of the Ninja Foodi, which allows for moist and perfectly cooked cakes thanks to its unique pressure cooking and air frying capabilities. The combination of rich cocoa powder and a silky chocolate ganache creates a dessert that's sure to impress family and friends alike.
With minimal effort and a few simple ingredients, you can whip up this chocolate cake that boasts a heavenly texture and flavor. The versatility of the Ninja Foodi means you can easily switch between cooking methods, guaranteeing that your cake comes out perfectly every time. Prepare to satisfy your chocolate cravings with this easy-to-follow recipe!
Additionally, using the air fryer function can help achieve a crispy exterior while keeping the cake moist inside, enhancing its overall texture.
Ingredients:
- 1 ¾ cups all-purpose flour
- 1 ½ cups granulated sugar
- ¾ cup unsweetened cocoa powder
- 1 ½ teaspoons baking powder
- 1 ½ teaspoons baking soda
- 1 teaspoon salt
- 2 large eggs
- 1 cup whole milk
- ½ cup vegetable oil
- 2 teaspoons vanilla extract
- 1 cup boiling water
- 1 cup chocolate ganache (for topping)
Instructions:
- Begin by greasing the Ninja Foodi pot with non-stick spray. In a large mixing bowl, combine the flour, sugar, cocoa powder, baking powder, baking soda, and salt. Whisk together until well mixed.
- Add the eggs, milk, vegetable oil, and vanilla extract to the dry ingredients. Beat the mixture on medium speed for about 2 minutes until smooth. Gradually stir in the boiling water (the batter will be thin). Pour the batter into the greased pot of the Ninja Foodi.
- Close the lid and set the Ninja Foodi to pressure cook on high for 30 minutes. Once the cooking time is complete, perform a quick release of the pressure. Carefully remove the pot and let the cake cool for about 10 minutes before inverting it onto a wire rack to cool completely. Once cooled, spread the chocolate ganache over the top of the cake.
Extra Tips:
For an even more indulgent experience, consider adding chocolate chips to the batter or garnishing with fresh berries and whipped cream. Confirm the cake is completely cooled before adding the ganache to prevent it from melting.
You can also experiment with different flavorings, such as espresso or orange zest, to elevate the chocolate flavor. Enjoy your delicious chocolate cake!
Frequently Asked Questions
Can I Use Frozen Ingredients in the Ninja Foodi Recipes?
Absolutely, you can use frozen ingredients in your recipes! Just remember to adjust cooking times accordingly, since frozen items often require a bit more time to cook through compared to fresh ingredients. Enjoy your cooking!
How Do I Clean the Ninja Foodi Properly?
Cleaning your Ninja Foodi's a breeze! Just unplug it, remove the inner pot, and wash it with warm soapy water. Wipe down the exterior and accessories, and you're ready for your next culinary adventure!
What Is the Warranty on the Ninja Foodi?
The warranty on the Ninja Foodi typically covers defects in materials and workmanship for one year. You should check your specific model's warranty terms, as they can differ based on where you purchased it.
Can I Use Metal Utensils in the Ninja Foodi?
You shouldn't use metal utensils in the Ninja Foodi. They can scratch the non-stick surface and damage the coating. Instead, opt for silicone, wood, or plastic utensils to keep your appliance in great shape.
How Does the Pressure Cooking Function Work?
The pressure cooking function traps steam inside the pot, increasing temperature and pressure. You set the time, and the cooker does the rest, tenderizing food quickly while locking in flavors and nutrients for delicious meals.

