As an affiliate, we may earn a commission from qualifying purchases. We get commissions for purchases made through links on this website from Amazon and other third parties.
Tiny cast iron skillets offer a unique blend of charm and practicality in the kitchen. Their compact size makes them perfect for single servings, allowing you to experiment with flavors without the commitment of larger dishes. Imagine whipping up a mini lasagna or a personal-sized pizza in no time. Curious about how these adorable skillets can transform your cooking routine? Let's explore some delightful recipes that make mealtime both easy and enjoyable.
Key Takeaways
- Miniature skillet mac and cheese offers a quick, creamy comfort food that's easy to prepare and customize with toppings like breadcrumbs.
- Single-serve lasagna provides a personal-sized Italian classic with layers of pasta, cheese, and sauce, perfect for portion control.
- Individual frittatas with seasonal veggies are nutritious and great for meal prep, combining eggs, cheese, and sautéed vegetables.
- Skillet breakfast burritos are hearty and easy, allowing for customizable fillings and a crispy exterior for delightful breakfast options.
- Tiny skillet chocolate chip cookies are a warm, gooey dessert, ideal for serving with ice cream or customizing with various mix-ins.
Miniature Skillet Mac and Cheese
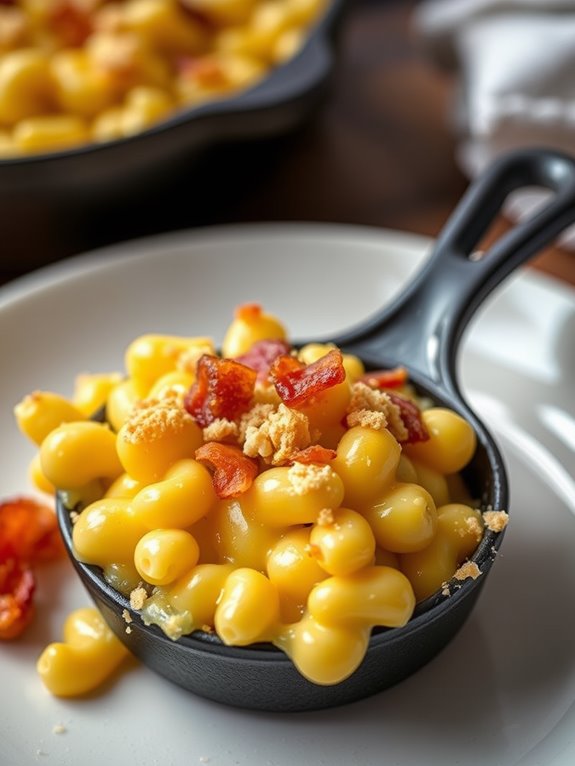
This recipe is quick and easy, allowing you to whip up a delicious serving of mac and cheese in no time. With just a few ingredients, you can enjoy a rich and satisfying meal that holds the nostalgia of childhood while still being suitable for adult palates.
So grab your miniature cast iron skillet and get ready to indulge in this gooey goodness!
Ingredients:
- 1 cup elbow macaroni
- 1 cup shredded sharp cheddar cheese
- ½ cup milk
- 2 tablespoons butter
- 1 tablespoon all-purpose flour
- Salt and pepper to taste
- Optional: breadcrumbs for topping
Cooking Instructions:
Begin by cooking the elbow macaroni according to the package instructions until al dente. Drain the pasta and set it aside.
In your tiny cast iron skillet, melt the butter over medium heat. Once melted, whisk in the flour to create a roux, cooking for about a minute to eliminate the raw flour taste. Gradually pour in the milk, stirring continuously until the mixture thickens.
Next, reduce the heat to low and add in the shredded cheddar cheese, stirring until it melts and becomes creamy. Season with salt and pepper to taste.
Finally, fold in the cooked macaroni until fully coated in the cheese sauce. If desired, sprinkle some breadcrumbs on top for a delightful crunch. Place the skillet under the broiler for a few minutes until the top is golden brown and bubbly. Serve immediately and enjoy!
Extra Tips:
For an extra flavor boost, consider adding cooked bacon, sautéed onions, or even a dash of hot sauce to your mac and cheese.
If you prefer a creamier texture, feel free to adjust the amount of milk and cheese to your liking. Just remember to keep an eye on it while broiling to prevent burning, and enjoy your delicious tiny skillet creation!
Individual Frittatas With Seasonal Veggies
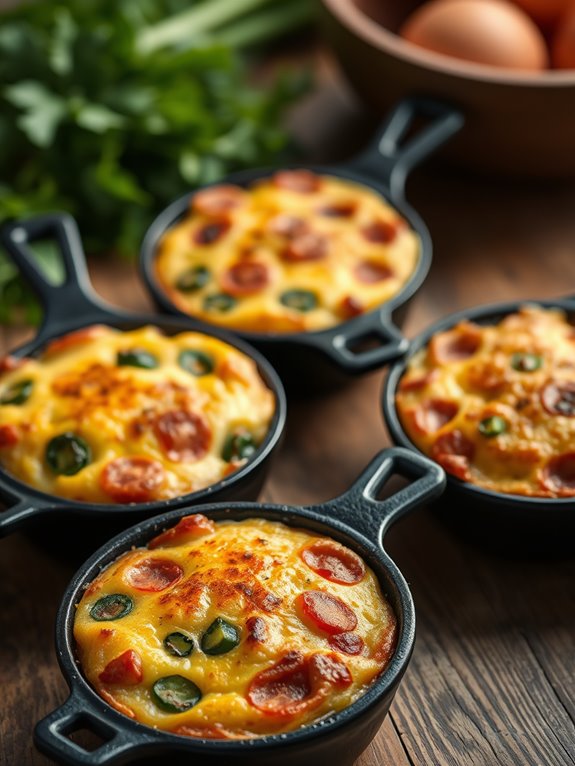
In this recipe, we'll combine fresh veggies with eggs and cheese to create a satisfying and nutritious meal. The tiny cast iron skillets will help the frittatas cook evenly and develop a delicious golden-brown top.
These individual servings are perfect for serving guests or meal-prepping for the week ahead, as they can be stored and reheated with ease.
Ingredients:
- 4 large eggs
- 1/4 cup milk
- Salt and pepper, to taste
- 1/2 cup seasonal vegetables (e.g., zucchini, bell peppers, spinach, asparagus)
- 1/4 cup shredded cheese (e.g., cheddar, feta, or mozzarella)
- 1 tablespoon olive oil or butter
- Fresh herbs (optional, for garnish)
Cooking Instructions:
Preheat your oven to 375°F (190°C). In a medium bowl, whisk together the eggs, milk, salt, and pepper. Set aside.
Heat the olive oil or butter in a tiny cast iron skillet over medium heat. Add the chopped seasonal vegetables and sauté for about 3-5 minutes, or until they're tender and slightly caramelized. Remove the skillet from the heat and let it cool slightly.
Pour the egg mixture over the sautéed vegetables, ensuring they're evenly distributed. Sprinkle the shredded cheese on top.
Transfer the skillet to the preheated oven and bake for 15-20 minutes, or until the frittatas are puffed and set in the center. Allow them to cool for a couple of minutes before serving. Garnish with fresh herbs if desired.
Extra Tips:
When preparing your individual frittatas, feel free to experiment with different combinations of vegetables, cheeses, and herbs to suit your taste preferences.
You can also make these ahead of time and store them in the fridge for up to three days. Simply reheat them in the oven or microwave before serving. Additionally, try using leftover roasted vegetables for a quick and easy option!
Cast Iron Cornbread Muffins

Whether you're serving them warm with butter, honey, or your favorite jam, these cornbread muffins are sure to please. They make for a wonderful addition to any meal, especially when paired with soups or chili.
Plus, they're quick to prepare, making them a great option for busy weeknights or weekend brunches.
Ingredients:
- 1 cup cornmeal
- 1 cup all-purpose flour
- 4 teaspoons baking powder
- 1/2 teaspoon salt
- 1/4 cup sugar
- 1 cup milk
- 2 large eggs
- 1/4 cup vegetable oil or melted butter
- Optional: 1 cup corn kernels, jalapeños, or cheese
Cooking Instructions:
Preheat your oven to 400°F (200°C) and place your tiny cast iron skillet in the oven to heat up as well.
In a large bowl, combine the cornmeal, flour, baking powder, salt, and sugar. In another bowl, whisk together the milk, eggs, and vegetable oil or melted butter until well combined.
Pour the wet ingredients into the dry ingredients and mix until just combined; don't overmix. If you're adding any optional ingredients like corn kernels or cheese, fold them in gently.
Carefully remove the hot cast iron skillet from the oven and grease it lightly with butter or oil. Pour the batter into the skillet, spreading it evenly.
Bake for 15-20 minutes, or until the top is golden brown and a toothpick inserted into the center comes out clean. Let the muffins cool slightly before serving.
Extra Tips:
For an extra crispy crust, you can preheat the skillet with a small amount of oil before adding the batter. This will help to achieve that perfect golden-brown exterior.
Additionally, feel free to experiment with different flavor combinations by adding herbs or spices to the batter. Storing the muffins in an airtight container will keep them fresh for a few days, but they're best enjoyed fresh out of the oven!
Tiny Skillet Chocolate Chip Cookie
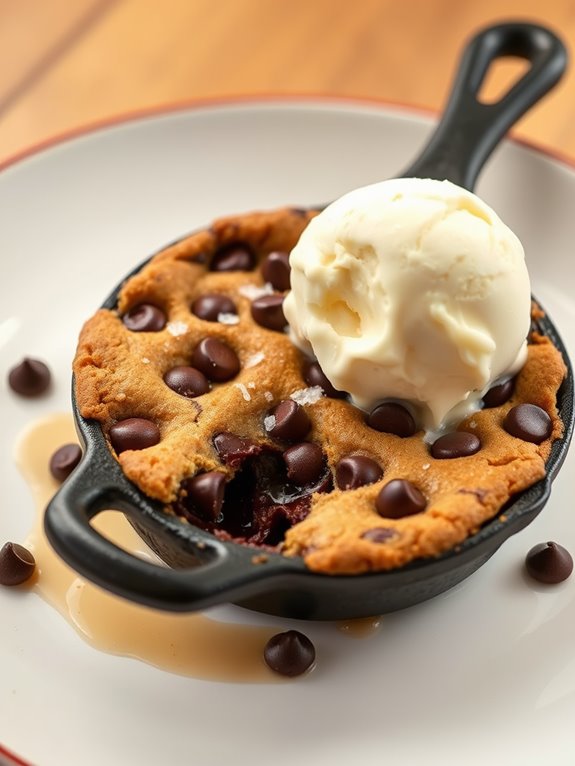
When you're in the mood for a warm, gooey treat but don't want to bake an entire batch of cookies, a tiny cast iron skillet chocolate chip cookie is the perfect solution. This individual-sized dessert isn't only quick to prepare but also creates a delightful crispy edge with a soft, chewy center.
It's the ultimate comfort food that can be enjoyed any time of day, whether as a late-night snack or a sweet ending to a meal.
This mini cookie is made with simple ingredients that you likely have on hand. With just a few minutes of preparation and baking time, you can indulge in a delicious cookie that feels like a warm hug. Serve it straight from the skillet, topped with a scoop of ice cream for an extra special treat.
Ingredients:
- 2 tablespoons unsalted butter, melted
- 2 tablespoons brown sugar
- 1 tablespoon granulated sugar
- 1/4 teaspoon vanilla extract
- Pinch of salt
- 1 egg yolk
- 1/4 cup all-purpose flour
- 2 tablespoons chocolate chips
Instructions:
Preheat your oven to 350°F (175°C). In a small mixing bowl, combine the melted butter, brown sugar, granulated sugar, vanilla extract, and salt. Stir until well combined.
Add the egg yolk and mix until smooth. Gradually fold in the flour until just incorporated, then gently stir in the chocolate chips.
Pour the cookie dough into a greased tiny cast iron skillet, spreading it evenly. Bake in the preheated oven for 10-12 minutes, or until the edges are golden brown and the center is set but still soft.
Allow the skillet to cool for a couple of minutes before serving. Enjoy your cookie warm, ideally with a scoop of vanilla ice cream on top.
Extra Tips:
For the best flavor and texture, make sure to use fresh chocolate chips and high-quality butter.
If you want to elevate your cookie even further, consider adding a sprinkle of sea salt on top just before baking for a delightful contrast of sweet and salty.
This recipe can also be easily customized by incorporating nuts, dried fruits, or even a bit of peanut butter for a unique twist!
Personal Size Pepperoni Pizza
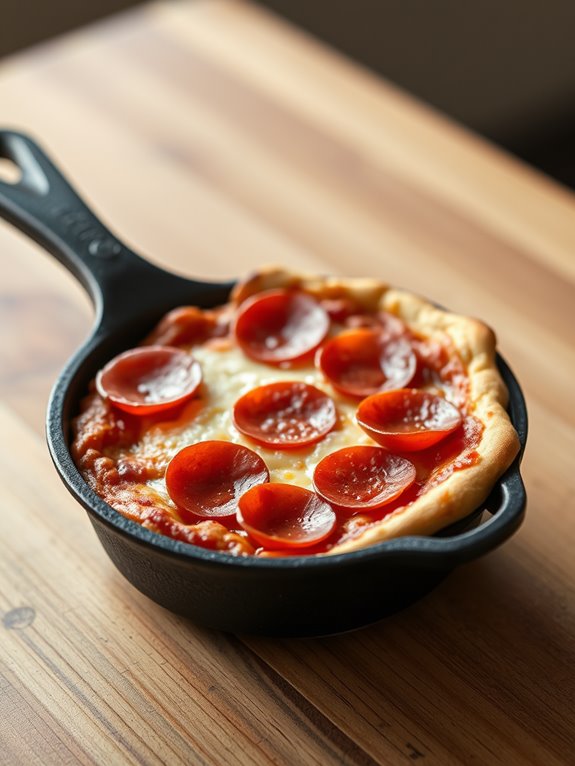
Making a personal size pepperoni pizza in a tiny cast iron skillet is a delightful way to satisfy your pizza cravings without the need for a full-sized pie. The beauty of this recipe lies in its simplicity and the capacity to customize it to your taste.
Whether you're cooking for one or just want to indulge in a quick meal, this mini pizza is perfect for any occasion. The cast iron skillet guarantees that your pizza crust gets wonderfully crispy while the toppings melt to perfection.
Plus, the cooking process is quick, making it an excellent choice for busy weeknights or spontaneous snack attacks. Gather your ingredients, and let's get ready to create a delicious personal-sized pepperoni pizza!
Ingredients:
- 1 small pizza dough (store-bought or homemade)
- 1/4 cup pizza sauce
- 1/2 cup shredded mozzarella cheese
- 1/4 cup sliced pepperoni
- 1 tablespoon olive oil
- Italian seasoning (optional)
- Cornmeal (for dusting)
Cooking Instructions:
- Preheat your oven to 450°F (232°C). While the oven is heating, prepare your cast iron skillet by lightly coating the bottom with olive oil and dusting it with cornmeal to prevent sticking.
- Roll out the pizza dough to fit the size of your skillet, then carefully place it into the skillet, pressing it against the sides to create a snug fit. Spread the pizza sauce evenly over the dough, leaving a small border around the edges.
- Sprinkle the shredded mozzarella cheese over the sauce, followed by an even layer of pepperoni slices. If you like, you can sprinkle some Italian seasoning on top for added flavor.
- Place the skillet in the preheated oven and bake for 10-12 minutes, or until the crust is golden brown and the cheese is bubbly and slightly browned. Remove the skillet from the oven and let it cool for a couple of minutes before slicing.
Extra Tips:
When making your personal size pepperoni pizza, feel free to get creative with toppings! You can add vegetables like bell peppers or mushrooms, or even experiment with different cheeses.
Just remember to adjust the cooking time slightly if you add more toppings to ascertain everything is cooked through. Enjoy your delicious mini pizza straight from the skillet for a cozy meal!
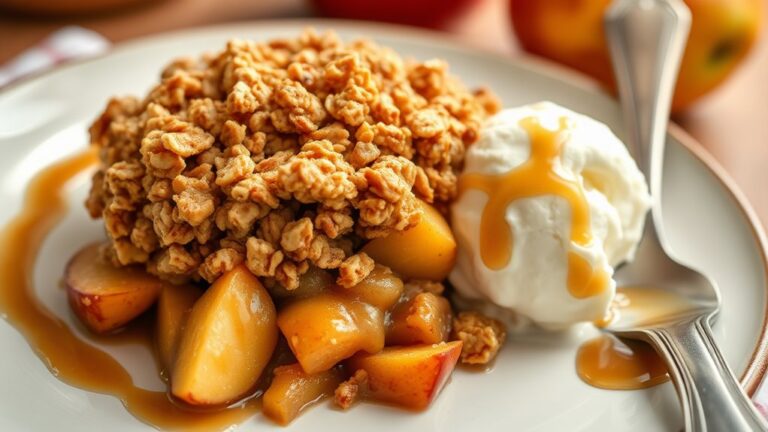
Miniature Fruit Crumbles
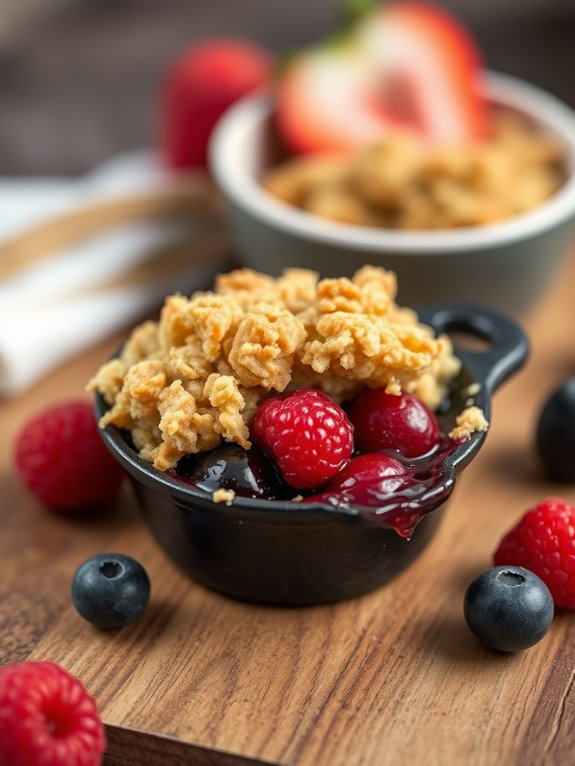
Preparing a miniature fruit crumble is a simple yet rewarding experience. The small size of the skillet guarantees even cooking, and the crust becomes wonderfully crisp while the fruit inside remains juicy and flavorful.
Serve these crumbles warm, perhaps with a scoop of vanilla ice cream or a dollop of whipped cream, for an irresistible treat that everyone will enjoy.
Ingredients:
- 1 cup mixed berries (strawberries, blueberries, raspberries)
- 2 tablespoons granulated sugar
- 1 teaspoon lemon juice
- 1/4 cup all-purpose flour
- 1/4 cup rolled oats
- 1/4 cup brown sugar
- 1/4 teaspoon cinnamon
- 1/4 cup unsalted butter, melted
- Pinch of salt
Cooking Instructions:
Preheat your oven to 350°F (175°C). In a small bowl, combine the mixed berries with granulated sugar and lemon juice, and stir gently to coat the fruit. Let the mixture sit for about 10 minutes to allow the berries to release their juices.
Meanwhile, in another bowl, mix together the flour, rolled oats, brown sugar, cinnamon, and a pinch of salt. Pour in the melted butter and mix until the mixture resembles coarse crumbs.
Transfer the berry mixture into the tiny cast iron skillet, spreading it evenly across the bottom. Top the fruit with the crumble mixture, making sure it covers the berries adequately.
Bake in the preheated oven for about 25-30 minutes or until the topping is golden brown and the fruit is bubbly. Remove from the oven and let it cool slightly before serving.
Extra Tips:
For an extra flavor boost, consider adding a splash of vanilla extract to the berry mixture or incorporating some chopped nuts into the crumble topping for added texture.
You can also experiment with different fruits depending on the season, such as peaches in summer or apples in fall. Finally, serve with a scoop of ice cream or a drizzle of cream for a truly decadent dessert experience.
Enjoy your delicious miniature fruit crumbles!
Skillet Breakfast Burritos
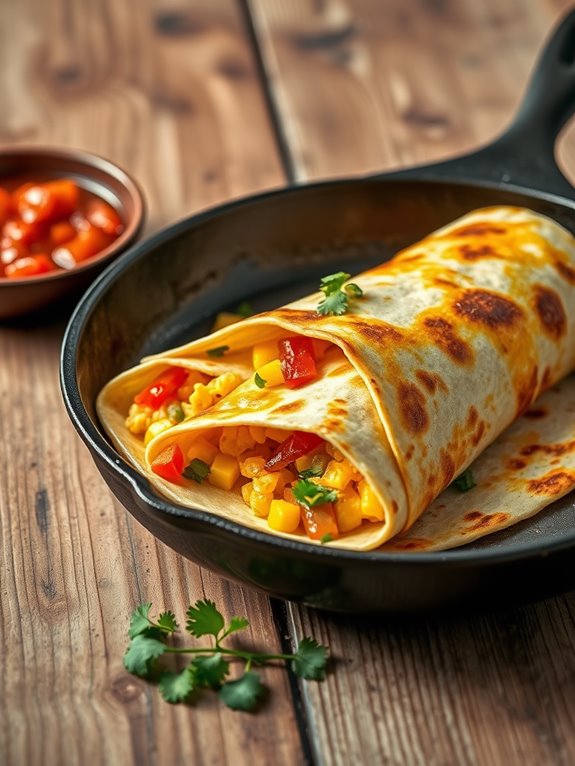
Skillet Breakfast Burritos are a delightful and hearty way to kickstart your day. Cooking them in a tiny cast iron skillet not only enhances the flavors but also creates a beautiful crispy texture on the outside. The combination of scrambled eggs, cheese, and your choice of fillings wrapped in a warm tortilla makes for a satisfying breakfast that can be enjoyed at home or on the go.
This recipe is perfect for those busy mornings or for a cozy weekend brunch. With a few simple ingredients and minimal prep time, you can whip up these burritos in no time. Plus, the tiny cast iron skillet guarantees that every bite is packed with flavor, making it a hit for both adults and kids alike.
Ingredients:
- 4 small tortillas
- 4 large eggs
- 1/2 cup shredded cheese (cheddar or Mexican blend)
- 1/2 cup cooked and crumbled sausage or bacon (optional)
- 1/4 cup diced bell peppers
- 1/4 cup diced onions
- Salt and pepper to taste
- Cooking oil or butter for greasing the skillet
- Salsa or hot sauce (for serving)
Cooking Instructions:
- Preheat your tiny cast iron skillet over medium heat and add a small amount of oil or butter to coat the bottom. In a mixing bowl, whisk together the eggs, salt, and pepper until well combined. Pour the mixture into the skillet and let it cook for a minute or two, gently stirring to scramble the eggs until they're just set.
- Once the eggs are cooked, add in the cheese, cooked sausage or bacon (if using), bell peppers, and onions. Stir everything together in the skillet until the cheese is melted and the vegetables are tender. Remove the skillet from the heat.
- Place a portion of the egg mixture onto each tortilla, fold in the sides, and roll it up tightly. Return the burritos to the skillet seam-side down and cook for an additional 1-2 minutes on each side until they're golden brown and crispy.
Extra Tips:
Feel free to customize your breakfast burritos with a variety of fillings, such as avocado, black beans, or spinach, based on your preferences.
If you prefer a spicier kick, consider adding jalapeños or red pepper flakes to the egg mixture. Also, remember to keep an eye on the heat; if the skillet gets too hot, the tortillas can burn before the insides are heated through.
Enjoy your delicious breakfast burritos with a side of salsa or hot sauce for dipping!
Single-Serve Lasagna
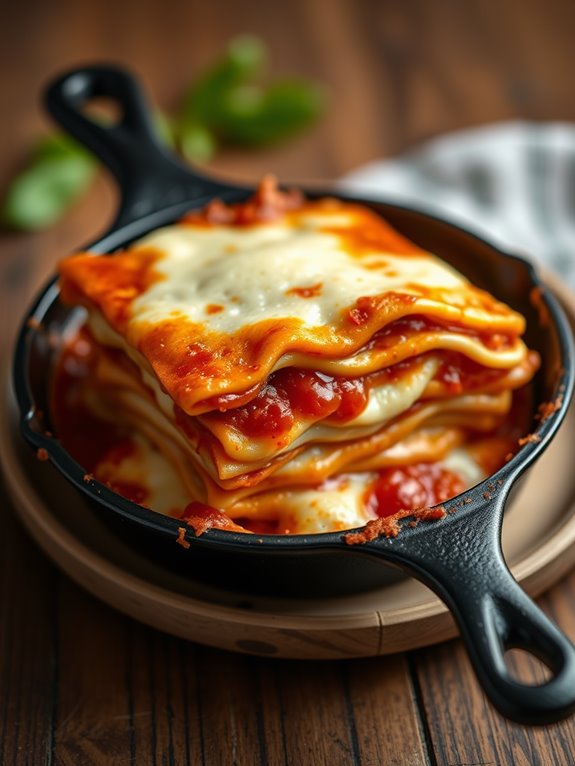
Lasagna is a beloved Italian dish that combines layers of pasta, rich meat sauce, creamy cheese, and aromatic herbs, making it a comforting meal for any occasion.
When prepared in a tiny cast iron skillet, this single-serve lasagna becomes a perfect personal treat that showcases the comforting flavors of traditional lasagna while being quick and easy to make. Plus, the cast iron skillet retains heat beautifully, allowing the cheese to melt and brown perfectly on top.
This single-serve lasagna isn't only delicious but also great for portion control or when you simply want a satisfying meal without the need to make a whole pan. With just a few ingredients and minimal prep time, you can whip up this delightful dish in no time.
Get ready to enjoy the taste of homemade lasagna right from your own little skillet!
Ingredients:
- 2 lasagna noodles (broken into pieces)
- 1/4 cup ricotta cheese
- 1/4 cup marinara sauce
- 1/4 cup shredded mozzarella cheese
- 1 tablespoon grated Parmesan cheese
- 1/4 teaspoon dried oregano
- 1/4 teaspoon garlic powder
- Salt and pepper to taste
- Fresh basil for garnish (optional)
Cooking Instructions:
Preheat your oven to 375°F (190°C). In your tiny cast iron skillet, spread a layer of marinara sauce on the bottom.
Layer some pieces of broken lasagna noodles over the sauce, followed by half of the ricotta cheese. Sprinkle a pinch of oregano, garlic powder, salt, and pepper over the ricotta. Add another layer of marinara sauce and repeat the process with the remaining noodles, ricotta, and sauce.
Once you have assembled the layers, top the lasagna with shredded mozzarella and grated Parmesan cheese. Place the skillet in the preheated oven and bake for about 20-25 minutes, or until the cheese is bubbly and golden.
Let it cool for a few minutes before garnishing with fresh basil if desired.
Extra Tips:
For added flavor and texture, consider incorporating cooked ground beef, sausage, or sautéed vegetables like spinach or mushrooms into your layers.
You can also experiment with different types of cheese or sauces to make it your own. If you don't have marinara, any tomato-based sauce will work, and for a creamier version, try using a béchamel sauce.
Enjoy your single-serve lasagna fresh from the skillet!
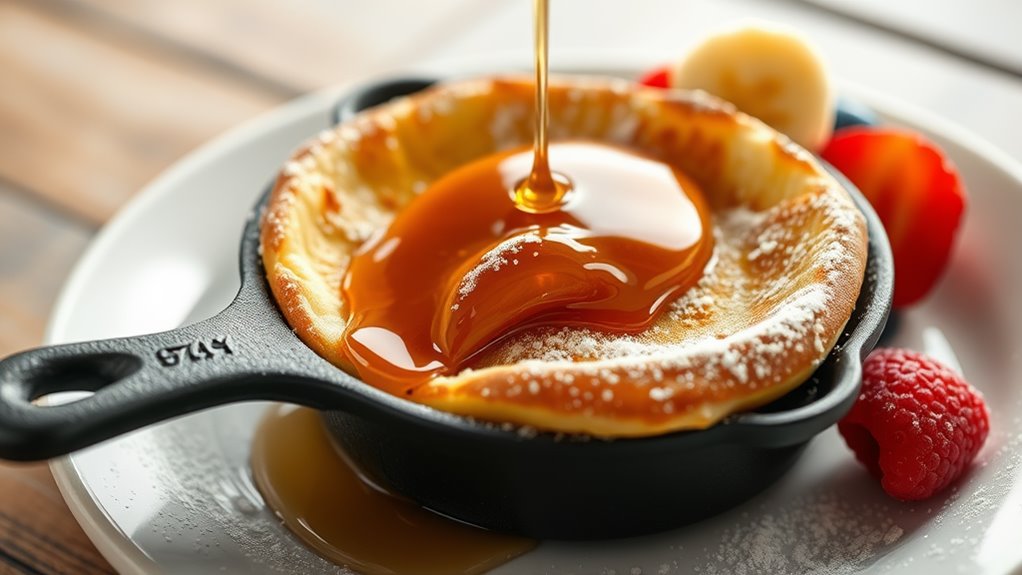
Mini Dutch Baby Pancakes
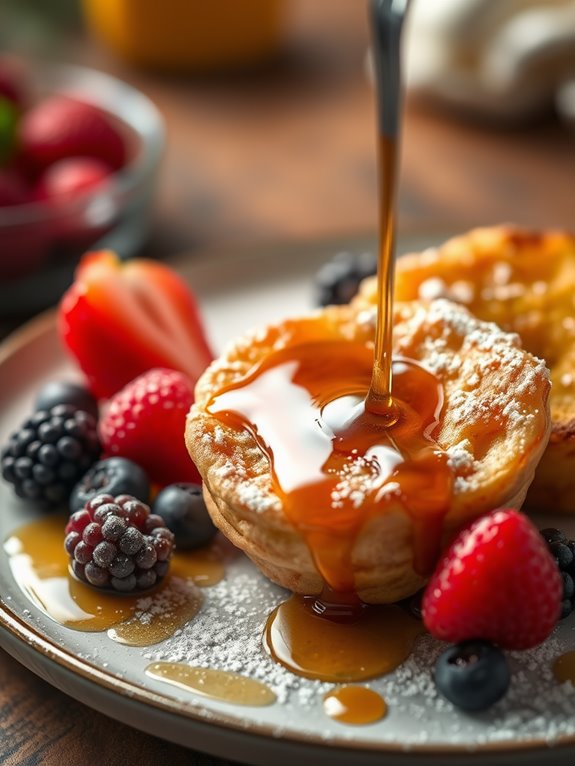
Mini Dutch Baby Pancakes are a delightful twist on the classic German pancake, made perfectly in a tiny cast iron skillet. These fluffy, puffy pancakes are incredibly simple to whip up and are perfect for a solo breakfast or a sweet snack.
With their crispy edges and soft, airy centers, Mini Dutch Babies can be topped with fresh fruit, powdered sugar, or a drizzle of maple syrup for a delicious treat any time of the day.
The beauty of Mini Dutch Baby Pancakes lies in their versatility. You can easily customize them with your favorite flavors and toppings, making them a fun dish for everyone.
Whether you enjoy them sweet or savory, these little pancakes are sure to impress. With just a few basic ingredients and a hot oven, you can create a delightful dish that's both satisfying and visually stunning.
Ingredients:
- 2 large eggs
- 1/2 cup milk
- 1/2 cup all-purpose flour
- 1 tablespoon sugar
- 1/4 teaspoon salt
- 2 tablespoons unsalted butter
- Optional toppings: powdered sugar, fresh fruit, maple syrup
Cooking Instructions:
Preheat your oven to 425°F (220°C) and place your tiny cast iron skillet inside to heat up. In a mixing bowl, whisk together the eggs, milk, flour, sugar, and salt until smooth.
The batter should be somewhat runny, which will help it puff up beautifully in the oven. Once the skillet is hot, carefully remove it from the oven and add the butter, swirling it around until melted and bubbly.
Pour the batter into the skillet immediately, then return it to the oven. Bake the Mini Dutch Baby Pancakes for about 15-20 minutes, or until they've puffed up and are golden brown around the edges.
Avoid opening the oven door during baking, as this can cause them to deflate. Once done, remove the skillet from the oven and let the pancakes cool slightly before cutting into wedges. Serve warm with your favorite toppings.
Extra Tips:
For an extra touch of flavor, consider adding a splash of vanilla extract or a pinch of cinnamon to the batter.
If you want to make these Mini Dutch Baby Pancakes ahead of time, feel free to reheat them in the oven for a few minutes before serving. They're best enjoyed fresh but can be stored in an airtight container in the refrigerator for a day or two.
Enjoy experimenting with various toppings to find your perfect combination!
Frequently Asked Questions
Can I Use Any Recipe in a Tiny Cast Iron Skillet?
You can imagine a miniature feast sizzling in your kitchen. Yes, you can use most recipes in a tiny cast iron skillet, but adjust cooking times and ingredient quantities for perfect results. Enjoy your culinary adventure!
How Do I Properly Season My Tiny Cast Iron Skillet?
To properly season your tiny cast iron skillet, clean it thoroughly, apply a thin layer of vegetable oil, and bake it upside down in the oven at a high temperature for an hour. Enjoy!
What Size Skillet Is Best for Individual Servings?
Did you know individual servings are often best prepared in skillets ranging from 6 to 8 inches? This size guarantees your dish cooks evenly, making it perfect for personal meals and easy cleanup afterward.
Can I Bake in My Tiny Cast Iron Skillet?
Yes, you can definitely bake in your tiny cast iron skillet! Just make sure it's well-seasoned, preheat it properly, and adjust your baking time since smaller sizes may cook faster than larger pans. Enjoy!
How Do I Clean and Care for My Mini Skillet?
Your mini skillet deserves tender love and care. After each use, wash it gently with warm water and a soft sponge. Dry it completely, then coat with a thin layer of oil to keep it seasoned.