As an affiliate, we may earn a commission from qualifying purchases. We get commissions for purchases made through links on this website from Amazon and other third parties.
Summer grilling is like an artist painting flavors on a canvas, and you're the one holding the brush. Imagine the aroma of honey-balsamic chicken skewers mingling with zesty lemon-garlic shrimp, all while spicy BBQ ribs sizzle nearby. Each dish brings something unique to your table. Curious about how to elevate your summer BBQ menu? Let's explore some standout recipes that'll make your gatherings unforgettable.
Key Takeaways
- Try Grilled Honey-Balsamic Chicken Skewers for a perfect blend of sweetness and tanginess, ideal for summer barbecues.
- Prepare Lemon-Garlic Grilled Shrimp, which cooks quickly and pairs well with fresh salads or grilled vegetables.
- Enjoy Spicy BBQ Ribs with a homemade sauce, slow-cooked for tenderness and flavor, perfect for family gatherings.
- Serve Classic BBQ Pulled Pork Sandwiches, featuring tender pork shoulder with smoky flavors, great for cookouts and casual meals.
- Create a colorful Grilled Vegetables Platter, enhancing natural sweetness and flavor, and marinate for deeper taste before grilling.
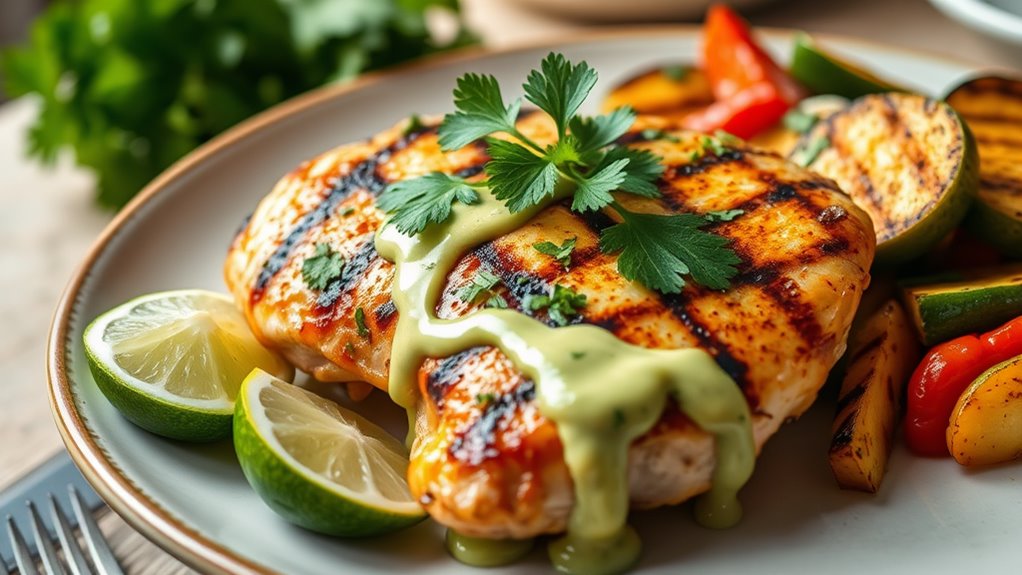
Grilled Honey-Balsamic Chicken Skewers
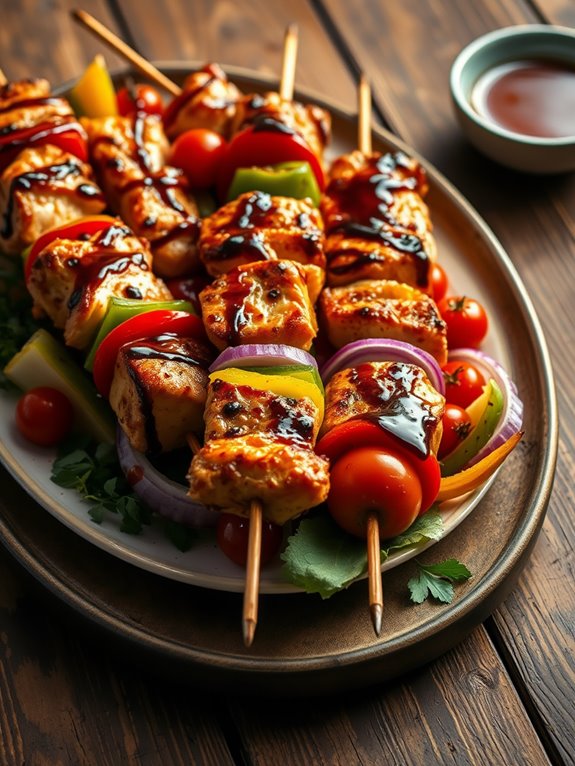
Grilled Honey-Balsamic Chicken Skewers are a delightful and flavorful dish that combines the sweetness of honey with the tanginess of balsamic vinegar. This dish is perfect for summer barbecues, family gatherings, or any outdoor cooking occasion where you want to impress your guests with minimal effort.
The skewers aren't only easy to make, but they also infuse the chicken with a delicious marinade that caramelizes beautifully on the grill, creating a mouthwatering result.
To elevate the flavors, you can also add a variety of vegetables to the skewers, such as bell peppers, red onions, or cherry tomatoes. These colorful additions not only enhance the visual appeal of the dish but also provide a delightful crunch and additional nutrients.
This recipe is versatile, allowing for customization based on your preferences, making it a go-to for any grilling enthusiast.
Ingredients:
- 1 lb boneless, skinless chicken breasts, cut into 1-inch pieces
- 1/4 cup honey
- 1/4 cup balsamic vinegar
- 2 tablespoons olive oil
- 3 cloves garlic, minced
- 1 teaspoon dried oregano
- Salt and pepper to taste
- Skewers (wooden or metal)
- Optional: assorted vegetables (bell peppers, red onions, cherry tomatoes)
To begin, soak wooden skewers in water for at least 30 minutes to prevent burning on the grill.
In a mixing bowl, whisk together the honey, balsamic vinegar, olive oil, minced garlic, oregano, salt, and pepper to create the marinade. Add the chicken pieces to the marinade, guaranteeing they're well coated. Cover the bowl and refrigerate for at least 30 minutes, allowing the chicken to absorb the flavors. If using vegetables, you can marinate them in the same mixture or separately.
Once marinated, preheat your grill to medium-high heat.
Thread the marinated chicken and any optional vegetables onto the skewers, alternating between chicken and vegetables for a colorful presentation. Grill the skewers for about 10-15 minutes, turning occasionally, until the chicken is cooked through and has nice grill marks. Ascertain the internal temperature of the chicken reaches 165°F for safe consumption.
For added flavor and a beautiful glaze, brush the skewers with any leftover marinade during the last few minutes of grilling.
Serve the grilled honey-balsamic chicken skewers hot off the grill, garnished with fresh herbs if desired.
Extra Tips: To enhance the flavor even further, consider adding fresh herbs like rosemary or thyme to the marinade. For a little heat, you can also sprinkle in some red pepper flakes.
If you have leftovers, they can be stored in an airtight container in the refrigerator and are delicious in salads or wraps the next day. Enjoy your grilling experience!
Spicy BBQ Ribs With Homemade Sauce
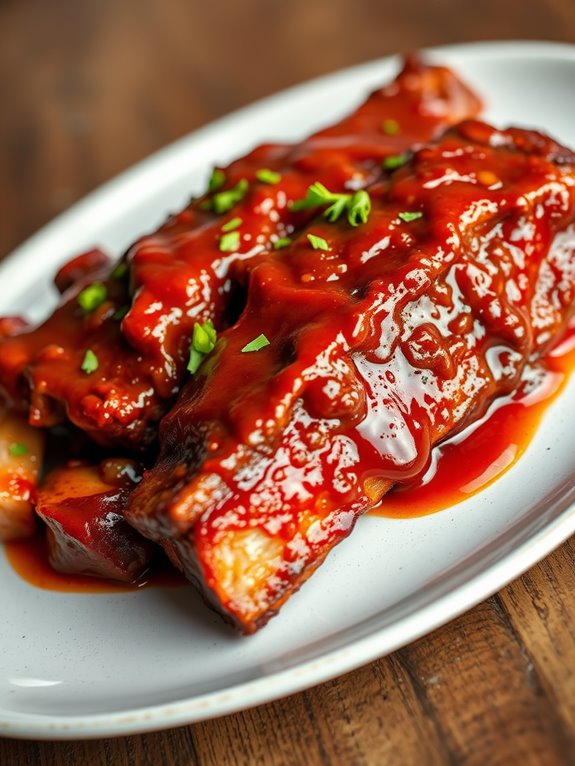
Spicy BBQ ribs are a crowd-pleaser that can elevate any gathering, be it a summer barbecue or a cozy family dinner. The combination of tender, juicy meat slathered in a homemade spicy BBQ sauce is a delight that will have everyone coming back for seconds. This recipe not only delivers on flavor but also allows you to control the heat level, making it perfect for those who enjoy a kick in their meals.
To achieve the best results, start with high-quality pork ribs. Slow-cooking the ribs before grilling them will guarantee they're tender and flavorful. The homemade sauce, packed with spices and a hint of sweetness, will caramelize beautifully on the grill, creating a delicious crust that seals in the juiciness of the meat. Let's plunge into this mouthwatering recipe!
Ingredients:
- 2 racks of pork ribs
- 1 tablespoon olive oil
- 1 teaspoon salt
- 1 teaspoon black pepper
- 1 teaspoon paprika
- 1 teaspoon garlic powder
- 1 teaspoon onion powder
- 1 teaspoon cayenne pepper (adjust for heat preference)
- 1 cup ketchup
- 1/4 cup apple cider vinegar
- 1/4 cup brown sugar
- 2 tablespoons Worcestershire sauce
- 1 tablespoon hot sauce (optional)
- 1 teaspoon smoked paprika
- 1/2 teaspoon mustard powder
Cooking Instructions:
- Preheat your grill to medium heat, around 300°F (150°C). While the grill is heating, prepare the ribs. Remove the membrane from the back of the ribs and pat them dry with paper towels. Rub the olive oil over the ribs, then season generously with salt, black pepper, paprika, garlic powder, onion powder, and cayenne pepper. Let them sit for at least 30 minutes to absorb the flavors.
- For the homemade BBQ sauce, combine ketchup, apple cider vinegar, brown sugar, Worcestershire sauce, hot sauce, smoked paprika, and mustard powder in a saucepan over medium heat. Stir well and bring to a simmer. Reduce the heat to low and let the sauce cook for about 15 minutes, stirring occasionally. Once thickened, remove from heat and set aside.
- Place the seasoned ribs on the grill and cook for about 2-3 hours, turning occasionally. Baste the ribs with the homemade sauce during the last 30 minutes of grilling to create that sticky, caramelized finish. Confirm the internal temperature of the ribs reaches at least 190°F (88°C) for peak tenderness.
Extra Tips:
For the best results, cook your ribs low and slow, allowing the connective tissues to break down, which makes the meat tender. If you prefer an extra smoky flavor, consider using wood chips in your grill.
Additionally, experimenting with different spices in your BBQ sauce can lead to a unique flavor profile that suits your taste. Always let the ribs rest for about 10 minutes after grilling to guarantee the juices redistribute before slicing and serving. Enjoy your spicy BBQ ribs!
Lemon-Garlic Grilled Shrimp
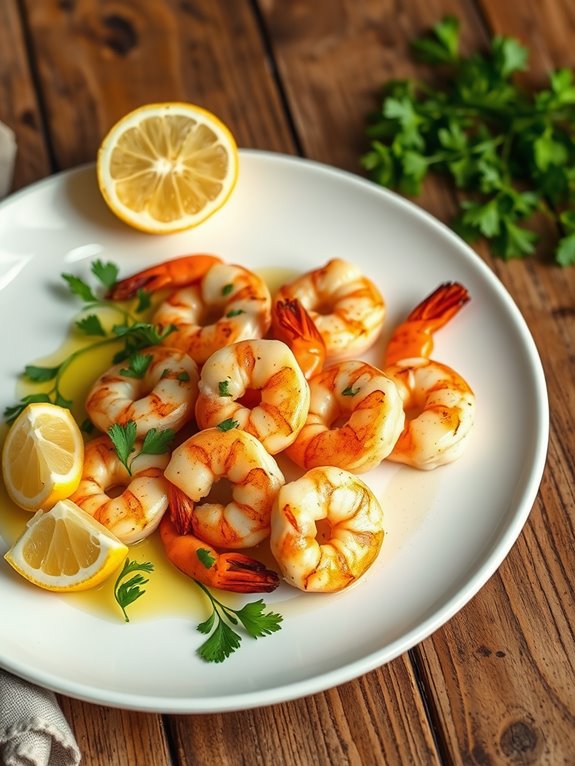
Lemon-Garlic Grilled Shrimp is a delightful dish that captures the essence of summer grilling. This recipe combines fresh shrimp with a zesty marinade made from lemon juice, garlic, and a touch of olive oil, resulting in a vibrant and flavorful seafood option perfect for any barbecue. The shrimp cook quickly on the grill, making this a fast and easy choice for weeknight dinners or weekend gatherings.
To elevate your grilling experience, pair these shrimp with a side of grilled vegetables or a fresh salad. The bright flavors of the lemon and garlic not only enhance the shrimp but also complement a variety of accompaniments. With simple preparation and minimal ingredients, this dish is sure to impress your guests and leave them asking for seconds.
Ingredients:
- 1 pound large shrimp, peeled and deveined
- 3 tablespoons olive oil
- 3 cloves garlic, minced
- Juice of 1 lemon
- Zest of 1 lemon
- 1 teaspoon paprika
- Salt and pepper to taste
- Fresh parsley, chopped (for garnish)
To start, in a mixing bowl, combine the olive oil, minced garlic, lemon juice, lemon zest, paprika, salt, and pepper. Whisk the ingredients together until well blended.
Add the shrimp to the marinade, making sure they're thoroughly coated. Cover the bowl with plastic wrap and refrigerate for at least 30 minutes to allow the flavors to meld.
Preheat your grill to medium-high heat. Once ready, thread the marinated shrimp onto skewers (if using wooden skewers, soak them in water for 30 minutes prior to prevent burning).
Grill the shrimp for 2-3 minutes on each side, or until they're opaque and slightly charred. For the best results, verify that your grill is properly preheated and avoid overcrowding the shrimp on the skewers.
You can also customize the marinade by adding your favorite herbs or spices. Serve the grilled shrimp hot off the grill, garnished with fresh parsley and lemon wedges for an extra burst of flavor.
Enjoy this dish with a light and revitalizing drink to complement the delicious zest of the lemon-garlic shrimp.
Smoky Grilled Vegetable Platter
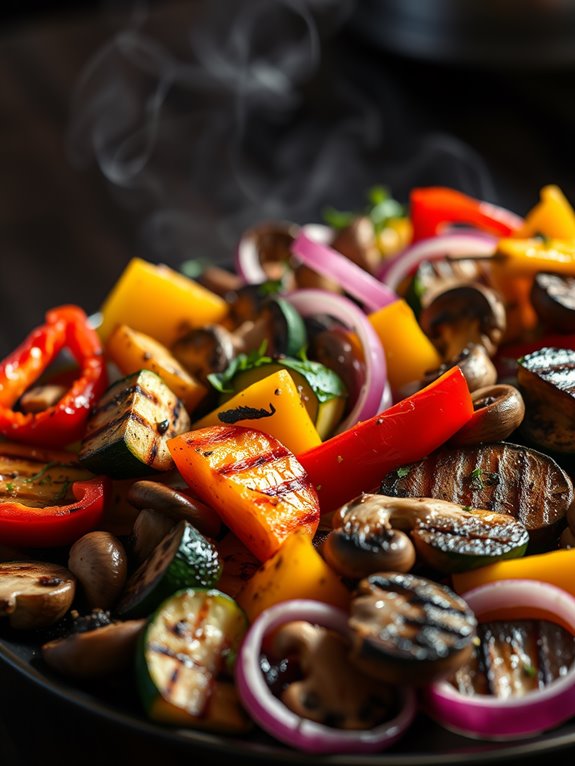
Grilling vegetables is a fantastic way to enhance their natural sweetness while adding a depth of flavor that can elevate any meal.
Whether you choose to serve them on skewers or simply tossed together on a platter, this dish is versatile and can be enjoyed warm or at room temperature.
Gather your favorite veggies, fire up the grill, and prepare for a deliciously smoky treat!
Ingredients:
- 1 red bell pepper, cut into strips
- 1 yellow bell pepper, cut into strips
- 1 zucchini, sliced into rounds
- 1 yellow squash, sliced into rounds
- 8 oz. mushrooms, cleaned and halved
- 1 red onion, cut into wedges
- 2 tablespoons olive oil
- 2 teaspoons smoked paprika
- 1 teaspoon garlic powder
- Salt and pepper to taste
- Fresh herbs (like parsley or basil) for garnish
Cooking Instructions:
- Preheat your grill to medium-high heat. In a large mixing bowl, combine the olive oil, smoked paprika, garlic powder, salt, and pepper. Mix until well combined.
- Add all the prepared vegetables to the bowl and toss to coat them evenly in the marinade. Let them sit for about 10-15 minutes to absorb the flavors.
- Once the grill is hot, place the vegetables directly on the grill grates or use a grill basket. Grill for about 8-10 minutes, turning occasionally until they're tender and have nice grill marks. Use a pair of tongs to flip them, ensuring even cooking.
Extra Tips:
To amp up the flavor even further, consider marinating the vegetables for a few hours or overnight in the refrigerator.
This will allow the spices to penetrate deeper into the veggies.
Additionally, feel free to experiment with different vegetables based on what's in season or your personal preferences.
Asparagus, eggplant, or cherry tomatoes can also be delicious additions to this colorful platter!
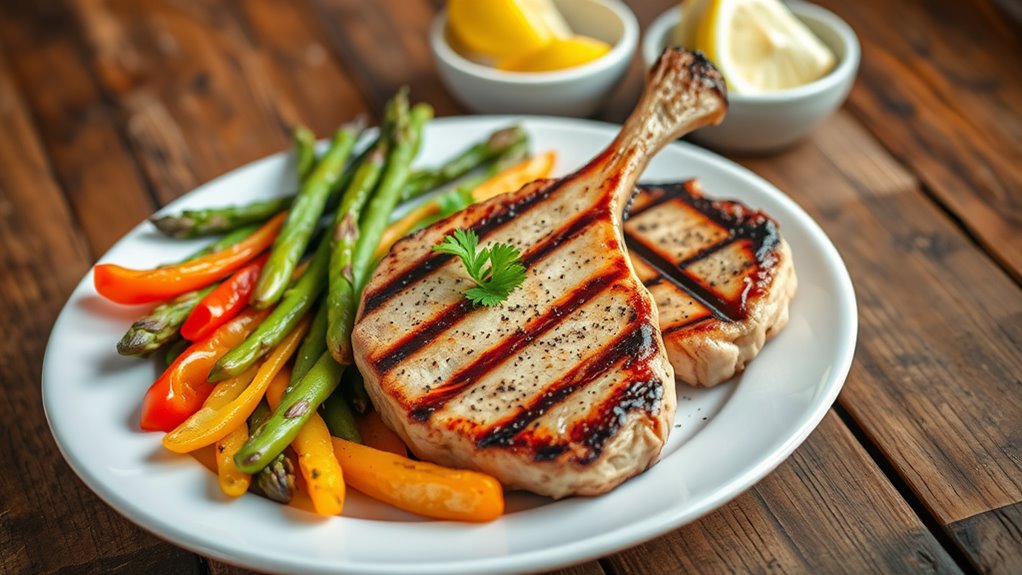
Teriyaki Beef Kebabs
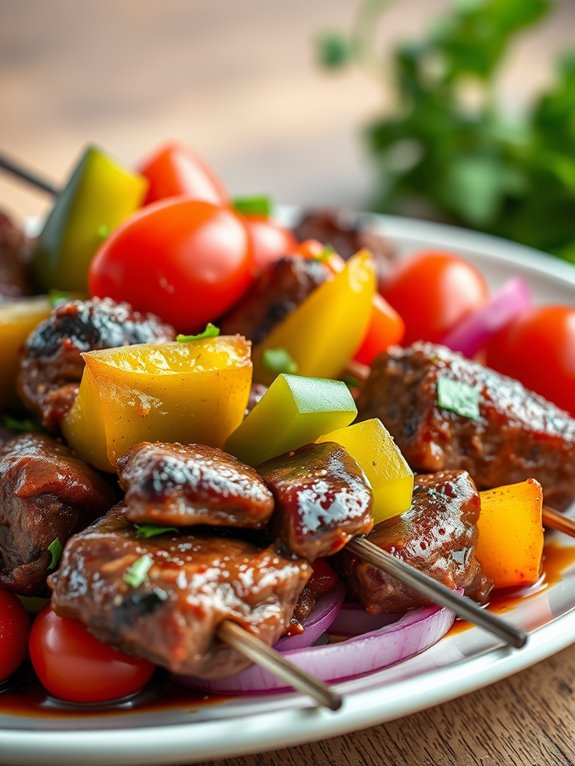
Whether you're hosting a backyard party or enjoying a quiet evening meal, these kebabs are sure to impress. Serve them with rice or a fresh salad for a complete meal. With just a few ingredients and minimal prep time, you'll have a delicious dish that everyone will love.
Ingredients:
- 1 pound of beef sirloin or flank steak, cut into 1-inch cubes
- 1/2 cup teriyaki sauce
- 1 tablespoon sesame oil
- 1 tablespoon minced garlic
- 1 tablespoon minced ginger
- 1 bell pepper, cut into 1-inch pieces
- 1 red onion, cut into wedges
- 1 cup cherry tomatoes
- Skewers (wooden or metal)
Cooking Instructions:
Begin by marinating the beef cubes in a mixture of teriyaki sauce, sesame oil, minced garlic, and minced ginger for at least 30 minutes to allow the flavors to meld.
If using wooden skewers, soak them in water for about 30 minutes to prevent burning on the grill. Alternate threading the marinated beef with pieces of bell pepper, onion, and cherry tomatoes onto the skewers.
Preheat your grill to medium-high heat. Place the assembled kebabs on the grill and cook for about 10-12 minutes, turning occasionally, until the beef is browned and cooked to your desired level of doneness.
Brush with additional teriyaki sauce during the last few minutes of grilling for an extra flavor boost.
Extra Tips:
For an added depth of flavor, consider adding pineapple chunks to your kebabs for a sweet contrast to the savory beef.
You can also experiment with different vegetables such as zucchini, mushrooms, or asparagus based on your preference.
Always allow the kebabs to rest for a few minutes after grilling to let the juices redistribute, ensuring each bite is tender and juicy. Enjoy your flavorful teriyaki beef kebabs!
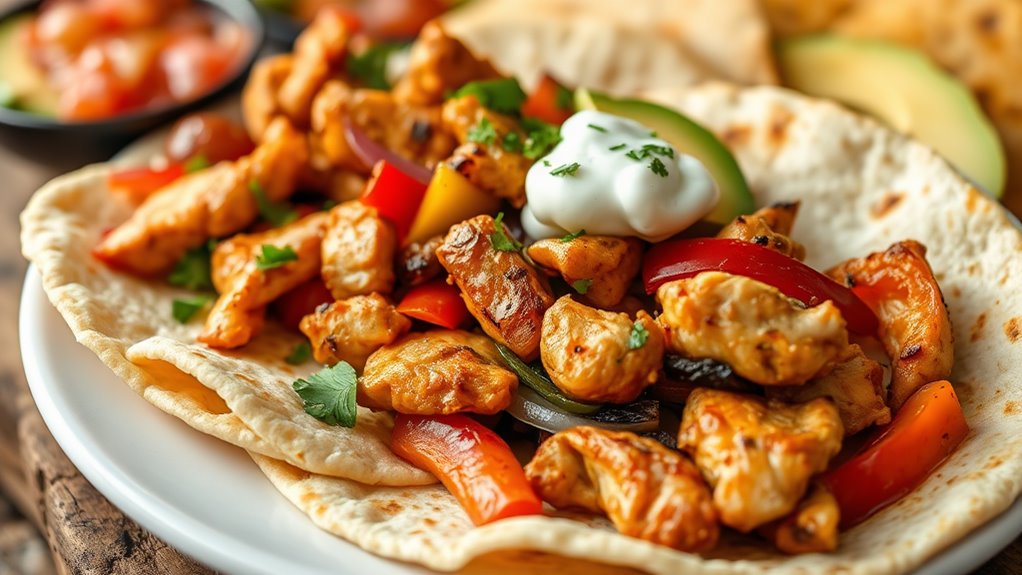
Classic BBQ Pulled Pork Sandwiches

Classic BBQ Pulled Pork Sandwiches are a beloved staple at summer cookouts and family gatherings. This dish features tender, slow-cooked pork that's infused with smoky flavors and topped with a tangy BBQ sauce, all piled high on a soft bun.
The beauty of pulled pork is in its versatility – it can be enjoyed on its own, served with coleslaw, or even topped with pickles for an extra kick. Whether you're a seasoned grill master or a novice looking to impress your friends, this recipe is sure to be a hit.
To make the perfect pulled pork, it's crucial to start with the right cut of meat, typically a pork shoulder or butt. This cut is well-marbled, which keeps the meat juicy and tender during the long cooking process. Slow cooking the pork allows the flavors to develop and the meat to easily shred when it's done.
Get ready to enjoy a mouthwatering dish that will have everyone coming back for seconds.
Ingredients:
- 4-5 lbs pork shoulder or pork butt
- 2 tablespoons paprika
- 1 tablespoon brown sugar
- 1 tablespoon garlic powder
- 1 tablespoon onion powder
- 1 tablespoon salt
- 1 teaspoon black pepper
- 1 teaspoon cayenne pepper (optional)
- 1 cup apple cider vinegar
- 1 cup BBQ sauce (your choice)
- Soft sandwich buns
- Coleslaw (optional for topping)
Cooking Instructions:
Begin by preparing your pork shoulder. In a small bowl, mix together paprika, brown sugar, garlic powder, onion powder, salt, black pepper, and cayenne pepper (if using).
Rub this spice mixture all over the pork, ensuring an even coating. Place the seasoned pork in a slow cooker or a smoker preheated to 225°F (107°C). If using a slow cooker, add apple cider vinegar around the meat to keep it moist.
Cook for 8-10 hours on low in the slow cooker or 10-12 hours in the smoker until the meat is fork-tender and easily shreds apart.
Once the pork is cooked, remove it from the heat and let it rest for about 15-20 minutes. Use two forks to shred the meat apart, discarding any excess fat.
Mix in the BBQ sauce to your desired level of sauciness. Serve the pulled pork on soft sandwich buns topped with coleslaw if you like, and enjoy!
Extra Tips:
For a deeper flavor, consider marinating the pork overnight with the spice rub before cooking. This allows the flavors to penetrate the meat more thoroughly.
Additionally, if you're using a smoker, experiment with different wood types, like hickory or applewood, to add unique smoky notes to your pulled pork.
Finally, make sure to let the meat rest before shredding; this step helps retain the juices for a more flavorful bite!
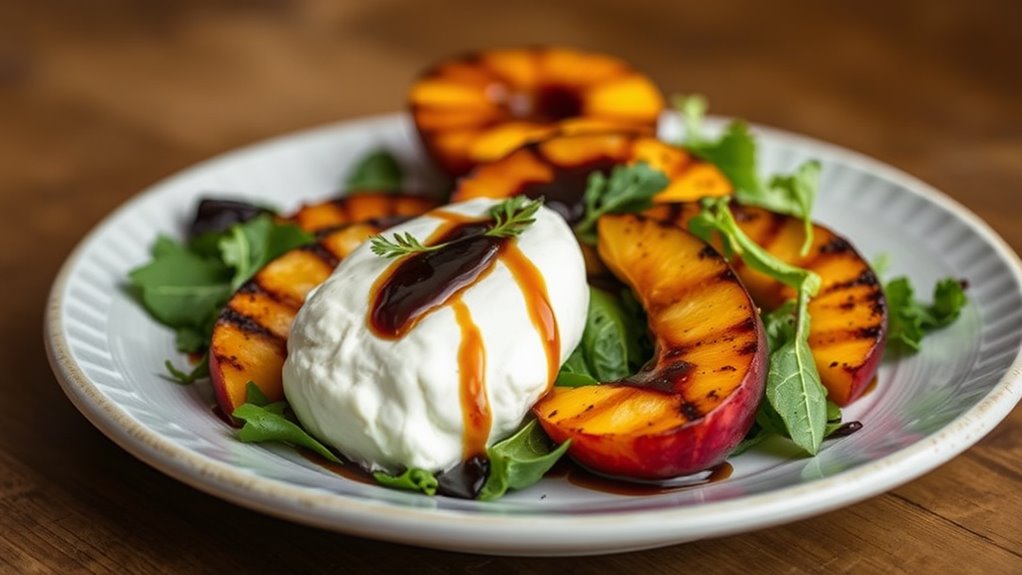
Grilled Peach and Burrata Salad
Grilled Peach and Burrata Salad is a delightful summer dish that combines the sweet, smoky flavors of grilled peaches with the creamy richness of burrata cheese. This salad is perfect for a barbecue or a light lunch, and it's incredibly easy to prepare.
The combination of fresh greens, juicy peaches, and decadent cheese creates a harmonious balance that's both invigorating and satisfying. The key to this salad is the grilling process, which enhances the natural sweetness of the peaches.
As they caramelize over the heat, their flavor intensifies, making them the star of the dish. Paired with a drizzle of balsamic reduction and a sprinkle of fresh herbs, this salad will impress your guests and elevate any meal.
Ingredients:
- 2 ripe peaches, halved and pitted
- 1 ball of burrata cheese
- 4 cups arugula or mixed greens
- 2 tablespoons olive oil
- Salt and pepper, to taste
- Balsamic reduction, for drizzling
- Fresh basil or mint leaves, for garnish
Instructions:
- Preheat your grill to medium-high heat. Brush the cut side of the peach halves with olive oil and season them lightly with salt and pepper. Place the peaches cut-side down on the grill and cook for about 3-4 minutes, or until grill marks appear and the peaches are slightly softened.
- While the peaches are grilling, arrange the arugula or mixed greens on a serving platter. Once the peaches are done, remove them from the grill and let them cool slightly before slicing them into wedges.
- Place the peach wedges on top of the greens, then tear the burrata cheese and scatter it over the salad. Finish by drizzling with balsamic reduction and garnishing with fresh basil or mint leaves.
Extra Tips:
For an even more flavorful salad, consider marinating the peach halves in a mixture of olive oil, honey, and a splash of lemon juice for about 30 minutes before grilling. This not only adds depth to the flavor but also enhances the caramelization process.
Additionally, feel free to mix in some toasted nuts, like walnuts or pecans, for added crunch and texture. Enjoy this dish as a side or a light main course on a warm summer evening!
Frequently Asked Questions
What Type of Grill Is Best for Summer BBQS?
When choosing a grill for summer BBQs, consider a gas grill for convenience and quick heat, or a charcoal grill for that smoky flavor. Each has its benefits, so pick one that suits your cooking style.
How Do I Prevent Food From Sticking on the Grill?
To keep your culinary creations from getting too friendly with the grill, preheat it well, oil the grates, and flip your food only once. You'll enjoy perfectly grilled dishes without any sticky situations!
What Are the Safest Ways to Store Leftover Grilled Food?
To safely store leftover grilled food, let it cool before transferring to airtight containers. Refrigerate within two hours, and consume within three to four days. For longer storage, consider freezing it for future meals.
Which Side Dishes Pair Well With BBQ Recipes?
When you're enjoying BBQ, consider pairing it with coleslaw, baked beans, or corn on the cob. These sides complement the flavors well and enhance your meal's overall experience, making it even more enjoyable.
How Can I Tell When My Meat Is Fully Cooked?
Picture a perfectly cooked steak, its juices glistening like morning dew. To know your meat's done, use a meat thermometer—145°F for medium-rare, or press it; firm means it's ready. Trust your senses!