As an affiliate, we may earn a commission from qualifying purchases. We get commissions for purchases made through links on this website from Amazon and other third parties.
When you're out camping, cooking doesn't have to be a hassle. You want meals that are simple, satisfying, and easy to prepare over the fire. From flavorful foil packet fajitas to sweet s'mores stuffed bananas, there are plenty of options that require minimal cleanup. Curious about how these dishes can elevate your campfire experience? Let's explore these six easy meals that promise stress-free cooking and delicious results.
Key Takeaways
- Foil Packet Fajitas offer vibrant flavors with minimal cleanup, making them perfect for grilling or campfires.
- Campfire Chili is hearty, customizable, and requires minimal equipment, ideal for cool evenings.
- One-Pan Breakfast Hash combines savory ingredients, encouraging sharing and easy preparation with just one skillet.
- Campfire Quesadillas are quick to make, using tortillas and various fillings for a delicious meal over the fire.
- S'mores Stuffed Bananas provide a fun and gooey dessert option, easily made with ripe bananas and chocolate toppings.
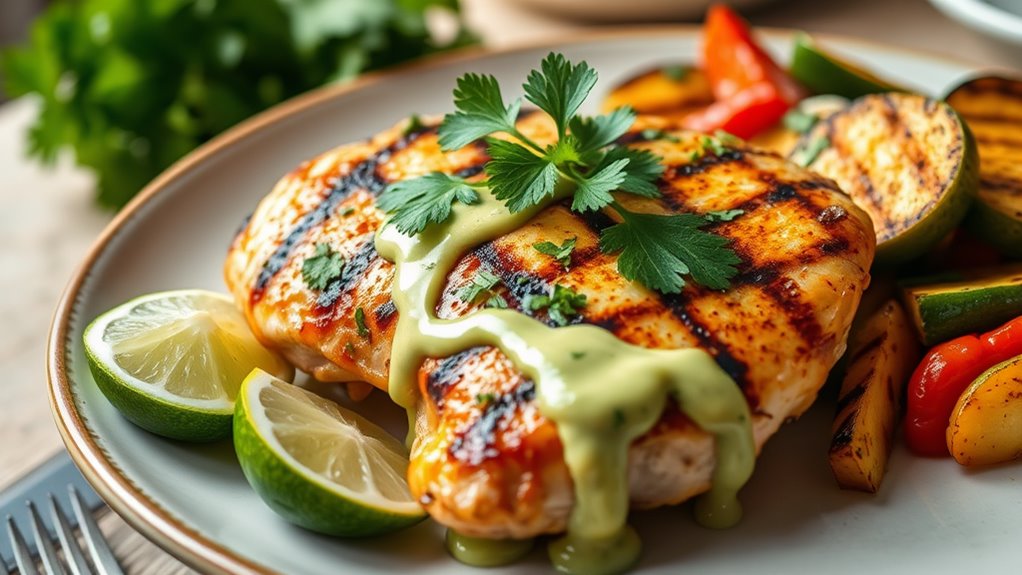
Foil Packet Fajitas
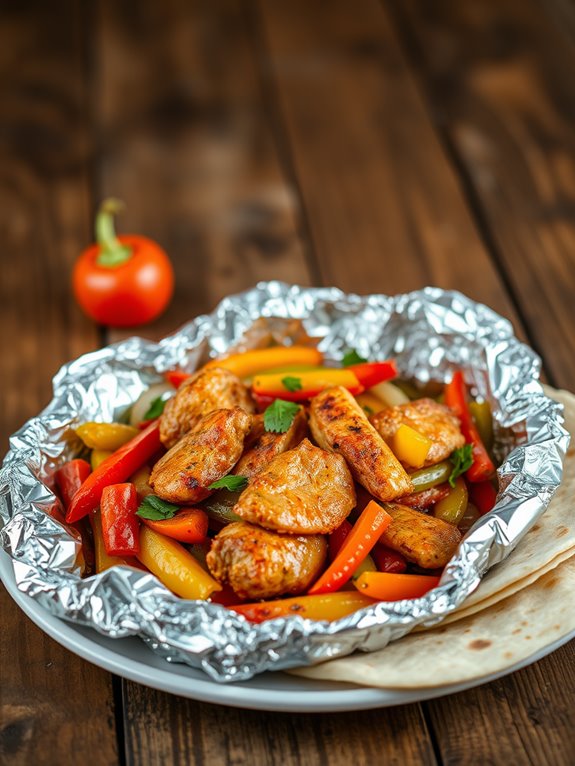
Foil packet fajitas are a fantastic way to enjoy the flavors of traditional fajitas while camping or grilling at home. The beauty of this dish lies in its simplicity and versatility. You can customize the ingredients based on your preferences or what you have on hand. The combination of marinated chicken, colorful bell peppers, and onions creates a vibrant and flavorful meal that's easy to prepare and clean up.
Cooking fajitas in foil packets allows the ingredients to steam together, locking in all the delicious flavors. As the meal cooks, the aromas will waft through the air, making your mouth water in anticipation. This recipe is perfect for cooking over a campfire, on the grill, or even in the oven, making it a great option for any outdoor adventure or cozy night in.
Ingredients:
- 1 pound boneless, skinless chicken breasts, sliced
- 1 red bell pepper, sliced
- 1 yellow bell pepper, sliced
- 1 green bell pepper, sliced
- 1 medium onion, sliced
- 2 tablespoons olive oil
- 2 teaspoons chili powder
- 1 teaspoon cumin
- 1 teaspoon garlic powder
- Salt and pepper to taste
- Tortillas (for serving)
- Optional toppings: sour cream, guacamole, salsa, cheese
To prepare the foil packet fajitas, start by preheating your grill or campfire to medium-high heat. In a large bowl, combine the sliced chicken, bell peppers, and onion. Drizzle with olive oil and sprinkle with chili powder, cumin, garlic powder, salt, and pepper. Toss everything together until well coated.
Lay out two large sheets of heavy-duty aluminum foil and divide the fajita mixture between them. Fold the edges of the foil tightly to create a sealed packet.
Place the foil packets directly on the grill or campfire grate, and cook for about 15-20 minutes, turning occasionally. The chicken should be cooked through, and the vegetables should be tender. Carefully open the packets (watch out for steam!) and serve the fajitas with warm tortillas and your favorite toppings.
Extra Tips:
For added flavor, consider marinating the chicken in the spices and olive oil for a few hours or overnight before cooking. You can also add other vegetables such as zucchini or mushrooms for more variety. If you're cooking over a campfire, make sure to use heavy-duty foil to prevent tearing. Enjoy your delicious and easy foil packet fajitas!
Campfire Chili
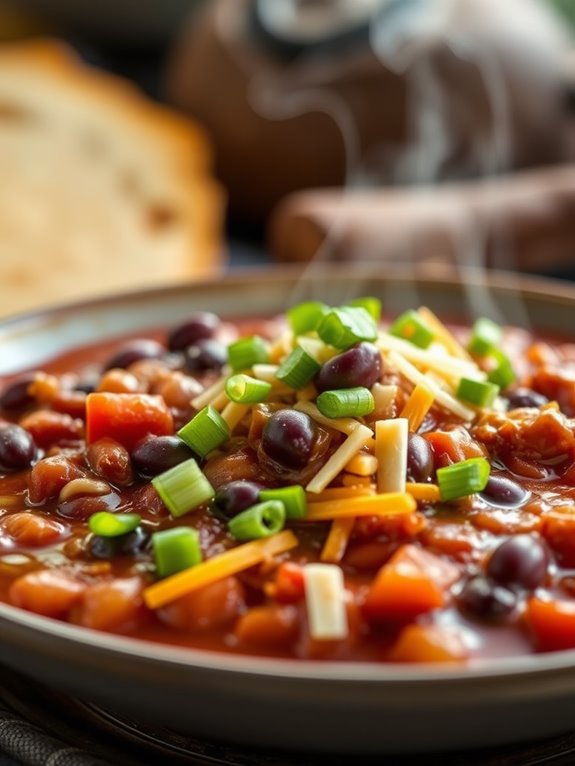
Campfire chili is a hearty and satisfying meal that's perfect for cool evenings spent under the stars. This dish isn't only delicious but also easy to prepare with minimal equipment. Cooking chili over a campfire allows the flavors to meld beautifully while providing a cozy atmosphere for gathering around the fire with friends and family.
When preparing campfire chili, you can customize the ingredients to suit your taste and dietary preferences. Whether you prefer it spicy or mild, vegetarian or meaty, this recipe can be adjusted to create the perfect blend of flavors. Just gather your ingredients and get ready for a flavorful camping experience!
Ingredients:
- 1 lb ground beef or turkey
- 1 can (15 oz) kidney beans, drained and rinsed
- 1 can (15 oz) black beans, drained and rinsed
- 1 can (14.5 oz) diced tomatoes
- 1 medium onion, chopped
- 2 cloves garlic, minced
- 1 packet chili seasoning mix
- 1 cup beef or vegetable broth
- Salt and pepper to taste
- Optional toppings: shredded cheese, sour cream, chopped green onions
To cook your campfire chili, start by heating a large, heavy-duty pot or Dutch oven over the campfire. Add the ground meat and cook until browned, breaking it apart with a wooden spoon as it cooks.
Once the meat is cooked, add the chopped onion and minced garlic, sautéing until the onion becomes translucent. Next, stir in the chili seasoning mix, diced tomatoes, kidney beans, black beans, and broth. Mix everything together and season with salt and pepper to taste.
Cover the pot and let the chili simmer over the fire for about 30-45 minutes, stirring occasionally. If the chili gets too thick, you can add more broth or water to reach your desired consistency. Once the flavors have melded and the chili is heated through, serve it hot with your choice of optional toppings.
Extra Tips:
For added depth of flavor, consider sautéing the onions and garlic before adding the meat. You can also experiment with different beans or spices to create a unique twist on this classic dish.
If you're camping in a location where you can gather fresh herbs, adding cilantro or parsley as a garnish can elevate the dish even further. Remember to keep an eye on the pot to avoid burning and guarantee that everyone enjoys your delicious campfire chili!
Grilled Vegetable Skewers
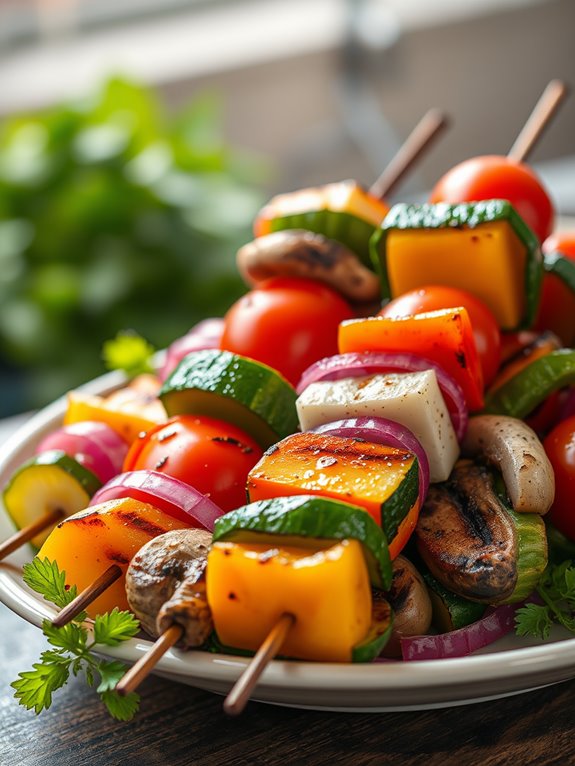
Grilled vegetable skewers are a fantastic way to enjoy fresh produce while camping or at a backyard barbecue. This dish isn't only colorful and visually appealing, but it's also incredibly versatile. You can mix and match your favorite vegetables, adding a burst of flavor to your meal.
The smoky aroma from the grill enhances the vegetables' natural sweetness, making them a delightful addition to any campfire feast.
Preparing these skewers is simple and requires minimal ingredients. They're perfect for vegetarians and can easily be paired with grilled meats for a complete meal. The skewers can be prepped in advance and stored in a cooler, making them easy to cook once you're ready to enjoy a delicious outdoor meal.
Ingredients:
- Bell peppers (any color)
- Zucchini
- Red onion
- Cherry tomatoes
- Mushrooms
- Olive oil
- Salt
- Pepper
- Skewers (metal or soaked wooden skewers)
Cooking Instructions:
- Begin by washing and cutting all the vegetables into uniform pieces for even cooking. Aim for about 1-inch chunks for the bell peppers, zucchini, and onion. Leave the cherry tomatoes whole and the mushrooms as they are.
- In a large bowl, toss the cut vegetables with olive oil, salt, and pepper until they're evenly coated.
- Thread the vegetables onto the skewers, alternating different types to create a colorful display.
- Preheat your grill over medium heat. Once hot, place the skewers on the grill and cook for about 10-15 minutes, turning occasionally, until the vegetables are tender and have nice grill marks.
Extra Tips:
For added flavor, consider marinating the vegetables in a mixture of balsamic vinegar, garlic, and herbs for at least 30 minutes before grilling.
You can also experiment with different vegetables, such as eggplant or asparagus, to suit your taste. If you're cooking over an open flame, keep a close eye on the skewers to prevent burning and guarantee even cooking.
Enjoy your grilled vegetable skewers hot off the grill!
One-Pan Breakfast Hash

When it comes to campfire cooking, simplicity and flavor are key. One-Pan Breakfast Hash is the perfect dish to kick-start your day in the great outdoors. This hearty meal combines crispy potatoes, savory sausage, and colorful bell peppers, all cooked together in one pan for minimal cleanup and maximum satisfaction. Not only is it easy to prepare over a campfire, but it also brings everyone together around the fire, sharing good food and good company.
To make this dish even better, you can customize it with your favorite ingredients. Whether you want to add some eggs on top or throw in some spinach for an extra nutrient boost, the possibilities are endless. So gather your ingredients and prepare for a delicious start to your camping adventure.
Ingredients:
- 2 medium potatoes, diced
- 1 cup breakfast sausage, crumbled
- 1 bell pepper, diced (any color)
- 1 small onion, diced
- 2 tablespoons olive oil
- Salt and pepper to taste
- Optional: 4 eggs (for topping)
- Optional: Fresh herbs (for garnish)
To begin, heat the olive oil in a large cast-iron skillet over the campfire. Once hot, add the diced potatoes and cook for about 10 minutes, stirring occasionally until they start to soften and become golden brown.
Then, add the crumbled sausage, diced onion, and bell pepper. Continue to cook for an additional 10-15 minutes, stirring occasionally, until the sausage is cooked through and the vegetables are tender. If you're adding eggs, create small wells in the hash and crack an egg into each well. Cover the skillet to help the eggs cook through, about 5-7 minutes.
For an extra layer of flavor, consider garnishing the dish with fresh herbs before serving. This dish isn't only filling and flavorful but also incredibly versatile. You can easily adjust the ingredients based on what you have on hand.
Extra Tips: When cooking over a campfire, be mindful of the heat level. You want a steady flame without direct contact to avoid burning your ingredients. If you find the heat too intense, you can move the skillet to a cooler part of the fire or add a bit of water to the pan to help steam the potatoes.
Always verify that the food is cooked thoroughly, especially when using sausage and eggs. Enjoy your One-Pan Breakfast Hash as a hearty start to your day in the wild!
S'mores Stuffed Banana
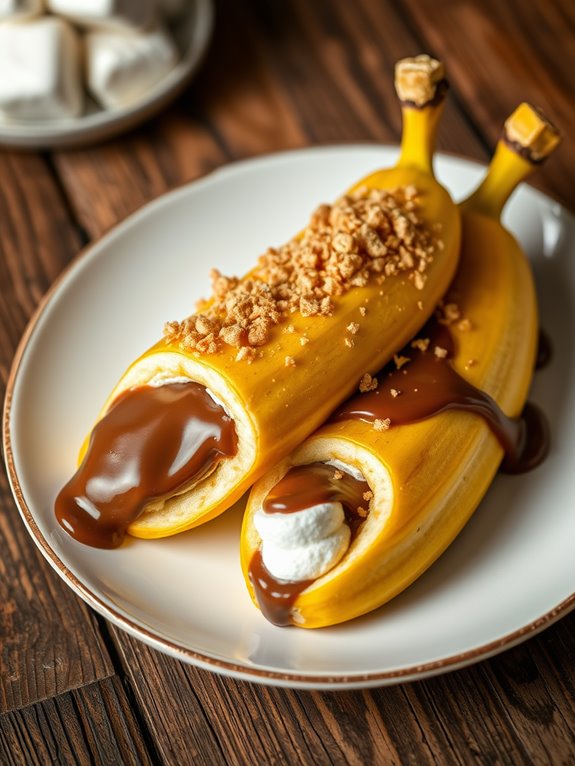
S'mores Stuffed Bananas are a delightful twist on the classic campfire treat. They combine the beloved flavors of chocolate, marshmallows, and graham crackers with the natural sweetness of bananas, creating a warm and gooey dessert that's perfect for any camping trip or backyard bonfire.
The best part is that they're incredibly easy to prepare and require minimal ingredients, making them a favorite among both kids and adults.
To make S'mores Stuffed Bananas, you just need to gather a few ingredients and enjoy the experience of cooking over an open flame. The bananas can be easily customized with your favorite chocolate and marshmallow brands, allowing for a personalized touch.
Whether you're camping in the woods or just enjoying a summer evening in your backyard, these treats are sure to bring smiles and satisfy your sweet tooth.
Ingredients:
- Ripe bananas
- Chocolate bars (milk chocolate or dark chocolate)
- Mini marshmallows
- Graham cracker crumbs
- Aluminum foil
Cooking Instructions:
- Start by preheating your campfire or grill to a medium heat. While it's warming up, take your ripe bananas and make a slit down the middle of each one, being careful not to cut all the way through. This slit will serve as a pocket for the delicious fillings.
- Gently push open the slit and stuff it with small pieces of chocolate, a handful of mini marshmallows, and a sprinkle of graham cracker crumbs. Once filled, wrap each stuffed banana in aluminum foil, guaranteeing it's sealed tightly to keep the heat inside.
- Place the wrapped bananas over the campfire or grill for about 5-10 minutes, turning occasionally. You'll know they're done when the chocolate and marshmallows are melted, and the banana is soft. Carefully unwrap the foil, and enjoy your gooey S'mores Stuffed Bananas while they're warm!
Extra Tips:
For the best results, choose ripe bananas that are slightly soft but not overly mushy. This will guarantee they hold their shape while cooking.
You can also experiment with different types of chocolate, such as peanut butter cups or flavored chocolate bars, to add a unique twist to your S'mores Stuffed Bananas.
Always be cautious when unwrapping the foil, as steam can escape and cause burns. Enjoy your sweet treat!
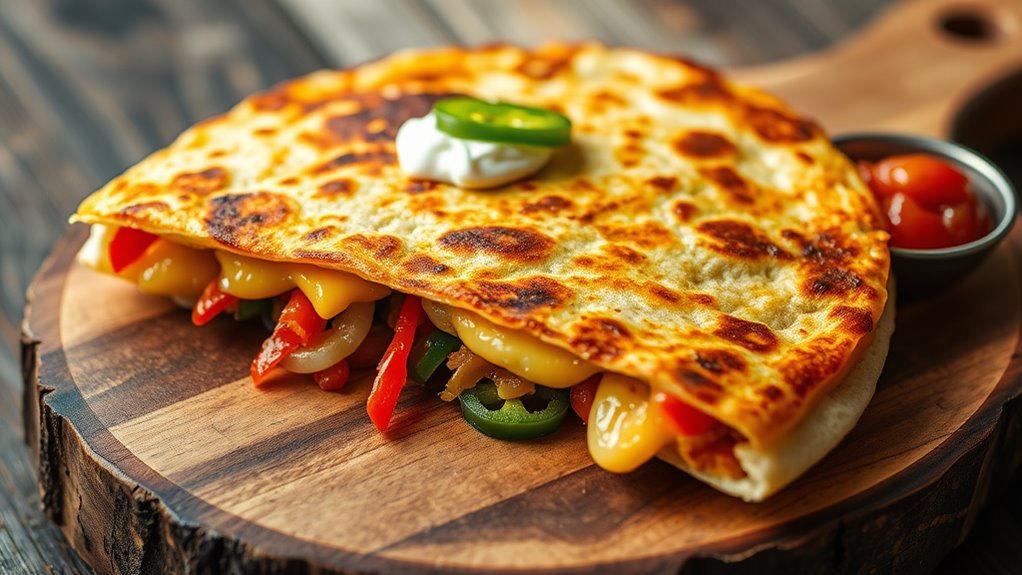
Campfire Quesadillas

Campfire quesadillas are a delicious and convenient meal option for outdoor enthusiasts. They're easy to prepare and can be customized with your favorite ingredients, making them perfect for a variety of taste preferences. With a few simple steps, you can create a warm and cheesy dish that will satisfy everyone around the campfire.
Cooking over an open flame adds a special flavor to the quesadillas, and the crispy, toasted tortillas are the perfect vessel for all your fillings. Gather your friends or family around the campfire, and enjoy the process of making these tasty treats together. Whether you're camping in the woods or just enjoying a backyard fire, campfire quesadillas are certain to become a favorite.
Ingredients:
- Flour tortillas (large)
- Shredded cheese (cheddar, mozzarella, or your choice)
- Cooked chicken, beef, or beans (optional)
- Bell peppers (sliced)
- Onions (sliced)
- Olive oil or butter
- Salsa (for serving)
- Sour cream (for serving)
- Jalapeños (sliced, optional)
To prepare campfire quesadillas, start by preheating a cast-iron skillet or a grill grate over the fire. Lightly grease the skillet with olive oil or butter to prevent sticking.
Place a tortilla in the skillet and sprinkle a generous amount of shredded cheese on one half of the tortilla. Add any additional fillings you desire, such as cooked chicken, sliced bell peppers, or onions. Fold the tortilla in half, covering the fillings, and cook for about 3-4 minutes on one side until golden and crispy.
Carefully flip the quesadilla using a spatula and cook for another 2-3 minutes on the other side. Once the cheese is melted and the tortilla is crispy, remove it from the heat and let it cool slightly before slicing into wedges.
When making campfire quesadillas, feel free to experiment with different ingredients based on your preferences. You can use leftover meats, various types of cheese, or even add spices for extra flavor.
Always supervise the cooking process to ascertain the quesadillas don't burn, and consider using a long-handled spatula to avoid getting too close to the flames. Enjoy your delicious campfire meal with salsa and sour cream on the side!
Frequently Asked Questions
What Are the Best Types of Campfire Cookware to Use?
When you're cooking over dancing flames, you'll want sturdy cast iron, non-stick skillets, and durable grills. They hold heat like a warm hug, ensuring your meals sizzle to perfection while you enjoy nature's symphony around you.
How Can I Safely Start a Campfire for Cooking?
To safely start a campfire for cooking, gather dry wood and kindling. Use matches or a lighter, creating a teepee structure. Once the fire's going, keep water nearby to extinguish it if needed.
Can I Prepare These Meals Ahead of Time?
Sure, you could prepare these meals ahead of time, if you enjoy the thrilling challenge of dodging wild animals while keeping everything cold! But really, prepping simplifies cooking and lets you enjoy nature more.
What Are Some Vegetarian Alternatives for These Recipes?
You can easily swap meat for hearty vegetables like mushrooms, zucchini, or bell peppers. Beans, lentils, and tofu also make great protein-packed options. Just season them well, and you'll create delicious vegetarian dishes everyone'll love.
How Do I Store Leftovers When Camping?
When you're camping, store leftovers in airtight containers or resealable bags. Keep them in a cooler with ice packs to maintain freshness. Always label the containers and consume them within a couple of days for safety.