As an affiliate, we may earn a commission from qualifying purchases. We get commissions for purchases made through links on this website from Amazon and other third parties.
Did you know that making your favorite fast-food meals at home can be both simple and satisfying? With just a few ingredients and some straightforward techniques, you can whip up classic Burger King favorites in your own kitchen. Imagine enjoying a Classic Whopper or crispy Onion Rings whenever you want. Curious about how to recreate these mouthwatering dishes? Let's explore some irresistible recipes that'll elevate your home cooking game.
Key Takeaways
- Recreate the Classic Whopper with ground beef, fresh toppings, and signature sauces for a homemade version of this iconic burger.
- Make a Flame-Grilled Cheeseburger Delight by adding American cheese and fresh vegetables to perfectly grilled patties on toasted buns.
- Try a Spicy Chicken Sandwich using marinated chicken breasts fried until golden and served with mayonnaise and pickles on burger buns.
- Complement your meal with Homemade Onion Rings, coated in seasoned flour and breadcrumbs, fried for ultimate crunchiness.
- For dessert, whip up a Chocolate Milkshake with vanilla ice cream and chocolate syrup for a sweet finish to your meal.
Classic Whopper Copycat Recipe
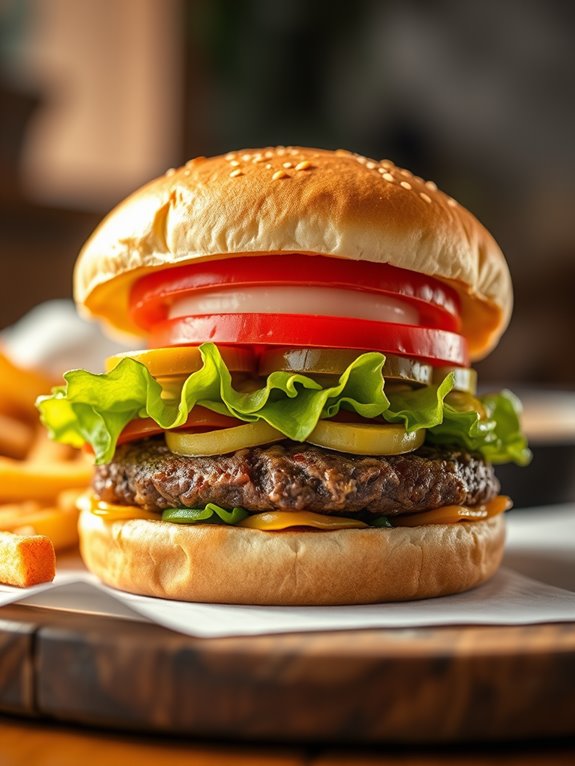
Making a Whopper at home allows you to customize it to your liking, whether you prefer extra pickles, a slice of cheese, or even a spicy twist. Gather your ingredients, fire up the grill, and get ready to impress your family or friends with this homemade burger delight.
Ingredients:
- 1 pound ground beef (80/20)
- 4 hamburger buns
- 4 slices of tomato
- 1 cup shredded lettuce
- 4 slices of pickles
- 1/4 cup mayonnaise
- 1/4 cup ketchup
- 2 tablespoons mustard
- Salt and pepper to taste
- Optional: sliced onions, cheese
Cooking Instructions:
Start by preheating your grill or stovetop pan to medium-high heat. While it heats up, form the ground beef into four equal patties, making a slight indentation in the center of each patty to prevent them from puffing up while cooking.
Season both sides generously with salt and pepper. Once the grill is hot, place the patties on it and cook for about 3-4 minutes on each side, or until they reach your desired doneness. If you're adding cheese, place a slice on each patty during the last minute of cooking to let it melt.
While the patties are cooking, prepare the buns by lightly toasting them on the grill or in a toaster. Assemble your Whopper by spreading mayonnaise, ketchup, and mustard on the bottom bun.
Layer on the grilled patty, followed by the lettuce, tomato, pickles, and any additional toppings you desire. Finally, place the top bun on and enjoy your homemade creation!
Extra Tips:
To achieve that signature flame-grilled flavor, consider using a charcoal grill if you have one available. The smoky taste can enhance the overall experience.
Additionally, don't be afraid to experiment with your toppings or sauces; adding a little barbecue sauce or switching out the pickles for jalapeños can give your Whopper a unique twist!
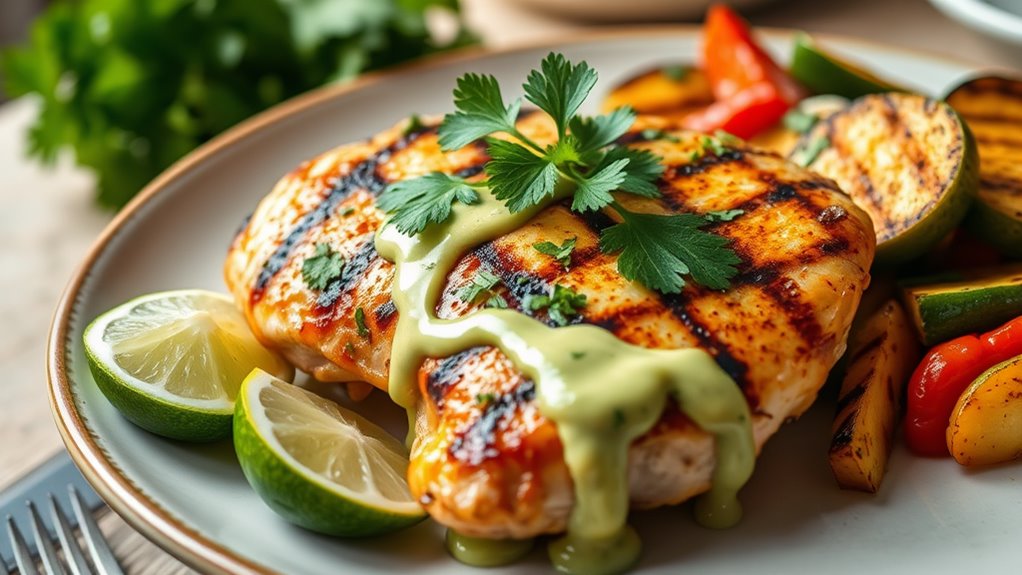
Spicy Chicken Sandwich Made Easy
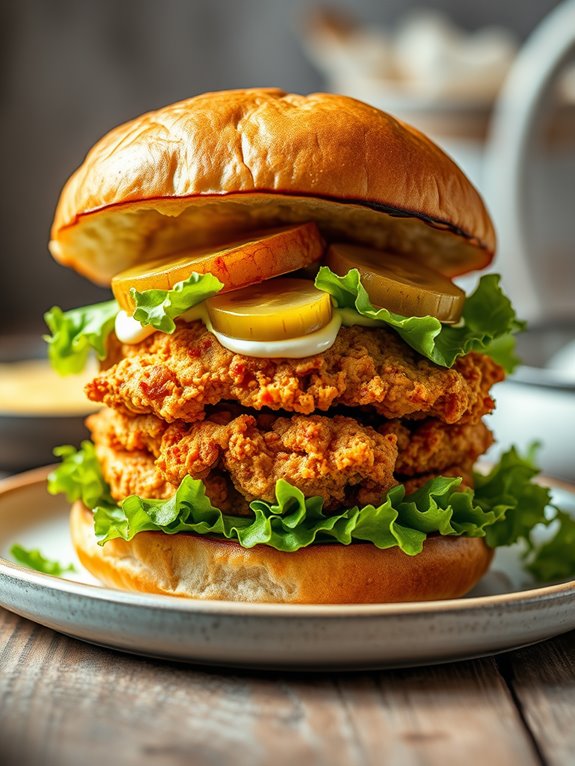
If you're craving that classic Spicy Chicken Sandwich from Burger King but want to make it at home, you're in luck! This easy recipe captures all the flavors you love, allowing you to customize the spice level to suit your taste.
With a crispy chicken breast coated in a spicy batter, topped with creamy mayonnaise, lettuce, and pickles, this sandwich is sure to satisfy your fast-food cravings without leaving the house.
Making your own Spicy Chicken Sandwich isn't only fun but also healthier than the fast-food version. You can control the ingredients, use fresh produce, and adjust the spice levels to your liking.
With just a few simple ingredients and steps, you can whip up a delicious sandwich that rivals the original. Let's get started!
Ingredients:
- 2 boneless, skinless chicken breasts
- 1 cup buttermilk
- 1 cup all-purpose flour
- 1 tablespoon cayenne pepper
- 1 teaspoon paprika
- 1 teaspoon garlic powder
- 1 teaspoon onion powder
- Salt and pepper to taste
- Oil for frying
- Burger buns
- Lettuce
- Mayonnaise
- Pickles
Cooking Instructions:
Begin by marinating the chicken breasts in buttermilk for at least 1 hour, or overnight for best results. This will help to tenderize the meat and infuse it with flavor.
Once marinated, remove the chicken from the buttermilk and let the excess drip off. In a separate bowl, mix the flour, cayenne pepper, paprika, garlic powder, onion powder, salt, and pepper. Dredge each piece of chicken in the flour mixture, ensuring they're fully coated.
Heat oil in a deep skillet over medium heat. Fry the chicken breasts for about 5-7 minutes on each side, or until they're golden brown and cooked through.
Once cooked, place them on a paper towel-lined plate to drain excess oil. Assemble your sandwiches by spreading mayonnaise on the burger buns, adding lettuce, pickles, and the crispy chicken.
Extra Tips:
For an extra kick, consider adding hot sauce to the mayonnaise or spicing up the pickle selection with spicy dill pickles.
If you prefer baking over frying, you can also bake the coated chicken in a preheated oven at 400°F (200°C) for about 20-25 minutes, turning halfway through, until crispy and cooked through.
Enjoy your homemade Spicy Chicken Sandwich!
Homemade Onion Rings That Crunch
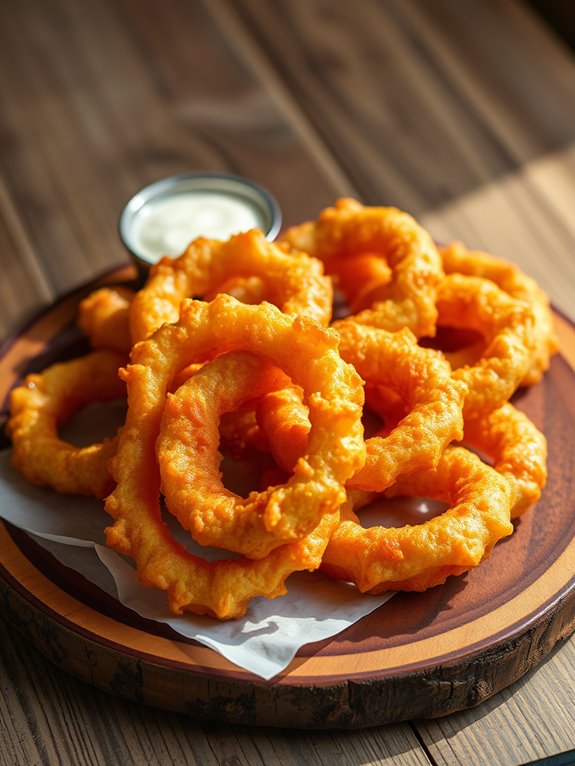
Homemade onion rings are a delightful addition to any meal, offering a satisfying crunch that pairs perfectly with burgers or as a standalone snack. This copycat recipe mimics the beloved crispy onion rings from Burger King, guaranteeing you can enjoy that fast-food flavor in the comfort of your own home.
With a few simple ingredients and some easy steps, you can create a batch that will have everyone asking for seconds. Making onion rings from scratch not only allows you to control the ingredients but also lets you customize the seasoning to suit your taste.
Whether you prefer them seasoned with classic salt and pepper or want to add a spicy kick, the flexibility of this recipe makes it a must-try. Grab some onions, and let's get started on these crunchy delights!
Ingredients:
- 2 large onions
- 1 cup all-purpose flour
- 1 teaspoon baking powder
- 1 teaspoon paprika
- 1 teaspoon garlic powder
- ½ teaspoon salt
- ½ teaspoon black pepper
- 1 cup buttermilk
- 1 cup breadcrumbs (panko recommended)
- Oil for frying
Cooking Instructions:
Start by peeling the onions and slicing them into thick rings, about ½ inch wide. In a mixing bowl, combine the flour, baking powder, paprika, garlic powder, salt, and black pepper.
In another bowl, pour the buttermilk. Dip each onion ring into the buttermilk, allowing any excess to drip off, then coat it in the flour mixture. For an extra crispy texture, dip it back into the buttermilk and then into the breadcrumbs, making sure to cover it thoroughly.
In a deep skillet or frying pan, heat oil over medium-high heat until it reaches 350°F (175°C). Carefully add the coated onion rings in batches, frying them until golden brown, about 2-3 minutes per side.
Once cooked, transfer them to a paper towel-lined plate to drain excess oil. Serve hot and enjoy your homemade onion rings!
Extra Tips:
For the best results, verify your oil is at the right temperature before frying; this will help achieve that perfect crunch.
You can also experiment with different seasonings or add a bit of cayenne pepper to the flour mixture for a spicy kick. To keep your onion rings crispy, avoid stacking them on top of each other after frying. Enjoy your homemade snack fresh, as they're best served immediately!
Flame-Grilled Cheeseburger Delight
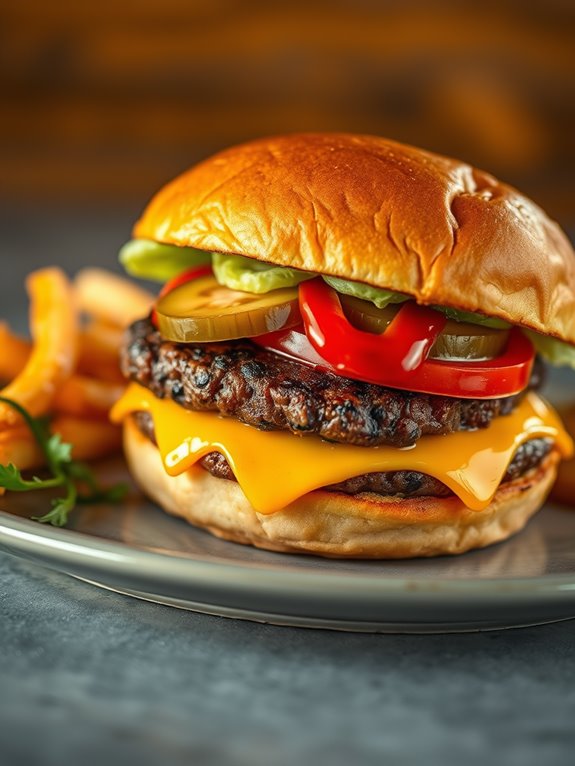
The key to achieving that flame-grilled taste is to use a grill or grill pan, which will give your burger the perfect sear while locking in the juices.
Pair your burger with fresh toppings, a toasted bun, and your favorite condiments for a satisfying meal that rivals the fast-food favorite. Gather your ingredients, fire up the grill, and get ready to savor every bite of this Flame-Grilled Cheeseburger Delight.
Ingredients:
- 1 lb ground beef (80/20 blend)
- Salt and pepper to taste
- 4 slices of American cheese
- 4 hamburger buns
- Lettuce leaves
- Tomato slices
- Pickles
- Ketchup
- Mustard
- Olive oil (optional, for grilling)
Cooking Instructions:
Start by preheating your grill or grill pan over medium-high heat.
While the grill is heating, form the ground beef into four equally sized patties, making sure to press a small indentation in the center of each patty to prevent them from puffing up while cooking.
Season both sides of the patties generously with salt and pepper.
Once the grill is hot, place the patties on it and cook for about 3-4 minutes on one side.
Flip the patties and place a slice of cheese on each one, cooking for an additional 3-4 minutes, or until the cheese is melted and the burger reaches your desired doneness.
While the burgers are cooking, lightly toast the hamburger buns on the grill for about 1-2 minutes, until they're golden brown.
Assemble the burgers by placing the lettuce, tomato, and pickles on the bottom bun, followed by the grilled patty with melted cheese.
Finish with a drizzle of ketchup and mustard, then top with the other half of the bun.
Serve immediately and enjoy your homemade Flame-Grilled Cheeseburger Delight.
Extra Tips:
For an even more authentic flame-grilled flavor, consider adding a few drops of liquid smoke to your ground beef mixture before forming the patties.
Additionally, you can customize your burger with other toppings, such as sautéed onions, jalapeños, or bacon, to elevate the flavor.
Remember to let the burgers rest for a few minutes after grilling, as this helps retain their juices for a more succulent bite.
Enjoy your culinary creation!
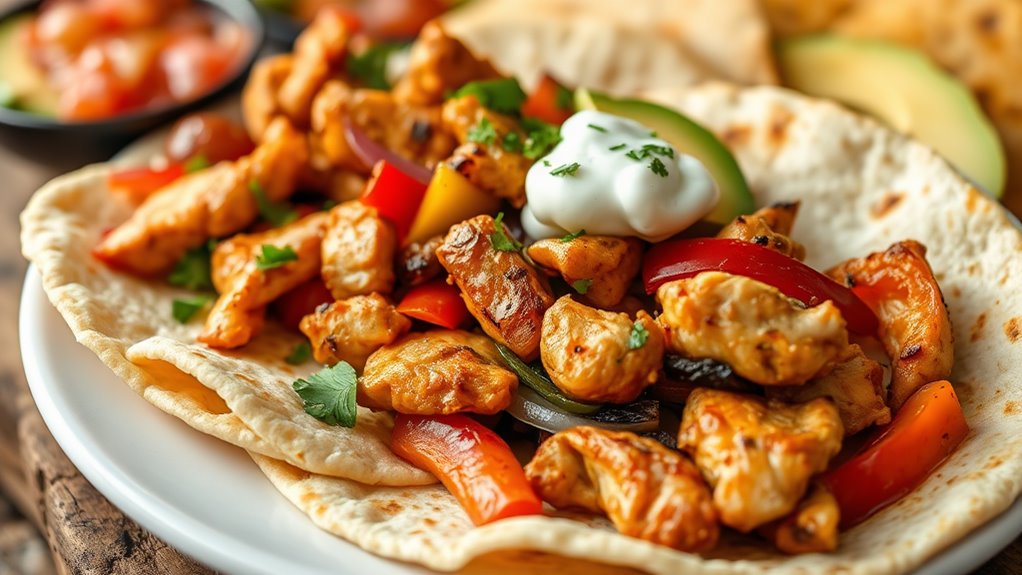
Tasty Chicken Fries Recipe

This recipe utilizes chicken breast, which is marinated in a blend of spices and coated in a crunchy breadcrumb mixture. The result is a golden, crispy exterior with tender chicken on the inside. Serve them hot with dipping sauces like ranch, BBQ, or honey mustard for an irresistible snack that will satisfy your cravings. Let's get started!
Ingredients:
- 2 large chicken breasts
- 1 cup buttermilk
- 1 teaspoon garlic powder
- 1 teaspoon onion powder
- 1 teaspoon paprika
- 1 teaspoon salt
- ½ teaspoon black pepper
- 1 cup all-purpose flour
- 2 cups breadcrumbs (panko for extra crunch)
- Vegetable oil (for frying)
Cooking Instructions:
Begin by cutting the chicken breasts into thin strips, resembling the shape of fries.
In a mixing bowl, combine the buttermilk, garlic powder, onion powder, paprika, salt, and pepper. Add the chicken strips to the marinade, ensuring they're fully coated. Cover the bowl and let it marinate in the refrigerator for at least 1 hour, or overnight for best results.
Once marinated, set up a breading station with three shallow bowls: one for flour, one for the remaining buttermilk, and one for breadcrumbs.
Dip each chicken strip first into the flour, shaking off any excess, then into the buttermilk, and finally into the breadcrumbs, pressing gently to adhere.
Heat vegetable oil in a large skillet over medium-high heat. Fry the chicken strips in batches until they're golden brown and cooked through, about 3-4 minutes per side. Drain on paper towels before serving.
Extra Tips:
For an extra layer of flavor, consider adding spices to the breadcrumbs, such as cayenne pepper for heat or Italian seasoning for an herbaceous touch.
You can also bake the chicken fries instead of frying them if you prefer a healthier option—just spray them with cooking oil and bake at 400°F (200°C) for about 20-25 minutes, flipping halfway through for even crispiness.
Enjoy your homemade chicken fries hot and fresh for the best taste experience!
Whipped Up Chocolate Milkshake

Whipped Up Chocolate Milkshake is a delightful treat that brings the nostalgia of fast-food desserts right into your home. This creamy concoction is perfect for hot summer days or as a special indulgent snack.
With just a few simple ingredients, you can whip up a chocolatey delight that rivals any restaurant version, making it a favorite among chocolate lovers of all ages.
The beauty of this milkshake lies in its versatility; you can adjust the ingredients to suit your taste or dietary preferences. Whether you prefer a thicker shake or a lighter version, this recipe allows for customization while still delivering that classic, rich chocolate flavor.
So gather your ingredients and let's plunge into creating this deliciously whipped-up treat!
Ingredients:
- 2 cups vanilla ice cream
- 1 cup milk
- ¼ cup chocolate syrup (plus extra for drizzling)
- Whipped cream (for topping)
- Chocolate shavings or sprinkles (optional)
To prepare your Whipped Up Chocolate Milkshake, start by combining the vanilla ice cream, milk, and chocolate syrup in a blender.
Blend on high speed until the mixture is smooth and creamy, ensuring there are no lumps. If you prefer a thicker consistency, you can add more ice cream or reduce the amount of milk.
Once blended, taste the shake and adjust the sweetness by adding more chocolate syrup if desired.
Pour the milkshake into tall glasses, and drizzle some chocolate syrup around the inside of the glass for an appealing presentation.
Top each milkshake with a generous dollop of whipped cream and sprinkle with chocolate shavings or sprinkles if desired. Serve immediately with a straw and enjoy!
Extra Tips:
For an even richer flavor, try adding a scoop of chocolate ice cream alongside the vanilla.
You can also experiment with different toppings like crushed cookies, nuts, or even a drizzle of caramel sauce.
For a fun twist, consider blending in a tablespoon of peanut butter or mint extract for a unique flavor profile.
Don't forget to chill your glasses beforehand for an extra frosty experience!
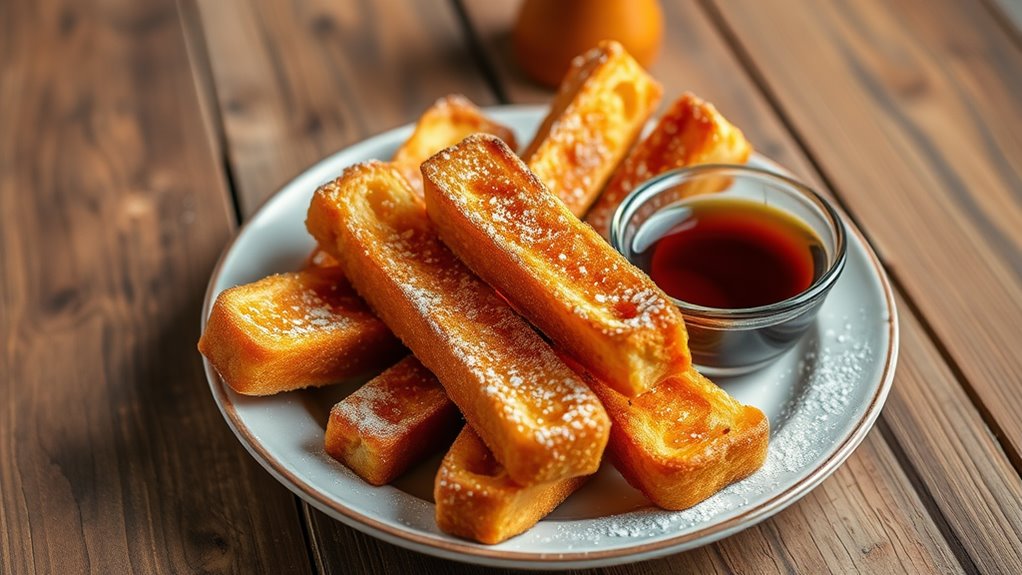
DIY French Toast Sticks
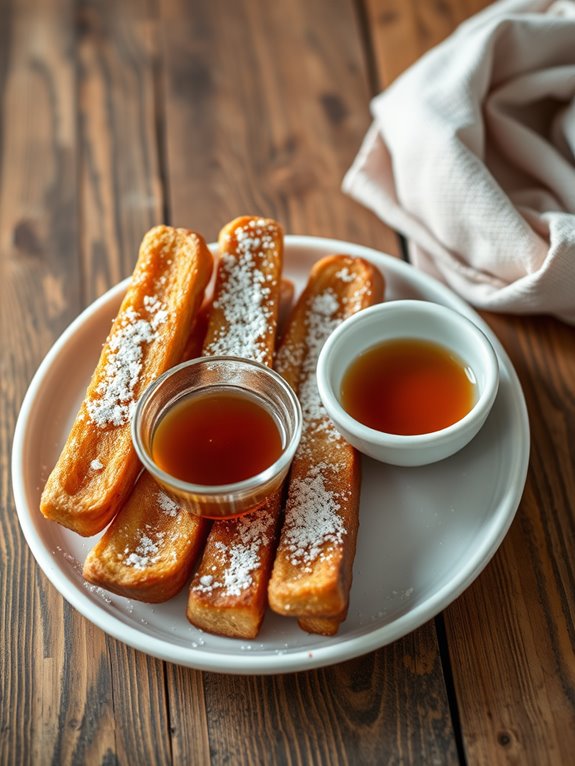
French toast sticks are a fun and delicious breakfast option that can easily be made at home. They offer a delightful crunch on the outside with a soft, fluffy interior, making them perfect for dipping in syrup or your favorite sauce. By making your own French toast sticks, you can customize the flavors and ingredients according to your preferences, ensuring a delightful start to your day.
Creating these tasty treats is simpler than you might think. With just a few basic ingredients, you can whip up a batch of homemade French toast sticks that rival those from your favorite fast-food joint. Serve them warm with a dusting of powdered sugar or a side of maple syrup for an indulgent breakfast that everyone will love.
Ingredients:
- 4 slices of thick bread (like Texas toast or brioche)
- 2 large eggs
- 1/2 cup milk
- 1 teaspoon vanilla extract
- 1 teaspoon ground cinnamon
- 1 tablespoon sugar (optional)
- Butter or oil for frying
- Maple syrup, for serving
Cooking Instructions:
Start by cutting each slice of bread into three equal strips to create your French toast sticks. In a shallow bowl, whisk together the eggs, milk, vanilla extract, ground cinnamon, and sugar (if using) until well combined.
Heat a skillet or griddle over medium heat and add a little butter or oil to coat the surface. Dip each bread stick into the egg mixture, ensuring it's fully coated, then place it on the hot skillet. Cook for about 2-3 minutes on each side, or until golden brown and crispy. Remove from the skillet and repeat with the remaining bread sticks.
Serve warm with maple syrup for dipping.
Extra Tips:
For added flavor, you can experiment by mixing in other spices like nutmeg or adding a dash of almond extract to the egg mixture. If you prefer a healthier version, consider using whole grain bread or a dairy alternative for the milk.
To make ahead, you can also freeze the cooked French toast sticks and reheat them in the toaster or oven for a quick breakfast option on busy mornings.
Frequently Asked Questions
Can I Use Gluten-Free Buns for These Recipes?
Absolutely, you can use gluten-free buns for these recipes! They'll still taste great and provide that satisfying crunch. Just make sure the rest of your ingredients are also gluten-free to keep everything safe and delicious.
How Do I Store Leftovers From These Recipes?
To store leftovers, let them cool to room temperature. Then, place them in airtight containers and refrigerate. They'll stay fresh for up to three days. Reheat thoroughly before enjoying them again.
Are There Vegan Alternatives for These Copycat Recipes?
Imagine a garden where every plant thrives without harming others. You can substitute ingredients in these recipes with vegan alternatives like plant-based patties, dairy-free cheeses, and egg substitutes, creating delicious dishes that nourish without guilt.
What Kitchen Tools Do I Need for These Recipes?
For these recipes, you'll need essential kitchen tools like a sharp knife, cutting board, mixing bowls, frying pan, and a baking sheet. Don't forget measuring cups and spoons to guarantee perfect ingredient proportions!
How Can I Adjust the Spice Levels in These Dishes?
To adjust spice levels in your dishes, start by tasting as you cook. You can add more spices gradually or dilute heat with dairy. Don't forget to balance flavors for a harmonious result!