As an affiliate, we may earn a commission from qualifying purchases. We get commissions for purchases made through links on this website from Amazon and other third parties.
If you're looking to bring the vibrant flavors of Mexican cuisine to your kitchen, cast iron cooking is the way to go. With its ability to evenly distribute heat, your dishes will come out perfectly charred and delicious every time. Imagine sizzling steak fajitas or spicy shrimp tacos gracing your table. But that's just the beginning—there's so much more to explore that can elevate your meals to a whole new level.
Key Takeaways
- Utilize cast iron skillets for even cooking and excellent heat retention, enhancing bold flavors in dishes like sizzling steak fajitas and chicken enchiladas.
- Explore vibrant recipes like spicy shrimp tacos and cheesy Mexican rice casserole that showcase the versatility of cast iron cooking.
- Incorporate customizable toppings and sides to enhance traditional dishes, such as fresh cilantro for shrimp tacos or guacamole for fajitas.
- Prepare quick and satisfying snacks like flavorful chorizo queso dip or crispy corn tortilla chips to complement your main dishes.
- Embrace cooking techniques like marinating and searing to elevate the taste and texture of your Mexican recipes in cast iron.
Sizzling Steak Fajitas
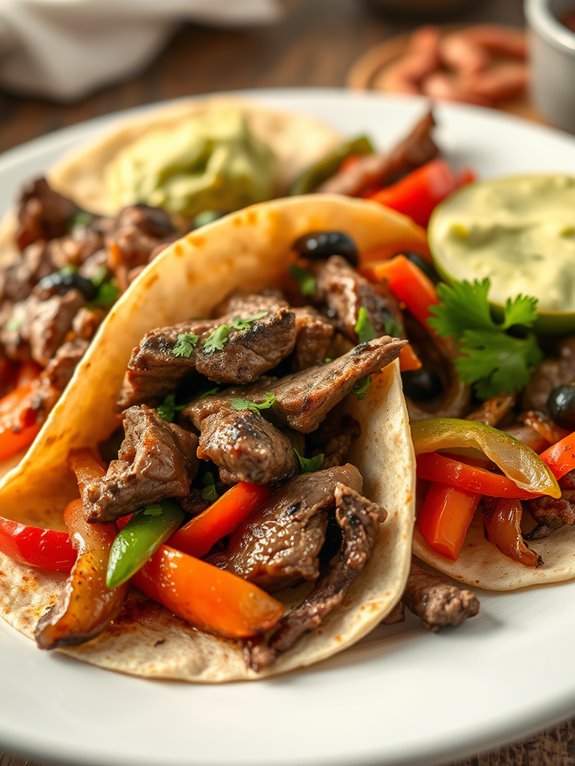
Sizzling steak fajitas are a classic Mexican dish that brings the vibrant flavors of the Southwest to your table. This recipe utilizes a cast iron skillet, which allows for excellent heat retention and even cooking, giving your fajitas a deliciously charred and smoky flavor.
With tender strips of marinated steak, colorful bell peppers, and onions, all served on warm tortillas, this dish is perfect for a family dinner or a fun gathering with friends.
The beauty of sizzling steak fajitas lies not only in their taste but also in their versatility. You can customize your fajitas with various toppings such as guacamole, sour cream, or fresh salsa, making them a crowd-pleaser.
Plus, cooking them in a cast iron skillet adds an extra element of excitement as they sizzle and steam right in front of your guests. Get ready to impress everyone with this mouth-watering recipe!
Ingredients:
- 1 pound flank steak or skirt steak
- 2 tablespoons olive oil
- 1 tablespoon lime juice
- 2 teaspoons chili powder
- 1 teaspoon cumin
- 1 teaspoon garlic powder
- Salt and pepper to taste
- 1 red bell pepper, sliced
- 1 green bell pepper, sliced
- 1 large onion, sliced
- 4-6 flour or corn tortillas
- Optional toppings: guacamole, sour cream, salsa, fresh cilantro
Cooking Instructions:
Start by marinating the steak. In a bowl, combine olive oil, lime juice, chili powder, cumin, garlic powder, salt, and pepper. Add the flank steak to the marinade, making sure it's well-coated.
Cover and let it marinate in the refrigerator for at least 30 minutes, or up to 2 hours for more flavor. While the steak is marinating, prepare the vegetables by slicing the bell peppers and onion.
Once the steak has marinated, heat a cast iron skillet over medium-high heat. Add a little oil, then sear the steak for about 4-5 minutes on each side, or until it reaches your desired doneness.
Remove the steak from the skillet and let it rest for a few minutes before slicing it into thin strips. In the same skillet, add the sliced bell peppers and onions, and sauté for about 5-7 minutes until they're tender and slightly charred.
Serve the steak and vegetables on warm tortillas, and add your favorite toppings.
Extra Tips:
For the best results, choose a well-marbled cut of steak, as this will guarantee tenderness and flavor.
Letting the steak rest after cooking is essential, as it allows the juices to redistribute, resulting in a juicier bite. Additionally, if you have leftover steak, it can be easily repurposed in salads, wraps, or quesadillas for delicious meals throughout the week.
Enjoy your sizzling steak fajitas!
Classic Chicken Enchiladas
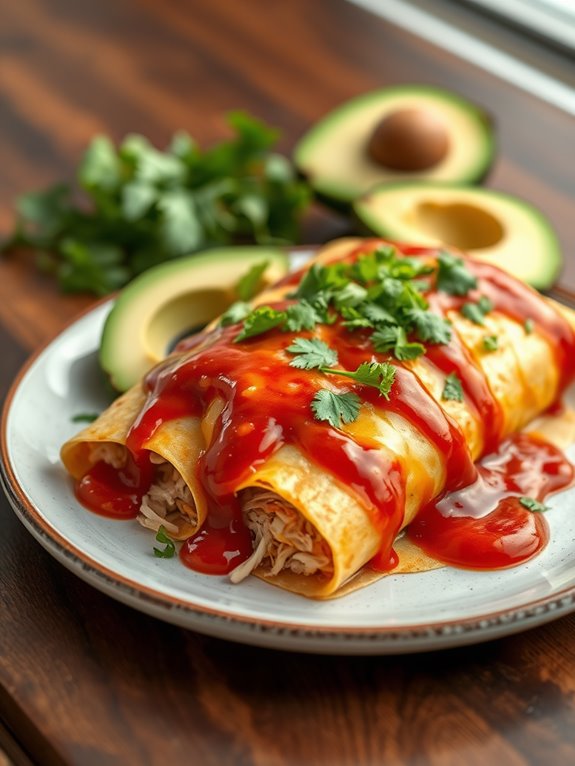
Classic Chicken Enchiladas are a beloved dish in Mexican cuisine, known for their savory flavors and comforting nature. The combination of shredded chicken, cheese, and a rich enchilada sauce, all wrapped in soft tortillas, makes for a satisfying meal that can be enjoyed by the whole family.
Cooking them in a cast iron skillet not only enhances the flavors but also gives the enchiladas a lovely crispy edge, making them even more delicious. This recipe is perfect for a cozy family dinner or a festive gathering with friends.
With just a few simple ingredients and easy steps, you can create a flavorful dish that will impress everyone at the table. Serve your enchiladas with a side of refried beans, Mexican rice, or a fresh salad for a complete meal.
Ingredients:
- 2 cups cooked shredded chicken
- 1 cup shredded cheese (cheddar or Monterey Jack)
- 1 cup enchilada sauce (store-bought or homemade)
- 8 small corn or flour tortillas
- 1 small onion, diced
- 2 cloves garlic, minced
- 1 tablespoon olive oil
- Salt and pepper to taste
- Fresh cilantro for garnish (optional)
- Sour cream for serving (optional)
Cooking Instructions:
Start by preheating your cast iron skillet over medium heat. In the skillet, add olive oil and sauté the diced onion until translucent, about 3-4 minutes.
Add the minced garlic and cook for another minute until fragrant. Stir in the shredded chicken and half of the enchilada sauce, seasoning with salt and pepper to taste. Mix until the chicken is well-coated and heated through.
Next, warm the tortillas in a dry skillet or microwave until pliable. Spoon a portion of the chicken mixture onto each tortilla, sprinkle with cheese, and roll them up tightly.
Place the rolled enchiladas seam-side down in the cast iron skillet. Pour the remaining enchilada sauce over the top and sprinkle with the remaining cheese. Cover the skillet with foil and bake in a preheated oven at 375°F (190°C) for about 20 minutes, then remove the foil and bake for an additional 10 minutes until the cheese is bubbly and golden.
Extra Tips:
For added flavor, consider adding black beans, corn, or diced bell peppers to the chicken mixture.
If you prefer a spicy kick, use a hotter enchilada sauce or add jalapeños to the filling. To make the dish even more vibrant, top your enchiladas with freshly chopped cilantro, avocado slices, or a drizzle of lime juice before serving.
Enjoy your delicious homemade chicken enchiladas with your favorite sides!
Spicy Shrimp Tacos
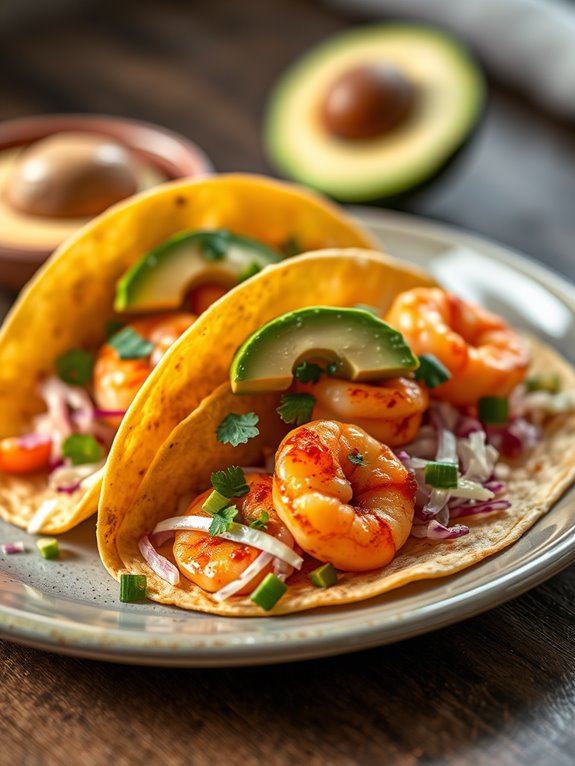
Spicy shrimp tacos are a delicious and vibrant dish that brings the flavors of coastal Mexico right to your kitchen. Utilizing your trusty cast iron skillet, you can achieve a perfect sear on the shrimp, giving them a smoky, charred flavor that complements the fresh toppings beautifully.
These tacos aren't only quick to prepare but also customizable, allowing you to add your favorite toppings for a personalized touch. The combination of spices used in marinating the shrimp adds a delightful kick, making these tacos a hit for anyone who enjoys a bit of heat.
Serve them up with a zesty lime wedge and some fresh cilantro, and you have a meal that's sure to impress your family and friends. Enjoy them for lunch, dinner, or even a fun taco night with loved ones!
Ingredients:
- 1 pound of shrimp, peeled and deveined
- 1 tablespoon olive oil
- 1 teaspoon chili powder
- 1 teaspoon smoked paprika
- 1 teaspoon cumin
- 1/2 teaspoon garlic powder
- 1/2 teaspoon onion powder
- 1/4 teaspoon cayenne pepper (adjust to taste)
- Salt and pepper to taste
- 8 small corn or flour tortillas
- 1 cup shredded cabbage
- 1 avocado, sliced
- Fresh cilantro, chopped
- Lime wedges for serving
To begin, toss the shrimp in a bowl with olive oil, chili powder, smoked paprika, cumin, garlic powder, onion powder, cayenne pepper, salt, and pepper. Make sure the shrimp are evenly coated with the spice mixture for maximum flavor.
Allow them to marinate for about 15 minutes while you prepare the rest of the ingredients. Heat your cast iron skillet over medium-high heat until hot. Add the marinated shrimp to the skillet in a single layer, cooking for about 2-3 minutes on each side, or until they turn pink and opaque.
Remove the shrimp from the skillet and warm the tortillas in the same skillet for about 30 seconds on each side to absorb the flavor left behind. Assemble your tacos by placing a handful of shredded cabbage on each tortilla, followed by the shrimp, avocado slices, and a sprinkle of fresh cilantro. Serve with lime wedges on the side.
When cooking spicy shrimp tacos, be mindful of the shrimp's cooking time; overcooking can make them rubbery. Also, feel free to experiment with different toppings such as salsa, diced tomatoes, or pickled onions to enhance the flavor profile.
If you like it extra spicy, consider adding a drizzle of hot sauce to each taco before serving!
Cheesy Mexican Rice Casserole
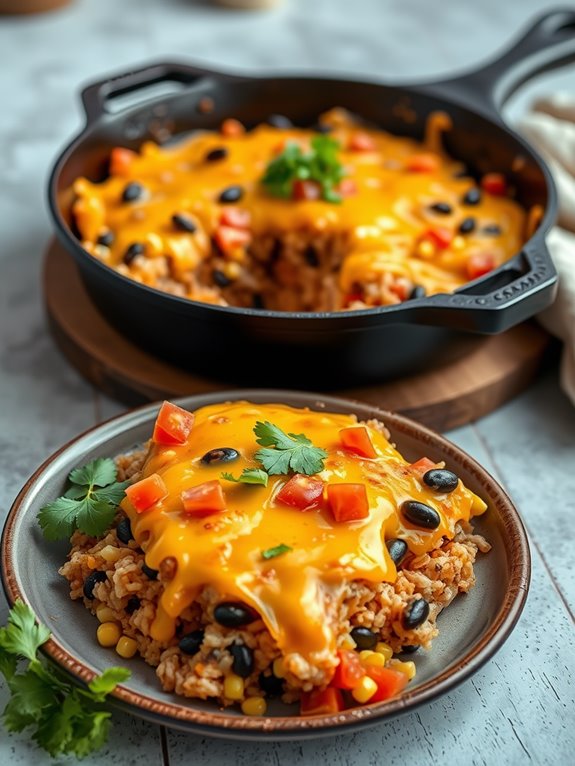
Cheesy Mexican Rice Casserole is a delightful dish that combines the comforting essence of rice, the richness of cheese, and the vibrant flavors of traditional Mexican cuisine. This casserole is perfect for family dinners, potlucks, or any occasion where you want to impress your guests with a hearty and satisfying meal.
The combination of spices, vegetables, and gooey cheese creates a dish that isn't only delicious but also easy to prepare in your trusty cast iron skillet. Using a cast iron skillet allows for even heat distribution and provides a beautiful presentation when serving.
The Cheesy Mexican Rice Casserole is made with simple ingredients that come together to create a flavorful and filling meal. With just a few steps, you can whip up this mouthwatering casserole that will have everyone asking for seconds. So, gather your ingredients and get ready to indulge in this cheesy delight!
Ingredients:
- 1 cup uncooked rice (white or brown)
- 2 cups vegetable or chicken broth
- 1 can (15 oz) black beans, rinsed and drained
- 1 cup corn (frozen or canned)
- 1 cup diced tomatoes (fresh or canned)
- 1 small onion, diced
- 2 cloves garlic, minced
- 1 teaspoon chili powder
- 1 teaspoon cumin
- Salt and pepper to taste
- 2 cups shredded cheese (cheddar or Mexican blend)
- Fresh cilantro for garnish (optional)
Cooking Instructions:
- Preheat your oven to 375°F (190°C). In your cast iron skillet, heat a small amount of oil over medium heat. Add the diced onion and sauté for about 3-4 minutes until softened. Add the minced garlic and cook for an additional minute until fragrant.
- Stir in the uncooked rice, vegetable or chicken broth, black beans, corn, diced tomatoes, chili powder, cumin, salt, and pepper. Bring the mixture to a gentle boil, then reduce the heat to low, cover the skillet, and let it simmer for about 15-20 minutes, or until the rice is cooked and the liquid is absorbed.
- Once the rice is cooked, remove the skillet from heat. Sprinkle the shredded cheese evenly over the top of the casserole. Transfer the skillet to the preheated oven and bake for an additional 10-15 minutes, or until the cheese is melted and bubbly. Remove from the oven and let it cool for a few minutes before garnishing with fresh cilantro, if desired.
Extra Tips:
For added flavor, consider mixing in some diced bell peppers or jalapeños when sautéing the onions. You can also top the casserole with sliced avocado or a dollop of sour cream before serving for extra creaminess.
If you want to make this dish ahead of time, you can prepare it up to the cheese topping and refrigerate it until ready to bake, ensuring a quick and convenient meal when you need it!
Flavorful Chorizo Queso Dip

The beauty of this recipe is its simplicity and speed; you can have this mouthwatering dip ready in no time. With just a few ingredients and a little bit of heat, you can create a cheesy, spicy dip that will have your friends and family coming back for more.
So, gather your ingredients and get ready to impress your guests with this flavorful chorizo queso dip!
Ingredients:
- 8 oz chorizo, casings removed
- 1 cup shredded Monterey Jack cheese
- 1 cup shredded cheddar cheese
- 1 can (10 oz) diced tomatoes with green chilies, undrained
- 1/2 cup cream cheese, softened
- 1/4 cup chopped fresh cilantro (optional)
- Tortilla chips for serving
Cooking Instructions:
In a cast iron skillet over medium heat, cook the chorizo until it's browned and cooked through, breaking it up into smaller pieces as it cooks. This should take about 5-7 minutes.
Once the chorizo is nicely browned, reduce the heat to low and add the cream cheese, stirring until it has melted and combined with the chorizo.
Next, stir in the diced tomatoes with green chilies along with the Monterey Jack and cheddar cheese. Continue to cook, stirring frequently, until the cheese is fully melted and the dip is creamy and well blended.
Once your dip is ready, remove it from the heat and sprinkle with chopped cilantro if desired. Serve it warm with tortilla chips for dipping, and enjoy the explosion of flavors!
Extra Tips:
For an extra layer of flavor, consider adding a dash of your favorite hot sauce or some jalapeños to the mix for additional heat.
You can also customize the cheeses to your liking—try using pepper jack for a spicier kick or goat cheese for a tangy twist.
If you have leftovers, store them in an airtight container in the refrigerator, and reheat gently on the stove or in the microwave. Enjoy your chorizo queso dip!
Hearty Beef and Bean Chili
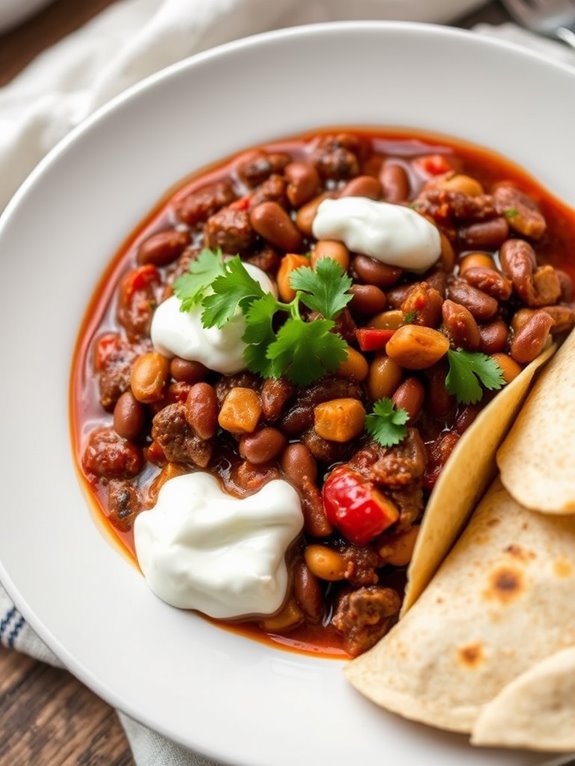
When it comes to hearty Mexican comfort food, few dishes can compete with a robust beef and bean chili. This dish is perfect for cool evenings or gatherings with friends and family, as it's not only filling but also packed with flavor. The use of a cast iron skillet enhances the overall taste, allowing the ingredients to meld beautifully while achieving a satisfying crust on the meat. You can tweak the spice levels to your preference, making it as mild or as fiery as you like.
This chili isn't just a simple meal; it's a celebration of flavors and textures. The rich beef combined with hearty beans creates a satisfying base, while the mix of spices elevates it to new heights. Serve it alongside warm tortillas or a dollop of sour cream for a complete experience that brings the warmth of Mexican cuisine to your table.
Ingredients:
- 1 pound ground beef
- 1 can (15 oz) kidney beans, drained and rinsed
- 1 can (15 oz) black beans, drained and rinsed
- 1 large onion, chopped
- 3 cloves garlic, minced
- 1 can (28 oz) diced tomatoes
- 2 tablespoons chili powder
- 1 teaspoon cumin
- 1 teaspoon smoked paprika
- ½ teaspoon cayenne pepper (optional)
- Salt and pepper to taste
- 2 tablespoons olive oil
- 1 cup beef broth
- Fresh cilantro for garnish (optional)
Cooking Instructions:
In a large cast iron skillet, heat the olive oil over medium heat. Add the chopped onion and sauté until softened, about 5 minutes. Stir in the minced garlic, and cook for an additional minute until fragrant.
Increase the heat to medium-high and add the ground beef, breaking it apart with a spatula. Cook until browned and no longer pink, about 7-10 minutes. Drain any excess fat if necessary.
Once the beef is cooked, stir in the chili powder, cumin, smoked paprika, cayenne pepper, salt, and pepper. Mix well to coat the meat with the spices.
Add the diced tomatoes, kidney beans, black beans, and beef broth. Bring the mixture to a simmer, then reduce the heat to low. Allow the chili to cook uncovered for 30-40 minutes, stirring occasionally, until it thickens and the flavors meld together.
Adjust seasoning as needed before serving, and garnish with fresh cilantro if desired.
Extra Tips:
For an added depth of flavor, consider browning the beef with a splash of Worcestershire sauce or adding a few chopped jalapeños for extra heat.
If you prefer a thicker chili, allow it to simmer a bit longer, or mash some of the beans against the side of the skillet to create a creamier texture.
This dish also stores well, so feel free to make it ahead of time; the flavors will only improve as it sits!
Crispy Corn Tortilla Chips
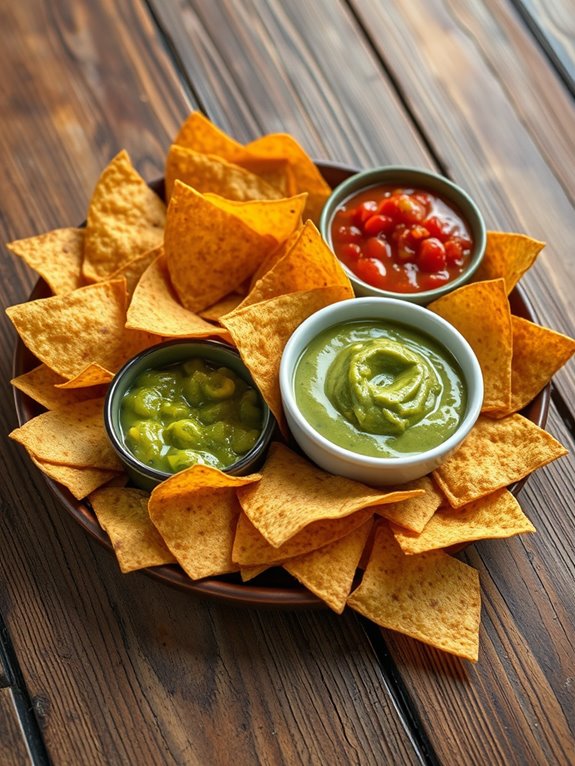
Crispy corn tortilla chips are a delightful snack that can elevate any meal or gathering. Made from simple ingredients, these chips are easy to prepare in your cast iron skillet, providing a satisfying crunch that store-bought options simply can't match. Not only are they perfect for dipping into salsa or guacamole, but they also make an excellent addition to salads or as a crunchy topping for your favorite dishes.
To achieve the perfect crispiness, it's important to choose the right type of corn tortillas and to fry them at the right temperature. This method guarantees that each chip is evenly cooked and golden brown. With just a little time and effort, you can enjoy a batch of homemade tortilla chips that are fresher and tastier than any packaged version.
Ingredients:
- 10-12 corn tortillas
- Vegetable oil (for frying)
- Sea salt (to taste)
To begin, stack the corn tortillas and cut them into wedges, making triangles. Heat about 1 inch of vegetable oil in a cast iron skillet over medium heat until it reaches 350°F (175°C). Carefully add a few tortilla wedges to the hot oil, making sure not to overcrowd the skillet.
Fry the chips for about 2-3 minutes on each side or until they're golden brown and crispy. Use a slotted spoon to remove the chips from the oil and transfer them to a paper towel-lined plate to drain any excess oil. While they're still hot, sprinkle with sea salt to taste.
For the best results, remember to keep the oil at a consistent temperature to prevent the chips from becoming soggy or unevenly cooked. If you notice that the oil is getting too hot or the chips are browning too quickly, lower the heat slightly.
Additionally, you can experiment with different seasonings or spices, such as chili powder or garlic salt, to add extra flavor to your chips. Enjoy your crispy corn tortilla chips fresh out of the skillet for the ultimate crunch!
Savory Vegetable Tamales

Savory Vegetable Tamales are a delicious and wholesome option for those looking to enjoy the classic flavors of Mexican cuisine while keeping things plant-based. These tamales are filled with a delightful mixture of vegetables, spices, and herbs, all wrapped in a soft masa dough and steamed to perfection.
Whether you're preparing a family meal or hosting a gathering with friends, these tamales will certainly impress with their vibrant flavors and textures.
Making tamales may seem intimidating at first, but the process is quite straightforward and rewarding. With a little patience, you can create these delightful parcels that are perfect for any occasion. Serve them with your favorite salsa, guacamole, or a revitalizing salad to complete the meal.
Let's get started on this fantastic recipe!
Ingredients:
- 2 cups masa harina
- 1 ½ cups vegetable broth
- 1/2 cup vegetable oil or melted coconut oil
- 1 teaspoon baking powder
- 1 teaspoon salt
- 1 cup cooked and chopped vegetables (such as zucchini, bell peppers, and corn)
- 1/4 cup chopped fresh cilantro
- 1 teaspoon ground cumin
- 1/2 teaspoon chili powder
- 12-15 dried corn husks (soaked in warm water)
Instructions:
In a large mixing bowl, combine the masa harina, baking powder, and salt.
In a separate bowl, whisk together the vegetable broth and oil. Gradually pour the wet mixture into the dry ingredients and mix until a smooth dough forms. If the dough feels too dry, add a bit more broth until you achieve a soft yet pliable consistency.
Next, take a soaked corn husk and spread about 2 tablespoons of the masa dough onto the center of the husk, leaving space at the edges. Add a spoonful of the vegetable filling on top of the masa.
Fold the sides of the husk over the filling and then fold up the bottom to secure it. Repeat this process until all the masa and filling are used.
Arrange the tamales upright in a cast iron pot or steamer, cover with a damp cloth, and steam for about 45-60 minutes, or until the masa easily pulls away from the husk.
Extra Tips:
When making tamales, it's important to verify you have the right consistency for the masa dough; it should be soft enough to spread but not too wet.
If you're new to tamale-making, consider making a test tamale to check the cooking time and flavor before preparing a full batch. Feel free to customize the filling with your favorite vegetables or add beans for extra protein.
Enjoy your savory vegetable tamales with a side of salsa verde for a revitalizing kick!
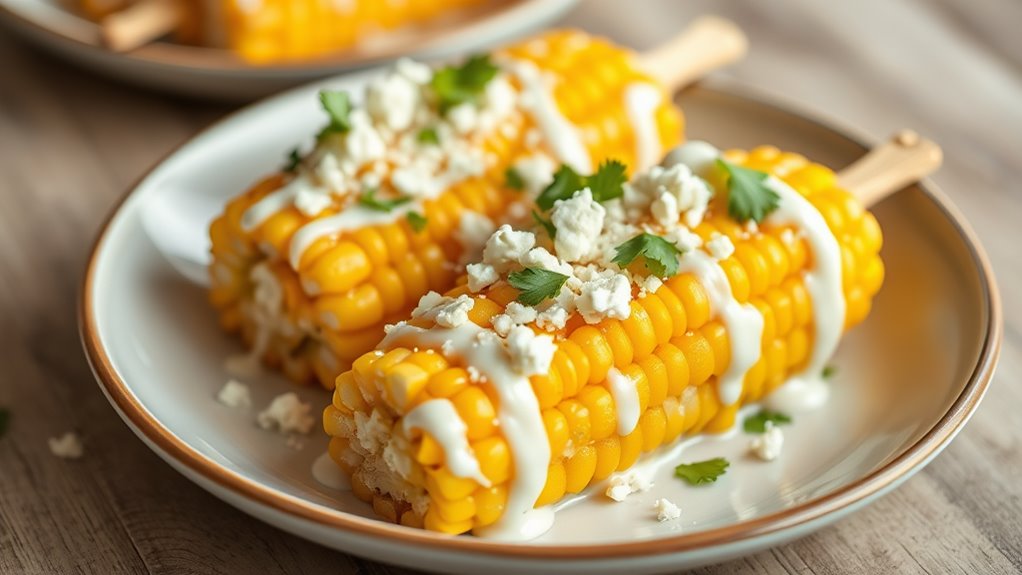
Sweet and Spicy Mexican Street Corn
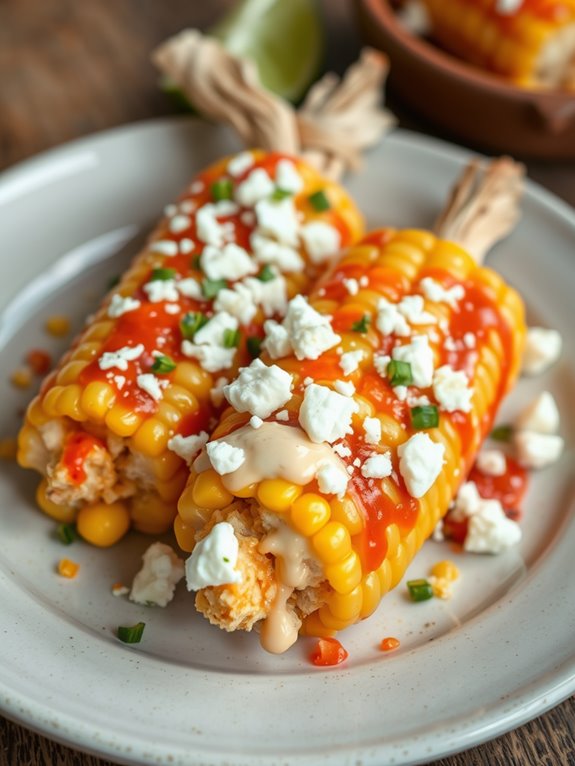
Sweet and Spicy Mexican Street Corn, also known as Elote, is a popular street food that captures the vibrant flavors of Mexico in every bite. This dish features juicy corn on the cob slathered in a creamy sauce and sprinkled with an array of spices. Cooking it in a cast iron skillet brings out the natural sweetness of the corn while adding a delightful char that enhances its overall flavor.
Perfect for summer barbecues or a cozy family dinner, this recipe will surely impress your guests. With just a few simple ingredients, you can recreate the authentic taste of Elote right in your kitchen. The combination of creamy, spicy, and sweet flavors creates a deliciously addictive dish that pairs well with any meal.
Whether you're hosting a gathering or enjoying a quiet night in, Sweet and Spicy Mexican Street Corn is a delightful treat that everyone will love.
Ingredients:
- 4 ears of corn, husked
- 1/2 cup mayonnaise
- 1/2 cup crumbled queso fresco (or feta cheese)
- 1/4 cup sour cream
- 1 tablespoon lime juice
- 1 teaspoon chili powder
- 1 teaspoon smoked paprika
- 1/4 teaspoon cayenne pepper (optional for extra heat)
- Fresh cilantro, chopped (for garnish)
- Lime wedges (for serving)
Cooking Instructions:
- Preheat your cast iron skillet over medium-high heat. Once hot, place the husked corn directly on the skillet and roast it, turning occasionally, until the corn is charred and tender, about 10-12 minutes. Remove the corn from the skillet and let it cool slightly.
- In a mixing bowl, combine the mayonnaise, sour cream, lime juice, chili powder, smoked paprika, and cayenne pepper (if using). Mix until well combined. Once the corn has cooled enough to handle, generously brush the creamy mixture over each ear of corn, ensuring it's fully coated. Sprinkle crumbled queso fresco on top and garnish with fresh cilantro.
Extra Tips:
For an added layer of flavor, consider grilling the corn instead of using the skillet for a smoky taste. If you want to make the dish healthier, you can reduce the amount of mayonnaise and sour cream or substitute Greek yogurt for a lighter option.
Additionally, feel free to adjust the spice levels to your liking by adding more or less chili powder or cayenne pepper. Enjoy your delicious Sweet and Spicy Mexican Street Corn!
Frequently Asked Questions
What Is the Best Type of Cast Iron Skillet for Mexican Cooking?
For Mexican cooking, you'll want a well-seasoned cast iron skillet, preferably 10 to 12 inches. This size offers versatility for various dishes, ensuring even heat distribution and enhancing those vibrant flavors you love.
How Do I Properly Season My Cast Iron Skillet?
To properly season your cast iron skillet, clean it with soap, dry it thoroughly, then apply a thin layer of vegetable oil. Bake it upside down at 375°F for an hour, letting it cool completely afterward.
Can I Use a Cast Iron Grill Pan for These Recipes?
Absolutely, you can use a cast iron grill pan for these recipes! In fact, studies show that cast iron cookware retains heat 20% better than other materials, giving your dishes that perfect sear and flavor.
Are There Any Tips for Cleaning Cast Iron After Cooking?
To clean your cast iron after cooking, avoid soap. Rinse with hot water, scrub with a brush, and dry it immediately. Apply a thin layer of oil to maintain its seasoning. Happy cooking!
Can I Adapt These Recipes for a Dutch Oven?
Absolutely, you can adapt those recipes for a Dutch oven! Just adjust cooking times and temperatures slightly. Keep an eye on moisture levels, and you'll achieve delicious results. Enjoy experimenting with your Dutch oven!