As an affiliate, we may earn a commission from qualifying purchases. We get commissions for purchases made through links on this website from Amazon and other third parties.
If you're looking to explore the versatility of Indian fry breads, you've come to the right place. These 7 easy recipes for the air fryer offer you a chance to enjoy classic favorites like naan and puris with a healthier twist. By using less oil, you can savor the same rich flavors without the guilt. Whether you're preparing a family feast or a quick meal, you'll find something that suits your taste. Curious about how to achieve that perfect crunch and flavor? Let's get started.
Key Takeaways
- Air frying offers a healthier alternative to traditional frying, reducing oil usage while maintaining the crispy texture of Indian fry breads.
- Recipes like classic naan and fluffy puri can be adapted for air frying, achieving soft interiors and golden exteriors without excess fat.
- Incorporate whole wheat flour in recipes such as bhakri and aloo paratha for added nutritional benefits and a heartier flavor profile.
- Customize flavors by adding fresh herbs or spices to each recipe, enhancing taste while personalizing your air-fried Indian bread.
- Serve air-fried breads warm with chutneys, yogurt, or curries for a delightful meal experience that combines tradition with healthier cooking methods.
Classic Naan Recipe
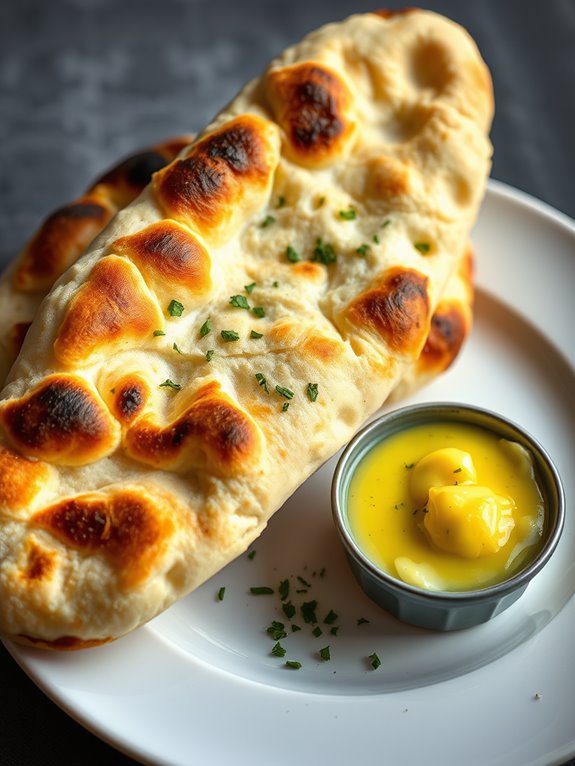
Naan, a traditional Indian flatbread, is soft, pillowy, and perfect for scooping up curries or enjoying with a variety of toppings. This classic naan recipe is simple and requires minimal ingredients, making it accessible to home cooks of all skill levels. The delightful combination of yogurt and yeast gives naan its characteristic texture and flavor, while baking it in a hot oven or on a grill creates a beautiful char that enhances its taste.
To achieve the best results, verify your ingredients are at room temperature, as this helps the yeast activate more effectively. While the dough requires some resting time to rise, the actual preparation is quite straightforward. This naan can be made plain, or you can customize it with garlic, herbs, or cheese to suit your palate.
Ingredients:
- 2 cups all-purpose flour
- 1 teaspoon active dry yeast
- 1 teaspoon sugar
- 1 teaspoon salt
- 1/2 cup plain yogurt
- 1/4 cup warm water
- 2 tablespoons olive oil or melted butter
Cooking Instructions:
In a small bowl, combine the warm water, sugar, and yeast. Allow it to sit for about 5-10 minutes until frothy.
In a large mixing bowl, combine the flour and salt. Make a well in the center and add the yogurt, the yeast mixture once activated, and the olive oil or melted butter. Mix until a rough dough forms, then knead on a floured surface for about 5-7 minutes until smooth and elastic.
Place the dough in a lightly greased bowl, cover it with a damp cloth, and let it rise in a warm place for 1-2 hours, or until doubled in size.
Once the dough has risen, punch it down and divide it into 6-8 equal portions. Roll each portion into a ball, then flatten it into a teardrop or oval shape, about 1/4 inch thick.
Preheat your oven to its highest setting (usually around 500°F or 260°C) or heat a skillet over medium-high heat. If using an oven, place a baking sheet or pizza stone inside to heat up. If using a skillet, lightly oil the pan.
Bake the naan for 2-3 minutes on each side until puffed and lightly charred, or cook in the skillet for about 1-2 minutes per side. Serve warm with your favorite dishes.
Extra Tips:
For an extra flavor boost, consider brushing the naan with garlic butter or melted ghee right after cooking.
You can also experiment with adding herbs like cilantro or parsley into the dough before cooking.
To store leftover naan, wrap it in foil and keep it in an airtight container; it can be reheated gently in the oven or on a skillet. Enjoy your homemade naan with a delicious curry or as a delightful accompaniment to any meal!
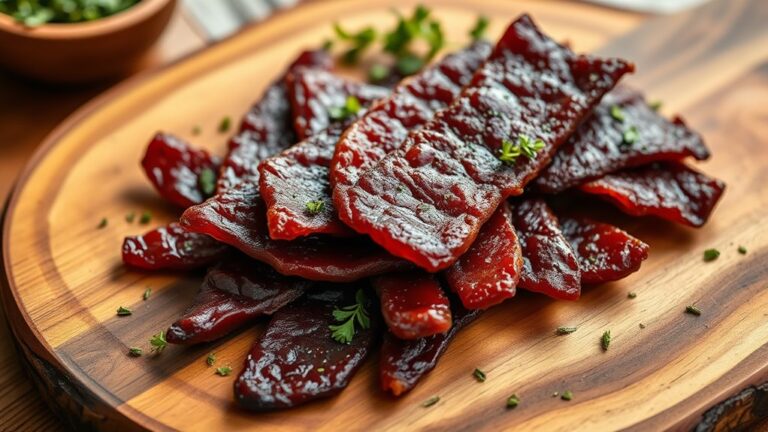
Savory Bhakri Delight
Savory Bhakri Delight is a delightful twist on traditional Indian fry bread, featuring a rich blend of flavors and textures. This dish isn't only filling but also versatile, allowing for customization to suit your taste preferences.
Bhakri, a type of unleavened flatbread made from whole grains, is perfect for pairing with a variety of dips or curries, making it a popular choice for meals and gatherings.
The process of making Savory Bhakri Delight is simple and enjoyable. By incorporating spices, herbs, and optional vegetables into the dough, you can create a unique and tasty bread that will impress your family and friends.
Serve it warm alongside your favorite chutney or yogurt for a complete meal that embodies the essence of Indian cuisine. Regularly enjoying such dishes can encourage healthier eating habits, supporting a balanced diet.
Ingredients:
- 2 cups whole wheat flour
- 1 teaspoon salt
- 1 teaspoon cumin seeds
- 1 teaspoon chili powder (adjust to taste)
- 1 tablespoon chopped fresh coriander or parsley
- 1 tablespoon oil (for dough)
- Water (as needed for kneading)
- Extra oil or ghee (for cooking)
Cooking Instructions:
In a large mixing bowl, combine whole wheat flour, salt, cumin seeds, chili powder, and chopped coriander.
Add the tablespoon of oil and mix until the flour resembles coarse crumbs. Gradually add water, a little at a time, kneading until a soft, pliable dough forms.
Cover the dough with a damp cloth and let it rest for about 15-20 minutes.
After resting, divide the dough into equal-sized balls. Roll each ball into a flat disc, about 6-8 inches in diameter.
Heat a tawa or skillet over medium heat and lightly grease it with oil or ghee. Cook each bhakri for about 2-3 minutes on each side, or until golden brown and slightly puffed.
Press down gently with a spatula to guarantee even cooking. Serve hot with your choice of chutney or yogurt.
Extra Tips:
For added flavor and nutrition, feel free to mix in finely chopped vegetables, such as spinach or grated carrots, into the dough.
You can also experiment with different spices, like turmeric or garam masala, to personalize the bhakri to your taste.
Confirm the skillet is hot enough before placing the bhakri on it to achieve that perfect crispy texture.
Enjoy your savory bhakri delight fresh off the pan for the best taste!
Sweet Puri Treats

Sweet puri treats, often known as sweet fry bread, are a delightful variation of traditional Indian fry bread that are perfect for satisfying your sweet tooth. These golden, crispy bites are lightly sweetened and can be enjoyed on their own or with a dusting of powdered sugar.
They're not only a popular snack but also a festive treat that can be served during celebrations and gatherings. The aroma of frying puris fills the kitchen and invites everyone to indulge in these delicious morsels.
Making sweet puri treats is a straightforward process that doesn't require any special skills or ingredients. The combination of flour, sugar, and ghee creates a rich dough that's then rolled out and fried to perfection. You can serve these puris with a variety of toppings, such as honey or syrup, or enjoy them plain to appreciate their innate sweetness.
These sweet puris are sure to be a hit with both kids and adults alike!
Ingredients:
- 2 cups all-purpose flour
- 1/4 cup sugar
- 1/4 teaspoon salt
- 1/2 teaspoon baking powder
- 2 tablespoons ghee (clarified butter) or unsalted butter
- 1/2 cup warm water (approximately)
- Oil for frying
- Powdered sugar (for dusting, optional)
Cooking Instructions:
In a large mixing bowl, combine the all-purpose flour, sugar, salt, and baking powder. Mix well to ascertain the dry ingredients are evenly distributed.
Add the ghee and rub it into the flour mixture until it resembles coarse crumbs. Gradually add warm water, a little at a time, kneading the mixture until a soft and pliable dough forms. Cover the dough with a damp cloth and let it rest for about 30 minutes.
After resting, divide the dough into small balls, about the size of a golf ball. On a lightly floured surface, roll each ball into a thin circle, approximately 4-5 inches in diameter.
Heat oil in a deep frying pan over medium heat. Once the oil is hot, gently slide one puri into the oil. Fry until it puffs up and turns golden brown on both sides. Remove with a slotted spoon and drain on paper towels. Repeat with the remaining puris and enjoy them warm, dusted with powdered sugar if desired.
Extra Tips:
For the best results, ascertain your oil is hot enough before frying the puris; this helps them puff up nicely. If the oil is too cool, the puris may absorb excess oil and become greasy.
You can also experiment with flavorings by adding a pinch of cardamom or cinnamon to the dough for an aromatic twist. For a healthier option, consider using whole wheat flour instead of all-purpose flour, although this may slightly alter the texture and sweetness.
Enjoy your sweet puri treats!
Spiced Aloo Paratha
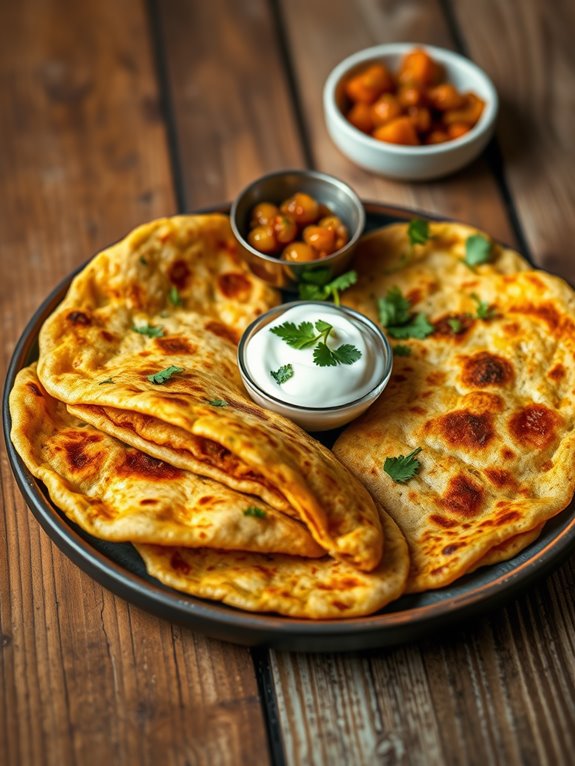
Aloo Paratha is a beloved Indian flatbread stuffed with a spiced potato filling, making it a popular choice for breakfast or any meal of the day. The crispy exterior and soft, flavorful interior create a delightful contrast that many enjoy. This dish isn't only delicious but also versatile, as it can be served with yogurt, pickles, or chutney, making it a perfect addition to any Indian meal. Using air fryer accessories can enhance the cooking process and yield even better results.
To make spiced Aloo Paratha, you'll need a few basic ingredients that come together to create a satisfying dish. The process involves making the dough, preparing the filling, and then rolling and cooking the parathas to golden perfection. Once you master this simple recipe, you can customize the spices in the filling to suit your taste preferences.
Ingredients:
- 2 cups whole wheat flour
- 1 teaspoon salt
- Water (as needed)
- 3 medium-sized potatoes (boiled and mashed)
- 1 teaspoon cumin seeds
- 1 teaspoon garam masala
- 1 teaspoon red chili powder
- 1 teaspoon coriander powder
- 2 tablespoons chopped fresh cilantro
- 2 tablespoons oil or ghee (for frying)
Cooking Instructions:
Start by making the dough for the parathas. In a mixing bowl, combine the whole wheat flour and salt. Gradually add water and knead until you have a smooth, pliable dough. Cover the dough with a damp cloth and let it rest for about 20-30 minutes.
Meanwhile, prepare the filling by mixing the boiled and mashed potatoes with cumin seeds, garam masala, red chili powder, coriander powder, and chopped cilantro. Confirm that the filling is well combined and adjusted to your taste.
After the dough has rested, divide it into equal-sized balls. Take one ball and flatten it slightly, then roll it out into a small disc. Place a generous amount of the potato filling in the center, fold the edges over the filling to seal it, and then gently roll it out into a larger circle.
Heat a skillet or tawa over medium heat, add a little oil or ghee, and cook the paratha on both sides until golden brown and crispy. Repeat with the remaining dough and filling.
Extra Tips:
For an even more flavorful Aloo Paratha, consider adding finely chopped green chilies or grated ginger to the potato filling. Additionally, confirm that the filling isn't too wet, as this can make rolling out the parathas difficult. If you find the dough sticking while rolling, dust it lightly with flour. Enjoy your Aloo Parathas fresh off the skillet for the best taste!
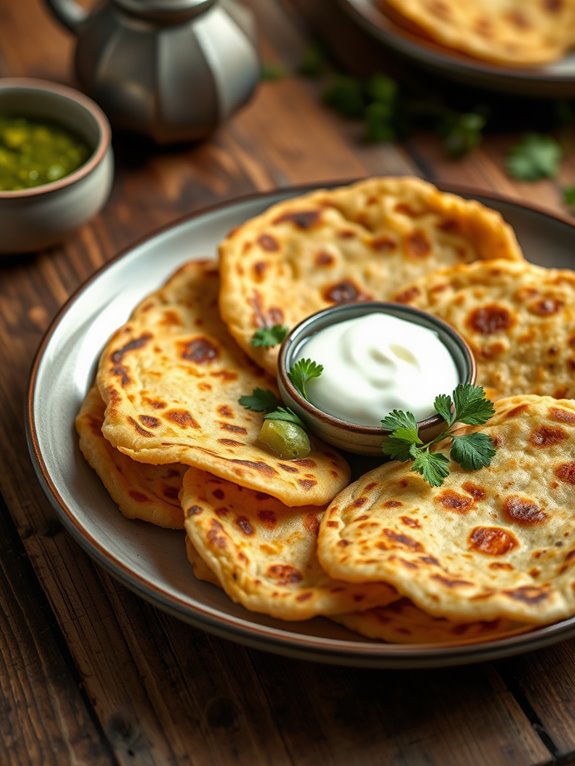
Fluffy Poori Variations
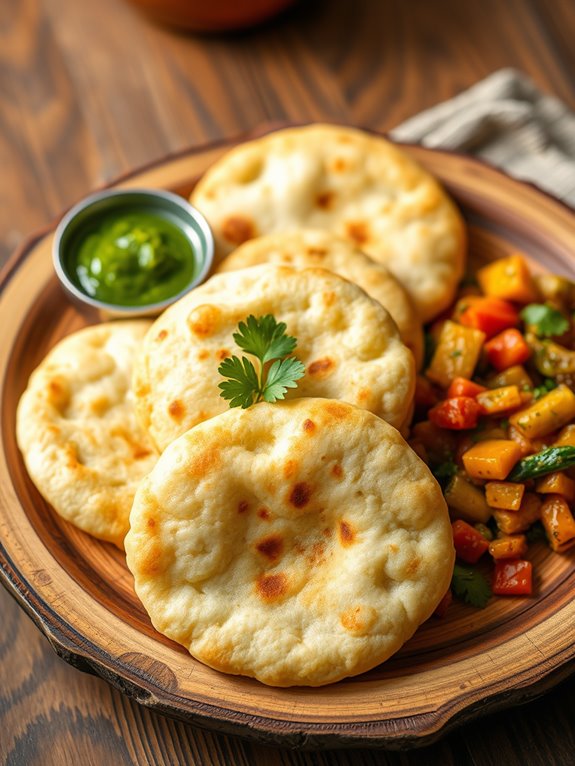
Fluffy Poori is a delightful Indian fried bread that's soft, puffy, and perfect for pairing with a variety of dishes, from curries to chutneys. The process of making Fluffy Poori is quite simple, yet the results are truly satisfying. This recipe will guide you through the easy steps of making this traditional dish, ensuring that your pooris turn out perfectly every time.
To start your culinary journey with Fluffy Poori, you'll need a handful of basic ingredients that can be found in most Indian kitchens. This versatile bread isn't only a staple in Indian cuisine but also a favorite for many family gatherings and festive occasions. With a crispy exterior and a light, fluffy interior, these pooris are sure to impress!
Ingredients:
- 2 cups whole wheat flour (atta)
- 1 teaspoon salt
- 2 tablespoons oil or ghee
- Water (as needed for kneading)
- Oil for deep frying
To prepare Fluffy Poori, begin by mixing the whole wheat flour and salt in a large mixing bowl. Add the oil or ghee, and rub it into the flour with your fingertips until the mixture resembles breadcrumbs.
Gradually add water, a little at a time, kneading the dough until it becomes soft and pliable. Once the dough is ready, cover it with a damp cloth and let it rest for about 30 minutes. This resting period is essential for achieving the desired puffiness.
After resting, divide the dough into small balls, about the size of a golf ball. Roll each ball out on a floured surface into circles that are approximately 4-5 inches in diameter, making sure not to roll them too thin.
Heat oil in a deep frying pan over medium heat. Once the oil is hot, carefully slide in a rolled-out poori. It should instantly puff up; gently press down with a slotted spoon to encourage puffing. Fry until golden brown on both sides, then remove and drain on paper towels. Repeat with the remaining dough.
When making Fluffy Poori, remember that the temperature of the oil is vital. If the oil is too hot, the pooris will burn quickly and not puff up properly. Conversely, if the oil isn't hot enough, the pooris will absorb too much oil and become greasy.
It's best to test the oil by dropping a small piece of dough into it; if it sizzles and rises to the surface, the oil is ready. Enjoy your Fluffy Poori fresh and hot for the best experience!
Cheesy Garlic Naan

Cheesy Garlic Naan is a delicious twist on traditional naan bread, combining the rich flavors of garlic and gooey cheese. This dish is perfect for pairing with your favorite Indian curries or enjoying on its own. The soft, fluffy texture of naan, complemented by the aromatic garlic and melted cheese, makes it a hit at any dinner table.
Whether you're hosting a gathering or simply indulging in a cozy night in, Cheesy Garlic Naan will elevate your meal to new heights.
Making Cheesy Garlic Naan at home is simpler than you might think. With just a few ingredients and some basic cooking techniques, you can create this mouth-watering bread in no time. The result is a warm, cheesy delight that will have everyone coming back for seconds.
Follow the recipe below to bring this delightful dish to your kitchen.
Ingredients:
- 2 cups all-purpose flour
- 1 teaspoon instant yeast
- 1 teaspoon sugar
- 1 teaspoon salt
- 1/2 cup warm water
- 2 tablespoons plain yogurt
- 2 tablespoons olive oil
- 3 cloves garlic, minced
- 1 cup shredded mozzarella cheese
- Fresh cilantro or parsley for garnish (optional)
Cooking Instructions:
- In a large mixing bowl, combine the flour, instant yeast, sugar, and salt. In a separate bowl, mix the warm water, yogurt, and olive oil. Gradually add the wet ingredients to the dry ingredients, mixing until a soft dough forms. Knead the dough for about 5-7 minutes until smooth and elastic.
- Cover the bowl with a damp cloth and let it rise in a warm place for about 1 hour, or until doubled in size.
- Once the dough has risen, punch it down and divide it into small balls (about the size of a golf ball). Roll each ball out into an oval shape, about 1/4 inch thick. Sprinkle minced garlic and shredded mozzarella cheese on one half of the rolled-out dough, then fold the other half over to cover the cheese. Press down gently to seal.
- Heat a skillet or tandoor over medium-high heat, and cook each naan for 2-3 minutes on each side, or until golden brown and cooked through. Remove from heat and brush with melted butter or ghee, if desired. Garnish with fresh cilantro or parsley before serving.
Extra Tips:
For an even more flavorful Cheesy Garlic Naan, consider adding herbs like oregano or thyme to the garlic mixture. Additionally, you can experiment with different types of cheese, such as cheddar or paneer, for a unique twist.
If you want a more authentic texture, try cooking the naan in a tandoor or a very hot oven. Remember to keep the naan covered with a clean kitchen towel after cooking to maintain its warmth and softness until serving. Enjoy your homemade cheesy delight!
Herbed Focaccia Style
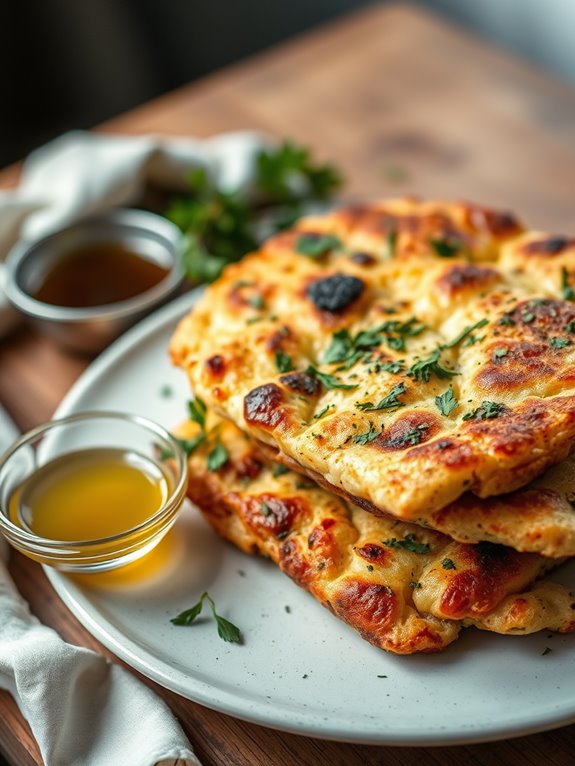
Herbed Focaccia Style Indian Fry Bread is a unique twist on traditional fry bread that incorporates the delightful flavors of focaccia. This recipe combines the soft, pillowy texture of fry bread with the aromatic herbs typically found in focaccia, making it a perfect accompaniment to soups, salads, or enjoyed on its own.
The infusion of herbs not only elevates the taste but also adds a beautiful touch of color to the dish, making it visually appealing. This herbed version is easy to make and can be customized with your favorite herbs and spices. Ideal for gatherings or as a comforting snack, it offers a delightful fusion of cultures that will impress your family and friends. Additionally, making this dish in an air fryer ensures lower fat content while still achieving a crispy texture, contributing to healthier eating habits.
Serve it warm with olive oil for dipping or use it as a base for delicious toppings, and you'll have a flavorful dish that everyone will love.
Ingredients:
- 2 cups all-purpose flour
- 1 teaspoon baking powder
- 1 teaspoon salt
- 1 tablespoon sugar
- 1/2 cup warm water
- 3 tablespoons olive oil
- 2 tablespoons fresh rosemary, chopped
- 2 tablespoons fresh thyme, chopped
- 1 tablespoon garlic powder
- Optional: Coarse sea salt for sprinkling
To make the Herbed Focaccia Style Indian Fry Bread, begin by mixing the flour, baking powder, salt, and sugar in a large bowl. In a separate smaller bowl, combine the warm water and olive oil, then slowly add this mixture to the dry ingredients. Stir until a dough forms.
Knead the dough on a floured surface for about 5 minutes until it becomes soft and elastic. After kneading, incorporate the chopped rosemary, thyme, and garlic powder into the dough, ensuring even distribution. Cover the dough with a damp cloth and let it rest for about 30 minutes.
Once the dough has rested, divide it into smaller portions and flatten each piece into a round shape, about 1/2 inch thick. Heat oil in a deep pan over medium heat and fry each piece of dough until golden brown on both sides, approximately 2-3 minutes per side.
Remove from oil and place on paper towels to absorb excess oil. If desired, sprinkle with coarse sea salt while still warm.
Extra Tips: For extra flavor, feel free to experiment with different herbs or even add some grated cheese to the dough. If you prefer a lighter version, you can bake the flattened dough in a preheated oven at 400°F (200°C) for about 15-20 minutes instead of frying.
Enjoy your Herbed Focaccia Style Indian Fry Bread fresh for the best taste!
Frequently Asked Questions
Can I Use Whole Wheat Flour for These Recipes?
You can definitely use whole wheat flour in these recipes! It'll give the bread a nuttier flavor and added nutrition. Just be aware that the texture might differ slightly compared to using all-purpose flour. Enjoy experimenting!
How Do I Store Leftover Fry Bread?
To store leftover fry bread, let it cool completely, then wrap it tightly in plastic wrap or aluminum foil. Place it in an airtight container or a resealable bag, and refrigerate for up to three days.
What Dipping Sauces Pair Well With Fry Bread?
Did you know that 70% of people prefer dipping sauces with their snacks? For fry bread, you can't go wrong with tangy yogurt sauce, spicy salsa, or sweet honey. They'll elevate your snack experience!
Can I Make These Recipes Gluten-Free?
Yes, you can definitely make these recipes gluten-free! Just substitute regular flour with a gluten-free flour blend. Experiment with different types to find the texture and flavor you enjoy most. You'll love the results!
How Long Does It Take to Preheat the Air Fryer?
Preheating the air fryer is like warming up your muscles before exercise; it's essential. Usually, it takes about 3 to 5 minutes to reach the right temperature, ensuring your food cooks evenly and perfectly.